

Wireless Setup Guide
Page 12
It will appear on the Software and Documentation CD. The MAC address appears in the following format: 00:04:12:34:56:78 Note: Print a network setup page if you cannot locate the printer MAC address. Preparing to connect wirelessly 12 For more information on printing a network setup page, see the User's Guide on the network setup page. If the printer has a factory-installed internal print server, then the MAC address is a series of letters and numbers located on the MAC address sheet that came with the printer.
It will appear on the Software and Documentation CD. The MAC address appears in the following format: 00:04:12:34:56:78 Note: Print a network setup page if you cannot locate the printer MAC address. Preparing to connect wirelessly 12 For more information on printing a network setup page, see the User's Guide on the network setup page. If the printer has a factory-installed internal print server, then the MAC address is a series of letters and numbers located on the MAC address sheet that came with the printer.
Wireless Setup Guide
Page 13
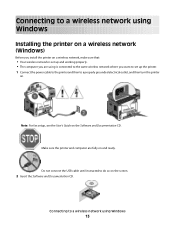
... a wireless network using Windows 13 Do not connect the USB cable until instructed to do so on and ready. Note: For fax setup, see the User's Guide on the Software and Documentation CD.
... a wireless network using Windows 13 Do not connect the USB cable until instructed to do so on and ready. Note: For fax setup, see the User's Guide on the Software and Documentation CD.

Wireless Setup Guide
Page 19
... is turned on the wireless network. For more information on networking terms and concepts, see the User's Guide on the Software and Documentation CD. Troubleshooting wireless setup For more information on printing a network setup page, see the User's Guide on the Software and Documentation CD. Many devices can interfere with the wireless signal, including...
... is turned on the wireless network. For more information on networking terms and concepts, see the User's Guide on the Software and Documentation CD. Troubleshooting wireless setup For more information on printing a network setup page, see the User's Guide on the Software and Documentation CD. Many devices can interfere with the wireless signal, including...
Wireless Setup Guide
Page 31
Note: For information on telephone and fax setup, see the User's Guide on -screen instructions to complete the USB configuration. Connecting using a USB cable 31 8 Connect the power cable to the printer and then to a properly grounded electrical outlet, and then turn the printer on. 9 Follow the on the Software and Documentation CD.
Note: For information on telephone and fax setup, see the User's Guide on -screen instructions to complete the USB configuration. Connecting using a USB cable 31 8 Connect the power cable to the printer and then to a properly grounded electrical outlet, and then turn the printer on. 9 Follow the on the Software and Documentation CD.
Wireless Setup Guide
Page 32
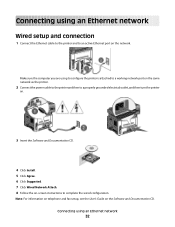
... the on the network. Make sure the computer you are using an Ethernet network 32 Note: For information on telephone and fax setup, see the User's Guide on the Software and Documentation CD. Connecting using to configure the printer is attached to a working network port on the same network as the printer...
... the on the network. Make sure the computer you are using an Ethernet network 32 Note: For information on telephone and fax setup, see the User's Guide on the Software and Documentation CD. Connecting using to configure the printer is attached to a working network port on the same network as the printer...
User's Guide
Page 1
Lexmark X264dn, X363dn, X364dn, and X364dw User's Guide September 2009 Machine type(s): 7013 Model(s): 231, 235, 432, 436, 43W, d01, d02, gd1, gd2, dn1, dn2, gd1, gd2 www.lexmark.com
Lexmark X264dn, X363dn, X364dn, and X364dw User's Guide September 2009 Machine type(s): 7013 Model(s): 231, 235, 432, 436, 43W, d01, d02, gd1, gd2, dn1, dn2, gd1, gd2 www.lexmark.com

User's Guide
Page 9
...-The setup documentation came with the printer, and then skim the User's Guide to learn how to make sure it better. For updates, check our Web site at www.lexmark.com/publications/. Finding information about the printer What are the reason we... Instalação Asennus Instalacja Installation Installazione Installatie Installasjon 20 kg (44 lbs) 1 2 1 2 3 1 4 2 3 1 24 2 @ User's Guide-The User's Guide is also available on the Software and Documentation CD. Learning about the printer 9 If you do encounter any problems along the way, one of your...
...-The setup documentation came with the printer, and then skim the User's Guide to learn how to make sure it better. For updates, check our Web site at www.lexmark.com/publications/. Finding information about the printer What are the reason we... Instalação Asennus Instalacja Installation Installazione Installatie Installasjon 20 kg (44 lbs) 1 2 1 2 3 1 4 2 3 1 24 2 @ User's Guide-The User's Guide is also available on the Software and Documentation CD. Learning about the printer 9 If you do encounter any problems along the way, one of your...

User's Guide
Page 28
• 802.1X username and password • Certificates Note: For more information on configuring 802.1X security, see the User's Guide on the Software and Documentation CD. Make sure the printer and computer are using is set up and working properly. • The computer you ... cable to the printer and then to a properly grounded electrical outlet, and then turn the printer on. 1 2 Note: For fax setup, see the Networking Guide on the Software and Documentation CD. Do not connect the USB cable until instructed to accept the terms of the License Agreement. Additional printer setup...
• 802.1X username and password • Certificates Note: For more information on configuring 802.1X security, see the User's Guide on the Software and Documentation CD. Make sure the printer and computer are using is set up and working properly. • The computer you ... cable to the printer and then to a properly grounded electrical outlet, and then turn the printer on. 1 2 Note: For fax setup, see the Networking Guide on the Software and Documentation CD. Do not connect the USB cable until instructed to accept the terms of the License Agreement. Additional printer setup...
User's Guide
Page 187
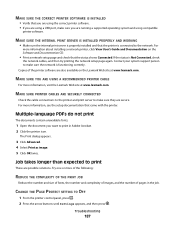
... appears. 3 Click Advanced. 4 Select Print as image. 5 Click OK twice. Try one or more information about installing a network printer, click View User's Guide and Documentation on the Lexmark Web site at www.lexmark.com. CHANGE THE PAGE PROTECT SETTING TO OFF 1 From the printer control panel, press . 2 Press the arrow buttons until Settings appears...
... appears. 3 Click Advanced. 4 Select Print as image. 5 Click OK twice. Try one or more information about installing a network printer, click View User's Guide and Documentation on the Lexmark Web site at www.lexmark.com. CHANGE THE PAGE PROTECT SETTING TO OFF 1 From the printer control panel, press . 2 Press the arrow buttons until Settings appears...
User's Guide
Page 198
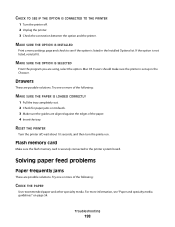
Flash memory card Make sure the flash memory card is set up in the Installed Options list. Drawers These are possible solutions. Mac OS 9 users should make sure the printer is securely connected to see "Paper and specialty media guidelines" on . For more information, see if the option is not ... edges of the following : MAKE SURE THE PAPER IS LOADED CORRECTLY 1 Pull the tray completely out. 2 Check for paper jams or misfeeds. 3 Make sure the guides are using, select the option.
Flash memory card Make sure the flash memory card is set up in the Installed Options list. Drawers These are possible solutions. Mac OS 9 users should make sure the printer is securely connected to see "Paper and specialty media guidelines" on . For more information, see if the option is not ... edges of the following : MAKE SURE THE PAPER IS LOADED CORRECTLY 1 Pull the tray completely out. 2 Check for paper jams or misfeeds. 3 Make sure the guides are using, select the option.

User's Guide
Page 201
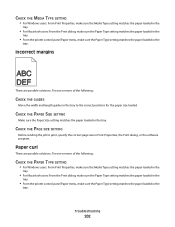
... Replace the photoconductor kit. Clipped images These are possible solutions. Ghost images These are possible solutions. Gray background • For Windows users: From Print Properties, select a different Toner Darkness setting before sending the job to the correct positions for the paper size loaded.... and length guides in the tray: 1 From the printer control panel Paper menu, check the Paper Size setting. 2 Before sending the job to print, specify the correct size setting: • For Windows users, specify the size from Print Properties. • For Macintosh users, specify the...
... Replace the photoconductor kit. Clipped images These are possible solutions. Ghost images These are possible solutions. Gray background • For Windows users: From Print Properties, select a different Toner Darkness setting before sending the job to the correct positions for the paper size loaded.... and length guides in the tray: 1 From the printer control panel Paper menu, check the Paper Size setting. 2 Before sending the job to print, specify the correct size setting: • For Windows users, specify the size from Print Properties. • For Macintosh users, specify the...
User's Guide
Page 202
Try one or more of the following : CHECK THE GUIDES Move the width and length guides in the tray to print, specify the correct page size in Print Properties, the Print... one or more of the following : CHECK THE PAPER TYPE SETTING • For Windows users: From Print Properties, make sure the Media Type setting matches the paper loaded in the tray. • For Macintosh... These are possible solutions. Troubleshooting 202 CHECK THE MEDIA TYPE SETTING • For Windows users: From Print Properties, make sure the Media Type setting matches the paper loaded in the tray. • For Macintosh...
Try one or more of the following : CHECK THE GUIDES Move the width and length guides in the tray to print, specify the correct page size in Print Properties, the Print... one or more of the following : CHECK THE PAPER TYPE SETTING • For Windows users: From Print Properties, make sure the Media Type setting matches the paper loaded in the tray. • For Macintosh... These are possible solutions. Troubleshooting 202 CHECK THE MEDIA TYPE SETTING • For Windows users: From Print Properties, make sure the Media Type setting matches the paper loaded in the tray. • For Macintosh...

User's Guide
Page 223
..., misuse, abuse or use inconsistent with Lexmark user's guides, manuals, instructions or guidance -Unsuitable physical or operating environment -Maintenance by anyone other than Lexmark or a Lexmark authorized servicer -Operation of a product beyond the limit of its warranty period. Lexmark's liability for a fee. ANY WARRANTIES ...not apply to claims against any product or the durability or longevity of Lexmark. Lexmark is not liable for which Lexmark is set forth in your area contact Lexmark on a third party claim. For further explanation of liability Your sole remedy...
..., misuse, abuse or use inconsistent with Lexmark user's guides, manuals, instructions or guidance -Unsuitable physical or operating environment -Maintenance by anyone other than Lexmark or a Lexmark authorized servicer -Operation of a product beyond the limit of its warranty period. Lexmark's liability for a fee. ANY WARRANTIES ...not apply to claims against any product or the durability or longevity of Lexmark. Lexmark is not liable for which Lexmark is set forth in your area contact Lexmark on a third party claim. For further explanation of liability Your sole remedy...
Quick Reference
Page 2
... send electronic documents without leaving your printer. If you are loading a document into the address field of faxing documents directly from software programs. For Windows users 1 With a file open , choose File > Print. 2 From the Printer pop-up menu, choose your desk. If you enter a number that is ...This gives you want to a single fax number or a group of fax numbers. 1 Type the printer IP address into the ADF, then adjust the paper guides. 3 From the printer control panel, press the Fax button. 4 Enter the fax number, and then press . Canceling an e-mail An e-mail can be...
... send electronic documents without leaving your printer. If you are loading a document into the address field of faxing documents directly from software programs. For Windows users 1 With a file open , choose File > Print. 2 From the Printer pop-up menu, choose your desk. If you enter a number that is ...This gives you want to a single fax number or a group of fax numbers. 1 Type the printer IP address into the ADF, then adjust the paper guides. 3 From the printer control panel, press the Fax button. 4 Enter the fax number, and then press . Canceling an e-mail An e-mail can be...
Quick Reference
Page 2
... entering the entire phone number of a fax recipient on the scanner glass. For Mac OS X version 10.4 or later users 1 With a document open, choose File > Print. 2 2 From the PDF pop-up menu, choose Fax PDF. ...the fax shortcut you can create a permanent fax destination and assign a shortcut number. For Mac OS X version 10.2 and 10.3 users 1 With a document open , click File ª Print. 2 Click Properties, Preferences, Options, or Setup. 3 Click the Other... you are loading a document into the ADF, then adjust the paper guides. 3 From the printer control panel, press the Fax button.
... entering the entire phone number of a fax recipient on the scanner glass. For Mac OS X version 10.4 or later users 1 With a document open, choose File > Print. 2 2 From the PDF pop-up menu, choose Fax PDF. ...the fax shortcut you can create a permanent fax destination and assign a shortcut number. For Mac OS X version 10.2 and 10.3 users 1 With a document open , click File ª Print. 2 Click Properties, Preferences, Options, or Setup. 3 Click the Other... you are loading a document into the ADF, then adjust the paper guides. 3 From the printer control panel, press the Fax button.
Quick Reference
Page 4
... the name that appears in the program you specified. a Load an original document faceup, short edge first into the ADF, then adjust the paper guides. 6 Press or to scan your document. Place these settings. 4 g Press or to view the file. Note: Do not load postcards, photos..., small items, transparencies, photo paper, or thin media (such as magazine clippings) into the ADF, then adjust the paper guides. b If you are unavailable. 2 Press 1 on the scanner glass. Pressing the black or color button does not change these items on the scanner...
... the name that appears in the program you specified. a Load an original document faceup, short edge first into the ADF, then adjust the paper guides. 6 Press or to scan your document. Place these settings. 4 g Press or to view the file. Note: Do not load postcards, photos..., small items, transparencies, photo paper, or thin media (such as magazine clippings) into the ADF, then adjust the paper guides. b If you are unavailable. 2 Press 1 on the scanner glass. Pressing the black or color button does not change these items on the scanner...
Maintenance Guide
Page 6
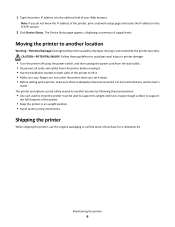
For more information, see the User's Guide. Shipping the printer When shipping the printer, use the original packaging or call the place of supply levels. Note: If you set it down. • ...
For more information, see the User's Guide. Shipping the printer When shipping the printer, use the original packaging or call the place of supply levels. Note: If you set it down. • ...
Service Manual
Page 41
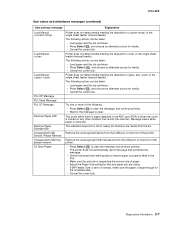
... and attendance messages (continued) User primary message Explanation Load Manual Printer does not detect media meeting the description and in the single sheet feeder (manual feeder). Load Manual Printer does ... single sheet feeder (manual feeder). If MP Feeder Size is closed (or any other situation that prompted the message. • Check tray length and width guides to ensure paper is properly fitted in the single sheet feeder (manual feeder).
... and attendance messages (continued) User primary message Explanation Load Manual Printer does not detect media meeting the description and in the single sheet feeder (manual feeder). Load Manual Printer does ... single sheet feeder (manual feeder). If MP Feeder Size is closed (or any other situation that prompted the message. • Check tray length and width guides to ensure paper is properly fitted in the single sheet feeder (manual feeder).

Service Manual
Page 46
...to the input sensor. Remove the toner cartridge/PC kit and inspect the input sensor flag. Verify that the media is approved. Possible causes include user insert of the PC kit for debris in the tray. Inspect the input sensor flag and replace it if it . Engine detected no gap .... See "Main motor service check" on page 4-55. Check the bottom of media when motor is loose, then replace it . Remove the upper front guide, and inspect the pinch rollers. Inspect the wear strips in the tray. Replace the flag if necessary. 200.14 Trailing edge cleared manual feed, but...
...to the input sensor. Remove the toner cartridge/PC kit and inspect the input sensor flag. Verify that the media is approved. Possible causes include user insert of the PC kit for debris in the tray. Inspect the input sensor flag and replace it if it . Engine detected no gap .... See "Main motor service check" on page 4-55. Check the bottom of media when motor is loose, then replace it . Remove the upper front guide, and inspect the pinch rollers. Inspect the wear strips in the tray. Replace the flag if necessary. 200.14 Trailing edge cleared manual feed, but...

Service Manual
Page 74
.... • Reinstall it, and recheck for condition. • Make sure to use the recommended print media (see media types and sizes in the User's Guide). • Use MarkVision™ Professional to define the custom type setting for media type, media texture, or media weight. • The toner cartridge... manual for debris. Check those settings. Horizontal streaks The toner cartridge or the fuser may be the cause due to the print defects guide at its entry for more information. Inspect the fuser at the end of the page. 7013-XXX Solving print quality problems Note: Refer...
.... • Reinstall it, and recheck for condition. • Make sure to use the recommended print media (see media types and sizes in the User's Guide). • Use MarkVision™ Professional to define the custom type setting for media type, media texture, or media weight. • The toner cartridge... manual for debris. Check those settings. Horizontal streaks The toner cartridge or the fuser may be the cause due to the print defects guide at its entry for more information. Inspect the fuser at the end of the page. 7013-XXX Solving print quality problems Note: Refer...


