
User Guide
Page 4
Contents 4 Settings menu...112 Help menu...145 Saving money and the environment 146 Saving paper and toner...146 Saving energy...146 Recycling...149 Securing the printer 151 Statement of Volatility...151 Erasing volatile memory...151 Erasing non‑volatile memory...151 Finding ...
Contents 4 Settings menu...112 Help menu...145 Saving money and the environment 146 Saving paper and toner...146 Saving energy...146 Recycling...149 Securing the printer 151 Statement of Volatility...151 Erasing volatile memory...151 Erasing non‑volatile memory...151 Finding ...

User Guide
Page 43
... in a jam. Have metal clasps, string ties, or folding bars - Have postage stamps attached - Adhesive material contaminates the printer and could void the printer and toner cartridge warranties. • Do not use labels with adhesive, and could void the warranty. • If zone coating of the label. • Make sure the... sheets. Label adhesives, face sheet (printable stock), and topcoats can withstand temperatures up to fit the width of the adhesive should be at http://support.lexmark.com. Zone coating of the envelopes.
... in a jam. Have metal clasps, string ties, or folding bars - Have postage stamps attached - Adhesive material contaminates the printer and could void the printer and toner cartridge warranties. • Do not use labels with adhesive, and could void the warranty. • If zone coating of the label. • Make sure the... sheets. Label adhesives, face sheet (printable stock), and topcoats can withstand temperatures up to fit the width of the adhesive should be at http://support.lexmark.com. Zone coating of the envelopes.

User Guide
Page 44
.... Excessive curl can cause paper feeding problems. Curl can cause feeding problems. Smoothness Paper smoothness directly affects print quality. If paper is too rough, then toner cannot fuse to printing and can occur after the paper passes through the printer, where it is exposed to use 75‑g/m2 (20‑...
.... Excessive curl can cause paper feeding problems. Curl can cause feeding problems. Smoothness Paper smoothness directly affects print quality. If paper is too rough, then toner cannot fuse to printing and can occur after the paper passes through the printer, where it is exposed to use 75‑g/m2 (20‑...

User Guide
Page 45
... either grain long, running the length of the paper, or grain short, running the width of paper to 48 hours before printing. mixing results in toner. The ink must be able to withstand temperatures up to feed the paper correctly. Inks that are specifically designed for 24 to moisture...
... either grain long, running the length of the paper, or grain short, running the width of paper to 48 hours before printing. mixing results in toner. The ink must be able to withstand temperatures up to feed the paper correctly. Inks that are specifically designed for 24 to moisture...

User Guide
Page 46
...socially responsible forest management and restoration practices. 3 Choose the most appropriate paper for the Endorsement of Forest Certification (PEFC). Lexmark does not endorse specific suppliers, although a converter's product list for special applications is another. Many factors are taken into... a tray) • Surface roughness (measured in Sheffield units, impacts print clarity and how well toner fuses to 100% post-consumer waste content.) • Temperature and humidity conditions (Testing chambers simulate climates from forestry operators that...
...socially responsible forest management and restoration practices. 3 Choose the most appropriate paper for the Endorsement of Forest Certification (PEFC). Lexmark does not endorse specific suppliers, although a converter's product list for special applications is another. Many factors are taken into... a tray) • Surface roughness (measured in Sheffield units, impacts print clarity and how well toner fuses to 100% post-consumer waste content.) • Temperature and humidity conditions (Testing chambers simulate climates from forestry operators that...

User Guide
Page 51
...a mobile device using a proxy server, then temporarily disable it to : > Settings > > Settings > > Print Settings > > Quality Menu > > Toner Darkness 2 Adjust the toner darkness, and then press . It allows you are using Mopria Print Service Mopria® Print Service is a mobile printing solution for mobile devices running... on configuring the wireless settings of the printer in the Network/Ports menu. Adjusting toner darkness Using the Embedded Web Server 1 Open a Web browser, and then type the IP address of your mobile device, see...
...a mobile device using a proxy server, then temporarily disable it to : > Settings > > Settings > > Print Settings > > Quality Menu > > Toner Darkness 2 Adjust the toner darkness, and then press . It allows you are using Mopria Print Service Mopria® Print Service is a mobile printing solution for mobile devices running... on configuring the wireless settings of the printer in the Network/Ports menu. Adjusting toner darkness Using the Embedded Web Server 1 Open a Web browser, and then type the IP address of your mobile device, see...

User Guide
Page 137
.... Automatically adjust the contrast enhancement applied to enhance fonts. Notes: • 8 is the factory default setting. • You can conserve toner by lightening or darkening it. For Macintosh users, choose File > Print, and then adjust the settings from the printer software. Adjust the .... Note: 0 is the factory default setting. Understanding the printer menus 137 Use Pixel Boost Off Fonts Horizontally Vertically Both directions Isolated Toner Darkness 1-10 Enhance Fine Lines On Off Gray Correction Auto Off Brightness ‑6 to 6 Contrast 0-5 To Enable more pixels to ...
.... Automatically adjust the contrast enhancement applied to enhance fonts. Notes: • 8 is the factory default setting. • You can conserve toner by lightening or darkening it. For Macintosh users, choose File > Print, and then adjust the settings from the printer software. Adjust the .... Note: 0 is the factory default setting. Understanding the printer menus 137 Use Pixel Boost Off Fonts Horizontally Vertically Both directions Isolated Toner Darkness 1-10 Enhance Fine Lines On Off Gray Correction Auto Off Brightness ‑6 to 6 Contrast 0-5 To Enable more pixels to ...

User Guide
Page 138
.... Warning-Potential Damage: Do not turn off the printer while the flash memory is being formatted. Provide an estimate of the percentage coverage of toner on errors, including XML markup errors. Understanding the printer menus 138 Utilities menu Use Format Flash Yes No Activate Hex Trace Coverage Estimator Off On...
.... Warning-Potential Damage: Do not turn off the printer while the flash memory is being formatted. Provide an estimate of the percentage coverage of toner on errors, including XML markup errors. Understanding the printer menus 138 Utilities menu Use Format Flash Yes No Activate Hex Trace Coverage Estimator Off On...

User Guide
Page 146
...paper. Saving energy Using Eco‑Mode Use Eco‑Mode to quickly select one side of a single sheet of paper. Saving paper and toner Studies show that may be able to reduce your printer's environmental impact. 1 From the printer control panel, navigate to: > Settings > you...your printer, see : • The Notices chapter • The Environmental Sustainability section of the Lexmark Web site at www.lexmark.com/environment • The Lexmark recycling program at www.lexmark.com/recycle By selecting certain printer settings or tasks, you can significantly reduce your carbon...
...paper. Saving energy Using Eco‑Mode Use Eco‑Mode to quickly select one side of a single sheet of paper. Saving paper and toner Studies show that may be able to reduce your printer's environmental impact. 1 From the printer control panel, navigate to: > Settings > you...your printer, see : • The Notices chapter • The Environmental Sustainability section of the Lexmark Web site at www.lexmark.com/environment • The Lexmark recycling program at www.lexmark.com/recycle By selecting certain printer settings or tasks, you can significantly reduce your carbon...

User Guide
Page 156
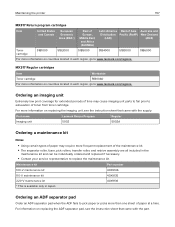
...+) Rest of Europe, Middle East, and Africa (RoEMEA) Latin America Rest of third-party supplies or parts can affect warranty coverage. The Lexmark Return Program lets you purchased the printer. MX310 Regular cartridges Item Worldwide High yield toner cartridge 60F0HA0 For more information on countries located in exchange for remanufacturing or recycling.
...+) Rest of Europe, Middle East, and Africa (RoEMEA) Latin America Rest of third-party supplies or parts can affect warranty coverage. The Lexmark Return Program lets you purchased the printer. MX310 Regular cartridges Item Worldwide High yield toner cartridge 60F0HA0 For more information on countries located in exchange for remanufacturing or recycling.
User Guide
Page 157
... separator pad when the ADF fails to pick paper or picks more information on countries located in each region, go to www.lexmark.com/regions. MX317 Regular cartridges Item Worldwide Toner cartridge 51B00A0 For more than one sheet of the maintenance kit. • The separator roller, fuser, pick rollers, transfer roller, and redrive...
... separator pad when the ADF fails to pick paper or picks more information on countries located in each region, go to www.lexmark.com/regions. MX317 Regular cartridges Item Worldwide Toner cartridge 51B00A0 For more than one sheet of the maintenance kit. • The separator roller, fuser, pick rollers, transfer roller, and redrive...

User Guide
Page 158
Store supplies right side up in their original packing until you are ready to : • Direct sunlight • Temperatures above 35°C (95°F) • High humidity above 80% • Salty air • Corrosive gases • Heavy dust Replacing supplies Replacing the toner cartridge 1 Press the button on the right side of the printer, and then open the front door. Do not expose supplies to use them. Maintaining the printer 158 Part name Separator pad Part number 40X6247 Storing supplies Choose a cool, clean storage area for the printer supplies.
Store supplies right side up in their original packing until you are ready to : • Direct sunlight • Temperatures above 35°C (95°F) • High humidity above 80% • Salty air • Corrosive gases • Heavy dust Replacing supplies Replacing the toner cartridge 1 Press the button on the right side of the printer, and then open the front door. Do not expose supplies to use them. Maintaining the printer 158 Part name Separator pad Part number 40X6247 Storing supplies Choose a cool, clean storage area for the printer supplies.

User Guide
Page 159
Maintaining the printer 159 2 Pull the toner cartridge out using the handle. 3 Unpack the toner cartridge, and then remove all packing materials. 4 Shake the new cartridge to direct light for more than 10 minutes. Warning-Potential Damage: Do not expose the imaging unit to redistribute the toner. 5 Insert the toner cartridge into the printer by aligning the side rails of the cartridge with the arrows on the side rails inside the printer. Extended exposure to light may cause print quality problems. 6 Close the front door.
Maintaining the printer 159 2 Pull the toner cartridge out using the handle. 3 Unpack the toner cartridge, and then remove all packing materials. 4 Shake the new cartridge to direct light for more than 10 minutes. Warning-Potential Damage: Do not expose the imaging unit to redistribute the toner. 5 Insert the toner cartridge into the printer by aligning the side rails of the cartridge with the arrows on the side rails inside the printer. Extended exposure to light may cause print quality problems. 6 Close the front door.

User Guide
Page 160
Maintaining the printer 160 Replacing the imaging unit 1 Press the button on the right side of the printer, and then open the front door. 2 Pull the toner cartridge out using the handle. 3 Lift the green handle, and then pull the imaging unit out of the printer.
Maintaining the printer 160 Replacing the imaging unit 1 Press the button on the right side of the printer, and then open the front door. 2 Pull the toner cartridge out using the handle. 3 Lift the green handle, and then pull the imaging unit out of the printer.

User Guide
Page 162
... cables from the printer. • If the printer has a caster base, then carefully roll it to the new location. Maintaining the printer 162 7 Insert the toner cartridge into the printer by aligning the side rails of the options. • Keep the printer in flooring. • If the printer does not...
... cables from the printer. • If the printer has a caster base, then carefully roll it to the new location. Maintaining the printer 162 7 Insert the toner cartridge into the printer by aligning the side rails of the options. • Keep the printer in flooring. • If the printer does not...

User Guide
Page 165
... The normal printer behavior for all supply conditions. • The percentage of ‑life supply condition. Notes: • Selectable alerts can be set on the toner cartridge, imaging unit, and maintenance kit. • All selectable alerts can be notified when supplies run nearly low, low, very low, or reach...
... The normal printer behavior for all supply conditions. • The percentage of ‑life supply condition. Notes: • Selectable alerts can be set on the toner cartridge, imaging unit, and maintenance kit. • All selectable alerts can be notified when supplies run nearly low, low, very low, or reach...

User Guide
Page 169
Clearing jams 169 Jam location 5 Duplex unit 6 Trays 7 Rear door Paper jam in the front door CAUTION-HOT SURFACE: The inside of injury from a hot component, allow the surface to cool before touching it. 1 Open the front door. 2 Remove the toner cartridge. To reduce the risk of the printer might be hot.
Clearing jams 169 Jam location 5 Duplex unit 6 Trays 7 Rear door Paper jam in the front door CAUTION-HOT SURFACE: The inside of injury from a hot component, allow the surface to cool before touching it. 1 Open the front door. 2 Remove the toner cartridge. To reduce the risk of the printer might be hot.

User Guide
Page 171
To reduce the risk of the printer might be hot. Clearing jams 171 6 Insert the toner cartridge. 7 Close the front door. 8 If necessary, press on the control panel. Paper jam in the rear door 1 Open the rear door. CAUTION-HOT SURFACE: The inside of injury from a hot component, allow the surface to cool before touching it.
To reduce the risk of the printer might be hot. Clearing jams 171 6 Insert the toner cartridge. 7 Close the front door. 8 If necessary, press on the control panel. Paper jam in the rear door 1 Open the rear door. CAUTION-HOT SURFACE: The inside of injury from a hot component, allow the surface to cool before touching it.

User Guide
Page 177
Troubleshooting 177 Troubleshooting Understanding the printer messages Cartridge, imaging unit mismatch [41.xy] Use only a supported toner cartridge and imaging unit. Note: For a list of the following • Load the correct paper size and type in the tray, verify the paper size...;ed in the Paper menu on the printer control panel, and then select Finished changing paper. to confirm. Change [paper source] to www.lexmark.com. For non‑touch‑screen printer models, press • Cancel the print job. Change [paper source] to [custom string] load [paper orientation] ...
Troubleshooting 177 Troubleshooting Understanding the printer messages Cartridge, imaging unit mismatch [41.xy] Use only a supported toner cartridge and imaging unit. Note: For a list of the following • Load the correct paper size and type in the tray, verify the paper size...;ed in the Paper menu on the printer control panel, and then select Finished changing paper. to confirm. Change [paper source] to www.lexmark.com. For non‑touch‑screen printer models, press • Cancel the print job. Change [paper source] to [custom string] load [paper orientation] ...

User Guide
Page 184
... after the printer restarts. Note: Held faxes will attempt to clear the message without printing. Use of thirdparty supplies or parts may not be toner cartridge or imaging unit. Memory full [38] Try one or more of the printer and its imaging components. Connect the printer to modem,... 10 seconds, and then turn the printer back on page 156. For non‑touch‑screen printer models, press to function with genuine Lexmark supplies and parts. All life indicators are designed to confirm. • Install additional printer memory. Damage caused by the warranty. To...
... after the printer restarts. Note: Held faxes will attempt to clear the message without printing. Use of thirdparty supplies or parts may not be toner cartridge or imaging unit. Memory full [38] Try one or more of the printer and its imaging components. Connect the printer to modem,... 10 seconds, and then turn the printer back on page 156. For non‑touch‑screen printer models, press to function with genuine Lexmark supplies and parts. All life indicators are designed to confirm. • Install additional printer memory. Damage caused by the warranty. To...

