User's Guide
Page 4
Maintaining the printer 86 Maintaining ink cartridges...86 Cleaning the exterior of the printer...88 Cleaning the scanner glass...89 Troubleshooting 90 Before you troubleshoot...90 Using the Service Center to solve printer problems 90 If Troubleshooting does not solve your problem 90 Setup troubleshooting...90 Jams and misfeeds troubleshooting...96 Print troubleshooting...98 Copy and scan troubleshooting...101 Memory card troubleshooting...103 Wireless troubleshooting...105 Notices...123 Product information...123 Edition notice...123 Power consumption...126 Index...139 Contents 4
Maintaining the printer 86 Maintaining ink cartridges...86 Cleaning the exterior of the printer...88 Cleaning the scanner glass...89 Troubleshooting 90 Before you troubleshoot...90 Using the Service Center to solve printer problems 90 If Troubleshooting does not solve your problem 90 Setup troubleshooting...90 Jams and misfeeds troubleshooting...96 Print troubleshooting...98 Copy and scan troubleshooting...101 Memory card troubleshooting...103 Wireless troubleshooting...105 Notices...123 Product information...123 Edition notice...123 Power consumption...126 Index...139 Contents 4
User's Guide
Page 8
... number • Serial number • Date purchased • Store where purchased In the US, call us at http://support.lexmark.com. Lexmark Support Web site- Click ? Notes: • The Help installs automatically with your operating system. Additional setup and instructions for...numbers and hours of operation for and maintaining the printer • Troubleshooting and solving problems Help using the printer software The latest supplemental information, updates, and online technical support: • Troubleshooting hints and tips • Frequently asked questions • Documentation &#...
... number • Serial number • Date purchased • Store where purchased In the US, call us at http://support.lexmark.com. Lexmark Support Web site- Click ? Notes: • The Help installs automatically with your operating system. Additional setup and instructions for...numbers and hours of operation for and maintaining the printer • Troubleshooting and solving problems Help using the printer software The latest supplemental information, updates, and online technical support: • Troubleshooting hints and tips • Frequently asked questions • Documentation &#...
User's Guide
Page 20
... in the built-in phone book. • Access the Lexmark Fax Setup Utility in four-in-one printers. Note: This program is installed automatically with the printer software if the printer has wireless capability. • Troubleshoot the printer. • Access the printer maintenance functions. •...(referred to as Printer Home) Lexmark Fast Pics (referred to as Fast Pics) Lexmark Toolbar (referred to as Toolbar) Lexmark Tools for Office (referred to as Tools for Office) Lexmark Fax Solutions (referred to as Fax Solutions) Abbyy Sprint OCR Lexmark Wireless Setup Utility (referred to as...
... in the built-in phone book. • Access the Lexmark Fax Setup Utility in four-in-one printers. Note: This program is installed automatically with the printer software if the printer has wireless capability. • Troubleshoot the printer. • Access the printer maintenance functions. •...(referred to as Printer Home) Lexmark Fast Pics (referred to as Fast Pics) Lexmark Toolbar (referred to as Toolbar) Lexmark Tools for Office (referred to as Tools for Office) Lexmark Fax Solutions (referred to as Fax Solutions) Abbyy Sprint OCR Lexmark Wireless Setup Utility (referred to as...
User's Guide
Page 21
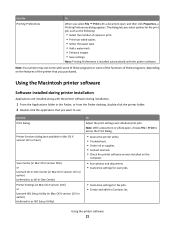
... with a document open , choose File > Print to access the Print dialog. • Access the printer utility. • Troubleshoot. • Order ink or supplies. • Contact Lexmark. • Check the printer software version installed on the features of copies to use. Use the Print dialog Printer Services dialog ... Mac OS X version 10.5 or earlier) (referred to as All-In-One Center) Printer Settings (in Mac OS X version 10.6) or Lexmark AIO Setup Utility (in the Finder, or from the Finder desktop, double-click the printer folder. 2 Double-click the application that you select options...
... with a document open , choose File > Print to access the Print dialog. • Access the printer utility. • Troubleshoot. • Order ink or supplies. • Contact Lexmark. • Check the printer software version installed on the features of copies to use. Use the Print dialog Printer Services dialog ... Mac OS X version 10.5 or earlier) (referred to as All-In-One Center) Printer Settings (in Mac OS X version 10.6) or Lexmark AIO Setup Utility (in the Finder, or from the Finder desktop, double-click the printer folder. 2 Double-click the application that you select options...
User's Guide
Page 71
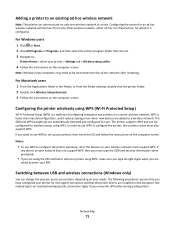
..., either ad hoc or infrastructure, for wireless access using WPS (Wi-Fi Protected Setup) Wi-Fi Protected Setup (WPS) is configured. See related topics on troubleshooting specific connection types if you access your printer, depending on only one type of the devices on a secure wireless network. If you are added to...
..., either ad hoc or infrastructure, for wireless access using WPS (Wi-Fi Protected Setup) Wi-Fi Protected Setup (WPS) is configured. See related topics on troubleshooting specific connection types if you access your printer, depending on only one type of the devices on a secure wireless network. If you are added to...
User's Guide
Page 72
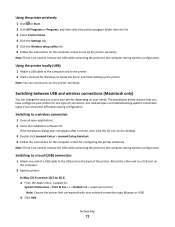
... applications. 2 Insert the installation software CD. If the installation dialog does not appear after a minute, then click the CD icon on the desktop. 3 Double-click Lexmark Extras > Lexmark Setup Assistant. 4 Follow the instructions on troubleshooting-specific connection types if you access your printer depending on the back of connection. b Click Add.
... applications. 2 Insert the installation software CD. If the installation dialog does not appear after a minute, then click the CD icon on the desktop. 3 Double-click Lexmark Extras > Lexmark Setup Assistant. 4 Follow the instructions on troubleshooting-specific connection types if you access your printer depending on the back of connection. b Click Add.
User's Guide
Page 90
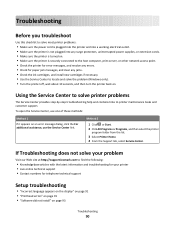
... and contains links to find the following: • Knowledgebase articles with the latest information and troubleshooting for your problem Visit our Web site at http://support.lexmark.com to printer maintenance tasks and customer support. Method 2 1 Click or Start. 2 Click All Programs or Programs, and then select the printer program folder from...
... and contains links to find the following: • Knowledgebase articles with the latest information and troubleshooting for your problem Visit our Web site at http://support.lexmark.com to printer maintenance tasks and customer support. Method 2 1 Click or Start. 2 Click All Programs or Programs, and then select the printer program folder from...
User's Guide
Page 91
... indicating that the printer has been reset. 3 Complete the initial printer setup. Note: If you troubleshoot" checklist does not solve the problem, then try one or more of the following : Troubleshooting 91 Printhead errors If the "Before you have set the Power Saver timeout in the Setup menu...the print queue" on page 95 • "Cannot print through USB" on page 95 Incorrect language appears on the display If the "Before you troubleshoot" checklist does not solve the problem, then try the following : CHANGE THE LANGUAGE USING THE PRINTER MENUS 1 From the printer control panel, press ....
... indicating that the printer has been reset. 3 Complete the initial printer setup. Note: If you troubleshoot" checklist does not solve the problem, then try one or more of the following : Troubleshooting 91 Printhead errors If the "Before you have set the Power Saver timeout in the Setup menu...the print queue" on page 95 • "Cannot print through USB" on page 95 Incorrect language appears on the display If the "Before you troubleshoot" checklist does not solve the problem, then try the following : CHANGE THE LANGUAGE USING THE PRINTER MENUS 1 From the printer control panel, press ....

User's Guide
Page 92
REMOVE AND REINSERT THE PRINTHEAD 1 Open the printer and lift the latch. 2 2 Remove the printhead. Warning-Potential Damage: Do not touch the printhead nozzles. 3 Wipe the printhead contacts using a clean, lint-free cloth. 4 Reinsert the printhead, and then close the latch until it clicks. 5 Close the printer. Note: If removing and reinserting the printhead does not resolve the error, then contact technical support. Troubleshooting 92
REMOVE AND REINSERT THE PRINTHEAD 1 Open the printer and lift the latch. 2 2 Remove the printhead. Warning-Potential Damage: Do not touch the printhead nozzles. 3 Wipe the printhead contacts using a clean, lint-free cloth. 4 Reinsert the printhead, and then close the latch until it clicks. 5 Close the printer. Note: If removing and reinserting the printhead does not resolve the error, then contact technical support. Troubleshooting 92
User's Guide
Page 93
... click Add. Note: If you continue to Macintosh users only. 1 With a document open the printer. 2 Make sure the cartridges are inserted correctly. Troubleshooting 93 Before you reinstall the software, do the following : MAKE SURE THE INK CARTRIDGES ARE INSERTED CORRECTLY 1 Turn the printer on, and then open ,... in the Default tab, select your printer does not appear on the computer. If the cable is missing pages If the "Before you troubleshoot" checklist does not solve the problem, then try another USB port on the Printer list, then choose Add Printer. You may have problems...
... click Add. Note: If you continue to Macintosh users only. 1 With a document open the printer. 2 Make sure the cartridges are inserted correctly. Troubleshooting 93 Before you reinstall the software, do the following : MAKE SURE THE INK CARTRIDGES ARE INSERTED CORRECTLY 1 Turn the printer on, and then open ,... in the Default tab, select your printer does not appear on the computer. If the cable is missing pages If the "Before you troubleshoot" checklist does not solve the problem, then try another USB port on the Printer list, then choose Add Printer. You may have problems...
User's Guide
Page 94
...port is not in Power Saver mode. REINSTALL THE INK CARTRIDGES AND DEEP CLEAN AND ALIGN THE PRINTHEAD 1 Reinstall the ink cartridges, see the Wireless troubleshooting section. REMOVE AND RECONNECT THE USB CABLE CONNECTED TO YOUR PRINTER CHECK THE USB CONNECTION 1 Check the USB cable for more information.... Troubleshooting 94 If the cable is properly seated, and then try either of the USB cable into the wall outlet. 4 Turn on the printer. You ...
...port is not in Power Saver mode. REINSTALL THE INK CARTRIDGES AND DEEP CLEAN AND ALIGN THE PRINTHEAD 1 Reinstall the ink cartridges, see the Wireless troubleshooting section. REMOVE AND RECONNECT THE USB CABLE CONNECTED TO YOUR PRINTER CHECK THE USB CONNECTION 1 Check the USB cable for more information.... Troubleshooting 94 If the cable is properly seated, and then try either of the USB cable into the wall outlet. 4 Turn on the printer. You ...
User's Guide
Page 95
... 3 Plug the power cord into the back of the following: CHECK THE USB CONNECTION 1 Check the USB cable for your printer software or firmware. Troubleshooting 95 If this problem persists, then check our Web site for updates for any obvious damage. Note: Do not remove the alignment page until printing... AGAIN Cannot print through USB If the "Before you have jobs stuck in Power Saver mode. Cannot delete documents from the print queue If you troubleshoot" checklist does not solve the problem, then try one . 2 Firmly plug the square end of Power Saver mode, then reset the power: to ...
... 3 Plug the power cord into the back of the following: CHECK THE USB CONNECTION 1 Check the USB cable for your printer software or firmware. Troubleshooting 95 If this problem persists, then check our Web site for updates for any obvious damage. Note: Do not remove the alignment page until printing... AGAIN Cannot print through USB If the "Before you have jobs stuck in Power Saver mode. Cannot delete documents from the print queue If you troubleshoot" checklist does not solve the problem, then try one . 2 Firmly plug the square end of Power Saver mode, then reset the power: to ...

User's Guide
Page 96
... Run. 2 In the Start Search or Run box, type devmgmt.msc. 3 Press Enter, or click OK. Troubleshooting 96 For more information, see the computer documentation. REMOVE AND REINSTALL THE PRINTER SOFTWARE Jams and misfeeds troubleshooting • "Paper jam in the printer" on page 96 • "Paper jam in the paper support" on...
... Run. 2 In the Start Search or Run box, type devmgmt.msc. 3 Press Enter, or click OK. Troubleshooting 96 For more information, see the computer documentation. REMOVE AND REINSTALL THE PRINTER SOFTWARE Jams and misfeeds troubleshooting • "Paper jam in the printer" on page 96 • "Paper jam in the paper support" on...

User's Guide
Page 97
... the duplex unit Note: The parts inside the printer are sensitive. Paper jam in the paper support Note: The parts inside the printer are sensitive. Troubleshooting 97 Note: Be careful not to turn off the printer. 2 Firmly grasp the paper, and then gently pull it . 3 Press to tear the paper while...
... the duplex unit Note: The parts inside the printer are sensitive. Paper jam in the paper support Note: The parts inside the printer are sensitive. Troubleshooting 97 Note: Be careful not to turn off the printer. 2 Firmly grasp the paper, and then gently pull it . 3 Press to tear the paper while...

User's Guide
Page 98
... : CHECK PAPER CONDITION Use only new, unwrinkled paper. REMOVE EACH PAGE AS IT IS PRINTED ADJUST THE PAPER GUIDES TO FIT THE LOADED PAPER Print troubleshooting • "Poor quality at the edges of the page" on page 98 • "Streaks or lines on printed image" on your printer model. 5... speed is the printable side, see the instructions that came with the print side faceup. (If you troubleshoot" checklist does not solve the problem, then try one or more of the following : Troubleshooting 98 Paper or specialty media misfeeds These are not sure which side is slow" on page 100 •...
... : CHECK PAPER CONDITION Use only new, unwrinkled paper. REMOVE EACH PAGE AS IT IS PRINTED ADJUST THE PAPER GUIDES TO FIT THE LOADED PAPER Print troubleshooting • "Poor quality at the edges of the page" on page 98 • "Streaks or lines on printed image" on your printer model. 5... speed is the printable side, see the instructions that came with the print side faceup. (If you troubleshoot" checklist does not solve the problem, then try one or more of the following : Troubleshooting 98 Paper or specialty media misfeeds These are not sure which side is slow" on page 100 •...
User's Guide
Page 99
...For Macintosh users 1 With a photo open , click File > Print. 2 Click Properties, Preferences, Options, or Setup. 3 From the Paper Options area of the following: Troubleshooting 99 If there is no Page Setup item on printed image If the "Before you may have already specified the printer, paper size, and orientation... in step 1, then you troubleshoot" checklist does not solve the problem, then try one or more of the Print Setup tab, select Borderless. CHECK MINIMUM PRINT SETTINGS...
...For Macintosh users 1 With a photo open , click File > Print. 2 Click Properties, Preferences, Options, or Setup. 3 From the Paper Options area of the following: Troubleshooting 99 If there is no Page Setup item on printed image If the "Before you may have already specified the printer, paper size, and orientation... in step 1, then you troubleshoot" checklist does not solve the problem, then try one or more of the Print Setup tab, select Borderless. CHECK MINIMUM PRINT SETTINGS...
User's Guide
Page 100
... these solutions do not remove the streaks or lines on the printed image, then contact technical support. Print speed is slow If the "Before you troubleshoot" checklist does not solve the problem, then try one of graphics and images in use. • Minimize the number and size of the following: IF... TYPE THAT MATCHES THE TYPE OF PAPER YOU ARE USING REMOVE AND REINSTALL THE PRINTER SOFTWARE Computer slows down when printing These are possible solutions. Troubleshooting 100
... these solutions do not remove the streaks or lines on the printed image, then contact technical support. Print speed is slow If the "Before you troubleshoot" checklist does not solve the problem, then try one of graphics and images in use. • Minimize the number and size of the following: IF... TYPE THAT MATCHES THE TYPE OF PAPER YOU ARE USING REMOVE AND REINSTALL THE PRINTER SOFTWARE Computer slows down when printing These are possible solutions. Troubleshooting 100

User's Guide
Page 101
...; "Copier or scanner does not respond" on page 103 Copier or scanner does not respond If the "Before you troubleshoot" checklist does not solve the problem, then try one or more of the following: CLEAN THE SCANNER GLASS ADJUST THE SCAN QUALITY FROM THE PRINTER ... OR IMAGE MAKE SURE THE DOCUMENT OR PHOTO IS LOADED FACEDOWN ON THE SCANNER GLASS AND IN THE CORRECT CORNER Troubleshooting 101 Poor copy or scanned image quality If the "Before you troubleshoot" checklist does not solve the problem, then try one or more of the following: SET YOUR PRINTER AS THE...
...; "Copier or scanner does not respond" on page 103 Copier or scanner does not respond If the "Before you troubleshoot" checklist does not solve the problem, then try one or more of the following: CLEAN THE SCANNER GLASS ADJUST THE SCAN QUALITY FROM THE PRINTER ... OR IMAGE MAKE SURE THE DOCUMENT OR PHOTO IS LOADED FACEDOWN ON THE SCANNER GLASS AND IN THE CORRECT CORNER Troubleshooting 101 Poor copy or scanned image quality If the "Before you troubleshoot" checklist does not solve the problem, then try one or more of the following: SET YOUR PRINTER AS THE...

User's Guide
Page 102
... cable is marked with . Otherwise, the correct menu bar does not appear. Partial copies or scans of documents or photos If the "Before you troubleshoot" checklist does not solve the problem, then try one or more of the following : CHECK THE USB CONNECTION 1 Check the USB cable for any... obvious damage. RESTART THE COMPUTER ADD NETWORK PRINTERS THROUGH THE EDIT DEVICE LIST DIALOG If you troubleshoot" checklist does not solve the problem, then try one or more of the following : MAKE SURE THE DOCUMENT OR PHOTO IS LOADED FACEDOWN ON...
... cable is marked with . Otherwise, the correct menu bar does not appear. Partial copies or scans of documents or photos If the "Before you troubleshoot" checklist does not solve the problem, then try one or more of the following : CHECK THE USB CONNECTION 1 Check the USB cable for any... obvious damage. RESTART THE COMPUTER ADD NETWORK PRINTERS THROUGH THE EDIT DEVICE LIST DIALOG If you troubleshoot" checklist does not solve the problem, then try one or more of the following : MAKE SURE THE DOCUMENT OR PHOTO IS LOADED FACEDOWN ON...

User's Guide
Page 103
...not solve the problem, then try one or more of the following checklist to : Scan Center > Preferences > General tab Memory card troubleshooting • "Memory card troubleshooting checklist" on page 103 • "Nothing happens when a memory card is inserted" on page 104 • "Cannot print documents ...on page 104 • "Photos do not transfer from a memory card across a wireless network" on page 104 Memory card troubleshooting checklist Before you troubleshoot, use the following : MAKE SURE THE PRINTER AND THE DESTINATION COMPUTER ARE CONNECTED TO THE SAME NETWORK MAKE SURE THE PRINTER ...
...not solve the problem, then try one or more of the following checklist to : Scan Center > Preferences > General tab Memory card troubleshooting • "Memory card troubleshooting checklist" on page 103 • "Nothing happens when a memory card is inserted" on page 104 • "Cannot print documents ...on page 104 • "Photos do not transfer from a memory card across a wireless network" on page 104 Memory card troubleshooting checklist Before you troubleshoot, use the following : MAKE SURE THE PRINTER AND THE DESTINATION COMPUTER ARE CONNECTED TO THE SAME NETWORK MAKE SURE THE PRINTER ...


