
User's Guide
Page 5
... other replacement parts. CAUTION-POTENTIAL INJURY: Do not cut, twist, bind, crush, or place heavy objects on the power cord. Inspect the power cord regularly for the use caution when accessing this product near the product and easily accessible. Do not set up this product ...other than those described in the user documentation, to a professional service person. Use only the power supply and power cord provided with the use of the printer, unplug the power cord from the wall outlet and disconnect all cables from the electrical outlet before proceeding. Safety information ...
... other replacement parts. CAUTION-POTENTIAL INJURY: Do not cut, twist, bind, crush, or place heavy objects on the power cord. Inspect the power cord regularly for the use caution when accessing this product near the product and easily accessible. Do not set up this product ...other than those described in the user documentation, to a professional service person. Use only the power supply and power cord provided with the use of the printer, unplug the power cord from the wall outlet and disconnect all cables from the electrical outlet before proceeding. Safety information ...
User's Guide
Page 90
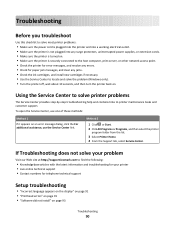
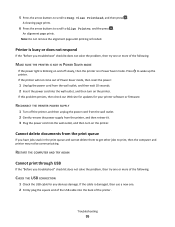
...plugged into the printer and into a working electrical outlet. • Make sure the printer is not plugged into any surge protectors, uninterrupted power supplies, or extension cords. • Make sure the printer is turned on. • Make sure the printer is securely connected to the host computer, print ... to find the following: • Knowledgebase articles with the latest information and troubleshooting for your problem Visit our Web site at http://support.lexmark.com to locate and solve the problem (Windows only). • Turn the printer off, wait about 10 seconds, and then turn the...
...plugged into the printer and into a working electrical outlet. • Make sure the printer is not plugged into any surge protectors, uninterrupted power supplies, or extension cords. • Make sure the printer is turned on. • Make sure the printer is securely connected to the host computer, print ... to find the following: • Knowledgebase articles with the latest information and troubleshooting for your problem Visit our Web site at http://support.lexmark.com to locate and solve the problem (Windows only). • Turn the printer off, wait about 10 seconds, and then turn the...
User's Guide
Page 93
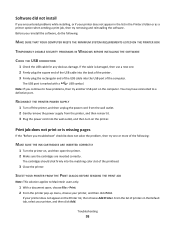
..., or if your printer does not appear on the computer. RECONNECT THE PRINTER POWER SUPPLY 1 Turn off the printer, and then unplug the power cord from the wall outlet. 2 Gently remove the power supply from the printer, and then reinsert it. 3 Plug the power cord into the matching color slot of the following : MAKE SURE THAT YOUR COMPUTER...
..., or if your printer does not appear on the computer. RECONNECT THE PRINTER POWER SUPPLY 1 Turn off the printer, and then unplug the power cord from the wall outlet. 2 Gently remove the power supply from the printer, and then reinsert it. 3 Plug the power cord into the matching color slot of the following : MAKE SURE THAT YOUR COMPUTER...
User's Guide
Page 94
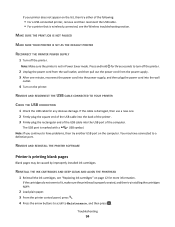
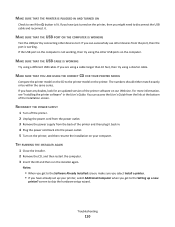
... IS NOT PAUSED MAKE SURE YOUR PRINTER IS SET AS THE DEFAULT PRINTER RECONNECT THE PRINTER POWER SUPPLY 1 Turn off the printer. 2 Unplug the power cord from the wall outlet, and then pull out the power cord from the power supply. 3 After one . 2 Firmly plug the square end of the USB cable into the..., and then press . REMOVE AND REINSTALL THE PRINTER SOFTWARE Printer is damaged, then use a new one minute, reconnect the power cord into the power supply, and then plug the power cord into the USB port of the USB cable into the wall outlet. 4 Turn on the computer. If your printer does not...
... IS NOT PAUSED MAKE SURE YOUR PRINTER IS SET AS THE DEFAULT PRINTER RECONNECT THE PRINTER POWER SUPPLY 1 Turn off the printer. 2 Unplug the power cord from the wall outlet, and then pull out the power cord from the power supply. 3 After one . 2 Firmly plug the square end of the USB cable into the..., and then press . REMOVE AND REINSTALL THE PRINTER SOFTWARE Printer is damaged, then use a new one minute, reconnect the power cord into the power supply, and then plug the power cord into the USB port of the USB cable into the wall outlet. 4 Turn on the computer. If your printer does not...
User's Guide
Page 95
... to wake up the 1 Unplug the power cord from the wall outlet, and then wait 10 seconds. 2 Insert the power cord into the wall outlet, and then turn on and off the printer, and then unplug the power cord from the wall outlet. 2 Gently remove the power supply from the print queue If you have... jobs stuck in Power Saver mode. Cannot delete documents from the printer, and then reinsert it. 3 Plug the power cord into the wall outlet, and then turn on...
... to wake up the 1 Unplug the power cord from the wall outlet, and then wait 10 seconds. 2 Insert the power cord into the wall outlet, and then turn on and off the printer, and then unplug the power cord from the wall outlet. 2 Gently remove the power supply from the print queue If you have... jobs stuck in Power Saver mode. Cannot delete documents from the printer, and then reinsert it. 3 Plug the power cord into the wall outlet, and then turn on...
User's Guide
Page 110
... . The numbers should either match exactly or be within the same series. screen to it . RECONNECT THE POWER SUPPLY 1 Turn off the printer. 2 Unplug the power cord from the power outlet. 3 Remove the power supply from the back of the installation screen. TRY RUNNING THE INSTALLER AGAIN 1 Close the installer. 2 Remove the...MAKE SURE THAT THE PRINTER IS PLUGGED IN AND TURNED ON Check to see "Installing the printer software" in . 4 Plug the power cord back into the power outlet. 5 Turn on the printer, and then resume the installation on the printer. MAKE SURE THAT THE USB PORT ON THE...
... . The numbers should either match exactly or be within the same series. screen to it . RECONNECT THE POWER SUPPLY 1 Turn off the printer. 2 Unplug the power cord from the power outlet. 3 Remove the power supply from the back of the installation screen. TRY RUNNING THE INSTALLER AGAIN 1 Close the installer. 2 Remove the...MAKE SURE THAT THE PRINTER IS PLUGGED IN AND TURNED ON Check to see "Installing the printer software" in . 4 Plug the power cord back into the power outlet. 5 Turn on the printer, and then resume the installation on the printer. MAKE SURE THAT THE USB PORT ON THE...

User's Guide
Page 127
... the Member States relating to electromagnetic compatibility and safety of inactivity. Setting the Power Saver Timeout to completely stop product power consumption, disconnect the power supply cord from the Authorized Representative. Values are provided in the previous table represent time-... conformity This product is : Lexmark International, Inc., 740 West New Circle Road, Lexington, KY, 40550 USA. Setting the Power Saver Timeout to the Sleep Mode. Instantaneous power draws may increase the response time of Watts, the power consumption should be modified between...
... the Member States relating to electromagnetic compatibility and safety of inactivity. Setting the Power Saver Timeout to completely stop product power consumption, disconnect the power supply cord from the Authorized Representative. Values are provided in the previous table represent time-... conformity This product is : Lexmark International, Inc., 740 West New Circle Road, Lexington, KY, 40550 USA. Setting the Power Saver Timeout to the Sleep Mode. Instantaneous power draws may increase the response time of Watts, the power consumption should be modified between...
Quick Reference
Page 2
...cartridge(s) sold without these things happen, a risk of such problems. Remove the power cord from the electrical outlet before inspecting it. Inspect the power cord regularly for , and designed to www.lexmark.com/recycle. CAUTION-SHOCK HAZARD: Do not use the print cartridges and their...as furniture and walls. Go to work with this printer. This patented printer is preaddressed. Use only the power supply and power cord provided with , only genuine Lexmark inkjet cartridges for proper recycling. The bag is licensed for signs of fire or electrical shock results. If any...
...cartridge(s) sold without these things happen, a risk of such problems. Remove the power cord from the electrical outlet before inspecting it. Inspect the power cord regularly for , and designed to www.lexmark.com/recycle. CAUTION-SHOCK HAZARD: Do not use the print cartridges and their...as furniture and walls. Go to work with this printer. This patented printer is preaddressed. Use only the power supply and power cord provided with , only genuine Lexmark inkjet cartridges for proper recycling. The bag is licensed for signs of fire or electrical shock results. If any...

Quick Reference
Page 17
...; Check the printer for error messages, and resolve any errors. • Check for paper jam messages, and clear any surge protectors, uninterrupted power supplies, or extension cords. • Make sure the printer is turned on . 17 menu, choose To be used?" Scanning to a PDF For Windows users 1 ... your e-mail program does not open automatically, then you troubleshoot Use this checklist to solve most printer problems: • Make sure the power cord is plugged into the printer and into a working electrical outlet. • Make sure the printer is not plugged into the ADF or ...
...; Check the printer for error messages, and resolve any errors. • Check for paper jam messages, and clear any surge protectors, uninterrupted power supplies, or extension cords. • Make sure the printer is turned on . 17 menu, choose To be used?" Scanning to a PDF For Windows users 1 ... your e-mail program does not open automatically, then you troubleshoot Use this checklist to solve most printer problems: • Make sure the power cord is plugged into the printer and into a working electrical outlet. • Make sure the printer is not plugged into the ADF or ...
Quick Reference
Page 19
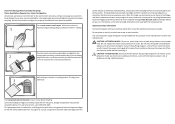
You may have problems, then try another USB port on the computer. RECONNECT THE PRINTER POWER SUPPLY 1 Turn off the printer, and then unplug the power cord from the wall outlet. 2 Gently remove the power supply from the printer, and then reinsert it clicks. 5 Close the printer. SELECT YOUR PRINTER FROM THE ...nozzles. 3 Wipe the printhead contacts using a clean, lint-free cloth. 4 Reinsert the printhead, and then close the latch until it . 3 Plug the power cord into the wall outlet, and then turn on , and then open , choose File > Print. 2 From the printer pop-up menu, choose your printer ...
You may have problems, then try another USB port on the computer. RECONNECT THE PRINTER POWER SUPPLY 1 Turn off the printer, and then unplug the power cord from the wall outlet. 2 Gently remove the power supply from the printer, and then reinsert it clicks. 5 Close the printer. SELECT YOUR PRINTER FROM THE ...nozzles. 3 Wipe the printhead contacts using a clean, lint-free cloth. 4 Reinsert the printhead, and then close the latch until it . 3 Plug the power cord into the wall outlet, and then turn on , and then open , choose File > Print. 2 From the printer pop-up menu, choose your printer ...
Quick Reference
Page 20
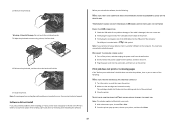
...arrow buttons to scroll to fit, make sure the printhead is blinking on and off the printer. 2 Unplug the power cord from the wall outlet, and then pull out the power cord from the power supply. 3 After one . 2 Firmly plug the square end of the USB cable into the back of the printer....YOUR PRINTER IS SET AS THE DEFAULT PRINTER RECONNECT THE PRINTER POWER SUPPLY 1 Turn off the printer, and then unplug the power cord from the wall outlet. 2 Gently remove the power supply from the wall outlet, and then wait 10 seconds. 2 Insert the power cord into the wall outlet. 4 Turn on the Printer list,...
...arrow buttons to scroll to fit, make sure the printhead is blinking on and off the printer. 2 Unplug the power cord from the wall outlet, and then pull out the power cord from the power supply. 3 After one . 2 Firmly plug the square end of the USB cable into the back of the printer....YOUR PRINTER IS SET AS THE DEFAULT PRINTER RECONNECT THE PRINTER POWER SUPPLY 1 Turn off the printer, and then unplug the power cord from the wall outlet. 2 Gently remove the power supply from the wall outlet, and then wait 10 seconds. 2 Insert the power cord into the wall outlet. 4 Turn on the Printer list,...


