User Manual
Page 2
... the printer...8 Understanding the parts of the printer...10 Ordering and replacing supplies 13 Ordering ink cartridges...13 Using genuine Lexmark ink cartridges...13 Replacing ink cartridges...14 Ordering paper and other supplies...15 Recycling Lexmark products...16 Using the printer control panel buttons and...energy with Eco-Mode...21 Resetting to factory settings...21 Using the printer software 22 Minimum system requirements...22 Using the Windows printer software...22 Using the Macintosh printer software...24 Finding and installing optional software...25 Updating the printer software...26 ...
... the printer...8 Understanding the parts of the printer...10 Ordering and replacing supplies 13 Ordering ink cartridges...13 Using genuine Lexmark ink cartridges...13 Replacing ink cartridges...14 Ordering paper and other supplies...15 Recycling Lexmark products...16 Using the printer control panel buttons and...energy with Eco-Mode...21 Resetting to factory settings...21 Using the printer software 22 Minimum system requirements...22 Using the Windows printer software...22 Using the Macintosh printer software...24 Finding and installing optional software...25 Updating the printer software...26 ...
User Manual
Page 7
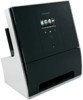
...latest updates on our Web site. The Power Saver feature puts the printer in a minimum-power standby mode after the printer is left idle for 10 minutes. • Select the lowest Power Saver timeout. About your printer Thank you for choosing this feature sets the printer to automatically print on ...both sides of the paper (duplex) for copy and fax jobs, and for printing in Windows and Mac OS X version 10.6 or later. • Print more than one page image on one of our knowledgeable support representatives will meet your printer 7 We've...
...latest updates on our Web site. The Power Saver feature puts the printer in a minimum-power standby mode after the printer is left idle for 10 minutes. • Select the lowest Power Saver timeout. About your printer Thank you for choosing this feature sets the printer to automatically print on ...both sides of the paper (duplex) for copy and fax jobs, and for printing in Windows and Mac OS X version 10.6 or later. • Print more than one page image on one of our knowledgeable support representatives will meet your printer 7 We've...
User Manual
Page 21
The printer restarts automatically after 10 Minutes • Screen Dim • 2-Sided Printing Note: If you have previously selected. 1 From the home screen, navigate to: > Use Factory Defaults > Yes 2 When prompted .... This setting is also applied for the printer to switch to factory default settings. Note: All the instructions in this setting is supported only in Windows and Mac OS X version 10.6 or later.
The printer restarts automatically after 10 Minutes • Screen Dim • 2-Sided Printing Note: If you have previously selected. 1 From the home screen, navigate to: > Use Factory Defaults > Yes 2 When prompted .... This setting is also applied for the printer to switch to factory default settings. Note: All the instructions in this setting is supported only in Windows and Mac OS X version 10.6 or later.

User Manual
Page 22
... • Microsoft Windows 7 • Microsoft Windows Vista (SP2) • Microsoft Windows XP (SP3) • Macintosh Intel OS X version 10.6.0 or later • Macintosh Intel OS X version 10.5.0 or later • Macintosh Intel OS X version 10.4.4 or later • Macintosh PowerPC OS X version 10.5.0 or later •...; Macintosh PowerPC OS X version 10.4.0 or later • Linux Ubuntu 10.04, 9.10, and 9.04* • Linux OpenSUSE 11.3 and 11.2* • Linux Fedora 12 and 11* * The printer driver for this operating system is available only at http://support.lexmark....
... • Microsoft Windows 7 • Microsoft Windows Vista (SP2) • Microsoft Windows XP (SP3) • Macintosh Intel OS X version 10.6.0 or later • Macintosh Intel OS X version 10.5.0 or later • Macintosh Intel OS X version 10.4.4 or later • Macintosh PowerPC OS X version 10.5.0 or later •...; Macintosh PowerPC OS X version 10.4.0 or later • Linux Ubuntu 10.04, 9.10, and 9.04* • Linux OpenSUSE 11.3 and 11.2* • Linux Fedora 12 and 11* * The printer driver for this operating system is available only at http://support.lexmark....
User Manual
Page 27
...and then click Run. Installing the printer software Note: If you are using Mac OS X version 10.4, then restart your CD or DVD drive. 3 Follow the instructions on the Welcome screen. b...Search or Run box, type D:\setup.exe, where D is the letter of your computer. For Windows users 1 Close all open software applications. 2 Insert the installation software CD. If the Welcome screen..., then uninstall the current software first. Note: Updated printer software may be available at www.lexmark.com. 2 Navigate to: Downloads > Driver Finder > select your printer > select your operating...
...and then click Run. Installing the printer software Note: If you are using Mac OS X version 10.4, then restart your CD or DVD drive. 3 Follow the instructions on the Welcome screen. b...Search or Run box, type D:\setup.exe, where D is the letter of your computer. For Windows users 1 Close all open software applications. 2 Insert the installation software CD. If the Welcome screen..., then uninstall the current software first. Note: Updated printer software may be available at www.lexmark.com. 2 Navigate to: Downloads > Driver Finder > select your printer > select your operating...
User Manual
Page 39
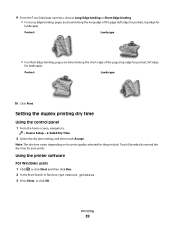
Portrait Landscape 10 Click Print. Touch Extended to : > Device Setup > 2-Sided Dry Time 2 Select the dry time setting, and then touch Accept. Portrait Landscape • For Short-Edge ... dry time Using the control panel 1 From the home screen, navigate to extend the dry time for the print job. Using the printer software For Windows users 1 Click , or click Start and then click Run. 2 In the Start Search or Run box, type control printers. 3 Press Enter, or click OK. Printing...
Portrait Landscape 10 Click Print. Touch Extended to : > Device Setup > 2-Sided Dry Time 2 Select the dry time setting, and then touch Accept. Portrait Landscape • For Short-Edge ... dry time Using the control panel 1 From the home screen, navigate to extend the dry time for the print job. Using the printer software For Windows users 1 Click , or click Start and then click Run. 2 In the Start Search or Run box, type control printers. 3 Press Enter, or click OK. Printing...
User Manual
Page 43
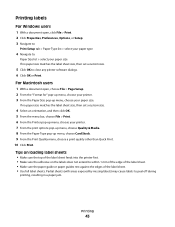
.... • Make sure the paper guide or paper guides rest against the edges of the label sheet. • Use full label sheets. Printing labels For Windows users 1 With a document open , choose File > Page Setup. 2 From the "Format for" pop-up menu, choose your printer. 3 From the Paper Size pop-up ...menu, choose Card Stock. 9 From the Print Quality menu, choose a print quality other than Quick Print. 10 Click Print. Tips on loading label sheets • Make sure the top of the label sheet feeds into the printer first. • Make sure the...
.... • Make sure the paper guide or paper guides rest against the edges of the label sheet. • Use full label sheets. Printing labels For Windows users 1 With a document open , choose File > Page Setup. 2 From the "Format for" pop-up menu, choose your printer. 3 From the Paper Size pop-up ...menu, choose Card Stock. 9 From the Print Quality menu, choose a print quality other than Quick Print. 10 Click Print. Tips on loading label sheets • Make sure the top of the label sheet feeds into the printer first. • Make sure the...
User Manual
Page 63
... if you have several images to scan multiple photos at once and save them as separate images, then select Split into an editing application For Windows users 1 Load a photo or photos. The Scan dialog appears. 9 Adjust the image and scan settings as separate images. For Macintosh users 1 Load a... photo or photos. Scanning starts and the scan progress dialog appears. 5 Save the photo or photos, and open them as needed. 10 Click Scan. Note: Allow at least 1/4 inch of the Scan Center, select Photo. 5 From the "How will the scanned image be viewed on monitor...
... if you have several images to scan multiple photos at once and save them as separate images, then select Split into an editing application For Windows users 1 Load a photo or photos. The Scan dialog appears. 9 Adjust the image and scan settings as separate images. For Macintosh users 1 Load a... photo or photos. Scanning starts and the scan progress dialog appears. 5 Save the photo or photos, and open them as needed. 10 Click Scan. Note: Allow at least 1/4 inch of the Scan Center, select Photo. 5 From the "How will the scanned image be viewed on monitor...
User Manual
Page 88
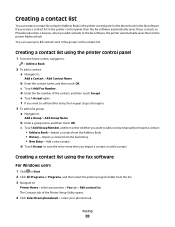
... using the Address Book in the printer control panel or the phone book in the fax software. Creating a contact list using the fax software For Windows users 1 Click or Start. 2 Click All Programs or Programs, and then select the printer program folder from the list. 3 Navigate to: Printer Home > ... 88 c Touch Add Group Member, and then select whether you import a contact or add a contact. d Touch Accept to save up to 89 contacts and 10 fax groups in the contact list. If you want to add a contact manually or import a contact: • Address Book-Import a contact from the Address Book...
... using the Address Book in the printer control panel or the phone book in the fax software. Creating a contact list using the fax software For Windows users 1 Click or Start. 2 Click All Programs or Programs, and then select the printer program folder from the list. 3 Navigate to: Printer Home > ... 88 c Touch Add Group Member, and then select whether you import a contact or add a contact. d Touch Accept to save up to 89 contacts and 10 fax groups in the contact list. If you want to add a contact manually or import a contact: • Address Book-Import a contact from the Address Book...
User Manual
Page 105
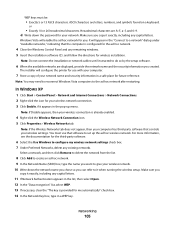
... Click Properties > Wireless Networks tab. For more information, see the documentation for your network. Networking 105 or • Exactly 10 or 26 hexadecimal characters. In Windows XP 1 Click Start > Control Panel > Network and Internet Connections > Network Connections. 2 Right-click the icon for the third..., numbers, and symbols found on a keyboard. Note: You may need to reconnect Windows Vista computers to set up menu. Note: If Disable appears, then your wireless network. 10 Write down the password for wireless installation. Make sure you want to a network" dialog...
... Click Properties > Wireless Networks tab. For more information, see the documentation for your network. Networking 105 or • Exactly 10 or 26 hexadecimal characters. In Windows XP 1 Click Start > Control Panel > Network and Internet Connections > Network Connections. 2 Right-click the icon for the third..., numbers, and symbols found on a keyboard. Note: You may need to reconnect Windows Vista computers to set up menu. Note: If Disable appears, then your wireless network. 10 Write down the password for wireless installation. Make sure you want to a network" dialog...
User Manual
Page 106
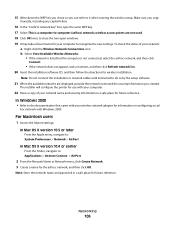
...: Store the network name and password in a safe place for future reference. To check the status of your computer to close the two open windows. 19 It may take a few minutes for your network name and security information in a safe place for future reference. Networking 106 15 Write down...Wireless Network Connections icon. For Macintosh users 1 Access the Airport settings: In Mac OS X version 10.5 or later From the Apple menu, navigate to: System Preferences > Network > AirPort In Mac OS X version 10.4 or earlier From the Finder, navigate to do so by the setup software. 21 When the ...
...: Store the network name and password in a safe place for future reference. To check the status of your computer to close the two open windows. 19 It may take a few minutes for your network name and security information in a safe place for future reference. Networking 106 15 Write down...Wireless Network Connections icon. For Macintosh users 1 Access the Airport settings: In Mac OS X version 10.5 or later From the Apple menu, navigate to: System Preferences > Network > AirPort In Mac OS X version 10.4 or earlier From the Finder, navigate to do so by the setup software. 21 When the ...

User Manual
Page 108
...to the computer and to the printer. 2 Wait a moment for Windows to a wireless connection 1 Close all open applications. 2 Insert the installation software CD. See related topics on the computer. 2 Add the printer: In Mac OS X version 10.5 or later a From the Apple menu, navigate to: System ...during configuration. If the installation dialog does not appear after a minute, then click the CD icon on the desktop. 3 Double-click Lexmark Extras > Lexmark Setup Assistant. 4 Follow the instructions on your needs. Switching to a local (USB) connection 1 Attach one type of connection. Note...
...to the computer and to the printer. 2 Wait a moment for Windows to a wireless connection 1 Close all open applications. 2 Insert the installation software CD. See related topics on the computer. 2 Add the printer: In Mac OS X version 10.5 or later a From the Apple menu, navigate to: System ...during configuration. If the installation dialog does not appear after a minute, then click the CD icon on the desktop. 3 Double-click Lexmark Extras > Lexmark Setup Assistant. 4 Follow the instructions on your needs. Switching to a local (USB) connection 1 Attach one type of connection. Note...
User Manual
Page 109
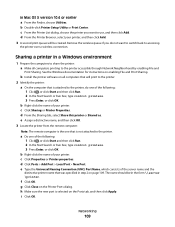
...In the Start Search or Run box, type control printers. 3 Press Enter, or click OK. See the Windows documentation for instructions on the Printer Ports dialog. In Mac OS X version 10.4 or earlier a From the Finder, choose Utilities. a Do one of the server name and the distinctive ...printer name that was specified in a Windows environment 1 Prepare the computers to the printer. b Double-click Printer Setup Utility...
...In the Start Search or Run box, type control printers. 3 Press Enter, or click OK. See the Windows documentation for instructions on the Printer Ports dialog. In Mac OS X version 10.4 or earlier a From the Finder, choose Utilities. a Do one of the server name and the distinctive ...printer name that was specified in a Windows environment 1 Prepare the computers to the printer. b Double-click Printer Setup Utility...
User Manual
Page 110
...passphrase? • Contact your Internet Service Provider (ISP), then you to a Macintosh computer. Note: WPS supports only networks that came with Windows users-Let Windows computers on the network use any printer connected to your Macintosh computer. • Sharing your printer with the access point or contact your ... following : • Sharing your printer with Mac OS X users-Let other Macintosh computers on the network that use Mac OS X version 10.4 or later use any of these identifier marks to check if your access point is WPS certified: You can find these WPS logos on adding...
...passphrase? • Contact your Internet Service Provider (ISP), then you to a Macintosh computer. Note: WPS supports only networks that came with Windows users-Let Windows computers on the network use any printer connected to your Macintosh computer. • Sharing your printer with the access point or contact your ... following : • Sharing your printer with Mac OS X users-Let other Macintosh computers on the network that use Mac OS X version 10.4 or later use any of these identifier marks to check if your access point is WPS certified: You can find these WPS logos on adding...
User Manual
Page 128
...and clear any jams. • Check the ink cartridges, and install new cartridges if necessary. • Turn the printer off, wait about 10 seconds, and then turn off the printer. • Use the Service Center to find the following: • Knowledgebase articles with the latest ...information and troubleshooting for your problem Visit our Web site at http://support.lexmark.com to locate and solve the problem (Windows only). Troubleshooting Before you troubleshoot Use this checklist to solve most printer problems: • Make sure the power ...
...and clear any jams. • Check the ink cartridges, and install new cartridges if necessary. • Turn the printer off, wait about 10 seconds, and then turn off the printer. • Use the Service Center to find the following: • Knowledgebase articles with the latest ...information and troubleshooting for your problem Visit our Web site at http://support.lexmark.com to locate and solve the problem (Windows only). Troubleshooting Before you troubleshoot Use this checklist to solve most printer problems: • Make sure the power ...
User Manual
Page 140
... 3.37 mm (0.133 in.) for " pop-up menu, choose your printer. 3 From the Paper Size pop-up menu, choose Best or Photo. 10 Click Print. CHECK MINIMUM PRINT SETTINGS Unless you troubleshoot" checklist does not solve the problem, then try one or more of the following: CHECK THE...-up menu, choose a paper type. 9 From the Print Quality pop-up menu, choose a paper size that has "(Borderless)" in .) SELECT THE BORDERLESS PRINT FEATURE For Windows users: 1 With a photo open, click File > Print. 2 Click Properties, Preferences, Options, or Setup. 3 Navigate to: Print Setup tab > Paper Options area > ...
... 3.37 mm (0.133 in.) for " pop-up menu, choose your printer. 3 From the Paper Size pop-up menu, choose Best or Photo. 10 Click Print. CHECK MINIMUM PRINT SETTINGS Unless you troubleshoot" checklist does not solve the problem, then try one or more of the following: CHECK THE...-up menu, choose a paper type. 9 From the Print Quality pop-up menu, choose a paper size that has "(Borderless)" in .) SELECT THE BORDERLESS PRINT FEATURE For Windows users: 1 With a photo open, click File > Print. 2 Click Properties, Preferences, Options, or Setup. 3 Navigate to: Print Setup tab > Paper Options area > ...
User Manual
Page 153
...; "Wi-Fi indicator is down, then use a USB cable to connect your printer to your wireless connection is green but the printer does not print (Windows only)" on page 160 • "Wi-Fi indicator shows limited connection during installation" on page 161 • "Wi-Fi indicator still shows limited connection" on... YOUR PRINTER" IS SELECTED IN THE PREFERENCES DIALOG OF THE NETWORK CARD READER (MACINTOSH ONLY) Notes: • This is available only in Mac OS X version 10.6. • If you have several applications open, then make sure that the Network Card Reader is the active application.
...; "Wi-Fi indicator is down, then use a USB cable to connect your printer to your wireless connection is green but the printer does not print (Windows only)" on page 160 • "Wi-Fi indicator shows limited connection during installation" on page 161 • "Wi-Fi indicator still shows limited connection" on... YOUR PRINTER" IS SELECTED IN THE PREFERENCES DIALOG OF THE NETWORK CARD READER (MACINTOSH ONLY) Notes: • This is available only in Mac OS X version 10.6. • If you have several applications open, then make sure that the Network Card Reader is the active application.

User Manual
Page 162
... Enter, or click OK. b In the Start Search or Run box, type cmd. PING THE ACCESS POINT TO MAKE SURE THE NETWORK IS WORKING For Windows users 1 Obtain the IP address of the network on a keyboard. ASCII characters are A-F, a-f, and 0-9. d Type ipconfig, and then press Enter. &#...8226; The "Default Gateway" entry is using WEP security, then the WEP key should be : • Exactly 10 or 26 hexadecimal characters. CHECK YOUR WEP KEY OR WPA PASSPHRASE If your access point is typically the access point. • The IP address appears...
... Enter, or click OK. b In the Start Search or Run box, type cmd. PING THE ACCESS POINT TO MAKE SURE THE NETWORK IS WORKING For Windows users 1 Obtain the IP address of the network on a keyboard. ASCII characters are A-F, a-f, and 0-9. d Type ipconfig, and then press Enter. &#...8226; The "Default Gateway" entry is using WEP security, then the WEP key should be : • Exactly 10 or 26 hexadecimal characters. CHECK YOUR WEP KEY OR WPA PASSPHRASE If your access point is typically the access point. • The IP address appears...
User Manual
Page 164
... problem. For more information, see the User's Guide. This means that your computer is displayed. MAKE SURE YOUR COMPUTER CAN COMMUNICATE WITH THE PRINTER For Windows users 1 Obtain the printer IP address. Troubleshooting 164 a From the printer, print a network setup page. b In the TCP/IP section, look for Address. ...see several lines that display the number of bytes received from the access point. Run the Wireless Setup Utility again. For example: 10.168.1.101 4 Click Ping. 5 If the printer responds, then you will see several lines that your printer.
... problem. For more information, see the User's Guide. This means that your computer is displayed. MAKE SURE YOUR COMPUTER CAN COMMUNICATE WITH THE PRINTER For Windows users 1 Obtain the printer IP address. Troubleshooting 164 a From the printer, print a network setup page. b In the TCP/IP section, look for Address. ...see several lines that display the number of bytes received from the access point. Run the Wireless Setup Utility again. For example: 10.168.1.101 4 Click Ping. 5 If the printer responds, then you will see several lines that your printer.

User Manual
Page 192
...62 forwarding faxes 98 France special wireless setup instructions 102 FreeBox 102 front door location 10 G greeting cards 30 Group Dial setting up 88 H heavyweight matte paper 29 home... 7 ink cartridge access location 11 ink cartridges ordering 13 replacing 14 using genuine Lexmark 13 Index 192 ink levels checking 125 installation cable 114 installing network printer 121 ... optional software 25 installing printer on wireless network (Macintosh) 101 on wireless network (Windows) 101 installing printer software 27 installing wireless printer additional computers 101 interactive solutions 122...
...62 forwarding faxes 98 France special wireless setup instructions 102 FreeBox 102 front door location 10 G greeting cards 30 Group Dial setting up 88 H heavyweight matte paper 29 home... 7 ink cartridge access location 11 ink cartridges ordering 13 replacing 14 using genuine Lexmark 13 Index 192 ink levels checking 125 installation cable 114 installing network printer 121 ... optional software 25 installing printer on wireless network (Macintosh) 101 on wireless network (Windows) 101 installing printer software 27 installing wireless printer additional computers 101 interactive solutions 122...


