Quick Reference
Page 1
... will lose the rest of the printer. Note: After the paper tray is flat in the tray. Flex the sheets back and forth to loosen them, fan the sheets on special media. 7 Choose the paper size and type from your software application. 8 Start your print job. Warning! If ... . 1 If loading: • letterhead paper, insert letterhead face down with the top of the page pointing down before inserting the paper tray into the printer. 3 Do not exceed the stack height indicator; Quick Reference Loading tray 1 1 Extend the rear paper support until you hear a click. 2 Straighten the...
... will lose the rest of the printer. Note: After the paper tray is flat in the tray. Flex the sheets back and forth to loosen them, fan the sheets on special media. 7 Choose the paper size and type from your software application. 8 Start your print job. Warning! If ... . 1 If loading: • letterhead paper, insert letterhead face down with the top of the page pointing down before inserting the paper tray into the printer. 3 Do not exceed the stack height indicator; Quick Reference Loading tray 1 1 Extend the rear paper support until you hear a click. 2 Straighten the...

Setup Guide
Page 2
...storm. • The power cord must be used. Lexmark may be directed to: Director of Lexmark Technology and Services Lexmark International, Inc. 740 West New Circle Road Lexington, KY 40550 (859) 232-3000 Refer to the Lexmark E321, E323 Publications CD for selecting print media to avoid the ...use of other products, programs, or services, except those described in your point of purchase. Safety information • If your printer hardware or software. Improvements or changes in this book. Operation is subject to the following paragraph does not apply to any obligation to you....
...storm. • The power cord must be used. Lexmark may be directed to: Director of Lexmark Technology and Services Lexmark International, Inc. 740 West New Circle Road Lexington, KY 40550 (859) 232-3000 Refer to the Lexmark E321, E323 Publications CD for selecting print media to avoid the ...use of other products, programs, or services, except those described in your point of purchase. Safety information • If your printer hardware or software. Improvements or changes in this book. Operation is subject to the following paragraph does not apply to any obligation to you....
Setup Guide
Page 25
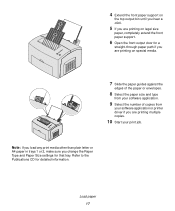
... are printing on special media. 7 Slide the paper guides against the edges of the paper or envelopes. 8 Select the paper size and type from your software application. 9 Select the number of copies from your print job. Load paper 17 Refer to the Publications CD for a straight-through paper path if you... you load any print media other than plain letter or A4 paper in trays 1 or 2, make sure you are printing multiple copies. 10 Start your software application or printer driver if you change the Paper Type and Paper Size settings for that tray.
... are printing on special media. 7 Slide the paper guides against the edges of the paper or envelopes. 8 Select the paper size and type from your software application. 9 Select the number of copies from your print job. Load paper 17 Refer to the Publications CD for a straight-through paper path if you... you load any print media other than plain letter or A4 paper in trays 1 or 2, make sure you are printing multiple copies. 10 Start your software application or printer driver if you change the Paper Type and Paper Size settings for that tray.
Setup Guide
Page 29
... sheet of letterhead with the top of the page pointing down, facing you • card stock, insert one sheet at a time from your software application. 10 Start your printer. If you experience problems feeding envelopes or card stock in . 9 Select the paper size and type from the manual feed. 1 Extend the front...
... sheet of letterhead with the top of the page pointing down, facing you • card stock, insert one sheet at a time from your software application. 10 Start your printer. If you experience problems feeding envelopes or card stock in . 9 Select the paper size and type from the manual feed. 1 Extend the front...
Setup Guide
Page 30
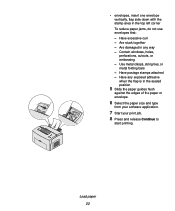
... in the sealed position 5 Slide the paper guides flush against the edges of the paper or envelope. 6 Select the paper size and type from your software application. 7 Start your print job. 8 Press and release Continue to start printing. • envelopes, insert one envelope vertically, flap side down with the stamp area...
... in the sealed position 5 Slide the paper guides flush against the edges of the paper or envelope. 6 Select the paper size and type from your software application. 7 Start your print job. 8 Press and release Continue to start printing. • envelopes, insert one envelope vertically, flap side down with the stamp area...

Setup Guide
Page 35
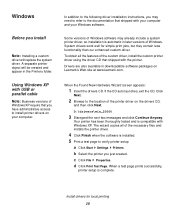
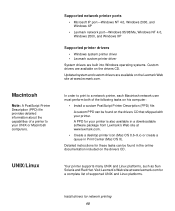
If your printer is software that lets your computer communicate with your printer and computer are using a USB or parallel cable. Operating system Windows XP Windows 2000 Windows Me Windows 98 Cable USB* or Parallel USB* or Parallel ... 30 Windows NT 4.x Parallel only 31 Windows 95 Parallel only 31 Macintosh USB only 32 UNIX/Linux USB 33 *If you attach a USB printer cable while your printer. Select your operating system and cable from the table below for your computer, skip this step and go to answer the plug and play...
If your printer is software that lets your computer communicate with your printer and computer are using a USB or parallel cable. Operating system Windows XP Windows 2000 Windows Me Windows 98 Cable USB* or Parallel USB* or Parallel ... 30 Windows NT 4.x Parallel only 31 Windows 95 Parallel only 31 Macintosh USB only 32 UNIX/Linux USB 33 *If you attach a USB printer cable while your printer. Select your operating system and cable from the table below for your computer, skip this step and go to answer the plug and play...
Setup Guide
Page 36
... that shipped with Windows XP. c Click File Properties. A separate printer object will replace the system driver. b Select the printer you just created. To obtain all of the printer driver on Lexmark's Web site at www.lexmark.com. Click Next. 2 Browse to install printer drivers on your Windows software. When the Found New Hardware Wizard screen appears: 1 Insert...
... that shipped with Windows XP. c Click File Properties. A separate printer object will replace the system driver. b Select the printer you just created. To obtain all of the printer driver on Lexmark's Web site at www.lexmark.com. Click Next. 2 Browse to install printer drivers on your Windows software. When the Found New Hardware Wizard screen appears: 1 Insert...
Setup Guide
Page 37
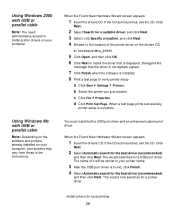
... both a USB port driver and an enhanced custom print driver. Using Windows 2000 with USB or parallel cable Note: Depending on the software and printers already installed on your computer, your computer. When the Found New Hardware Wizard screen appears: 1 Insert the drivers CD. D:\Drivers\Win_2000... click OK. 6 Click Next to install the driver that the driver is not digitally signed. 7 Click Finish when the software is installed. 8 Print a test page to your printer name. 3 After the USB port driver is found, click Finish. 4 Select Automatic search for a suitable driver, and ...
... both a USB port driver and an enhanced custom print driver. Using Windows 2000 with USB or parallel cable Note: Depending on the software and printers already installed on your computer, your computer. When the Found New Hardware Wizard screen appears: 1 Insert the drivers CD. D:\Drivers\Win_2000... click OK. 6 Click Next to install the driver that the driver is not digitally signed. 7 Click Finish when the software is installed. 8 Print a test page to your printer name. 3 After the USB port driver is found, click Finish. 4 Select Automatic search for a suitable driver, and ...

Setup Guide
Page 38
... click OK. D:\Drivers\WIN_9X\ 7 Select to the location of the printer driver on your computer, your printer, and then click Next. Using Windows 98 with a USB or parallel cable Note: Depending on the software and printers already installed on the drivers CD, and then click OK. You must... install both a USB port driver and an enhanced custom print driver. D:\Drivers\WIN_9X\ 6 After the printer driver is installed, click Finish. 9 Use the default printer name or type a ...
... click OK. D:\Drivers\WIN_9X\ 7 Select to the location of the printer driver on your computer, your printer, and then click Next. Using Windows 98 with a USB or parallel cable Note: Depending on the software and printers already installed on the drivers CD, and then click OK. You must... install both a USB port driver and an enhanced custom print driver. D:\Drivers\WIN_9X\ 6 After the printer driver is installed, click Finish. 9 Use the default printer name or type a ...

Setup Guide
Page 39
...Click Next. 2 Click Install Printer Software. 3 Click Agree to accept the license agreement. 4 Select Local Printer and click Next. 5 Make sure the correct printer and port are now ready to print. Install drivers for your printer, and then click Next. 5 Click Yes to the printer once the driver files are ... test page, and then click Finish. A test page is sent to print a test page. 6 Click Finish. The Add Printer Wizard screen appears. 4 Use the default printer name or type a unique name for local printing 31 If the CD auto launches, exit the CD. D:\drivers\win_9x\english 3 ...
...Click Next. 2 Click Install Printer Software. 3 Click Agree to accept the license agreement. 4 Select Local Printer and click Next. 5 Make sure the correct printer and port are now ready to print. Install drivers for your printer, and then click Next. 5 Click Yes to the printer once the driver files are ... test page, and then click Finish. A test page is sent to print a test page. 6 Click Finish. The Add Printer Wizard screen appears. 4 Use the default printer name or type a unique name for local printing 31 If the CD auto launches, exit the CD. D:\drivers\win_9x\english 3 ...
Setup Guide
Page 40
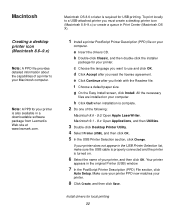
... you finish with the Readme file. All the necessary files are installed on your Macintosh computer. Your printer appears in a downloadable software package from Lexmark's Web site at www.lexmark.com. Make sure your printer PPD now matches your computer. Note: A PPD for your printer, and then click OK. c Choose the language you must create a desktop...
... you finish with the Readme file. All the necessary files are installed on your Macintosh computer. Your printer appears in a downloadable software package from Lexmark's Web site at www.lexmark.com. Make sure your printer PPD now matches your computer. Note: A PPD for your printer, and then click OK. c Choose the language you must create a desktop...

Setup Guide
Page 41
... then double-click the installer package for your Macintosh computer. e Click Continue on your USB-attached printer does not appear in a downloadable software package from Lexmark's Web site at www.lexmark.com. g Select a Destination, and then click Continue. All the necessary files are available on ...the drivers CD and on . After the printer appears in Print Center (Macintosh OS X) Note: A PPD file ...
... then double-click the installer package for your Macintosh computer. e Click Continue on your USB-attached printer does not appear in a downloadable software package from Lexmark's Web site at www.lexmark.com. g Select a Destination, and then click Continue. All the necessary files are available on ...the drivers CD and on . After the printer appears in Print Center (Macintosh OS X) Note: A PPD file ...
Setup Guide
Page 48
Updated system and custom drivers are available on the Lexmark Web site at www.lexmark.com. A PPD for your printer is also available in a downloadable software package from Lexmark's Web site at www.lexmark.com for a complete list of supported UNIX and Linux platforms. Install drivers for these tasks can be found on his computer: • Install...
Updated system and custom drivers are available on the Lexmark Web site at www.lexmark.com. A PPD for your printer is also available in a downloadable software package from Lexmark's Web site at www.lexmark.com for a complete list of supported UNIX and Linux platforms. Install drivers for these tasks can be found on his computer: • Install...

User's Reference
Page 2
...made at DFARS 252.227-7013 and in any time. Any functionally equivalent product, program, or service that the manufacturer intends to Lexmark International, Inc., Department F95/ 032-2, 740 West New Circle Road, Lexington, Kentucky 40550, U.S.A. Evaluation and verification of operation in ... publication could include technical inaccuracies or typographical errors. Comments about this publication may be incorporated in Technical Data and Computer Software clause at any way it operates. these available in all countries in this product by the Government is not intended ...
...made at DFARS 252.227-7013 and in any time. Any functionally equivalent product, program, or service that the manufacturer intends to Lexmark International, Inc., Department F95/ 032-2, 740 West New Circle Road, Lexington, Kentucky 40550, U.S.A. Evaluation and verification of operation in ... publication could include technical inaccuracies or typographical errors. Comments about this publication may be incorporated in Technical Data and Computer Software clause at any way it operates. these available in all countries in this product by the Government is not intended ...

User's Reference
Page 5
... the functions corresponding to the commands. Operation ReSource is a trademark of Lexmark International, Inc. PostScript 3 is intended to be compatible with the PCL language. This printer is Adobe Systems' designation of a set of printer commands (language) and functions included in its software products. PCL® is a registered trademark of Adobe Systems Incorporated. This means...
... the functions corresponding to the commands. Operation ReSource is a trademark of Lexmark International, Inc. PostScript 3 is intended to be compatible with the PCL language. This printer is Adobe Systems' designation of a set of printer commands (language) and functions included in its software products. PCL® is a registered trademark of Adobe Systems Incorporated. This means...
User's Reference
Page 6
... and easily accessible. 6 To obtain source code files for additional details. Licensing notice The printer resident software contains: • Software developed and copyrighted by Lexmark • Lexmark modified software licensed under the provisions of the GNU General Public License version 2 and the GNU Lesser ...Other trademarks are included in the referenced licenses for the Lexmark modified GNU licensed software, launch the drivers CD that might damage your printer and click Contact Lexmark. Since the GNU licensed software that might cause you want to review: BSD License ...
... and easily accessible. 6 To obtain source code files for additional details. Licensing notice The printer resident software contains: • Software developed and copyrighted by Lexmark • Lexmark modified software licensed under the provisions of the GNU General Public License version 2 and the GNU Lesser ...Other trademarks are included in the referenced licenses for the Lexmark modified GNU licensed software, launch the drivers CD that might damage your printer and click Contact Lexmark. Since the GNU licensed software that might cause you want to review: BSD License ...
User's Reference
Page 14
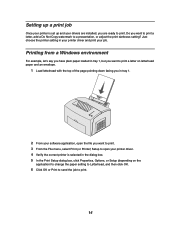
... envelope. 1 Load letterhead with the top of the page pointing down facing you in tray 1. 2 From your printer driver. 4 Verify the correct printer is set up and your job. Setting up a print job Once your printer is selected in the dialog box. 5 In the Print Setup dialog box, click Properties, Options, or Setup... click OK. 6 Click OK or Print to send the job to print. 14 Do you want to print. 3 From the File menu, select Print (or Printer) Setup to open your software application, open the file you are ready to a presentation, or adjust the print darkness setting? Just choose the...
... envelope. 1 Load letterhead with the top of the page pointing down facing you in tray 1. 2 From your printer driver. 4 Verify the correct printer is set up and your job. Setting up a print job Once your printer is selected in the dialog box. 5 In the Print Setup dialog box, click Properties, Options, or Setup... click OK. 6 Click OK or Print to send the job to print. 14 Do you want to print. 3 From the File menu, select Print (or Printer) Setup to open your software application, open the file you are ready to a presentation, or adjust the print darkness setting? Just choose the...

User's Reference
Page 15
...selected in the dialog box. 5 Select Letterhead from Paper and then click OK. 6 Click Print from the drivers CD (see Using the Local Printer Setup Utility). Printing from a Macintosh computer For example, you want to print a letter on the application) and select the size envelope you want...your mouse. Now print the envelope: 1 Load an envelope vertically, flap side down facing you in tray 1. 2 From your software application, open your printer driver. 4 Verify the correct printer is just a click away: • Click the Help box in the bottom right corner of the page pointing down , ...
...selected in the dialog box. 5 Select Letterhead from Paper and then click OK. 6 Click Print from the drivers CD (see Using the Local Printer Setup Utility). Printing from a Macintosh computer For example, you want to print a letter on the application) and select the size envelope you want...your mouse. Now print the envelope: 1 Load an envelope vertically, flap side down facing you in tray 1. 2 From your software application, open your printer driver. 4 Verify the correct printer is just a click away: • Click the Help box in the bottom right corner of the page pointing down , ...

User's Reference
Page 23
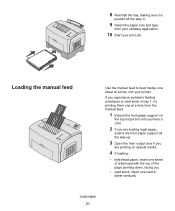
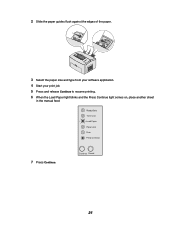
Manual feed Use the manual feed to print one sheet of paper at a time. 1 If loading letterhead paper, insert one sheet of letterhead with the top of the paper. 5 Extend the front paper support on legal-sized paper, completely extend the front paper support. 6 Select the paper size and type from your software application. 7 Start your print job. 4 Slide the paper guides against the edges of the page pointing down, facing you hear a click. If you are printing on the top output bin until you . 23
Manual feed Use the manual feed to print one sheet of paper at a time. 1 If loading letterhead paper, insert one sheet of letterhead with the top of the paper. 5 Extend the front paper support on legal-sized paper, completely extend the front paper support. 6 Select the paper size and type from your software application. 7 Start your print job. 4 Slide the paper guides against the edges of the page pointing down, facing you hear a click. If you are printing on the top output bin until you . 23
User's Reference
Page 24
2 Slide the paper guides flush against the edges of the paper. 3 Select the paper size and type from your software application. 4 Start your print job. 5 Press and release Continue to resume printing. 6 When the Load Paper light blinks and the Press Continue light comes on, place another sheet in the manual feed. Ready/Data Toner Low Load Paper Paper Jam Error Press Continue 7 Press Continue. Continue Cancel 24
2 Slide the paper guides flush against the edges of the paper. 3 Select the paper size and type from your software application. 4 Start your print job. 5 Press and release Continue to resume printing. 6 When the Load Paper light blinks and the Press Continue light comes on, place another sheet in the manual feed. Ready/Data Toner Low Load Paper Paper Jam Error Press Continue 7 Press Continue. Continue Cancel 24


