User's Guide
Page 10
... 172 Jams and misfeeds troubleshooting 172 How to clear and avoid paper jams ...172 Paper jam in the printer ...173 Paper jam in the paper support ...173 Paper or specialty media misfeeds...173 Printer does not feed paper, envelopes, or specialty media 174 Banner paper jams ...174 Paper continues to jam...
... 172 Jams and misfeeds troubleshooting 172 How to clear and avoid paper jams ...172 Paper jam in the printer ...173 Paper jam in the paper support ...173 Paper or specialty media misfeeds...173 Printer does not feed paper, envelopes, or specialty media 174 Banner paper jams ...174 Paper continues to jam...
User's Guide
Page 11
... the camera card...196 Some photos removed from card by host 196 Problems reading the memory card ...196 2-Sided Paper Type Error...196 File Not Supported...196 Unsupported Paper Size ...197 Error messages on the computer screen 197 Clearing error messages ...197 Left/Right Cartridge Missing ...197 Communication not available ...197...
... the camera card...196 Some photos removed from card by host 196 Problems reading the memory card ...196 2-Sided Paper Type Error...196 File Not Supported...196 Unsupported Paper Size ...197 Error messages on the computer screen 197 Clearing error messages ...197 Left/Right Cartridge Missing ...197 Communication not available ...197...
User's Guide
Page 13
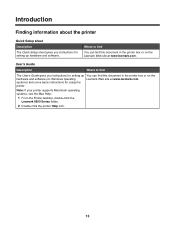
Note: If your printer supports Macintosh operating systems, see the Mac Help: 1 From the Finder desktop, double-click the Lexmark 6500 Series folder. 2 Double-click the printer Help icon. 13 Where to find The User's Guide gives you instructions for using the printer... systems) and some basic instructions for setting up You can find this document in the printer box or on Windows operating Lexmark Web site at www.lexmark.com. Introduction Finding information about the printer Quick Setup sheet Description The Quick Setup sheet gives you instructions for setting up ...
Note: If your printer supports Macintosh operating systems, see the Mac Help: 1 From the Finder desktop, double-click the Lexmark 6500 Series folder. 2 Double-click the printer Help icon. 13 Where to find The User's Guide gives you instructions for using the printer... systems) and some basic instructions for setting up You can find this document in the printer box or on Windows operating Lexmark Web site at www.lexmark.com. Introduction Finding information about the printer Quick Setup sheet Description The Quick Setup sheet gives you instructions for setting up ...
User's Guide
Page 14
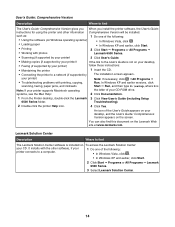
... misfeeds Start Œ Run, and then type D:\setup, where D is included on the Lexmark Web site at www.lexmark.com. User's Guide: Comprehensive Version Description Where to a network (if supported by your printer) follow these instructions: • Maintaining the printer 1 Insert the CD. ... with the other information Comprehensive Version will be installed. It installs with photos Lexmark 6500 Series. • Scanning (if supported by your printer) 3 Click User's Guide. • Making copies (if supported by your printer) If the link to the User's Guide is not on...
... misfeeds Start Œ Run, and then type D:\setup, where D is included on the Lexmark Web site at www.lexmark.com. User's Guide: Comprehensive Version Description Where to a network (if supported by your printer) follow these instructions: • Maintaining the printer 1 Insert the CD. ... with the other information Comprehensive Version will be installed. It installs with photos Lexmark 6500 Series. • Scanning (if supported by your printer) 3 Click User's Guide. • Making copies (if supported by your printer) If the link to the User's Guide is not on...
User's Guide
Page 15
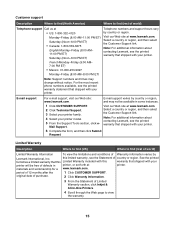
... that shipped with this limited warranty, see the printed warranty that shipped with your printer. Mail Support. Visit our Web site at www.lexmark.com. E-mail support varies by country or region. materials and workmanship for a www.lexmark.com. original date of purchase. 2 Click Warranty Information. 3 From the Statement of defects in printer, or...
... that shipped with this limited warranty, see the printed warranty that shipped with your printer. Mail Support. Visit our Web site at www.lexmark.com. E-mail support varies by country or region. materials and workmanship for a www.lexmark.com. original date of purchase. 2 Click Warranty Information. 3 From the Statement of defects in printer, or...

User's Guide
Page 16
... the back of the printer), and have it ready when you contact us so that are having issues with an N router, verify with your product supports Macintosh, see the Mac Help installed with IEEE 802.11 b/g/n routers that we may serve you faster: • Machine Type number • Serial number •...
... the back of the printer), and have it ready when you contact us so that are having issues with an N router, verify with your product supports Macintosh, see the Mac Help installed with IEEE 802.11 b/g/n routers that we may serve you faster: • Machine Type number • Serial number •...
User's Guide
Page 18
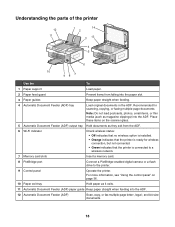
... multiple-page letter-, legal-, and A4-size documents. 18 Understanding the parts of the printer 12 11 1 14 2 3 13 4 5 6 10 98 7 Use the To 1 Paper support Load paper. 2 Paper feed guard Prevent items from the ADF. 6 Wi-Fi indicator Check wireless status: • Off indicates that no wireless option is installed...
... multiple-page letter-, legal-, and A4-size documents. 18 Understanding the parts of the printer 12 11 1 14 2 3 13 4 5 6 10 98 7 Use the To 1 Paper support Load paper. 2 Paper feed guard Prevent items from the ADF. 6 Wi-Fi indicator Check wireless status: • Off indicates that no wireless option is installed...
User's Guide
Page 21
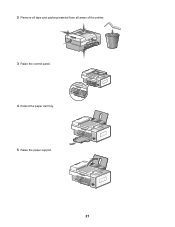
2 Remove all tape and packing material from all areas of the printer. 3 Raise the control panel. 4 Extend the paper exit tray. 5 Raise the paper support. 21
2 Remove all tape and packing material from all areas of the printer. 3 Raise the control panel. 4 Extend the paper exit tray. 5 Raise the paper support. 21

User's Guide
Page 26
... up the printer. Always allow these programs to begin. Click Install to communicate. Wait several seconds for the printer to work properly. Lexmark XXXX Series Installation Welcome... Note: If the install screen does not appear automatically, click Start ΠRun, and then type D:\setup....exe, where D is trying to appear. To prevent errors during installation, close all open programs. Security Information Documentation Support 26 Your security software may notify you unpack the printer or attach anything, locate the CD for Windows. 2 Make sure the computer is...
... up the printer. Always allow these programs to begin. Click Install to communicate. Wait several seconds for the printer to work properly. Lexmark XXXX Series Installation Welcome... Note: If the install screen does not appear automatically, click Start ΠRun, and then type D:\setup....exe, where D is trying to appear. To prevent errors during installation, close all open programs. Security Information Documentation Support 26 Your security software may notify you unpack the printer or attach anything, locate the CD for Windows. 2 Make sure the computer is...

User's Guide
Page 36
... the sections of dialing may be used in a business or office, it may not work if the PBX telephone system uses a dial tone that will support analog use. The "Dialing while behind a PBX If the printer is an analog device.
... the sections of dialing may be used in a business or office, it may not work if the PBX telephone system uses a dial tone that will support analog use. The "Dialing while behind a PBX If the printer is an analog device.
User's Guide
Page 55
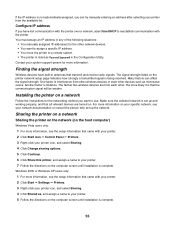
... subnet. • The printer is listed as Unconfigured in antennas that came with your printer. 2 Click Start Œ Settings Œ Printers. 3 Right-click your system support person for the other devices such as , and assign a name to use. Make sure the selected network is set up and working properly, and that...
... subnet. • The printer is listed as Unconfigured in antennas that came with your printer. 2 Click Start Œ Settings Œ Printers. 3 Right-click your system support person for the other devices such as , and assign a name to use. Make sure the selected network is set up and working properly, and that...
User's Guide
Page 56
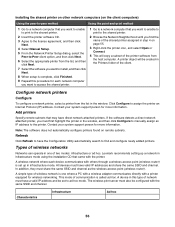
...will be configured with others through a wireless access point (wireless router) is one of the printer software from the host computer. Lexmark recommends setting up in this procedure for more information. Characteristics Infrastructure Ad hoc 56 A simple type of communication is complete, click ...the wireless access point (wireless router). The wireless print server must have direct network attached printers. Contact your system support person for each device communicates with the same SSID and channel. A printer object will copy a subset of two modes: ...
...will be configured with others through a wireless access point (wireless router) is one of the printer software from the host computer. Lexmark recommends setting up in this procedure for more information. Characteristics Infrastructure Ad hoc 56 A simple type of communication is complete, click ...the wireless access point (wireless router). The wireless print server must have direct network attached printers. Contact your system support person for each device communicates with the same SSID and channel. A printer object will copy a subset of two modes: ...
User's Guide
Page 60
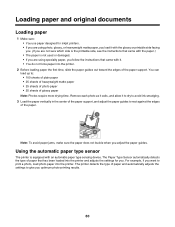
...; You do not force paper into the printer. 2 Before loading paper the first time, slide the paper guides out toward the edges of the paper support, and adjust the paper guides to print a photo, load photo paper into the printer and adjusts the settings for inkjet printers. • If you are... the paper.) • The paper is equipped with it to dry to avoid ink smudging. 3 Load the paper vertically in the center of the paper support. Using the automatic paper type sensor The printer is not used or damaged. • If you are not sure which side is the printable side...
...; You do not force paper into the printer. 2 Before loading paper the first time, slide the paper guides out toward the edges of the paper support, and adjust the paper guides to print a photo, load photo paper into the printer and adjusts the settings for inkjet printers. • If you are... the paper.) • The paper is equipped with it to dry to avoid ink smudging. 3 Load the paper vertically in the center of the paper support. Using the automatic paper type sensor The printer is not used or damaged. • If you are not sure which side is the printable side...
User's Guide
Page 61
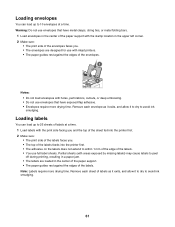
... use envelopes that have metal clasps, string ties, or metal folding bars. 1 Load envelopes in the center of the paper support. • The paper guides rest against the edges of the paper support with holes, perforations, cutouts, or deep embossing. • Do not use with the print side facing you and the...
... use envelopes that have metal clasps, string ties, or metal folding bars. 1 Load envelopes in the center of the paper support. • The paper guides rest against the edges of the paper support with holes, perforations, cutouts, or deep embossing. • Do not use with the print side facing you and the...
User's Guide
Page 62
...strip should face away from you and down toward the printer. 2 Make sure: • The transparencies are loaded in the center of the paper support. • The paper guides rest against the edges of the transfer facing you. 2 Make sure: • You follow the loading instructions that ...drying time. Note: Photo cards require more drying time. Notes: • Transparencies with paper backing sheets are loaded in the center of the paper support. • The paper guides rest against the edges of the transfers. 62 Loading greeting cards, index cards, photo cards, and postcards You can...
...strip should face away from you and down toward the printer. 2 Make sure: • The transparencies are loaded in the center of the paper support. • The paper guides rest against the edges of the transfer facing you. 2 Make sure: • You follow the loading instructions that ...drying time. Note: Photo cards require more drying time. Notes: • Transparencies with paper backing sheets are loaded in the center of the paper support. • The paper guides rest against the edges of the transfers. 62 Loading greeting cards, index cards, photo cards, and postcards You can...
User's Guide
Page 63
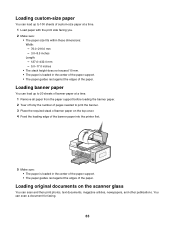
...into the printer first. 5 Make sure: • The paper is loaded in the center of the paper support. • The paper guides rest against the edges of the paper. You can scan a document for ... up to 100 sheets of custom-size paper at a time. 1 Remove all paper from the paper support before loading the banner paper. 2 Tear off only the number of pages needed to 20 sheets of ...The stack height does not exceed 10 mm. • The paper is loaded in the center of the paper support. • The paper guides rest against the edges of the paper. Loading custom-size paper You can load up...
...into the printer first. 5 Make sure: • The paper is loaded in the center of the paper support. • The paper guides rest against the edges of the paper. You can scan a document for ... up to 100 sheets of custom-size paper at a time. 1 Remove all paper from the paper support before loading the banner paper. 2 Tear off only the number of pages needed to 20 sheets of ...The stack height does not exceed 10 mm. • The paper is loaded in the center of the paper support. • The paper guides rest against the edges of the paper. Loading custom-size paper You can load up...
User's Guide
Page 69
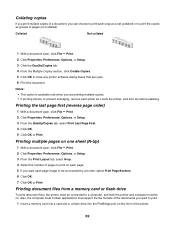
..., or Setup. 3 Click the Quality/Copies tab. 4 From the Multiple Copies section, click Collate Copies. 5 Click OK to close any printer software dialog boxes that support the file formats of the documents you want to print. 1 Insert a memory card into a card slot or a flash drive into the PictBridge port on . Printing...
..., or Setup. 3 Click the Quality/Copies tab. 4 From the Multiple Copies section, click Collate Copies. 5 Click OK to close any printer software dialog boxes that support the file formats of the documents you want to print. 1 Insert a memory card into a card slot or a flash drive into the PictBridge port on . Printing...

User's Guide
Page 92
Paper sizes supported Dimensions A4 210 x 297 millimeters Letter 8.5 x 11 inches Greeting cards 4 x 8 inches (10.16 x 20.32 centimeters) 12 Click Print Now. 13 If you want in ...
Paper sizes supported Dimensions A4 210 x 297 millimeters Letter 8.5 x 11 inches Greeting cards 4 x 8 inches (10.16 x 20.32 centimeters) 12 Click Print Now. 13 If you want in ...

User's Guide
Page 96
... date range 1 Load photo paper with the glossy or printable side facing you. (If you are displayed sequentially on the second line of your camera supports DPOF, you can also print photos with the most recent month. 7 Press or to print. 3 Press or repeatedly until Print Photos appears. 4 Press . 5 Press or...
... date range 1 Load photo paper with the glossy or printable side facing you. (If you are displayed sequentially on the second line of your camera supports DPOF, you can also print photos with the most recent month. 7 Press or to print. 3 Press or repeatedly until Print Photos appears. 4 Press . 5 Press or...
User's Guide
Page 116
... can include up to seven numbers, commas, periods, spaces, and/or these symbols 6 Click OK to this service, it works with the printer. The printer supports two distinct Caller ID patterns: Pattern 1 (FSK) and Pattern 2 (DTMF). Receiving a fax Receiving a fax manually 1 Make sure the Auto Answer light is off. 2 To receive...
... can include up to seven numbers, commas, periods, spaces, and/or these symbols 6 Click OK to this service, it works with the printer. The printer supports two distinct Caller ID patterns: Pattern 1 (FSK) and Pattern 2 (DTMF). Receiving a fax Receiving a fax manually 1 Make sure the Auto Answer light is off. 2 To receive...


