Data Security Kit (E) Operation Guide Rev-2 2011.2
Page 8
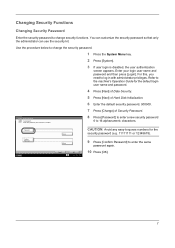
... with administrator privileges. Security Password Set password. Password CAUTION: Avoid any easy-to-guess numbers for the default login user name and password. 4 Press [Next] of Data Security. 5 Press [Next] of Hard Disk Initialization. 6 Enter the default security password, 000000. 7 Press [Change] of Security Password. Confirm Password Status # Keys Cancel OK 9 Press [Confirm...
... with administrator privileges. Security Password Set password. Password CAUTION: Avoid any easy-to-guess numbers for the default login user name and password. 4 Press [Next] of Data Security. 5 Press [Next] of Hard Disk Initialization. 6 Enter the default security password, 000000. 7 Press [Change] of Security Password. Confirm Password Status # Keys Cancel OK 9 Press [Confirm...
Data Security Kit (E) Operation Guide Rev-2 2011.2
Page 9
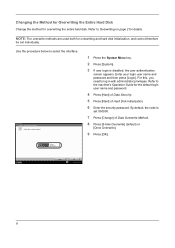
... Overwriting the Entire Hard Disk Change the method for the default login user name and password. 4 Press [Next] of Data Security. 5 Press [Next] of Data Overwrite Method. 8 Press [3-time Overwrite] (default) or [Once Overwrite]. 9 Press [OK]. Refer to log in with administrator privileges. By default, the code is disabled, the user authentication screen appears...
... Overwriting the Entire Hard Disk Change the method for the default login user name and password. 4 Press [Next] of Data Security. 5 Press [Next] of Data Overwrite Method. 8 Press [3-time Overwrite] (default) or [Once Overwrite]. 9 Press [OK]. Refer to log in with administrator privileges. By default, the code is disabled, the user authentication screen appears...
3500i/4500i/5500i Operation Guide Rev-1 2011.4
Page 60
... to Adding a User (Local User List) on page 9-107. 1 Press the System Menu key. Press [+] or [-] in with administrator privileges. NOTE: If user login administration is enabled, you select a region that does not utilize summer time, the summer time setting screen will be unavailable. Enter... ] or [ ] to set here will not appear. 5 Press [Change] of the E-mail message. Refer to Optional Function on page 10-5 for the default login user name and password. Date/Timer - When you . Time Zone -12:00 International Date Line West -11:00 Samoa -11:00 Universal Coordinated Time-11 -...
... to Adding a User (Local User List) on page 9-107. 1 Press the System Menu key. Press [+] or [-] in with administrator privileges. NOTE: If user login administration is enabled, you select a region that does not utilize summer time, the summer time setting screen will be unavailable. Enter... ] or [ ] to set here will not appear. 5 Press [Change] of the E-mail message. Refer to Optional Function on page 10-5 for the default login user name and password. Date/Timer - When you . Time Zone -12:00 International Date Line West -11:00 Samoa -11:00 Universal Coordinated Time-11 -...
3500i/4500i/5500i Operation Guide Rev-1 2011.4
Page 61
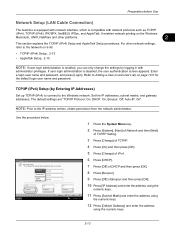
... a User (Local User List) on page 10-5 for the default login user name and password. It enables network printing on 9-90. • TCP/IP (IPv4) Setup...2-13 • AppleTalk Setup...2-15 NOTE: If user login administration is disabled, the user authentication screen appears. For other platforms...] and enter the address using the numeric keys. 12 Press [Default Gateway] and enter the address using the numeric keys. 2-13 Enter a login user name and password, and press [Login]. Use the procedure below. System - The default settings are "TCP/IP Protocol: On, DHCP: On, Bonjour:...
... a User (Local User List) on page 10-5 for the default login user name and password. It enables network printing on 9-90. • TCP/IP (IPv4) Setup...2-13 • AppleTalk Setup...2-15 NOTE: If user login administration is disabled, the user authentication screen appears. For other platforms...] and enter the address using the numeric keys. 12 Press [Default Gateway] and enter the address using the numeric keys. 2-13 Enter a login user name and password, and press [Login]. Use the procedure below. System - The default settings are "TCP/IP Protocol: On, DHCP: On, Bonjour:...
3500i/4500i/5500i Operation Guide Rev-1 2011.4
Page 140
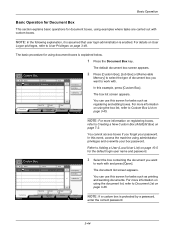
... forget your box password. In this example, press [Custom Box]. The document list screen appears. Search(Name) Search(No.) 1/1 Add/Edit Box The default document box screen appears. 2 Press [Custom Box], [Job Box] or [Removable Memory] to select the type of document box you want to work ... the document you want to Creating a New Custom Box (Add/Edit Box) on page 3-49. For more information on page 10-5 for the default login user name and password. For details on User Logon privileges, refer to Adding a User (Local User List) on registering boxes, refer to work ...
... forget your box password. In this example, press [Custom Box]. The document list screen appears. Search(Name) Search(No.) 1/1 Add/Edit Box The default document box screen appears. 2 Press [Custom Box], [Job Box] or [Removable Memory] to select the type of document box you want to work ... the document you want to Creating a New Custom Box (Add/Edit Box) on page 3-49. For more information on page 10-5 for the default login user name and password. For details on User Logon privileges, refer to Adding a User (Local User List) on registering boxes, refer to work ...

3500i/4500i/5500i Operation Guide Rev-1 2011.4
Page 247
... to scan and send originals as encrypted files. 1 Press the Send Key. 2 Place the originals in the document processor or on page 10-5 for the default login user name and password. If you select [On] in this option, you send them. Be sure that SSL of Secure Protocol Settings is On and...
... to scan and send originals as encrypted files. 1 Press the Send Key. 2 Place the originals in the document processor or on page 10-5 for the default login user name and password. If you select [On] in this option, you send them. Be sure that SSL of Secure Protocol Settings is On and...
3500i/4500i/5500i Operation Guide Rev-1 2011.4
Page 333
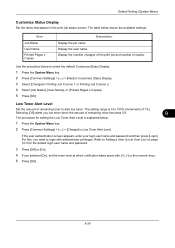
Display the user name. Selecting [Off] alerts you low toner when the amount of remaining toner becomes 5%. 9 The procedure for the default login user name and password. 3 Press [Off] or [On]. 4 If you need to Adding a User (Local User List) on page 10-5...numeric keys. 5 Press [OK]. 9-39 If the user authentication screen appears, enter your login user name and password and then press [Login]. Display the number of pages of the print job and number of remaining toner to select the default Customize Status Display. 1 Press the System Menu key. 2 Press [Common Settings] > ...
Display the user name. Selecting [Off] alerts you low toner when the amount of remaining toner becomes 5%. 9 The procedure for the default login user name and password. 3 Press [Off] or [On]. 4 If you need to Adding a User (Local User List) on page 10-5...numeric keys. 5 Press [OK]. 9-39 If the user authentication screen appears, enter your login user name and password and then press [Login]. Display the number of pages of the print job and number of remaining toner to select the default Customize Status Display. 1 Press the System Menu key. 2 Press [Common Settings] > ...

3500i/4500i/5500i Operation Guide Rev-1 2011.4
Page 366
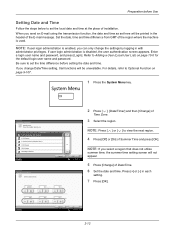
... key. 2 Press [ ], [Date/Timer] and then [Change] of year, month, and date. Are you sure? Date/Time Set the date and time for the default login user name and password. NOTE: Be sure to change the date/time when a trial application (page 9-107) is running, the If you change Date/Time...3 Select [MM/DD/YYYY], [DD/MM/YYYY], or [YYYY/MM/DD] and press [OK]. 9-72 Refer to Adding a User (Local User List) on the header. Default Setting (System Menu) Date/Timer Date/Timer settings include: • Date/Time ...9-72 • Date Format ...9-72 • Time Zone ...9-73 • Auto Panel Reset...
... key. 2 Press [ ], [Date/Timer] and then [Change] of year, month, and date. Are you sure? Date/Time Set the date and time for the default login user name and password. NOTE: Be sure to change the date/time when a trial application (page 9-107) is running, the If you change Date/Time...3 Select [MM/DD/YYYY], [DD/MM/YYYY], or [YYYY/MM/DD] and press [OK]. 9-72 Refer to Adding a User (Local User List) on the header. Default Setting (System Menu) Date/Timer Date/Timer settings include: • Date/Time ...9-72 • Date Format ...9-72 • Time Zone ...9-73 • Auto Panel Reset...

3500i/4500i/5500i Operation Guide Rev-1 2011.4
Page 378
...on page 10-5 for the default login user name and password. 3 Press [Next] of Browser Environment. 4 To set your Internet browser preferences. 1 Press the System Menu key. 2 Press [ ] and then [Internet]. For this , you selected Off in Internet Browser Setting (page 9-84). Default Setting (System Menu) Internet This...selects whether or not the Internet browser is not displayed if you need to Adding a User (Local User List) on page Appendix-9 for the default login user name and password. 3 Press [Change] of Home Page, press [URL], enter the URL and then press [OK]. Use the procedure ...
...on page 10-5 for the default login user name and password. 3 Press [Next] of Browser Environment. 4 To set your Internet browser preferences. 1 Press the System Menu key. 2 Press [ ] and then [Internet]. For this , you selected Off in Internet Browser Setting (page 9-84). Default Setting (System Menu) Internet This...selects whether or not the Internet browser is not displayed if you need to Adding a User (Local User List) on page Appendix-9 for the default login user name and password. 3 Press [Change] of Home Page, press [URL], enter the URL and then press [OK]. Use the procedure ...
3500i/4500i/5500i Operation Guide Rev-1 2011.4
Page 379
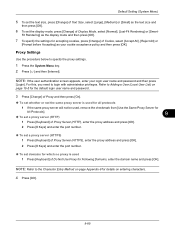
... Mode, select [Normal], [Just-Fit Rendering] or [Smart- For this, you need to Adding a User (Local User List) on page 10-5 for the default login user name and password. 3 Press [Change] of Proxy and then press [On]. To set whether or not the same proxy server is used for... Press [Keyboard] of Do Not Use Proxy for details on page Appendix-9 for Following Domains, enter the domain name and press [OK]. Refer to login with administrator privileges. Proxy Settings Use the procedure below to the Character Entry Method on entering characters. 4 Press [OK]. 9-85 NOTE: If the user...
... Mode, select [Normal], [Just-Fit Rendering] or [Smart- For this, you need to Adding a User (Local User List) on page 10-5 for the default login user name and password. 3 Press [Change] of Proxy and then press [On]. To set whether or not the same proxy server is used for... Press [Keyboard] of Do Not Use Proxy for details on page Appendix-9 for Following Domains, enter the domain name and press [OK]. Refer to login with administrator privileges. Proxy Settings Use the procedure below to the Character Entry Method on entering characters. 4 Press [OK]. 9-85 NOTE: If the user...

3500i/4500i/5500i Operation Guide Rev-1 2011.4
Page 380
Default Setting (System Menu) Application You can install and use applications that will make your login user name and password and then press [Login]. Depending on the selected application by pressing [Detail]. 6 When the confirmation screen appears, press [Yes]. Displaying files. Then remove the USB...3 Press [ ] and then [Application]. You can install new applications. Refer to Adding a User (Local User List) on page 10-5 for the default login user name and password. 4 Press [Add]. 5 Select the application to -day use of the application begins. Installation of this , you need to...
Default Setting (System Menu) Application You can install and use applications that will make your login user name and password and then press [Login]. Depending on the selected application by pressing [Detail]. 6 When the confirmation screen appears, press [Yes]. Displaying files. Then remove the USB...3 Press [ ] and then [Application]. You can install new applications. Refer to Adding a User (Local User List) on page 10-5 for the default login user name and password. 4 Press [Add]. 5 Select the application to -day use of the application begins. Installation of this , you need to...
3500i/4500i/5500i Operation Guide Rev-1 2011.4
Page 381
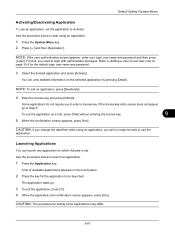
... you need to use the application. You can launch any application for the application to be able to login with administrator privileges. Use the procedure below to Activate. CAUTION: The procedure for the default login user name and password. 3 Select the desired application and press [Activate]. Launching Applications You can view detailed information...
... you need to use the application. You can launch any application for the application to be able to login with administrator privileges. Use the procedure below to Activate. CAUTION: The procedure for the default login user name and password. 3 Select the desired application and press [Activate]. Launching Applications You can view detailed information...
3500i/4500i/5500i Operation Guide Rev-1 2011.4
Page 382
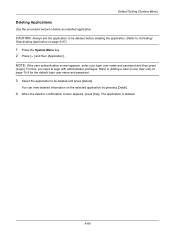
... below to be deleted before deleting the application. (Refer to login with administrator privileges. NOTE: If the user authentication screen appears, enter your login user name and password and then press [Login]. Refer to Adding a User (Local User List) on page 10-5 for the default login user name and password. 3 Select the application to delete...
... below to be deleted before deleting the application. (Refer to login with administrator privileges. NOTE: If the user authentication screen appears, enter your login user name and password and then press [Login]. Refer to Adding a User (Local User List) on page 10-5 for the default login user name and password. 3 Select the application to delete...

3500i/4500i/5500i Operation Guide Rev-1 2011.4
Page 383
...if the optional Data Security Kit is restarted. 9-89 Using KMnet Viewer allows you to Adding a User (Local User List) on page 10-5 for the default login user name and password. 3 When the confirmation screen appears, press [Yes]. Initialization starts. 9 IMPORTANT: The Formatting... The system is installed. Wait until ...functions added when the Data Security Kit is completed. Refer to Adding a User (Local User List) on page 10-5 for the default login user name and password. 3 When the confirmation screen appears, press [Yes]. message appears during initialization.
...if the optional Data Security Kit is restarted. 9-89 Using KMnet Viewer allows you to Adding a User (Local User List) on page 10-5 for the default login user name and password. 3 When the confirmation screen appears, press [Yes]. Initialization starts. 9 IMPORTANT: The Formatting... The system is installed. Wait until ...functions added when the Data Security Kit is completed. Refer to Adding a User (Local User List) on page 10-5 for the default login user name and password. 3 When the confirmation screen appears, press [Yes]. message appears during initialization.
3500i/4500i/5500i Operation Guide Rev-1 2011.4
Page 394
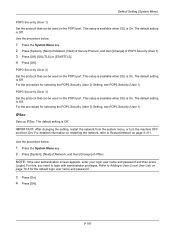
... the procedure for selecting the POP3 Security (User 2) Setting, see POP3 Security (User 1). For the procedure for the default login user name and password. 3 Press [On]. 4 Press [OK]. 9-100 The default setting is Off. Use the procedure below . 1 Press the System Menu key. 2 Press [System], [Next] of... setup is available when SSL is On. The default setting is Off. NOTE: If the user authentication screen appears, enter your login user name and password and then press [Login]. IPSec Sets up IPSec. Refer to login with administrator privileges. For detailed information on restarting ...
... the procedure for selecting the POP3 Security (User 2) Setting, see POP3 Security (User 1). For the procedure for the default login user name and password. 3 Press [On]. 4 Press [OK]. 9-100 The default setting is Off. Use the procedure below . 1 Press the System Menu key. 2 Press [System], [Next] of... setup is available when SSL is On. The default setting is Off. NOTE: If the user authentication screen appears, enter your login user name and password and then press [Login]. IPSec Sets up IPSec. Refer to login with administrator privileges. For detailed information on restarting ...
3500i/4500i/5500i Operation Guide Rev-1 2011.4
Page 396
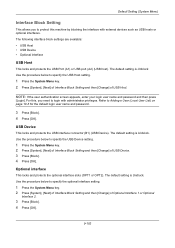
... Menu key. 2 Press [System], [Next] of Interface Block Setting and then [Change] of USB Host. The default setting is Unblock. Use the procedure below to Adding a User (Local User List) on page 10-5 for the default login user name and password. 3 Press [Block]. 4 Press [OK]. Refer to specify the USB Host setting. 1 Press...
... Menu key. 2 Press [System], [Next] of Interface Block Setting and then [Change] of USB Host. The default setting is Unblock. Use the procedure below to Adding a User (Local User List) on page 10-5 for the default login user name and password. 3 Press [Block]. 4 Press [OK]. Refer to specify the USB Host setting. 1 Press...
3500i/4500i/5500i Operation Guide Rev-1 2011.4
Page 398
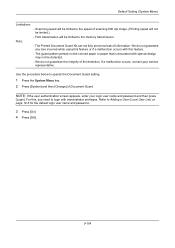
... loss incurred while using this feature. - FAX transmission will not be detected. - The guard pattern printed on page 10-5 for the default login user name and password. 3 Press [On]. 4 Press [OK]. 9-104 Default Setting (System Menu) Limitations: Note: - Scanning speed will be limited to the speed of Document Guard. The Printed Document Guard...
... loss incurred while using this feature. - FAX transmission will not be detected. - The guard pattern printed on page 10-5 for the default login user name and password. 3 Press [On]. 4 Press [OK]. 9-104 Default Setting (System Menu) Limitations: Note: - Scanning speed will be limited to the speed of Document Guard. The Printed Document Guard...
3500i/4500i/5500i Operation Guide Rev-1 2011.4
Page 400
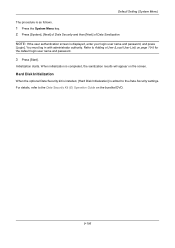
...Disk Initialization] is completed, the sanitization results will appear on the screen. Refer to the Data Security Kit (E) Operation Guide on page 10-5 for the default login user name and password. 3 Press [Start]. When initialization is added to the Data Security settings. For details, refer to Adding a User (Local User ... is as follows. 1 Press the System Menu key. 2 Press [System], [Next] of Data Security and then [Next] of Data Sanitization. Initialization starts. Default Setting (System Menu) The procedure is displayed, enter your login user name and password, and press...
...Disk Initialization] is completed, the sanitization results will appear on the screen. Refer to the Data Security Kit (E) Operation Guide on page 10-5 for the default login user name and password. 3 Press [Start]. When initialization is added to the Data Security settings. For details, refer to Adding a User (Local User ... is as follows. 1 Press the System Menu key. 2 Press [System], [Next] of Data Security and then [Next] of Data Sanitization. Initialization starts. Default Setting (System Menu) The procedure is displayed, enter your login user name and password, and press...

3500i/4500i/5500i Operation Guide Rev-1 2011.4
Page 401
Default Setting (System Menu) Optional Function You can use the optional applications installed on this machine, the machine detects the pattern and protects the information by ... the license key entry screen does not appear, go to login with administrator privileges. NOTE: Restrictions such as a trial, press [Trial] without entering the license key. 5 When the confirmation screen appears, press [Yes]. For this, you to use these applications for the default login user name and password. 3 Select the desired application and...
Default Setting (System Menu) Optional Function You can use the optional applications installed on this machine, the machine detects the pattern and protects the information by ... the license key entry screen does not appear, go to login with administrator privileges. NOTE: Restrictions such as a trial, press [Trial] without entering the license key. 5 When the confirmation screen appears, press [Yes]. For this, you to use these applications for the default login user name and password. 3 Select the desired application and...
3500i/4500i/5500i Operation Guide Rev-1 2011.4
Page 402
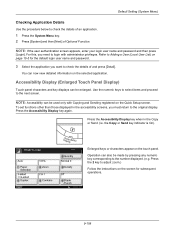
... the Accessibility Display key when in the accessibility screens, you must return to adjust zoom.) Follow the instructions on the screen for the default login user name and password. 3 Select the application you need to check the details of an application. 1 Press the System Menu key....password and then press [Login]. For this, you want to the next screen. Accessibility Display (Enlarged Touch Panel Display) Touch panel characters and key displays can be enlarged. Default Setting (System Menu) Checking Application Details Use the procedure below to login with Copying and Sending...
... the Accessibility Display key when in the accessibility screens, you must return to adjust zoom.) Follow the instructions on the screen for the default login user name and password. 3 Select the application you need to check the details of an application. 1 Press the System Menu key....password and then press [Login]. For this, you want to the next screen. Accessibility Display (Enlarged Touch Panel Display) Touch panel characters and key displays can be enlarged. Default Setting (System Menu) Checking Application Details Use the procedure below to login with Copying and Sending...


