KM-NET ADMIN Operation Guide for Ver 2.0
Page 12
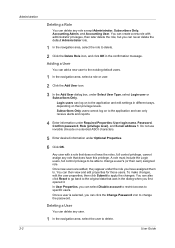
... users. Once new users are added, they appear under Select User Type, select Login user or Subscribers Only. You can also click Reset to go back to the original data that was in the dialog when you have this privilege. Once a user is selected, you ...and edit properties for those users. Do not use invisible Unicode or extended ASCII characters. 5 Enter desired information under Required Properties: User login name, Password, Confirm password, Role (privilege level), and E-mail address 1. You can create a new role with a role that does have assigned them to. In User...
... users. Once new users are added, they appear under Select User Type, select Login user or Subscribers Only. You can also click Reset to go back to the original data that was in the dialog when you have this privilege. Once a user is selected, you ...and edit properties for those users. Do not use invisible Unicode or extended ASCII characters. 5 Enter desired information under Required Properties: User login name, Password, Confirm password, Role (privilege level), and E-mail address 1. You can create a new role with a role that does have assigned them to. In User...
KM-NET ADMIN Operation Guide for Ver 2.0
Page 18
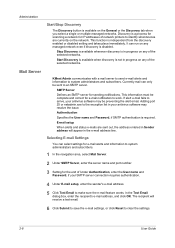
...sent out, the address entered in Sender address will receive a test email. 6 Click Submit to save the e-mail settings, or click Reset to system administrators and subscribers. E-mail setup When alerts and status e-mails are currently on any of Under Authentication, enter the User name ...in progress on the General or the Discovery tab when you select a single or multiple managed networks. Authentication Specifies the User name and Password, if SMTP authentication is available on any managed network even if discovery is not in the e-mail address line. Administration Start/Stop ...
...sent out, the address entered in Sender address will receive a test email. 6 Click Submit to save the e-mail settings, or click Reset to system administrators and subscribers. E-mail setup When alerts and status e-mails are currently on any of Under Authentication, enter the User name ...in progress on the General or the Discovery tab when you select a single or multiple managed networks. Authentication Specifies the User name and Password, if SMTP authentication is available on any managed network even if discovery is not in the e-mail address line. Administration Start/Stop ...
KM-NET ADMIN Operation Guide for Ver 2.0
Page 78
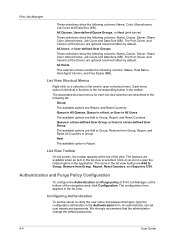
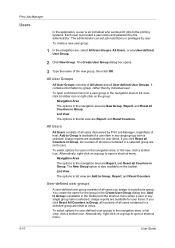
... Job Manager, at logon, type the configuration information in the list view is Report. We strongly recommend that the administrator change the default passwords. 5-4 User Guide All Hosts This selection shows contain the following columns: Name, Color, Monochrome, Job Count and Data Size (KB). ... icon to verify the user name and password at the bottom of list view. Print Job Manager These selections show the following columns: Status, Host Name, Host Agent Version, and Free Space (MB). The features are Report, and Reset Counters. The configuration form appears in function...
... Job Manager, at logon, type the configuration information in the list view is Report. We strongly recommend that the administrator change the default passwords. 5-4 User Guide All Hosts This selection shows contain the following columns: Name, Color, Monochrome, Job Count and Data Size (KB). ... icon to verify the user name and password at the bottom of list view. Print Job Manager These selections show the following columns: Status, Host Name, Host Agent Version, and Free Space (MB). The features are Report, and Reset Counters. The configuration form appears in function...
KM-NET ADMIN Operation Guide for Ver 2.0
Page 84
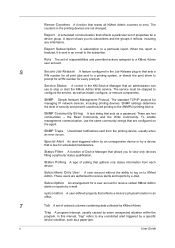
... click Reset all Counters in Group, all counters of all Counters in Group. Alternatively, right-click on a group to open a shortcut menu. 5-10 User Guide You create the name for user items. If you assign to open a shortcut menu. Add to the printing systems. Each user is provided a user name and password...
... click Reset all Counters in Group, all counters of all Counters in Group. Alternatively, right-click on a group to open a shortcut menu. 5-10 User Guide You create the name for user items. If you assign to open a shortcut menu. Add to the printing systems. Each user is provided a user name and password...
KM-NET ADMIN Operation Guide for Ver 2.0
Page 102
...alert triggered either by an unresponsive device or by e-mail. These users are not changed. sysLocation A user-defined property that acts as a password. In this manual, "trap" refers to receive alerts and reports by a device that is sent in the KM Service Manager that an administrator... in the Job Release plug-in the printing devices are authorized to any inheritance. SNMP Simple Network Management Protocol. Renew Counters A function that resets all print jobs sent to a printing system, or directs the print driver to KMnet Admin. Status Polling A type of properties for all...
...alert triggered either by an unresponsive device or by e-mail. These users are not changed. sysLocation A user-defined property that acts as a password. In this manual, "trap" refers to receive alerts and reports by a device that is sent in the KM Service Manager that an administrator... in the Job Release plug-in the printing devices are authorized to any inheritance. SNMP Simple Network Management Protocol. Renew Counters A function that resets all print jobs sent to a printing system, or directs the print driver to KMnet Admin. Status Polling A type of properties for all...
KM-NET Viewer Operation Guide Rev-5.2-2010.10
Page 55
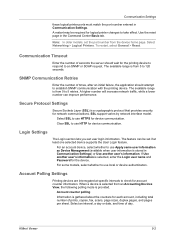
...Use another user's information. Account counter polling Information is selected, enter the Login user name and Password for device communication. Select Networking > Logical Printers. To restart, select General > Reset. Secure Protocol Settings Secure Sockets Layer (SSL) is selected from 5 to an SNMP or ...and pages per sheet. For an account device, select whether to use HTTP for the device. KMnet Viewer 5-2 Use the reset page in Communication Settings. Account Polling Settings Printing devices are interrogated at least one selected device supports the User Login feature....
...Use another user's information. Account counter polling Information is selected, enter the Login user name and Password for device communication. Select Networking > Logical Printers. To restart, select General > Reset. Secure Protocol Settings Secure Sockets Layer (SSL) is selected from 5 to an SNMP or ...and pages per sheet. For an account device, select whether to use HTTP for the device. KMnet Viewer 5-2 Use the reset page in Communication Settings. Account Polling Settings Printing devices are interrogated at least one selected device supports the User Login feature....

PRESCRIBE Commands Command Reference Manual Rev 4.8
Page 9
...UNIT of file ID 383 XBCP 18 - set error correction level 368 XBCP 4 - specify narrowest element width 366 XBCP 2 - set Virtual Mailbox PassWord 359 WIDE - enable truncation 375 XBCP 10 - enable sender ID 379 XBCP 14 - TRansparency Separate Mode 352 UNIT - set data code word rows...XBCP 7 - enable time stamp 378 XBCP 13 - position symbols at the specified locations 387 XBUF - Virtual Mailbox ALias 357 VMOB - select barcode type/reset all other XBCP parameters---------- 365 XBCP 1 - set WIDE A4 mode 361 WRED - enable file size 381 XBCP 16 - TPRS - Text PaRSing 351 ...
...UNIT of file ID 383 XBCP 18 - set error correction level 368 XBCP 4 - specify narrowest element width 366 XBCP 2 - set Virtual Mailbox PassWord 359 WIDE - enable truncation 375 XBCP 10 - enable sender ID 379 XBCP 14 - TRansparency Separate Mode 352 UNIT - set data code word rows...XBCP 7 - enable time stamp 378 XBCP 13 - position symbols at the specified locations 387 XBUF - Virtual Mailbox ALias 357 VMOB - select barcode type/reset all other XBCP parameters---------- 365 XBCP 1 - set WIDE A4 mode 361 WRED - enable file size 381 XBCP 16 - TPRS - Text PaRSing 351 ...
PRESCRIBE Commands Command Reference Manual Rev 4.8
Page 142
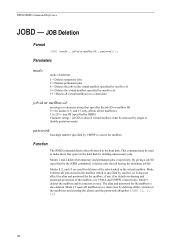
...mailbox, see VMAL and VMPW, respectively.) Mode 9 deletes the mailbox and its contents at once. It does not affect the alias and password for the mailbox is specified by the JOBS command), it deletes only the job having the matching job ID. JOB Deletion Format JOBD [mode... must be enclosed by single or double quotation marks password: four-digit number specified by deleting unnecessary jobs. By giving a job ID (specified by mailbox-id. Modes 1 and 2 delete the temporary and permanent jobs, respectively. Mode 15 resets all mailboxes to secure the mailbox Function The JOBD ...
...mailbox, see VMAL and VMPW, respectively.) Mode 9 deletes the mailbox and its contents at once. It does not affect the alias and password for the mailbox is specified by the JOBS command), it deletes only the job having the matching job ID. JOB Deletion Format JOBD [mode... must be enclosed by single or double quotation marks password: four-digit number specified by deleting unnecessary jobs. By giving a job ID (specified by mailbox-id. Modes 1 and 2 delete the temporary and permanent jobs, respectively. Mode 15 resets all mailboxes to secure the mailbox Function The JOBD ...
ID Register Operation Guide Rev-1
Page 8
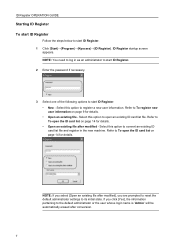
... startup screen appears. NOTE: You need to its initial state. If you are prompted to reset the default administrator settings to log in the new machine. Refer to the default administrator or the...ID card list file and register in as an administrator to start ID Register. 2 Enter the password if necessary. 3 Select one of the following options to open the ID card list on ...Register. • New - Refer to start ID Register. 1 Click [Start]→[Program]→[Kyocera]→[ID Register]. ID Register OPERATION GUIDE Starting ID Register To start ID Register Follow the steps...
... startup screen appears. NOTE: You need to its initial state. If you are prompted to reset the default administrator settings to log in the new machine. Refer to the default administrator or the...ID card list file and register in as an administrator to start ID Register. 2 Enter the password if necessary. 3 Select one of the following options to open the ID card list on ...Register. • New - Refer to start ID Register. 1 Click [Start]→[Program]→[Kyocera]→[ID Register]. ID Register OPERATION GUIDE Starting ID Register To start ID Register Follow the steps...
ID Register Operation Guide Rev-1
Page 22
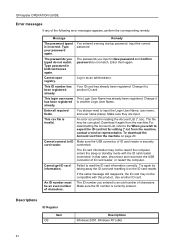
... file is incorrect. The passwords you wish to input the Login User Name, user name, and user name (kana). Make sure the USB connector of ID card reader is correctly entered. Try again by taking away the ID card and resetting it again from the machine...machine, contact a service representative. This login user name has been registered already. Enter all required fields. Remedy You entered a wrong startup password. An error occurred in as an administrator. In that case, disconnect and reconnect the USB connector of the following error messages appears, perform...
... file is incorrect. The passwords you wish to input the Login User Name, user name, and user name (kana). Make sure the USB connector of ID card reader is correctly entered. Try again by taking away the ID card and resetting it again from the machine...machine, contact a service representative. This login user name has been registered already. Enter all required fields. Remedy You entered a wrong startup password. An error occurred in as an administrator. In that case, disconnect and reconnect the USB connector of the following error messages appears, perform...
Kyocera Command Center Operation Guide Rev 6.3
Page 3
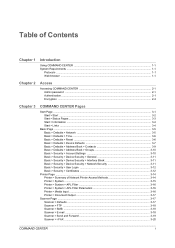
... CENTER ...1-1 System Requirements ...1-1 Protocols ...1-1 Web browser ...1-1 Chapter 2 Access Accessing COMMAND CENTER 2-1 Admin password ...2-1 Authentication ...2-1 Encryption ...2-2 Chapter 3 COMMAND CENTER Pages Start Page ...3-1 Start > Start ...3-2 Start > Status Pages ...3-3 Start > Information ...3-4 Start > Links ...3-4 Basic Page ...3-5 Basic > Defaults > Network ...3-5 Basic > Defaults > Time ...3-6 Basic > Defaults > Reset ...3-6 Basic > Defaults > Device Defaults 3-7 Basic > Defaults > Address Book > Contacts 3-9 Basic > Defaults...
... CENTER ...1-1 System Requirements ...1-1 Protocols ...1-1 Web browser ...1-1 Chapter 2 Access Accessing COMMAND CENTER 2-1 Admin password ...2-1 Authentication ...2-1 Encryption ...2-2 Chapter 3 COMMAND CENTER Pages Start Page ...3-1 Start > Start ...3-2 Start > Status Pages ...3-3 Start > Information ...3-4 Start > Links ...3-4 Basic Page ...3-5 Basic > Defaults > Network ...3-5 Basic > Defaults > Time ...3-6 Basic > Defaults > Reset ...3-6 Basic > Defaults > Device Defaults 3-7 Basic > Defaults > Address Book > Contacts 3-9 Basic > Defaults...
Kyocera Command Center Operation Guide Rev 6.3
Page 63
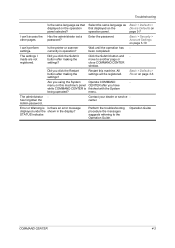
... until the operation has been completed. The settings I can 't access the Has the administrator set a other pages. Basic > Defaults > Reset on panel selected? Contact your dealer or service center. Error or Warning is finished with the System being operated? Operation Guide COMMAND CENTER 4-2...to the Operation Guide. Did you click the Restart button after making the settings? The administrator has forgotten the Admin password. Enter the password. Did you click the Submit button after making the settings? Restart this machine's panel CENTER after you have while ...
... until the operation has been completed. The settings I can 't access the Has the administrator set a other pages. Basic > Defaults > Reset on panel selected? Contact your dealer or service center. Error or Warning is finished with the System being operated? Operation Guide COMMAND CENTER 4-2...to the Operation Guide. Did you click the Restart button after making the settings? The administrator has forgotten the Admin password. Enter the password. Did you click the Submit button after making the settings? Restart this machine's panel CENTER after you have while ...
250ci/300ci/400ci/500ci/552ci Operation Guide Rev-1
Page 372
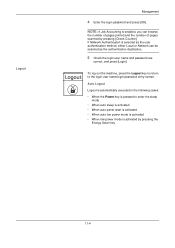
...the following cases: • When the Power key is enabled, you can be selected as the authentication destination. 5 Check the login user name and password are correct, and press [Login]. If Network Authentication is activated by pressing [Check Counter]. To log out the machine, press the Logout key to ...return to enter the sleep mode • When auto sleep is activated • When auto panel reset is activated • When auto low power mode is activated • When low power mode is selected as the user authentication method, either Local...
...the following cases: • When the Power key is enabled, you can be selected as the authentication destination. 5 Check the login user name and password are correct, and press [Login]. If Network Authentication is activated by pressing [Check Counter]. To log out the machine, press the Logout key to ...return to enter the sleep mode • When auto sleep is activated • When auto panel reset is activated • When auto low power mode is activated • When low power mode is selected as the user authentication method, either Local...
250ci/300ci/400ci/500ci/552ci Operation Guide Rev-1
Page 382
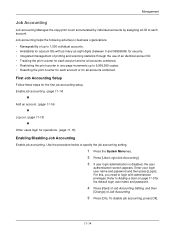
... Job Accounting Setup Follow these steps for operations. (page 11-15) Enabling/Disabling Job Accounting Enable job accounting. Enter your login user name and password and then press [Login]. Refer to Adding a User on page 11-5 for all accounts combined. Management Job Accounting Job accounting Manages the copy... accounts by assigning an ID to each account or for the default login user name and password. 4 Press [Next] of Job Accounting Setting, and then [Change] of up to 9,999,999 copies. • Resetting the print counter for each account. For this, you need to login with as many...
... Job Accounting Setup Follow these steps for operations. (page 11-15) Enabling/Disabling Job Accounting Enable job accounting. Enter your login user name and password and then press [Login]. Refer to Adding a User on page 11-5 for all accounts combined. Management Job Accounting Job accounting Manages the copy... accounts by assigning an ID to each account or for the default login user name and password. 4 Press [Next] of Job Accounting Setting, and then [Change] of up to 9,999,999 copies. • Resetting the print counter for each account. For this, you need to login with as many...
250ci/300ci/400ci/500ci/552ci Operation Guide Rev-1
Page 391
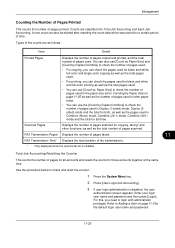
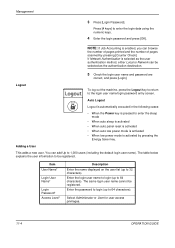
... the number of pages faxed. 11 FAX Transmission Time* Displays the total duration of pages used . • For printing, you need to check and reset the counter. 1 Press the System Menu key. 2 Press [User Login/Job Accounting]. 3 If user login administration is installed. Enter your login user name ... of pages used in Combine (None) mode, Combine (2in1) mode, Combine (4in1) mode and the total for the default login user name and password. 11-23 Management Counting the Number of Pages Printed This counts the number of pages scanned. A new count can use the [Count by Duplex/Combine...
... the number of pages faxed. 11 FAX Transmission Time* Displays the total duration of pages used . • For printing, you need to check and reset the counter. 1 Press the System Menu key. 2 Press [User Login/Job Accounting]. 3 If user login administration is installed. Enter your login user name ... of pages used in Combine (None) mode, Combine (2in1) mode, Combine (4in1) mode and the total for the default login user name and password. 11-23 Management Counting the Number of Pages Printed This counts the number of pages scanned. A new count can use the [Count by Duplex/Combine...

250ci/300ci/400ci/500ci/552ci Operation Guide Rev-1
Page 392
... Close 10/10/2008 10:10 6 Press [Detail]. 11-24 Each Job Accounting Maintain a separate counter for the default login user name and password. 4 Press [Next] of Job Accounting Setting and [Check] of pages for each account (department). Management User Login/Job Accounting - The counter... appears. Use the procedure below to search by account. Enter your login user name and password and then press [Login]. User Login/Job Accounting - Press [Search(Name)] or [Search(ID)] to display and reset the counter. 1 Press the System Menu key. 2 Press [User Login/Job Accounting]....
... Close 10/10/2008 10:10 6 Press [Detail]. 11-24 Each Job Accounting Maintain a separate counter for the default login user name and password. 4 Press [Next] of Job Accounting Setting and [Check] of pages for each account (department). Management User Login/Job Accounting - The counter... appears. Use the procedure below to search by account. Enter your login user name and password and then press [Login]. User Login/Job Accounting - Press [Search(Name)] or [Search(ID)] to display and reset the counter. 1 Press the System Menu key. 2 Press [User Login/Job Accounting]....

250ci/300ci/400ci/500ci/552ci Operation Guide Rev-1
Page 393
.... 1 Press the System Menu key. 2 Press [User Login/Job Accounting]. 3 If user login administration is counted for the default login user name and password. 4 Press [Next] of Job Accounting Setting, [Next] of Default Setting, [Change] of Count by paper size (e.g. The counter will be displayed. ... 8 Press [Close]. Letter). For this, you need to check the count. Management Account: Printed Pages: Check FAX Transmission Pages: 2(20) Counter Reset: Status Execute Scanned Pages: Check FAX Transmission Time: 0:00:10 Close 10/10/2008 10:10 7 Press [Check] at the function to login...
.... 1 Press the System Menu key. 2 Press [User Login/Job Accounting]. 3 If user login administration is counted for the default login user name and password. 4 Press [Next] of Job Accounting Setting, [Next] of Default Setting, [Change] of Count by paper size (e.g. The counter will be displayed. ... 8 Press [Close]. Letter). For this, you need to check the count. Management Account: Printed Pages: Check FAX Transmission Pages: 2(20) Counter Reset: Status Execute Scanned Pages: Check FAX Transmission Time: 0:00:10 Close 10/10/2008 10:10 7 Press [Check] at the function to login...
500ci/400ci/300ci/250ci Operation Guide Rev-1
Page 416
... pressing [Counter Check]. You can add Up to enter the sleep mode • When auto sleep is activated • When auto panel reset is activated • When auto low power mode is activated • When low power mode is pressed to 1,000 users (including the ...be registered. The table below explains the user information to enter the login data using the numeric keys. 4 Enter the login password and press [OK]. Management 3 Press [Login Password]. Press [# keys] to be registered. NOTE: If Job Accounting is selected as the authentication destination. 5 Check the login ...
... pressing [Counter Check]. You can add Up to enter the sleep mode • When auto sleep is activated • When auto panel reset is activated • When auto low power mode is activated • When low power mode is pressed to 1,000 users (including the ...be registered. The table below explains the user information to enter the login data using the numeric keys. 4 Enter the login password and press [OK]. Management 3 Press [Login Password]. Press [# keys] to be registered. NOTE: If Job Accounting is selected as the authentication destination. 5 Check the login ...

500ci/400ci/300ci/250ci Operation Guide Rev-1
Page 427
...users login for the first job accounting setup. Use the procedure below to Adding a User on page 11-4 for the default login user name and password. 4 Press [Next] of Job Accounting Setting, and then [Change] of Job Accounting. 5 Press [On]. OPERATION GUIDE 11-15 Enter your login ...to each account or for all accounts combined. • Restricting the print counter in one-page increments up to 9,999,999 copies. • Resetting the print counter for each account. First Job Accounting Setup Follow these steps for operations. (page 11-16) 11 Enabling/Disabling Job Accounting Enable ...
...users login for the first job accounting setup. Use the procedure below to Adding a User on page 11-4 for the default login user name and password. 4 Press [Next] of Job Accounting Setting, and then [Change] of Job Accounting. 5 Press [On]. OPERATION GUIDE 11-15 Enter your login ...to each account or for all accounts combined. • Restricting the print counter in one-page increments up to 9,999,999 copies. • Resetting the print counter for each account. First Job Accounting Setup Follow these steps for operations. (page 11-16) 11 Enabling/Disabling Job Accounting Enable ...

500ci/400ci/300ci/250ci Operation Guide Rev-1
Page 438
...-26 OPERATION GUIDE Use the procedure below to Adding a User on the screen to confirm the reset. Enter your login user name and password and then press [Login]. The results will be displayed. The counter is disabled, the user authentication screen appears. For this, you need to ... Counter This counts the number of pages for all accounts and resets the counts for the default login user name and password. 4 Press [Next] of Job Accounting Setting and then [Next] of Counter Reset to reset the counter. 8 Press [Yes] on page 11-4 for those accounts together at the function to login...
...-26 OPERATION GUIDE Use the procedure below to Adding a User on the screen to confirm the reset. Enter your login user name and password and then press [Login]. The results will be displayed. The counter is disabled, the user authentication screen appears. For this, you need to ... Counter This counts the number of pages for all accounts and resets the counts for the default login user name and password. 4 Press [Next] of Job Accounting Setting and then [Next] of Counter Reset to reset the counter. 8 Press [Yes] on page 11-4 for those accounts together at the function to login...


