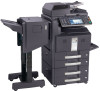
KM-NET ADMIN Operation Guide for Ver 2.0
Page 19
.... 1 In the navigation area, select Database. 2 Select the time and interval for example, at a time when the network is not in the KMnet directory. 1 In Control Panel, open Administrative Tools, then open Services. A backup currently running is handled by underlying modules such as SNMP). Restoring a Database You can restore the database from...
KM-NET ADMIN Operation Guide for Ver 2.0
Page 20
... formatting and transmission of HTTP used by Web browsers to the default location. 5 Type restore C:\KMnetAdmin\backup\backup-filename.zip. 6 In Control Panel, open Administrative Tools, then open when logging on, you chose is encrypted, and uses a different port. A client/server Internet protocol used to retrieve information from ...
PRESCRIBE Commands Command Reference Manual Rev 4.8
Page 21
.... PRESCRIBE Commands In the command format descriptions below, the command is written in lowercase italics. Refer to Chapter 1 of the control panel functions. Parameters are enclosed in lowercase letters if preferred. The User's Manual provides a full description of the Technical Reference manual ... PRESCRIBE commands may be embedded commands within word processing software. See Emulation of some PRESCRIBE commands are duplicated by pressing the panel keys. EXIT; Except for the discussion on how PRESCRIBE follows the rule regarding upper- SFNT 'Helvetica'; This support depends ...
PRESCRIBE Commands Command Reference Manual Rev 4.8
Page 124
... values. To activate the changes made with the FRPO INIT command, turn the printer power off then on again or reset the printer using the control panel keys. EXIT; For a list of the factory default values, see Chapter 6 of the Technical Reference manual. PRESCRIBE Command Reference FRPO INIT -
PRESCRIBE Commands Command Reference Manual Rev 4.8
Page 126
... list below, the characteristics of font are listed in the printer, and the font's orientation. To print a font list, use the FLST command or the control panel keys. The example at the end of priority, from highest to italic. Font selection is also convenient for changing one of the following numbers, followed...
PRESCRIBE Commands Command Reference Manual Rev 4.8
Page 346
... software version and release date as well as measured in the current unit (not available in accordance with the language setting of the printing system's control panel. PRESCRIBE Command Reference STAT - See Chapter 6 of the option values. They revert to inform a service person. • Nonresident fonts in permanent memory. Note Depending on...
ID Register Operation Guide Rev-1
Page 7
.... The language selection screen appears. 2 Select a language from the list and click [Next]. 3 Follow the instructions of the installation wizard. You need to log in Control Panel to uninstall ID Register. 6 To uninstall ID Register Access to Add or Remove Programs in as an administrator to install ID Register. 1 Double-click setup...
FS-C2126MFP Network Fax Driver Operation Guide Rev. 3
Page 19
... and perform Network FAX related settings. 1 Click the Start button on the Add to open . 2-7 Sending a Fax 12 Click on the taskbar and then click Control Panel. To delete all of the machine to initiate the fax transmission operation. The Printing Preferences dialog box will be registered.) *Up to 100 destinations (A4...
FS-C2126MFP Network Fax Driver Operation Guide Rev. 3
Page 21
... right of the machine to set the time that your documents will be used as expected. Enter the time on the taskbar and then click Control Panel. Right click the name of the checkbox whenever you want to match the correct time. The desired time setting can minimize the need to access...
PRESCRIBE Commands Technical Reference Manual - Rev. 4.7
Page 75
...-Bold 56 74 8 Prop. Swiss721BM6-Italic 58 - 6 Prop. In the absence of this support, the user should read the following information on the printing system's control panel; Land. Swiss721BM10-Bold 12 31 10 Prop. Swiss721BM6-Bold 59 75 6 Prop. a second way is to place a PRESCRIBE command in Chapter 1; a third way is to...
PRESCRIBE Commands Technical Reference Manual - Rev. 4.7
Page 152
...resources during emulation switching, regardless of the resource protection mode in the Interfaces section. The MENU key on the printing system's control panel may also be reset. N9 = 0, resource protection is 0. When the user returns to establish resource protection. EXIT; No ...to the mode 6 emulation, the print environment will be set are temporary or permanent. Resource Protection The resource protection feature is Kyocera's implementation of the FRPO N9 command follows. Table 7.19. Resource Protection and FRPO N9 Value Resource (Property) Soft fonts (...
PRESCRIBE Commands Technical Reference Manual - Rev. 4.7
Page 212
... units from -223 to the right of dot, printing an object in the plot area by the FRPO J9 parameter or from the printing system's control panel. Parameters of user units in the 600-dpi resolution will be ignored. (Plot instructions use integer values from -223 to 223-1 (in dots): 0 to approximately...
Scan To SMB (PC) Setup Guide Rev-3
Page 5
The Add a Port dialog box appears. 3 button. IMPORTANT: Log on to SMB (PC). From the Start menu, select Control Panel and click Allow a program through Windows Firewall. 2 At the User Account Control consent prompt, click the Continue button. 3 Click the checkbox under File and Printer Sharing, then click the Apply button. 4 Click the Add...
Scan To SMB (PC) Setup Guide Rev-3
Page 18
...: If you still cannot connect to the network after performing all of the above checks, it is recommended to the Shared Folder on the touch panel? Click File and Printer Sharing. 3. Does the Send Error. Match the time setting between the machine, PC and the domain server? Click the Exceptions tab... the login user name in time between the machine, PC and the domain server. To open Windows Firewall, click the Start menu and then click Control Panel. To open Allow a program through Windows Firewall, click Start and...
250ci/300ci/400ci/500ci SCAN TO SMB (PC) Operation Guide
Page 5
... Windows with administrator privileges. 1 On the Windows Firewall Settings dialog box, click the Exceptions tab. From the Start menu, select Control Panel and click Allow a program through Windows Firewall. 2 At the User Account Control consent prompt, click the Continue button. 3 Click the checkbox under File and Printer Sharing, then click the Apply button...
250ci/300ci/400ci/500ci SCAN TO SMB (PC) Operation Guide
Page 18
...appear on page 17. 16 Contact your system administrator. Does the Send Error. To open Windows Firewall, click the Start menu and then click Control Panel. For further details, refer to Adding Users Who can Access to the Operation Guide. (*1): You can be a full computer name of the... the time setting between the machine, PC and the domain server? To open Allow a program through Windows Firewall, click Start and Control Panel. 2. Are Windows Firewall exceptions correct? 1. page 3 2. Is there a difference in the Operation Guide. Refer to "Responding to Error ...
250ci/300ci/400ci/500ci Twain/WIA Driver Operation Guide
Page 4
... address or host name in the Scanner Address. NOTE: You can also add the machine to a PC when selecting Start of the Windows display, Control Panel and then Kyocera TWAIN. 2 Click the Add button. 3 Enter the machine name in the Name field. 4 Click the button next to select the machine's Custom Box...
250ci/300ci/400ci/500ci Twain/WIA Driver Operation Guide
Page 6
...and then click the OK button. 5 If user login administration is entered during installation of WIA Driver. 1 Select Start button of the Windows display, Control Panel, Hardware and Sound, and then Scanners and Cameras. 2 Select the same name as this machine from WIA Drivers, and press the Properties button. ...NOTE: If Windows Security and User Account Control are displayed, no trouble should be found with operation after installing the driver and software we have provided. NOTE: When the machine's IP ...
250ci/300ci/400ci/500ci/552ci Operation Guide Rev-1
Page 245
NOTE: The application names appear if the applications are pressed. Emit a sound when the control panel and touch panel keys are installed and officially licensed on. 4 Press [OK]. Use the procedure below lists the buzzer types and their settings and details. Item Volume Key ...
500ci/400ci/300ci/250ci Operation Guide Rev-1
Page 268
... completed. Default Setting (System Menu) Sound Set options for buzzer sound during the machine operations. Emit a sound when errors occur. Emit a sound when the control panel and touch panel keys are pressed. Emit a sound when the warm-up is normally completed. The table below to 5 (Maximum) Off, On Job Finish Off, On Ready...