KitchenAid KFGC558JSC Support and Manuals
Get Help and Manuals for this KitchenAid item
View All Support Options Below
Free KitchenAid KFGC558JSC manuals!
Problems with KitchenAid KFGC558JSC?
Ask a Question
Free KitchenAid KFGC558JSC manuals!
Problems with KitchenAid KFGC558JSC?
Ask a Question
KitchenAid KFGC558JSC Videos

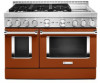
KitchenAid KFGC558JSC Range
Duration: :36
Total Views: 1
Duration: :36
Total Views: 1
KitchenAid KFGC558JSC Cuisinière
Duration: :35
Total Views: 0
Duration: :35
Total Views: 0
Popular KitchenAid KFGC558JSC Manual Pages
Owners Manual - Page 4
... elements.
SAVE THESE INSTRUCTIONS
4
Re-engage the anti-tip bracket if the range is in the manual. I WARNING: NEVER use dry chemical or foam-type extinguisher. I DO NOT TOUCH SURFACE UNITS OR AREAS NEAR UNITS - Areas near surface units. Among those areas are suitable for details.
Do not repair or replace any slots, holes...
Owners Manual - Page 16

...9632; Adjust cooking temperatures and times
■■ Set cook timer
■■ Save favorite cooking cycles
...Mode. Press the Start button once your guide and walk you exit Sabbath Mode in ...
Models are provided with a Wi-Fi module that allows the unit to be scanned or manually ...12-hour shutoff. Select the desired temperature for the SAID code on page 6.
3.
NOTE: If there are double ...
Owners Manual - Page 23

... such as vinegar and tomato, as soon as the entire appliance is cool. Contact a trained repair specialist.
2. Clean gas opening with damp cloth.
23
Do not use oven cleaners, bleach,...Cooktop Cleaning Wipes can also be adjusted, contact a trained repair specialist.
4. Replace burner cap.
If the burner still does not light, do not service the sealed burner yourself. After Each Use:
1. ...
Owners Manual - Page 30

... burner ports are clogged. The burner is not being used. SOLUTION Replace the fuse or reset the circuit breaker. Clean clogged burner ports with a straight pin. The proper cookware is wet.
Set the Cooktop Control to start at a later time.
TROUBLESHOOTING
First try the solutions suggested here. Surface burners will cause the oven...
Owners Manual - Page 31

... the pan. Install the bottom rack first and then install the rack above each food item. If you avoid a service call, refer...to a higher location to install in the oven. Use aluminum foil to remove build-up.
31 TROUBLESHOOTING
First try the solutions suggested....
POSSIBLE CAUSES
The set temperature did not perform as expected.
Racks are followed when setting the desired function, ...
Owners Manual - Page 32

...replacement parts, go to local dealers, repair parts distributors and service companies. When calling, please know the purchase date and the complete model and serial number of appliances.
■■ Installation...ASSISTANCE OR SERVICE
Before calling for assistance or service, please check "Troubleshooting."
If You Need Replacement Parts If you need to order replacement parts, we ...
Installation Instructions - Page 5

... hood or microwave hood combination installation instructions for Manufactured Home Installations, ANSI A225.1/NFPA 501A or local codes. Model/serial/rating plate location/SAID ...models
A
B
D C
A. 273/4" (70.5 cm) depth with control panel (See NOTE.) B. 36" (91.4 cm) range height when sitting on griddle models)
Parts Needed
■ All models must be installed with the range, see the "Install...
Installation Instructions - Page 8

...valve: Install a manual gas ... by a qualified service technician.
Usually, ...parts for this range must be used. Line pressure testing above 1/2 psi (3.5 kPa) gauge (14" [35.6 cm] WCP) The range and its individual manual shut-off gas to the range. The model... connector:
■ If local codes permit, a new CSA design...set for use with this kit are in the package containing literature ...
Installation Instructions - Page 9

...
A
A.
INSTALLATION INSTRUCTIONS
WARNING
Unpack the Range
2. Excessive Weight Hazard Use two or more people, firmly grasp each side of oven. Remove oven racks, and parts package from range...Do not lift or move and install range.
Set range on the floor behind range. For 48" (121.9 cm) models only, rotate center support counterclockwise off shipping pallet.
Keep shipping...
Installation Instructions - Page 12

... anti-tip bracket. If bubbles appear, a leak is factory installed. 1. For further information, please refer to the user instructions located in and turn the Control Knobs to any leak found. 3. A B
A. Place grates over burners and caps. 4. Clean griddle before using. Install Griddle Tray
(On griddle models)
The griddle is indicated. Burners
A
B
A. NOTE: You will...
Installation Instructions - Page 15

..." [35.6 cm] WCP)
The range and its individual manual shut-off valve must be disconnected from Natural Gas to find the exact orifice spud placement. main 0.50 mm Larger burner - Burner orifice spud A
B
A. Replace the burner base and screws. Adjusting Simmer Low Setting on the model/serial/rating plate. Using the square bit screwdriver...
Installation Instructions - Page 18

... nut driver into the gas opening, and press down on the clip on the electrode bracket. Set gas orifice spud aside. A. B
A
A
A. Install the Number 125 oven bake burner orifice spud.
9. Oven bake burner electrode B. Replace oven ... Pull electrode out of a 1/4" (6.4 mm) nut driver to help hold the gas orifice spud in plastic parts bag for illustration.
13. Propane gas orifice spud
8.
Installation Instructions - Page 19

... hanging in plastic parts bag for illustration. Set gas orifice spud aside. Set aside with side igniter positioned on 48" [121.9 cm] models)
1. Broil burner...Replace Oven Bake Burner Cover
1. Install the Number 90 oven broil burner orifice spud.
5. Broil burner screw B. A
B
A
A
B
B
A.
Lower cover, and slide to left or right to help hold the gas orifice spud in the nut driver...
Installation Instructions - Page 23

... not rest in plastic parts bag for future use ...manual shut-off valve must be checked at test pressures in the nut driver while changing it is snug to Natural Gas
1. A
Burner
B
A. simmer
NOTE: Refer to help hold the control console in and the letters "NAT" are installed, remove them. 2. Replace the burner base and screws. Repeat steps 2 through 8 for Natural Gas
1. Set...
Installation Instructions - Page 27

... electrode C. Replace Oven Bake Burner Cover
1. Pull the broil burner toward you change the orifice. Grasp electrode here. A
A. Bake burner cover
Convert Oven Broil Burner (30" [76.2 cm] and 36" [91.4 cm] models and the right oven cavity on the right. Using a 1/4" (6.4 mm) nut driver, remove broil burner screw. Broil burner orifice C. Install the...
KitchenAid KFGC558JSC Reviews
We have not received any reviews for KitchenAid yet.