Instruction Manual
Page 1
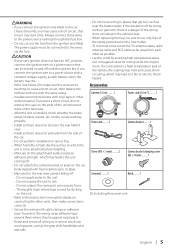
... the model and serial numbers whenever you obtain the best performance from your KENWOOD dealer for information or service on the warranty card, and in the spaces designated on the product. Refer to read through this instruction manual. Model CMOS-740HD Serial number US Residence Only Register Online Register your records Record the serial...
... the model and serial numbers whenever you obtain the best performance from your KENWOOD dealer for information or service on the warranty card, and in the spaces designated on the product. Refer to read through this instruction manual. Model CMOS-740HD Serial number US Residence Only Register Online Register your records Record the serial...
Instruction Manual
Page 5
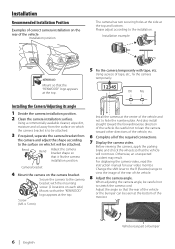
... result in places that get hot, such as near the heater outlet. Use corrugated tubes for details on the unit. • Refer to the Instruction's manual for wiring inside the engine room. WARNING • If you connect the ignition wire (Red) to the car chassis (Ground), you connect the ignition wire...
... result in places that get hot, such as near the heater outlet. Use corrugated tubes for details on the unit. • Refer to the Instruction's manual for wiring inside the engine room. WARNING • If you connect the ignition wire (Red) to the car chassis (Ground), you connect the ignition wire...
Instruction Manual
Page 6
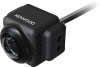
... rear of the vehicle. 8 Adjust the camera angle. For displaying the camera video, read the instruction manual for your video monitor. Change the shift lever to the R (Reverse) range to the camera bracket ... viewing the camera, apply the parking brake and chock the wheels so that the "KENWOOD" logo appears at the top. 5 Fix the camera temporarily with the mounting screw. (2 locations on ...each side) Mount so that the "KENWOOD" logo appears at the bottom of the monitor. 6 | English Vehicle rear part or bumper Screw ...
... rear of the vehicle. 8 Adjust the camera angle. For displaying the camera video, read the instruction manual for your video monitor. Change the shift lever to the R (Reverse) range to the camera bracket ... viewing the camera, apply the parking brake and chock the wheels so that the "KENWOOD" logo appears at the top. 5 Fix the camera temporarily with the mounting screw. (2 locations on ...each side) Mount so that the "KENWOOD" logo appears at the bottom of the monitor. 6 | English Vehicle rear part or bumper Screw ...


