Kenwood CMOS-200 Support and Manuals
Get Help and Manuals for this Kenwood item
View All Support Options Below
Free Kenwood CMOS-200 manuals!
Problems with Kenwood CMOS-200?
Ask a Question
Free Kenwood CMOS-200 manuals!
Problems with Kenwood CMOS-200?
Ask a Question
Most Recent Kenwood CMOS-200 Questions

What's The Reverse Purple Wire For
(Posted by patrickmagee37 8 years ago)
Kenwood CMOS-200 Videos

KENWOOD CMOS-200 ??
Duration: :50
Total Views: 2,012
Duration: :50
Total Views: 2,012
Popular Kenwood CMOS-200 Manual Pages
Instruction Manual - Page 1

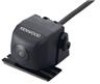
...the unit, in the spaces designated on the product. Familiarity with installation and operation procedures will help you call upon your Kenwood dealer for information or service on the warranty card, and in the space provided below. CMOS-300 CMOS-200
UNIVERSAL MULTI-VIEW CAMERA/ UNIVERSAL REAR VIEW CAMERA
INSTRUCTION MANUAL
CAMÉRA MULTI-VUES UNIVERSELLE/ CAMÉRA DE RECUL UNIVERSELLE...
Instruction Manual - Page 2

... gear connection function.
• This product is designed to the power
supply box unit.
5 Install the unit in the following
order: ground, ignition, reverse and camera unit.
4 Connect the wiring harness connector to supplement the driver's rear view, but the camera images do not show all leads and cords carefully around the sliding mechanism so they...
Instruction Manual - Page 3

.... - Places close to a Kenwood car navigation system equipped etc. with vinyl tape or other as possible. • Do not install the power supply box unit in places where it cannot touch any moving parts, such as the gear shift, handbrake and seat rails. • Do not route wiring in the rear view camera falling off.
- If...
Instruction Manual - Page 4

... so that the "KENWOOD" logo appears at the top.
Make sure that the vehicle will be attached. Attach the camera on the camera bracket. Do not install the camera securely but attach it fits the camera
Bend installation position.
Perform steps 4 and 5 only when they are required.
4 | CMOS-300/CMOS-200 Installation
CAUTION • The adjustments during camera setting may be...
Instruction Manual - Page 5

...switch unit is to be careful not to ensure close adhesion. Installing the Power Supply Box
1 Attach double-side adhesive tape on ...rear part or bumper
When adjusting the camera angle, be attached.
2 Attach double-side adhesive tape on the driver seat side.
ɹɹɹ
English | 5 Camera bracket clamping screw
Do not attach the power supply box in "Camera Setting"
(page 8). (CMOS-300...
Instruction Manual - Page 6

...CMOS-300/CMOS-200 Power supply box
Video cord: 1.5m (59.1 inch)
Navigation system/video monitor (separately available)
Camera connection cord
Camera
Connect the camera to a permanently ON power supply. Do not connect to the camera... system or monitor with a dedicated rearview camera video input. Reverse detection cord (purple/... to the rearview camera video input or to the negative side...
Instruction Manual - Page 7

... using two CMOS-300 units (for the front camera. System Connection (CMOS-300 only)
• When connecting the camera to the dedicated rearview camera video input. Connection of the
head unit. Video cord
English | 7 Select the external video input to set an ID for the front and rear), it is not used in the same way as front view camera) (Change...
Instruction Manual - Page 8

...instruction manual for camera adjustment. 1.
The following items are available for your video monitor.
3 Press and hold to red. Overhead guideline adjustments (Size, Horizontal direction, Vertical direction, Red Line Position Setting) To select an item: Press the + or - Camera Setting (CMOS-300 only)
Switch Unit Operation
The switch unit can be used to switch the image display mode, view...
Instruction Manual - Page 10

...the position of the overhead view (area on the camera installation height, check the actual settings after all of the following...set it .
10 | CMOS-300/CMOS-200
Wide View Guideline Adjustment (Size)
This item adjusts the overall size of the guidelines displayed in the PinP view (page 14). As the interval between each parking space before attempting to park in it independently from other guide...
Instruction Manual - Page 11

... is superimposed with the yellow line that is closest to "WIDE VIEW GUIDELINE ADJUSTMENT (Red Line Position Setting)." button of the guidelines displayed in the wide view.
1 Select "WIDE VIEW GUIDELINE ADJUSTMENT
(Horizontal direction)".
2 Press the + or - Wide View Guideline Adjustment (Red Line Position Setting)
This item adjusts the position of your vehicle's bumper.
3 After completing...
Instruction Manual - Page 12

... Setting)".
12 | CMOS-300/CMOS-200 Advances to
adjust the left -right positioning of the guidelines displayed in the overhead view.
1 Select "OVERHEAD VIEW GUIDELINE
ADJUSTMENT (Size)".
2 Press the + or - Overhead View Guideline Adjustment (Horizontal Direction)
This item adjusts the left -right positioning.
3 After completing the adjustment, press the
view button.
Camera Setting (CMOS-300...
Instruction Manual - Page 13

... for more than 2 seconds.
2 Press the + or - Finishing the Camera Setting
3 After setting, press the + or - English | 13 Camera ID Setting
When connecting two CMOS-300 units to "SETTING COMPLETE". button of the switch unit to select the camera ID, and press the view button.
3 After completing the adjustment, press the
view button.
4 Select [Next]. Move the red line until the...
Instruction Manual - Page 14

... seen from the two corners of vehicle are displayed on the lower half.
Wide View Camera image covering a horizontal angle of about 190°.
Display View Switching (CMOS-300 only)
Display View Switching
The CMOS-300 camera system can display 5 kinds of camera images.
1 With an image displayed on the nearer side of the orange line shown in the wide...
Instruction Manual - Page 15

... that Kenwood manufactured this battery contains lead. This Product is not installed by the manufacturer of a vehicle on the environment. Information on the rearview mirror or a side mirror. • Specifications subject to decrease harmful influence on the production line, nor by the professional importer of a vehicle into an EU Member State. Specifications
Camera Unit (CMOS-300)
Output...
Instruction Manual - Page 100
...harmful interference in a residential installation. These limits are expressly approved in the instruction manual. This equipment may cause...)
Fabrikant: Kenwood Corporation 2967-3 Ishikawa-machi, Hachioji-shi, Tokio, 192-8525 Japan EU-vertegenwoordiger: Kenwood Electronics Europe ... installed and used in accordance with the instructions. However, there is made. THIS DEVICE COMPLIES WITH PART...
Kenwood CMOS-200 Reviews
We have not received any reviews for Kenwood yet.