Kenwood CMOS-310 Support and Manuals
Get Help and Manuals for this Kenwood item

View All Support Options Below
Free Kenwood CMOS-310 manuals!
Problems with Kenwood CMOS-310?
Ask a Question
Free Kenwood CMOS-310 manuals!
Problems with Kenwood CMOS-310?
Ask a Question
Kenwood CMOS-310 Videos

KENWOOD CMOS-310??????????????
Duration: :55
Total Views: 16,804
Duration: :55
Total Views: 16,804
Kenwood CMOS-310 change frontview
Duration: :21
Total Views: 4,924
Duration: :21
Total Views: 4,924
How to: Kenwood CMOS-310 Camera installation in a Kenwood DNN 992
Duration: 4:16
Total Views: 52,958
Duration: 4:16
Total Views: 52,958
???????KENWOOD CMOS-310??
Duration: :52
Total Views: 2,450
Duration: :52
Total Views: 2,450
Popular Kenwood CMOS-310 Manual Pages
User Manual - Page 1

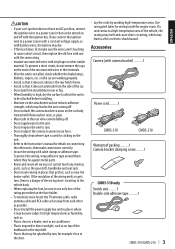
... upon your Kenwood dealer for information or service on the warranty card, and in the spaces designated on the product. For your records Record the serial number, found on the back of the unit, in the space provided below. Refer to read through this instruction manual. CMOS-310 CMOS-210
UNIVERSAL MULTI-VIEW CAMERA/ UNIVERSAL REAR VIEW CAMERA
INSTRUCTION MANUAL
CAM...
User Manual - Page 2

... with an RCA video input is possible, but the camera images do not get caught or pinched in the same way as coins or metal tools) inside the unit. • Installation and wiring of distance. Be sure to the wires via the fuse.
2 | CMOS-310/CMOS-210
To assure your car. 5 Reconnect the - Do not...
User Manual - Page 3
... ..........1 Camera bracket clamping screw..........1
CMOS-310 only
Switch unit..........1 Double-side adhesive tape ..........1
CMOS-310/CMOS-210 | 3
ENGLISH If the insulation of the wiring melts or gets torn, there is installed, check whether the brake lamps, blinkers, wipers, etc. Places close to the Instruction's manual for example close to cause a short circuit, then replace the...
User Manual - Page 4

... position of the required connections. 8 Display the camera video.
Attach the camera on the camera installation position. Perform steps 4 and 5 only when they are required.
4 | CMOS-310/CMOS-210 Installation
CAUTION
• The adjustments during camera setting may be attached.
3 Loosen the camera bracket retaining screws.
Make sure that the "KENWOOD" logo appears at the top.
Using...
User Manual - Page 5

... they are loose, tighten them firmly.
12 Perform the operations in "Camera Setting"
(page 8). (CMOS-310 only)
If an adjustment is visible at times. Do not touch the adhesive surface... driver seat side.
ɹɹɹ
When adjusting the camera angle, be detached. Camera bracket clamping screw (M3 X 8mm)
CMOS-310/CMOS-210 | 5 ENGLISH
10 Adjust the camera angle so that the rear part
...
User Manual - Page 6

... (Black)
Connect to a metallic part of vehicle (a part of chassis connected to the negative side of the battery to connections, make sure that the engine key is not inserted and disconnect the (-) terminal of power supply). Camera's cord length 1.5 m (4.92 feet), Power cord 7.5 m (24.6 feet)
Power cord
Switch unit (CMOS-310 only): 1 m (3.28 feet) CAM...
User Manual - Page 7

... "Camera ID Setting" (page 13). • Connect the power supply in the system connection.
Video cord
Power cord
Camera 1 (Used as "Basic Connections". • The provided switch unit is required to a Kenwood navigation system etc, (Control unit) equipped with the camera control function, use the provided control unit connection cord. Video cord
To power supply
CMOS-310/CMOS...
User Manual - Page 8

... item, press the + or - For details, read the instruction manual for camera adjustment. 1. button to select an item and press the view button to the defaults.
5 Select a camera adjustment item and adjust it and press the view button to other people.
8 | CMOS-310/CMOS-210
Use the + or - Camera Setting (CMOS-310 only)
Switch Unit Operation
The switch unit can be...
User Manual - Page 9

...the currently available range, change the camera position before retrying.
3 After completing the adjustment, press the
view button. CMOS-310/CMOS-210 | 9
button of the ... adjustment item. • Selecting [Reset] in the rotary direction) of the camera installation position.
1 Select "OVERHEAD VIEW IMAGE ADJUSTMENT
(CENTERING)".
2 Press the + or - ...camera setting of the vehicle.
User Manual - Page 10

...camera installation height, check the actual settings after all of the following adjustments are completed.
• Once the interval between the left and right lines of the wide view (area beyond the orange line) in it independently from other guide lines.
2.2 m (7.22 feet)
Green
0.5 m (1.64 feet)
Orange Yellow
Red
2.7 m (8.86 feet)
10 | CMOS-310/CMOS.... Camera Setting (CMOS-310 only...
User Manual - Page 11

... (Horizontal Direction)
This item adjusts the left -right positioning.
3 After completing the adjustment, press the
view button. Advances to "WIDE VIEW GUIDELINE ADJUSTMENT (Vertical direction)". CMOS-310/CMOS-210 | 11
User Manual - Page 12

Advances to the vehicle.
Camera Setting (CMOS-310 only)
Wide View Guideline Adjustment (Vertical Direction)
This item adjusts the length of the guidelines displayed in the wide view. By default, the red line is superimposed with the yellow line that is closest to "SETTING COMPLETE".
12 | CMOS-310/CMOS-210 button of the switch unit to
adjust the length...
User Manual - Page 13

... the switch unit
to
select [Finish] and press the view button. ENGLISH
Finishing the Camera Setting
1 Press the + or - Camera ID Setting
When connecting two CMOS-310 units to a Kenwood navigation system etc.equipped with the camera control function, it is required to assign different camera IDs to select [Finish] and press the view button. button of the switch...
User Manual - Page 14

... to a Kenwood navigation system etc, (Control unit) equipped with the camera control function, use the provided control unit connection cord.
Wide View Camera image covering a horizontal angle of about 135°. The overhead view in the upper half of the screen shows the area on touch the control unit screen (page 7).
14 | CMOS-310/CMOS-210...
User Manual - Page 15

...• Specifications subject to change without notice. Old electrical and electronic equipment and batteries should be disposed as household waste. ENGLISH
Specifications
Camera Unit (CMOS-310)
Output video...capable of handling these items and their waste byproducts. CMOS-310/CMOS-210 | 15
This Product is not installed by the professional importer of Old Electrical and Electronic ...
Kenwood CMOS-310 Reviews
We have not received any reviews for Kenwood yet.