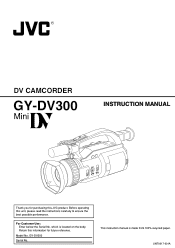
Wired Peer-to-Peer Connections from Streamcorder to Computer
Page 2
...are from a KA-DV300 revision 1.04. z Page 2 of the computer is needed. • A CF to your User's Guide for use your owners' manual for either the KA-DV300/350 or KA-DV5000. • A computer with an SA-DV6000 Network Pack. • A Socket Communications EA2900-117 Low Power Ethernet... Pack, a GY-DV5000 camera with a KADV5000 Network Pack, or a BR-DV6000 VTR with a wired LAN card. • A crossover CAT-5 cable. Configuring the KA-DV300, KA-DV350, KA-DV5000 or SA-DV6000 Network Pack Before you can use with a wired LAN interface, you must be configured manually. In peer-...
Wired Peer-to-Peer Connections from Streamcorder to Computer
Page 3
When set : • HOST NAME - Since, in Web server. Please refer to your Owners' Manual if any address following parameters are set to 'ON', this application, there is no direct connection to the outside world and thus there can be ... used to connect to Web Browser and Streamproducer connections. The netmask is used for QuickTime'). The user name provides security and is acceptable for the GY-DV300, select 'NETWORK PACK CONFIGURATION'. The factory default is 255.255.255.0, and this must be assigned. With the direct connection discussed here, the factory...
Wireless Peer-to-Peer Connections from Streamcorder to Computer
Page 2
... number IP address. This must be the same. z Page 2 of number must be set identically on a network must be unique, the Netmask must be configured manually. Please refer to the manual that came with the WLAN card installed in the same network group.
Wireless Peer-to-Peer Connections from Streamcorder to Computer
Page 3
...Encryption - This is an arbitrary name, up to 64 characters, that will know when the sequence finished when the icon, shown to your owners' manual for saving files. • DHCP - Only those shown on both Streamcorder and computer. The menus illustrated in the viewfinder. 2. From the '...350, KA-DV5000, or SA-DV6000 Network Pack Before you can use Streamcorder with a wireless LAN interface, you must configure it for the GY-DV300, select 'NETWORK PACK CONFIGURAION'. Other revisions of the two NETWORK SET windows, shown below, the following discussion are from a KA-...
108 pg. instruction manual on the GY-DV300U Pro-DV Camcorder (PDF, 3790KB)
Page 1
which is made from 100% recycled paper. GY-DV300 Serial No. Retain this information for purchasing this unit, please read the instructions carefully to ensure the best possible performance. This instruction manual is located on the body. DV CAMCORDER GY-DV300 INSTRUCTION MANUAL Thank you for future reference. For Customer Use : Enter below the Serial No. Model No. LWT0017-001A Before operating this JVC product.
108 pg. instruction manual on the GY-DV300U Pro-DV Camcorder (PDF, 3790KB)
Page 6
...Maintenance 9 Precautions for Use of Head Cleaning Tape ... 10 Videocassette to be Used 10 Condensation 11 Characteristic CCD Phenomena 11 CONTROLS, INDICATORS AND CONNECTORS Right Side Section 12 Rear Section 14 Left Side Section 18 Front Section...Manual Adjustment of the Audio Recording Level 76 Disabling Operation of the Camera-Shake Compensation Function 78 Adjusting the Quality of Camera Image .......... 79 PLAYBACK Playback of Tape 80 Blank Search 81 Adjusting the Playback Sound Volume 82 Outputting CH-3/CH-4 Channel Sound 83 EXTERNAL COMPONENTS Connecting a Video Component with DV...
108 pg. instruction manual on the GY-DV300U Pro-DV Camcorder (PDF, 3790KB)
Page 12
... Side Section !2 !0 u CH-1 CH-2 AUDIO LEVEL ND FILTER ON OFF IRIS FOCUS AUTO MANU PUSH AUTO q wer yt PROFESSINAL OPEN DV CAMCORDER GY-DV300 !1 i o 1 FOCUS ring Manual focus ring. FILTER] ND-filter switch Turns the built-in ND-filter ON or OFF. To allow iris adjustment with this dial, set...forced auto iris mode as long as the button is restored. This will not work . 5 [FOCUS] Focus switch This is selected for manual adjustment of light to move the iris from the auto iris condition. When the shooting conditions are too bright during outdoor shooting, set this...
108 pg. instruction manual on the GY-DV300U Pro-DV Camcorder (PDF, 3790KB)
Page 13
...the CH-1 and CH-2 audio channels. B Tally lamp This lamp lights up red when the GY-DV300 is restored. To use these controls to adjust the audio level, set to "AUTO", this button when the MANUAL mode is selected for adjusting until the viewfinder screen image is clearly visible. A Viewfinder diopter ...page 39.) 9 LCD door lock release button Slide the button toward the rear side to facilitate the adjustment. 13 When the button is released, the manual mode is in the recording mode. Raise the viewfinder to open . When the tape has run out, or the VTR enters the warning mode, ...
108 pg. instruction manual on the GY-DV300U Pro-DV Camcorder (PDF, 3790KB)
Page 14
...shooting mode, two separate sets of setting values for recording can be set to record the video signal input from the DV connector. "CAM-B" : In this button to "VTR". Also set by means of sensitivity. It works when the ...Set in the VTR playback mode, it is set for 7 V DC. When used in accordance with the operating mode of the GY-DV300. G REC Start/Stop button This button starts and stops recording. When used in accordance with the conditions set to 12 ... is set to "CAM-A" or "CAM-B" in accordance with the conditions set for manual adjustment of the menu screens.
108 pg. instruction manual on the GY-DV300U Pro-DV Camcorder (PDF, 3790KB)
Page 15
...setting screen is displayed, this dial is used to select and set the gain setting of the GY-DV300. Selections and settings in microphone or from the MIC 2 input connector is set to the MANUAL mode, the white balance setting mode can be selected by rotating the SELECT dial L. The ...normal screen returns when this button is pressed while the MENU setting screen is input. J [SHUTTER] Shutter speed selector button This button is for manual adjustment of the shutter speed. ● It works when the AE item on the LCD screen and the viewfinder screen. The MENU setting screen is...
108 pg. instruction manual on the GY-DV300U Pro-DV Camcorder (PDF, 3790KB)
Page 24
... is inhibited.) WB1: White Balance memory 1 mode WB2: White Balance memory 2 mode WB3: White Balance memory 3 mode When WB1, WB2 or WB3 is indicated, manual white balance adjustment is set to PUSH AUTO on the OPERATION menu screen). CONTROLS, Indications on the OPERATION menu screen). 6 dB: The gain value is... set to AUTO. 24 The result of 3200 K. It is not shown when the shutter is NORMAL (1/60) or gain is set to ALC. 9 Manual gain mode indication Indicated in LOLUX mode. This indication is not shown when the shooting mode is AUTO or the AE item is set to...
108 pg. instruction manual on the GY-DV300U Pro-DV Camcorder (PDF, 3790KB)
Page 25
...[1/2] menu screen. (Audio is recorded with 16-bit, 48 kHz sampling.) H Audio level meter display Indicates the audio levels of the lens in the manual iris adjustment mode (when the IRIS item is set to 48K on the DISPLAY [2/2] menu screen. M: Displayed in reverse direction STOP: Tape protect mode ...These meters are : F1.6, F2, F2.8, F4, F5.6, F8, F11, F16. Item Contents A Shooting mode indication Indicates whether the shooting mode is AUTO or MANUAL. Å: Displayed when the shooting mode is AUTO (when the MODE item is set to AUTO on the TOP MENU screen). ˜: Displayed when the...
108 pg. instruction manual on the GY-DV300U Pro-DV Camcorder (PDF, 3790KB)
Page 29
Event Indications When the gain and shutter speed are changed V.SHUTTER 1/60.1 - 1/2084.6 When the shutter is made. Event display area Event display area Set Condition Contents of Indication When the gain value is changed GAIN -3 dB to 18 dB (1 step) When the LOLUX gain mode is selected LOLUX When the shutter speed is changed SHUTTER 1/100, 1/250. 1/500, 1/1000, 1/2000 When the variable shutter speed is changed manually, the set condition is displayed for about 3 seconds at the time the change is NORMAL (shutter speed: 1/60) SHUTTER NORMAL 29
108 pg. instruction manual on the GY-DV300U Pro-DV Camcorder (PDF, 3790KB)
Page 33
... battery pack. 1. If a battery pack is connected, the remaining battery power indication for the AA-P30. The DC INPUT connector on the GY-DV300 accepts power voltage in the range of the AC Adapter/Charger into the DC INPUT connector of the DC cable provided with AC power... OUTPUT connector Set the POWER switch on the AC Adapter/ Charger. 2. PREPARATIONS Power Supply Preparation The GY-DV300 is supplied to the AC Adapter/Charger. * For details, see the instruction manual for fully charged battery may not be displayed. The POWER lamp illuminates when power is operable with the...
108 pg. instruction manual on the GY-DV300U Pro-DV Camcorder (PDF, 3790KB)
Page 34
... the mounting direction. * For details, see the instruction manual for battery pack operation. Hold the battery pack with the connector side facing the GY-DC300. 2. DC300, slide it downward to attach it in the direction of the arrow to the GY-DC300, unplug the cable. 1. Battery lock release button ... set to remove it in the opposite direction of the AC Adapter/Charger into an AC outlet. While pressing the battery pack against the GY- While pressing the battery lock release button, slide the battery pack upward to OFF. 1. Charging starts, and the CHARGE lamp blinks green...
108 pg. instruction manual on the GY-DV300U Pro-DV Camcorder (PDF, 3790KB)
Page 37
.... 2. If the battery is removed or the power supply from the AC adapter is disconnected while the GYDV300's POWER switch is set to "ON", the manual mode operation setting values (IRIS, zoom, gain, shutter speed, white balance, etc.) are not backed up be set the POWER switch to "OFF" during a..., be used for at least 5 seconds before the power is indicated in the VTR playback mode. "STOP" is turned off. Power is loaded, the GY-DV300 enters the recording-standby mode automatically. In this condition, press the REC START/STOP button to the unit. The camera image appears in the...
108 pg. instruction manual on the GY-DV300U Pro-DV Camcorder (PDF, 3790KB)
Page 47
... menu screens for camera shooting can be those valid for the auto mode. C LOC K / TC . . Also, the GY-DV300 offers two shooting modes, AUTO and MANUAL, which are selected by setting the MODE item on the OPERATION menu screen. AUTO shooting The...- SETTINGS BEFORE Shooting Mode SHOOTING (Auto/Manual) Selection MODE switch MODE CAM-B CAM-A VTR GAIN SHUTTER MENU TOP MENU screen MENU MO D E MANU AL E A R PHON E LEV EL 1 0 S YS T EM S E T . . MENU A L L R ESE T CANCE L EX I T The GY-DV300 is adjusted automatically. MANUAL shooting Make settings as desired on the TOP...
108 pg. instruction manual on the GY-DV300U Pro-DV Camcorder (PDF, 3790KB)
Page 48
...to align the cursor (f) with the MODE item, and then press the SELECT dial. ● The MODE item setting area is set to AUTO or MANUAL. Rotate the SELECT dial to align the cursor (f) with the EXIT item, and then press the SELECT dial. ● The normal screen returns. 48...C AM - Press the MENU button to the "CAM-A" or "CAM-B" position. 2. OPER AT I S PLAY SE T . . Rotate the SELECT dial to set to Select Either MANUAL or AUTO Shooting Mode MODE switch MODE MENU button CAM-B CAM-A VTR GAIN SHUTTER MENU SELECT dial TOP MENU screen MENU MO D E MANU AL E A R PHON...
108 pg. instruction manual on the GY-DV300U Pro-DV Camcorder (PDF, 3790KB)
Page 52
FOCUS Switch AUTO Focus Adjustment The auto focus function will be obtainable in the manual mode. 52 Depending on the subject and the shooting conditions, focusing may not be operating and the camera automatically focuses on the subject. MANU The .... In this case, adjust the focus in the auto focus mode. For manual focusing, see page 63. SETTINGS BEFORE SHOOTING Focus Mode Selection CH-1 CH-2 AUDIO LEVEL ND FILTER ON OFF IRIS FOCUS AUTO MANU PUSH AUTO PROFESSINAL DV CAMCORDER GY-DV300 FOCUS ring OPEN FOCUS AUTO MANU PUSH AUTO FOCUS switch The FOCUS...
108 pg. instruction manual on the GY-DV300U Pro-DV Camcorder (PDF, 3790KB)
Page 54
... cursor (f) with the NEXT PAGE item, and then press the SELECT dial. 8. To return to the normal screen, use either of whether the AUTO or MANUAL shooting mode is entered. 6. Repeat the steps 3 to 5 above to the TOP MENU screen and then select the EXIT item from the TOP MENU screen...