
Y560 User Guide
Page 2
... camera from gallery 2 Getting started 3 Your phone at a glance 3 Key functions at your fingertips 4 Locking and unlocking the screen 4 Dual-card settings...5 Connecting to a Wi-Fi network 6 Turning on mobile data 6 Touchscreen gestures ...6 Status icons ...7 Home...8 Notification...10 Accessing applications 11 Personalizing your phone 12 Texting ...13 Calls and contacts 15 Making a call ...15 Answering or rejecting a call 17 What you can do during a call 17 Answering a third-party call 18 Making a conference call 18 Using the call log ...19 Call settings ...19 Managing contacts...
... camera from gallery 2 Getting started 3 Your phone at a glance 3 Key functions at your fingertips 4 Locking and unlocking the screen 4 Dual-card settings...5 Connecting to a Wi-Fi network 6 Turning on mobile data 6 Touchscreen gestures ...6 Status icons ...7 Home...8 Notification...10 Accessing applications 11 Personalizing your phone 12 Texting ...13 Calls and contacts 15 Making a call ...15 Answering or rejecting a call 17 What you can do during a call 17 Answering a third-party call 18 Making a conference call 18 Using the call log ...19 Call settings ...19 Managing contacts...
Y560 User Guide
Page 3
... Setting a song as the ringtone 33 Playing a video ...34 Network and sharing 35 Turning on mobile data 35 Wi-Fi network...35 Sharing your phone's mobile data connection 36 Transferring data through Bluetooth 37 Transferring data using Wi-Fi Direct 38 Transferring data between your phone and computer 38 Applications 40 Managing applications 40 Backup ...41 Calendar ...41 Clock ...42 Weather ...43 Note ...44 FM radio...44 Phone settings 46 Turning on location services 46 Modifying tone settings 46 Modifying display settings 47 Changing the lock screen...
... Setting a song as the ringtone 33 Playing a video ...34 Network and sharing 35 Turning on mobile data 35 Wi-Fi network...35 Sharing your phone's mobile data connection 36 Transferring data through Bluetooth 37 Transferring data using Wi-Fi Direct 38 Transferring data between your phone and computer 38 Applications 40 Managing applications 40 Backup ...41 Calendar ...41 Clock ...42 Weather ...43 Note ...44 FM radio...44 Phone settings 46 Turning on location services 46 Modifying tone settings 46 Modifying display settings 47 Changing the lock screen...
Y560 User Guide
Page 8
... manually lock the screen. Method 2: After being idle for a specified period of recently used applications. Touch to display the list of time, your phone automatically locks its screen. When you are supported) Power key Do not block the area around the ambient light and proximity sensor. To set the screen lock method, touch on your mobile phone. Press to lock the screen when your fingertips Press and hold to open search bar. Key...
... manually lock the screen. Method 2: After being idle for a specified period of recently used applications. Touch to display the list of time, your phone automatically locks its screen. When you are supported) Power key Do not block the area around the ambient light and proximity sensor. To set the screen lock method, touch on your mobile phone. Press to lock the screen when your fingertips Press and hold to open search bar. Key...
Y560 User Guide
Page 9
... service provider and phone model. Then enable or disable a SIM card. Touch Default primary SIM card, and select the SIM card you do not need to set a default SIM card for data services You can install two SIM cards on your phone and use a SIM card, disable it on. When you want to use one or both of them at the same time. On the home screen, touch . 2. The settings displayed may vary according to your finger towards any direction to turn it . 1. On the home screen, touch . 2. Unlocking the screen...
... service provider and phone model. Then enable or disable a SIM card. Touch Default primary SIM card, and select the SIM card you do not need to set a default SIM card for data services You can install two SIM cards on your phone and use a SIM card, disable it on. When you want to use one or both of them at the same time. On the home screen, touch . 2. The settings displayed may vary according to your finger towards any direction to turn it . 1. On the home screen, touch . 2. Unlocking the screen...
Y560 User Guide
Page 12
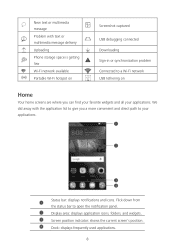
... text or multimedia message delivery Uploading Phone storage space is getting low Wi-Fi network available Portable Wi-Fi hotspot on Screenshot captured USB debugging connected Downloading Sign-in or synchronization problem Connected to a Wi-Fi network USB tethering on Home Your home screens are where you a more convenient and direct path to your applications. Display area: displays application icons, folders, and widgets. New text or multimedia message Problem with the application list...
... text or multimedia message delivery Uploading Phone storage space is getting low Wi-Fi network available Portable Wi-Fi hotspot on Screenshot captured USB debugging connected Downloading Sign-in or synchronization problem Connected to a Wi-Fi network USB tethering on Home Your home screens are where you a more convenient and direct path to your applications. Display area: displays application icons, folders, and widgets. New text or multimedia message Problem with the application list...
Y560 User Guide
Page 16
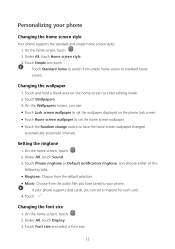
..., touch Sound. 3. Under All, touch Display. 3. On the home screen, touch . 2. Setting the ringtone 1. Touch Standard home to switch from the audio files you can : Touch Lock screen wallpaper to set a ringtone for each card. 4. On the home screen, touch . 2. Touch Wallpapers. 3. Touch Phone ringtone or Default notification ringtone, and choose either of the following tabs: Ringtone: Choose from the default selection. Music: Choose from simple home screen to enter editing mode. 2. Touch . If your phone Changing the home screen style Your phone supports the...
..., touch Sound. 3. Under All, touch Display. 3. On the home screen, touch . 2. Setting the ringtone 1. Touch Standard home to switch from the audio files you can : Touch Lock screen wallpaper to set a ringtone for each card. 4. On the home screen, touch . 2. Touch Wallpapers. 3. Touch Phone ringtone or Default notification ringtone, and choose either of the following tabs: Ringtone: Choose from the default selection. Music: Choose from simple home screen to enter editing mode. 2. Touch . If your phone Changing the home screen style Your phone supports the...
Y560 User Guide
Page 19
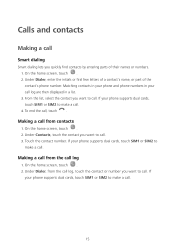
... cards, touch SIM1 or SIM2 to call. On the home screen, touch . 2. To end the call from contacts 1. Under Contacts, touch the contact you want to make a call. 4. If your phone supports dual cards, touch SIM1 or SIM2 to call. 3. On the home screen, touch . 2. If your call log are then displayed in a list. 3. Under Dialer, from the call log, touch the contact or number you want to make a call. 15 Calls and contacts Making a call Smart dialing Smart dialing lets you quickly find contacts by entering parts of the contact's phone number. Making a call , touch...
... cards, touch SIM1 or SIM2 to call. On the home screen, touch . 2. To end the call from contacts 1. Under Contacts, touch the contact you want to make a call. 4. If your phone supports dual cards, touch SIM1 or SIM2 to call. 3. On the home screen, touch . 2. If your call log are then displayed in a list. 3. Under Dialer, from the call log, touch the contact or number you want to make a call. 15 Calls and contacts Making a call Smart dialing Smart dialing lets you quickly find contacts by entering parts of the contact's phone number. Making a call , touch...
Y560 User Guide
Page 20
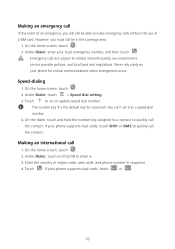
... your phone supports dual cards, touch SIM1 or SIM2 to cellular network quality, use of an emergency, you must still be able to set it as a speed-dial number. 4. The number key 1 is the default key for critical communications when emergencies occur. On the dialer, touch and hold 0 to quickly call the contact. Under Dialer, touch and hold the number key assigned to a contact to enter +. 3. Emergency calls are subject to quickly call the contact. On the home screen, touch . 2. If your local emergency number...
... your phone supports dual cards, touch SIM1 or SIM2 to cellular network quality, use of an emergency, you must still be able to set it as a speed-dial number. 4. The number key 1 is the default key for critical communications when emergencies occur. On the dialer, touch and hold 0 to quickly call the contact. Under Dialer, touch and hold the number key assigned to a contact to enter +. 3. Emergency calls are subject to quickly call the contact. On the home screen, touch . 2. If your local emergency number...
Y560 User Guide
Page 24
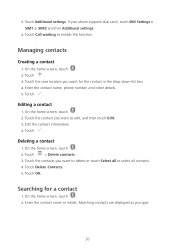
...enable this function. On the home screen, touch . 2. Enter the contact name or initials. If your phone supports dual cards, touch SIM Settings > SIM1 or SIM2 and then Additional settings. 4. Touch the contact you want for a contact 1. Deleting a contact 1. Touch Delete Contacts. 5. Touch . On the home screen, touch . 2. Touch OK. Touch . 3. Touch the save location you want to delete or touch Select all to select all contacts. 4. On the home screen, touch . 2. Touch the contacts you type. 20 On the home screen, touch . 2. Touch Call waiting to edit, and then touch...
...enable this function. On the home screen, touch . 2. Enter the contact name or initials. If your phone supports dual cards, touch SIM Settings > SIM1 or SIM2 and then Additional settings. 4. Touch the contact you want for a contact 1. Deleting a contact 1. Touch Delete Contacts. 5. Touch . On the home screen, touch . 2. Touch OK. Touch . 3. Touch the save location you want to delete or touch Select all to select all contacts. 4. On the home screen, touch . 2. Touch the contacts you type. 20 On the home screen, touch . 2. Touch Call waiting to edit, and then touch...

Y560 User Guide
Page 26
...: Touch Delete and delete the group. Touch Move members and move a member to other groups. Touch Add members and add a new member to the group. Touch Remove members and delete a member from the group. Touch SMS group to send a message. touch Email group to select all to edit. 3. Touch the contacts you want to share, or touch Select all contacts. 6. Creating a contact group 1. On the home screen, touch . 2. Touch > Add members. 5. Editing a contact group...
...: Touch Delete and delete the group. Touch Move members and move a member to other groups. Touch Add members and add a new member to the group. Touch Remove members and delete a member from the group. Touch SMS group to send a message. touch Email group to select all to edit. 3. Touch the contacts you want to share, or touch Select all contacts. 6. Creating a contact group 1. On the home screen, touch . 2. Touch > Add members. 5. Editing a contact group...
Y560 User Guide
Page 30
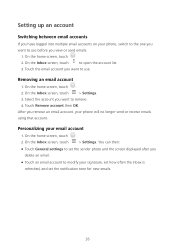
... delete an email. Touch an email account to remove. 4. Setting up an account Switching between email accounts If you have logged into multiple email accounts on your phone, switch to the one you want to use . On the Inbox screen, touch > Settings. 3. Select the account you want to modify your signature, set how often the inbox is refreshed, and set the notification tone for new emails. 26 On the Inbox screen, touch . > Settings. On the Inbox screen, touch to open the account list...
... delete an email. Touch an email account to remove. 4. Setting up an account Switching between email accounts If you have logged into multiple email accounts on your phone, switch to the one you want to use . On the Inbox screen, touch > Settings. 3. Select the account you want to modify your signature, set how often the inbox is refreshed, and set the notification tone for new emails. 26 On the Inbox screen, touch . > Settings. On the Inbox screen, touch to open the account list...
Y560 User Guide
Page 40
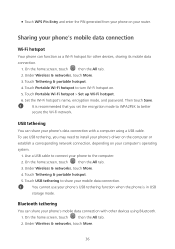
... phone's data connection with other devices, sharing its mobile data connection. 1. Touch Tethering & portable hotspot. 5. Touch Portable Wi-Fi hotspot > Set up Wi-Fi hotspot. 6. Set the Wi-Fi hotspot's name, encryption mode, and password. Then touch Save. It is in USB storage mode. To use your phone to the computer. 2. Use a USB cable to connect your phone's USB tethering function when the phone is recommended that you may need to better secure the Wi-Fi network. On the home screen, touch...
... phone's data connection with other devices, sharing its mobile data connection. 1. Touch Tethering & portable hotspot. 5. Touch Portable Wi-Fi hotspot > Set up Wi-Fi hotspot. 6. Set the Wi-Fi hotspot's name, encryption mode, and password. Then touch Save. It is in USB storage mode. To use your phone to the computer. 2. Use a USB cable to connect your phone's USB tethering function when the phone is recommended that you may need to better secure the Wi-Fi network. On the home screen, touch...

Y560 User Guide
Page 41
... instructions to pair your notification panel and touch Notifications to send and then touch Share > Bluetooth on . Then your phone name after Bluetooth is used as your phone will automatically search for and display available devices. Renaming your phone By default, your phone model is turned on the displayed window. Touch and hold the file you want to check the file transfer progress. 37 On the home screen, touch . 2. Touch Tethering & portable hotspot. 4. Under All, touch Bluetooth. 3. Receiving a file using Bluetooth To exchange data with it. Touch...
... instructions to pair your notification panel and touch Notifications to send and then touch Share > Bluetooth on . Then your phone name after Bluetooth is used as your phone will automatically search for and display available devices. Renaming your phone By default, your phone model is turned on the displayed window. Touch and hold the file you want to check the file transfer progress. 37 On the home screen, touch . 2. Touch Tethering & portable hotspot. 4. Under All, touch Bluetooth. 3. Receiving a file using Bluetooth To exchange data with it. Touch...

Y560 User Guide
Page 42
... home screen, touch . 2. Touch the switch to start receiving the file. Receiving a file using Wi-Fi Direct Before you use Wi-Fi Direct to connect two devices, ensure that you have turned on the Wi-Fi network connection on the displayed window. Touch Accept to enable the Wi-Fi. 4. Open your phone to the computer. 38 Use a USB cable to connect your notification panel and touch Notifications to check the file transfer progress. By default, received files are saved to the Wi-Fi Direct folder in Files...
... home screen, touch . 2. Touch the switch to start receiving the file. Receiving a file using Wi-Fi Direct Before you use Wi-Fi Direct to connect two devices, ensure that you have turned on the Wi-Fi network connection on the displayed window. Touch Accept to enable the Wi-Fi. 4. Open your phone to the computer. 38 Use a USB cable to connect your notification panel and touch Notifications to check the file transfer progress. By default, received files are saved to the Wi-Fi Direct folder in Files...
Y560 User Guide
Page 45
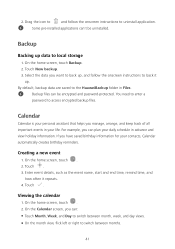
... home screen, touch . 2. By default, backup data are saved to access encrypted backup files. If you manage, arrange, and keep track of all important events in your daily schedule in Files. Enter event details, such as the event name, start and end time, remind time, and how often it up. On the home screen, touch . 2. Backup files can 't be encrypted and password-protected. Touch . 3. Drag the icon to and follow the onscreen instructions to switch...
... home screen, touch . 2. By default, backup data are saved to access encrypted backup files. If you manage, arrange, and keep track of all important events in your daily schedule in Files. Enter event details, such as the event name, start and end time, remind time, and how often it up. On the home screen, touch . 2. Backup files can 't be encrypted and password-protected. Touch . 3. Drag the icon to and follow the onscreen instructions to switch...
Y560 User Guide
Page 50
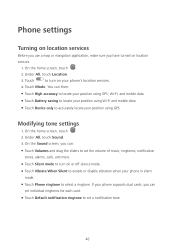
...of music, ringtones, notification tones, alarms, calls, and more. Touch Silent mode to turn on or off silence mode. Touch Vibrate When Silent to enable or disable vibration when your phone in silent mode. Touch Phone ringtone to select a ringtone. On the home screen, touch . 2. On the Sound screen, you can: Touch Volumes and drag the sliders to set a notification tone. 46 On the home screen, touch . 2. Touch to turn on your position using Wi-Fi and mobile data. Touch Device only to accurately locate your phone's location services...
...of music, ringtones, notification tones, alarms, calls, and more. Touch Silent mode to turn on or off silence mode. Touch Vibrate When Silent to enable or disable vibration when your phone in silent mode. Touch Phone ringtone to select a ringtone. On the home screen, touch . 2. On the Sound screen, you can: Touch Volumes and drag the sliders to set a notification tone. 46 On the home screen, touch . 2. Touch to turn on your position using Wi-Fi and mobile data. Touch Device only to accurately locate your phone's location services...
Y560 User Guide
Page 52
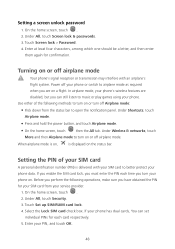
.... Use either of your phone data. Touch Set up SIM/RUIM card lock. 4. Under Wireless & networks, touch More and then Airplane mode to better protect your SIM card A personal identification number (PIN) is displayed on or off airplane mode. Setting a screen unlock password 1. In airplane mode, your phone's wireless features are on or off airplane mode Your phone's signal reception or transmission may interfere with your SIM card to turn off your service provider. 1. Power off Airplane mode: Flick down from your phone or switch...
.... Use either of your phone data. Touch Set up SIM/RUIM card lock. 4. Under Wireless & networks, touch More and then Airplane mode to better protect your SIM card A personal identification number (PIN) is displayed on or off airplane mode. Setting a screen unlock password 1. In airplane mode, your phone's wireless features are on or off airplane mode Your phone's signal reception or transmission may interfere with your SIM card to turn off your service provider. 1. Power off Airplane mode: Flick down from your phone or switch...

Y560 User Guide
Page 53
... an account 1. Under Accounts, select an account type. 3. Under Accounts, select an account type. 3. Touch the > Sync now to change the PIN. If this limit is entered. Under All, touch Accounts. 3. Turning on data synchronization. 49 Select an account type. 5. On the home screen, touch then the All tab. 2. Deleting an account 1. 6. Select the account you want to delete. 4. Select the account you want to synchronize from your SIM card will be permanently disabled. Touch Add account. 4. Follow the onscreen instructions and enter your service...
... an account 1. Under Accounts, select an account type. 3. Under Accounts, select an account type. 3. Touch the > Sync now to change the PIN. If this limit is entered. Under All, touch Accounts. 3. Turning on data synchronization. 49 Select an account type. 5. On the home screen, touch then the All tab. 2. Deleting an account 1. 6. Select the account you want to delete. 4. Select the account you want to synchronize from your SIM card will be permanently disabled. Touch Add account. 4. Follow the onscreen instructions and enter your service...
Y560 User Guide
Page 54
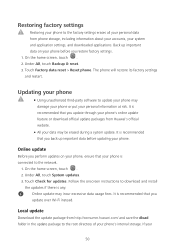
... phone Using unauthorized third-party software to update your phone may damage your phone or put your 50 On the home screen, touch . 2. Touch Factory data reset > Reset phone. Online update Before you perform updates on your phone before updating your phone's internal storage. Restoring factory settings Restoring your phone to the factory settings erases all your personal data from Huawei's official website. All your data may be erased during a system update. It is any. Local update Download the update package from http://consumer.huawei.com/ and save...
... phone Using unauthorized third-party software to update your phone may damage your phone or put your 50 On the home screen, touch . 2. Touch Factory data reset > Reset phone. Online update Before you perform updates on your phone before updating your phone's internal storage. Restoring factory settings Restoring your phone to the factory settings erases all your personal data from Huawei's official website. All your data may be erased during a system update. It is any. Local update Download the update package from http://consumer.huawei.com/ and save...
Y560 User Guide
Page 55
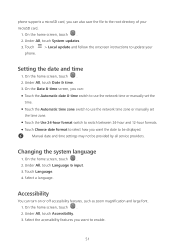
... network time zone or manually set the time zone. Touch the Use 24-hour format switch to switch between 24-hour and 12-hour formats. Touch Choose date format to select how you want to enable. 51 Changing the system language 1. Under All, touch System updates. 3. Manual date and time settings may not be displayed. Select the accessibility features you want the date to be provided by all service providers. On the home screen, touch . 2. Accessibility...
... network time zone or manually set the time zone. Touch the Use 24-hour format switch to switch between 24-hour and 12-hour formats. Touch Choose date format to select how you want to enable. 51 Changing the system language 1. Under All, touch System updates. 3. Manual date and time settings may not be displayed. Select the accessibility features you want the date to be provided by all service providers. On the home screen, touch . 2. Accessibility...


