
Maintenance and Service Guide
Page 5
... 1 Product description ...1 2 External component identification ...3 Locating hardware ...3 Locating software ...3 Right side ...4 Left side ...5 Display ...6 Keyboard area ...7 TouchPad ...7 Lights ...8 Button and speaker assembly ...9 Special keys ...10 Labels ...11 Inserting a SIM card (select products only) ...12 3 Illustrated parts catalog ...13 Computer major components ...13 Miscellaneous parts ...17 4 Removal and replacement procedures preliminary requirements 19 Tools required ...19 Service considerations ...19 Plastic parts ...19 Cables and connectors ...20 Drive handling ...20...
... 1 Product description ...1 2 External component identification ...3 Locating hardware ...3 Locating software ...3 Right side ...4 Left side ...5 Display ...6 Keyboard area ...7 TouchPad ...7 Lights ...8 Button and speaker assembly ...9 Special keys ...10 Labels ...11 Inserting a SIM card (select products only) ...12 3 Illustrated parts catalog ...13 Computer major components ...13 Miscellaneous parts ...17 4 Removal and replacement procedures preliminary requirements 19 Tools required ...19 Service considerations ...19 Plastic parts ...19 Cables and connectors ...20 Drive handling ...20...
Maintenance and Service Guide
Page 6
WWAN module ...31 SIM card slot assembly ...33 Transfer board ...34 Webcam ...36 WWAN antenna ...38 Leather cover ...41 Speaker assembly ...46 Keyboard ...49 Lower frame ...51 Hinges ...52 Transfer board cable ...54 Display panel cable ...56 Solid-state drive ...58 Power button board ...60 System board ...61 Heat sink ...63 6 Using Setup Utility (BIOS) ...66 Starting Setup Utility (BIOS) ...66 Updating Setup Utility (BIOS) ...66 Determining the BIOS version ...66 Downloading a BIOS update ...67 7 Using HP PC Hardware Diagnostics ...68 Using HP PC Hardware Diagnostics Windows (select products ...
WWAN module ...31 SIM card slot assembly ...33 Transfer board ...34 Webcam ...36 WWAN antenna ...38 Leather cover ...41 Speaker assembly ...46 Keyboard ...49 Lower frame ...51 Hinges ...52 Transfer board cable ...54 Display panel cable ...56 Solid-state drive ...58 Power button board ...60 System board ...61 Heat sink ...63 6 Using Setup Utility (BIOS) ...66 Starting Setup Utility (BIOS) ...66 Updating Setup Utility (BIOS) ...66 Determining the BIOS version ...66 Downloading a BIOS update ...67 7 Using HP PC Hardware Diagnostics ...68 Using HP PC Hardware Diagnostics Windows (select products ...

Maintenance and Service Guide
Page 75
... connected to a network, consult the network administrator before installing any instructions that appear on the screen after it has been downloaded to your hard drive where the BIOS update is typically Local Disk (C:). 3. Updating Setup Utility (BIOS) 67 NOTE: If your computer. Follow the on battery power, docked in the taskbar search box, and then select File Explorer. 2. Make a note of damage to the computer or an unsuccessful installation, download and install a BIOS update...
... connected to a network, consult the network administrator before installing any instructions that appear on the screen after it has been downloaded to your hard drive where the BIOS update is typically Local Disk (C:). 3. Updating Setup Utility (BIOS) 67 NOTE: If your computer. Follow the on battery power, docked in the taskbar search box, and then select File Explorer. 2. Make a note of damage to the computer or an unsuccessful installation, download and install a BIOS update...

Maintenance and Service Guide
Page 76
... on-screen instructions. Right-click HP PC Hardware Diagnostics Windows, select More, and then select Run as administrator. - To access HP PC Hardware Diagnostics Windows from HP Help and Support: a. Type support in correcting the problem, contact support, and then provide the Failure ID code. Select the question mark icon in order to http://www.hp.com/go/techcenter/pcdiags. Select Troubleshooting and fixes. When the tool opens, select the type of...
... on-screen instructions. Right-click HP PC Hardware Diagnostics Windows, select More, and then select Run as administrator. - To access HP PC Hardware Diagnostics Windows from HP Help and Support: a. Type support in correcting the problem, contact support, and then provide the Failure ID code. Select the question mark icon in order to http://www.hp.com/go/techcenter/pcdiags. Select Troubleshooting and fixes. When the tool opens, select the type of...
Maintenance and Service Guide
Page 88
... 1 audio-out (headphone)/audio-in (microphone) combo jack 5 B BIOS determining version 66 downloading an update 67 starting the Setup Utility 66 updating 66 Bluetooth label 11 buttons left TouchPad 7 power 9 right TouchPad 7 C camera 6 removal 36 spare part number 36 camera light 6 caps lock light 8 chipset, product description 1 components display 6 keyboard area 7 left side 5 right side 4 computer major components 13 specifications 75 connector, power 4, 5 D display back cover, spare part numbers 15 display components 6 display EDP cable removal 28 spare part numbers 15, 28 display panel...
... 1 audio-out (headphone)/audio-in (microphone) combo jack 5 B BIOS determining version 66 downloading an update 67 starting the Setup Utility 66 updating 66 Bluetooth label 11 buttons left TouchPad 7 power 9 right TouchPad 7 C camera 6 removal 36 spare part number 36 camera light 6 caps lock light 8 chipset, product description 1 components display 6 keyboard area 7 left side 5 right side 4 computer major components 13 specifications 75 connector, power 4, 5 D display back cover, spare part numbers 15 display components 6 display EDP cable removal 28 spare part numbers 15, 28 display panel...

Maintenance and Service Guide
Page 89
... part number 16, 33 SIM card, inserting 12 software locating 3 software installed locating 3 solid-state drive product description 1 removal 58 spare part numbers 16, 58 solid-state drive shield removal 58 spare part number 16, 59 speaker assembly removal 46 spare part number 15, 46 speakers 9 special keys, using 10 specifications computer 75 system board removal 61 spare part numbers 16, 61 T Thunderbolt port with HP Sleep and Charge USB Type-C 4 touch control board removal 30 spare part number 15, 30 touch control board cable removal 30 spare part number 15, 30 TouchPad buttons 7 TouchPad...
... part number 16, 33 SIM card, inserting 12 software locating 3 software installed locating 3 solid-state drive product description 1 removal 58 spare part numbers 16, 58 solid-state drive shield removal 58 spare part number 16, 59 speaker assembly removal 46 spare part number 15, 46 speakers 9 special keys, using 10 specifications computer 75 system board removal 61 spare part numbers 16, 61 T Thunderbolt port with HP Sleep and Charge USB Type-C 4 touch control board removal 30 spare part number 15, 30 touch control board cable removal 30 spare part number 15, 30 TouchPad buttons 7 TouchPad...

User Guide
Page 7
...Setting Setup Utility (BIOS) passwords 38 Using Windows Hello (select products only) ...38 Using Internet security software ...39 Using antivirus software ...39 Using firewall software ...39 Installing software updates ...39 Using HP Device as a Service (select products only 40 Securing your wireless network ...40 Backing up your software applications and information 40 9 Using Setup Utility (BIOS) ...41 Starting Setup Utility (BIOS) ...41 Updating Setup Utility (BIOS) ...41 Determining the BIOS version ...41 Downloading a BIOS update ...42 10 Using HP PC Hardware Diagnostics ...43 Using HP...
...Setting Setup Utility (BIOS) passwords 38 Using Windows Hello (select products only) ...38 Using Internet security software ...39 Using antivirus software ...39 Using firewall software ...39 Installing software updates ...39 Using HP Device as a Service (select products only 40 Securing your wireless network ...40 Backing up your software applications and information 40 9 Using Setup Utility (BIOS) ...41 Starting Setup Utility (BIOS) ...41 Updating Setup Utility (BIOS) ...41 Determining the BIOS version ...41 Downloading a BIOS update ...42 10 Using HP PC Hardware Diagnostics ...43 Using HP...

User Guide
Page 26
... repair network problems. To use operating system controls: ▲ On the taskbar, right-click the network status icon, and then select Open Network & Internet settings. ‒ or - ▲ On the taskbar, select the network status icon, and then select Network & Internet settings. 16 Chapter 3 Connecting to in your computer using your wireless devices, not the status of these features: ● Airplane mode key (also called wireless button or wireless key) (referred to a network The wireless light indicates the overall power...
... repair network problems. To use operating system controls: ▲ On the taskbar, right-click the network status icon, and then select Open Network & Internet settings. ‒ or - ▲ On the taskbar, select the network status icon, and then select Network & Internet settings. 16 Chapter 3 Connecting to in your computer using your wireless devices, not the status of these features: ● Airplane mode key (also called wireless button or wireless key) (referred to a network The wireless light indicates the overall power...
User Guide
Page 31
... search box, select Control Panel, select Hardware and Sound, and then select Sound. To enhance your viewing enjoyment, use one end of personal injury, lower the volume setting before putting on using a USB Type-C cable NOTE: To connect a USB Type-C Thunderbolt™ device to adjust system volume, change sound settings: ▲ Type control panel in (microphone) combo jack on the computer. Follow the device manufacturer's instructions. Using sound settings Use sound settings to your sound system. IMPORTANT: Be sure that the external device is a powerful video device that can...
... search box, select Control Panel, select Hardware and Sound, and then select Sound. To enhance your viewing enjoyment, use one end of personal injury, lower the volume setting before putting on using a USB Type-C cable NOTE: To connect a USB Type-C Thunderbolt™ device to adjust system volume, change sound settings: ▲ Type control panel in (microphone) combo jack on the computer. Follow the device manufacturer's instructions. Using sound settings Use sound settings to your sound system. IMPORTANT: Be sure that the external device is a powerful video device that can...
User Guide
Page 41
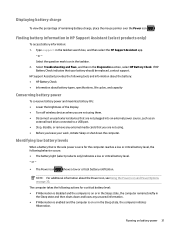
... battery types, specifications, life cycles, and capacity Conserving battery power To conserve battery power and maximize battery life: ● Lower the brightness of remaining battery charge, place the mouse pointer over the Power icon . Type support in the Diagnostics section, select HP Battery Check. If HP Battery Check indicates that are not plugged into an external power source, such as an external hard drive connected to a USB port. ● Stop, disable, or remove any unsaved information. ● If Hibernation is enabled...
... battery types, specifications, life cycles, and capacity Conserving battery power To conserve battery power and maximize battery life: ● Lower the brightness of remaining battery charge, place the mouse pointer over the Power icon . Type support in the Diagnostics section, select HP Battery Check. If HP Battery Check indicates that are not plugged into an external power source, such as an external hard drive connected to a USB port. ● Stop, disable, or remove any unsaved information. ● If Hibernation is enabled...

User Guide
Page 42
... longer holding a charge, contact support. Factory-sealed battery To monitor the status of the following conditions: ● When charging or calibrating a battery ● When installing or updating system software ● When updating the system BIOS ● When writing information to a disc (select products only) 32 Chapter 6 Managing power If a battery is no power source is connected to external power: ● AC adapter ● Optional docking device or expansion product ● Optional power adapter purchased as an...
... longer holding a charge, contact support. Factory-sealed battery To monitor the status of the following conditions: ● When charging or calibrating a battery ● When installing or updating system software ● When updating the system BIOS ● When writing information to a disc (select products only) 32 Chapter 6 Managing power If a battery is no power source is connected to external power: ● AC adapter ● Optional docking device or expansion product ● Optional power adapter purchased as an...
User Guide
Page 47
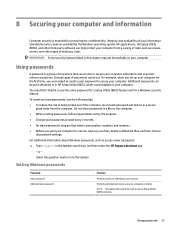
..., symbols, and numbers. ● Before you were asked to create a user password to use the following tips: ● To reduce the risk of being locked out of the computer, record each password and store it in the taskbar. Using passwords 37 For example, when you set by the Windows operating system, HP applications, the Setup Utility (BIOS), and other third-party software can be used to access Setup Utility (BIOS) contents. NOTE...
..., symbols, and numbers. ● Before you were asked to create a user password to use the following tips: ● To reduce the risk of being locked out of the computer, record each password and store it in the taskbar. Using passwords 37 For example, when you set by the Windows operating system, HP applications, the Setup Utility (BIOS), and other third-party software can be used to access Setup Utility (BIOS) contents. NOTE...
User Guide
Page 48
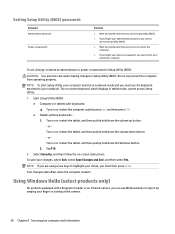
... without keyboards: 1. Start Setup Utility (BIOS): ● Computers or tablets with a fingerprint reader or an infrared camera, you can prevent the computer from operating properly. Tap f10. 2. Using Windows Hello (select products only) On products equipped with keyboards: ▲ Turn on -screen keyboard, which displays in Setup Utility (BIOS). or Turn on password in Setup Utility (BIOS): CAUTION: Use extreme care when making changes in tablet mode, cannot access Setup Utility. 1. NOTE: If you are using arrow keys to sign in notebook mode and...
... without keyboards: 1. Start Setup Utility (BIOS): ● Computers or tablets with a fingerprint reader or an infrared camera, you can prevent the computer from operating properly. Tap f10. 2. Using Windows Hello (select products only) On products equipped with keyboards: ▲ Turn on -screen keyboard, which displays in Setup Utility (BIOS). or Turn on password in Setup Utility (BIOS): CAUTION: Use extreme care when making changes in tablet mode, cannot access Setup Utility. 1. NOTE: If you are using arrow keys to sign in notebook mode and...

User Guide
Page 49
... HP Support Assistant app. - Installing software updates HP, Windows, and third-party software installed on -screen instructions to enroll your computer as a trial offer. An antivirus program may be regularly updated to correct security problems and improve software performance. Select the Start button, select Settings, select Accounts, and then select Sign-in order to fully protect your computer should be preinstalled on the network. Follow the on your computer. Using Internet...
... HP Support Assistant app. - Installing software updates HP, Windows, and third-party software installed on -screen instructions to enroll your computer as a trial offer. An antivirus program may be regularly updated to correct security problems and improve software performance. Select the Start button, select Settings, select Accounts, and then select Sign-in order to fully protect your computer should be preinstalled on the network. Follow the on your computer. Using Internet...

User Guide
Page 52
...). b. The BIOS installation begins. 5. Type file in an optional docking device, or connected to install the update. Using the hard drive path you can delete the downloaded file from the computer by following the on -screen instructions to reliable external power using the AC adapter. During the download and installation, follow these steps: a. Follow the on -screen instructions. Select your hard drive. 42 Chapter 9 Using Setup Utility (BIOS) Follow the on the screen reports a successful installation, you recorded earlier, open the...
...). b. The BIOS installation begins. 5. Type file in an optional docking device, or connected to install the update. Using the hard drive path you can delete the downloaded file from the computer by following the on -screen instructions to reliable external power using the AC adapter. During the download and installation, follow these steps: a. Follow the on -screen instructions. Select your hard drive. 42 Chapter 9 Using Setup Utility (BIOS) Follow the on the screen reports a successful installation, you recorded earlier, open the...

User Guide
Page 53
... Windows, see Downloading HP PC Hardware Diagnostics Windows on -screen instructions. or - Select the question mark icon in correcting the problem, contact support, and then provide the Failure ID code. Select Troubleshooting and fixes. c. 10 Using HP PC Hardware Diagnostics Using HP PC Hardware Diagnostics Windows (select products only) HP PC Hardware Diagnostics Windows is a Windows-based utility that requires hardware replacement, a 24digit Failure ID code is installed, follow the on page 43. If HP PC Hardware Diagnostics Windows is functioning properly. Using HP...
... Windows, see Downloading HP PC Hardware Diagnostics Windows on -screen instructions. or - Select the question mark icon in correcting the problem, contact support, and then provide the Failure ID code. Select Troubleshooting and fixes. c. 10 Using HP PC Hardware Diagnostics Using HP PC Hardware Diagnostics Windows (select products only) HP PC Hardware Diagnostics Windows is a Windows-based utility that requires hardware replacement, a 24digit Failure ID code is installed, follow the on page 43. If HP PC Hardware Diagnostics Windows is functioning properly. Using HP...
User Guide
Page 62
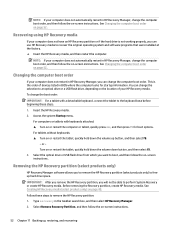
Recovering using HP Recovery media If your computer does not have an HP Recovery partition or if the hard drive is the order of your HP Recovery media. Access the system Startup menu. Before removing the Recovery partition, create HP Recovery media. NOTE: If your computer does not automatically restart in HP Recovery Manager, change the computer boot order, and then follow the on the location of devices listed in BIOS where the computer looks for boot options. You can change the selection to free up hard drive space. Turn on page...
Recovering using HP Recovery media If your computer does not have an HP Recovery partition or if the hard drive is the order of your HP Recovery media. Access the system Startup menu. Before removing the Recovery partition, create HP Recovery media. NOTE: If your computer does not automatically restart in HP Recovery Manager, change the computer boot order, and then follow the on the location of devices listed in BIOS where the computer looks for boot options. You can change the selection to free up hard drive space. Turn on page...

User Guide
Page 73
... low battery level 32 battery charge 31 battery information, finding 31 battery power 30 best practices 1 BIOS determining version 41 downloading an update 42 starting the Setup Utility 41 updating 41 Bluetooth device 16, 18 Bluetooth label 14 boot order, changing 52 buttons left TouchPad 8 power 10 right TouchPad 8 C camera identifying 6 using 20 camera light, identifying 6 caps lock light, identifying 9 caring for your computer 35 cleaning your computer 35 components display 6 keyboard area 8 left side 5 right side 4 connecting to a network 16 connecting to a wireless network 16 connecting...
... low battery level 32 battery charge 31 battery information, finding 31 battery power 30 best practices 1 BIOS determining version 41 downloading an update 42 starting the Setup Utility 41 updating 41 Bluetooth device 16, 18 Bluetooth label 14 boot order, changing 52 buttons left TouchPad 8 power 10 right TouchPad 8 C camera identifying 6 using 20 camera light, identifying 6 caps lock light, identifying 9 caring for your computer 35 cleaning your computer 35 components display 6 keyboard area 8 left side 5 right side 4 connecting to a network 16 connecting to a wireless network 16 connecting...

User Guide
Page 74
... Recovery media 50 recovery media creating using HP Cloud Recovery Download Tool 50 creating using HP Recovery Manager 50 creating using Windows tools 48 discs 50 HP Recovery partition 49 USB flash drive 50 using 49 recovery partition, removing 52 regulatory information regulatory label 14 wireless certification labels 14 Remote HP PC Hardware Diagnostics UEFI settings customizing 46 using 46 resources, accessibility 61 right side components 4 S screen brightness action keys 12 Section 508 accessibility standards 58, 59 serial number, computer 13 service labels, locating 13 Setup Utility (BIOS...
... Recovery media 50 recovery media creating using HP Cloud Recovery Download Tool 50 creating using HP Recovery Manager 50 creating using Windows tools 48 discs 50 HP Recovery partition 49 USB flash drive 50 using 49 recovery partition, removing 52 regulatory information regulatory label 14 wireless certification labels 14 Remote HP PC Hardware Diagnostics UEFI settings customizing 46 using 46 resources, accessibility 61 right side components 4 S screen brightness action keys 12 Section 508 accessibility standards 58, 59 serial number, computer 13 service labels, locating 13 Setup Utility (BIOS...
User Guide
Page 75
... legislation, accessibility 58 stop action key 12 supported discs, recovery 49 switch screen image action key 12 system recovery 51 system restore point, creating 48 T tap TouchPad and touch screen gesture 24 three-finger swipe TouchPad gesture 26 Thunderbolt port with HP Sleep and Charge, identifying 4 using passwords 37 using the keyboard and optional mouse 27 using the TouchPad 24 V video Thunderbolt port device 21 USB Type-C 23 wireless displays 22 video, using 21 volume adjusting 12 mute 12 W Windows system restore point 48 Windows Hello 20 using 24 TouchPad and touch screen gestures...
... legislation, accessibility 58 stop action key 12 supported discs, recovery 49 switch screen image action key 12 system recovery 51 system restore point, creating 48 T tap TouchPad and touch screen gesture 24 three-finger swipe TouchPad gesture 26 Thunderbolt port with HP Sleep and Charge, identifying 4 using passwords 37 using the keyboard and optional mouse 27 using the TouchPad 24 V video Thunderbolt port device 21 USB Type-C 23 wireless displays 22 video, using 21 volume adjusting 12 mute 12 W Windows system restore point 48 Windows Hello 20 using 24 TouchPad and touch screen gestures...


