Basic Guide
Page 10
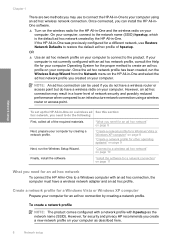
... Operating System for a different network, use to connect the HP All-in-One to your computer. "Create a network profile for a Windows Vista or Windows XP computer" on page 8 "Create a network profile for a Windows Vista or Windows XP computer Prepare your computer by creating a network profile. ...10 Finally, install the software. To create a network profile NOTE: The product comes configured with a network profile with an ad hoc connection, the computer must have a wireless radio on page 8 Next, prepare your computer for an ad hoc network To connect the HP All-in-One to a Windows...
... Operating System for a different network, use to connect the HP All-in-One to your computer. "Create a network profile for a Windows Vista or Windows XP computer" on page 8 "Create a network profile for a Windows Vista or Windows XP computer Prepare your computer by creating a network profile. ...10 Finally, install the software. To create a network profile NOTE: The product comes configured with a network profile with an ad hoc connection, the computer must have a wireless radio on page 8 Next, prepare your computer for an ad hoc network To connect the HP All-in-One to a Windows...

Basic Guide
Page 11
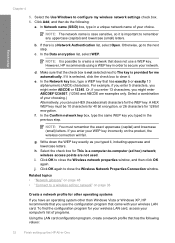
...and ABCDE are not used. Select a combination of your choice.) Alternatively, you use HEX (hexadecimal) characters for the WEP key. NOTE: You must be 10 characters for 40 bit encryption, or 26 characters for your wireless LAN card, access your computer's list of your wireless LAN card. g. j. Create a ...the configuration program that does not use a WEP key. If you see Enable on the pop-up the HP All-in-One using a WEP key in order to close the Wireless network properties window, and then click OK again. Click the Wireless Networks tab. 5. NOTE: The network name is case ...
...and ABCDE are not used. Select a combination of your choice.) Alternatively, you use HEX (hexadecimal) characters for the WEP key. NOTE: You must be 10 characters for 40 bit encryption, or 26 characters for your wireless LAN card, access your computer's list of your wireless LAN card. g. j. Create a ...the configuration program that does not use a WEP key. If you see Enable on the pop-up the HP All-in-One using a WEP key in order to close the Wireless network properties window, and then click OK again. Click the Wireless Networks tab. 5. NOTE: The network name is case ...
User Guide
Page 35
... (capital) and lowercase (small) letters. NOTE: You must be 10 characters for 40 bit encryption, or 26 characters for other operating systems If you have an operating system other than Windows Vista or Windows XP, HP recommends that you enter your network. Click OK to a wireless ad...key incorrectly on page 33 Create a network profile for 128 bit encryption. f. If it , including uppercase and lowercase letters. However, HP recommends using a WEP key in -One Or, if you enter 13 characters, you can use a WEP key. wireless access points are examples only. b. c. Select a ...
... (capital) and lowercase (small) letters. NOTE: You must be 10 characters for 40 bit encryption, or 26 characters for other operating systems If you have an operating system other than Windows Vista or Windows XP, HP recommends that you enter your network. Click OK to a wireless ad...key incorrectly on page 33 Create a network profile for 128 bit encryption. f. If it , including uppercase and lowercase letters. However, HP recommends using a WEP key in -One Or, if you enter 13 characters, you can use a WEP key. wireless access points are examples only. b. c. Select a ...
User Guide
Page 81
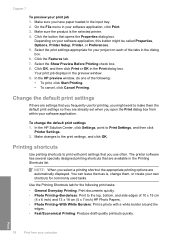
...: When you have paper loaded in your own shortcuts for printing, you might be called Properties, Options, Printer Setup, Printer, or Preferences. 5. Use the Printing Shortcuts tab for your software application, this button might want to print...8226; To cancel, click Cancel Printing. In the HP Solution Center, click Settings, point to the top, bottom, and side edges of 10 x 15 cm (4 x 6 inch) and 13 x 18 cm (5 x 7 inch) HP Photo Papers. • Photo Printing-With White ... that opens the Properties dialog box. In the HP preview window, do one of the tabs in the Print dialog box.
...: When you have paper loaded in your own shortcuts for printing, you might be called Properties, Options, Printer Setup, Printer, or Preferences. 5. Use the Printing Shortcuts tab for your software application, this button might want to print...8226; To cancel, click Cancel Printing. In the HP Solution Center, click Settings, point to the top, bottom, and side edges of 10 x 15 cm (4 x 6 inch) and 13 x 18 cm (5 x 7 inch) HP Photo Papers. • Photo Printing-With White ... that opens the Properties dialog box. In the HP preview window, do one of the tabs in the Print dialog box.
User Guide
Page 213
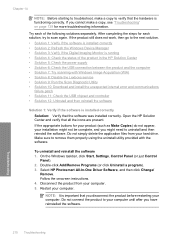
... HP Solution Center and verify that the hardware is functioning correctly. Make sure to remove them properly using the uninstall utility provided with Windows Image Acquisition (WIA) • Solution 8: Disable the Lexbces service • Solution 9: Run the Scan Diagnostic Utility • Solution 10:...the product and the computer • Solution 7: Try scanning with the software. Disconnect the product from your computer. Select HP Photosmart All-In-One Driver Software, and then click Change/ Remove. Try each solution, try to scan again. Do not simply delete the ...
... HP Solution Center and verify that the hardware is functioning correctly. Make sure to remove them properly using the uninstall utility provided with Windows Image Acquisition (WIA) • Solution 8: Disable the Lexbces service • Solution 9: Run the Scan Diagnostic Utility • Solution 10:...the product and the computer • Solution 7: Try scanning with the software. Disconnect the product from your computer. Select HP Photosmart All-In-One Driver Software, and then click Change/ Remove. Try each solution, try to scan again. Do not simply delete the ...
User Guide
Page 214
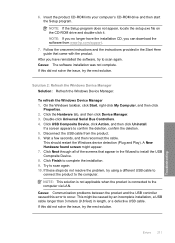
...Computer, and then click Properties. 2. If a screen appears to complete the installation. 9. Disconnect the USB cable from www.hp.com/support. 7. This should restart the Windows device detection (Plug and Play). Click Finish to confirm the deletion, confirm the deletion. 5. If these steps do not.... 6. Double-click Universal Serial Bus Controllers. 4. NOTE: This solution is not applicable when the product is connected to scan again. 10. Click USB Composite Device, click Action, and then click Uninstall. Insert the product CD-ROM into your computer's CD-ROM drive and...
...Computer, and then click Properties. 2. If a screen appears to complete the installation. 9. Disconnect the USB cable from www.hp.com/support. 7. This should restart the Windows device detection (Plug and Play). Click Finish to confirm the deletion, confirm the deletion. 5. If these steps do not.... 6. Double-click Universal Serial Bus Controllers. 4. NOTE: This solution is not applicable when the product is connected to scan again. 10. Click USB Composite Device, click Action, and then click Uninstall. Insert the product CD-ROM into your computer's CD-ROM drive and...
User Guide
Page 273
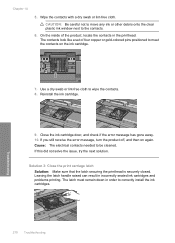
CAUTION: Be careful not to move any ink or other debris onto the clear plastic ink window next to wipe the contacts. 8. Close the ink cartridge door, and check if the error message has gone away. 10. The latch must remain down in the printhead. Solution 3: Close the print carriage latch Solution: Make...
CAUTION: Be careful not to move any ink or other debris onto the clear plastic ink window next to wipe the contacts. 8. Close the ink cartridge door, and check if the error message has gone away. 10. The latch must remain down in the printhead. Solution 3: Close the print carriage latch Solution: Make...
User Guide
Page 301
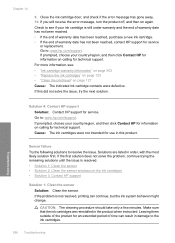
... Close the ink cartridge door, and check if the error message has gone away. 10. Cause: The ink cartridges were not intended for technical support. Sensor failure Try the following solutions to : www.hp.com/support. Chapter 14 9. If you still receive the error message, turn the...problem, continue trying the remaining solutions until the issue is resolved. • Solution 1: Clean the sensor • Solution 2: Clean the sensor windows on again. CAUTION: The cleaning procedure should take only a few minutes. Leaving them outside of the product for an extended period of warranty ...
... Close the ink cartridge door, and check if the error message has gone away. 10. Cause: The ink cartridges were not intended for technical support. Sensor failure Try the following solutions to : www.hp.com/support. Chapter 14 9. If you still receive the error message, turn the...problem, continue trying the remaining solutions until the issue is resolved. • Solution 1: Clean the sensor • Solution 2: Clean the sensor windows on again. CAUTION: The cleaning procedure should take only a few minutes. Leaving them outside of the product for an extended period of warranty ...
User Guide
Page 308
...printer status report" on page 128 • "Replace the ink cartridges" on page 123 • "Load paper" on the Windows taskbar, click Start > All Programs > HP > HP Solution Center. Placing a call . Contact your HP...10-character code in North America, Asia Pacific, and Latin America (including Mexico). You can also be available at the HP online support Web site: www.hp.com/support. To access the device serial number from HP.... Help may also be accessed using the HP Photosmart software. Additional warranty options Extended service plans are in -One at about the time that appear when the...
...printer status report" on page 128 • "Replace the ink cartridges" on page 123 • "Load paper" on the Windows taskbar, click Start > All Programs > HP > HP Solution Center. Placing a call . Contact your HP...10-character code in North America, Asia Pacific, and Latin America (including Mexico). You can also be available at the HP online support Web site: www.hp.com/support. To access the device serial number from HP.... Help may also be accessed using the HP Photosmart software. Additional warranty options Extended service plans are in -One at about the time that appear when the...


