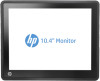
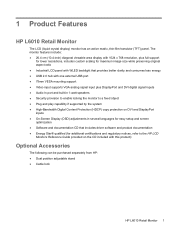
L6010 Retail Monitor Dual Position Stand Low-Mount Instructions and HIgh-Mount Instructions
Page 1
HP L6010 Retail Monitor Dual Position Stand Low-Mount Instructions Copyright © 2012 Hewlett-Packard Development Company, L.P. The information contained herein is subject to change without notice. Printed in *688918-B21* 688918-B21
L6010 Retail Monitor Dual Position Stand Low-Mount Instructions and HIgh-Mount Instructions
Page 2
HP L6010 Retail Monitor Dual Position Stand HIgh-Mount Instructions
Setup Poster
Page 1
Printed in xxxxx 75mm VESA support (dual position stand sold separately) First Edition May 2012 The information contained herein is subject to change without notice. HP L6010 Retail Monitor Optimal Resolution: 1024 x 768 @ 60 Hz 1 2 VGA DisplayPort OR 3 4 5 DVI OR 6 7 8 688915-B21 Copyright © 2012 Hewlett-Packard Development Company, L.P.
L6010 Retail Monitor User Guide
Page 2
Microsoft, Windows, and Windows Vista are set forth in the United States and/or other countries. First Edition (June 2012) Document Part Number: 688916-001 This document contains proprietary information that is protected by copyright. © 2012 Hewlett-Packard ...prior written consent of Hewlett-Packard Company. No part of Microsoft Corporation in the express warranty statements accompanying such products and services . HP shall not be liable for HP products and services are either trademarks or registered trademarks of this document may be construed as constituting...
L6010 Retail Monitor User Guide
Page 5
... Monitor Stand 12 Mounting the Monitor ...12 Connecting the Cables ...12 Installing a Cable Lock ...18 Locating the Rating Labels ...18 3 Operating the Monitor ...19 Front Panel Controls ...19 Power Management System ...20 OSD Lock/Unlock ...20 Power Button Lock/Unlock ...20 4 Locating Additional Information ...22 5 Technical Specifications ...23 HP L6010 Retail Monitor ...23 Recognizing Preset Display Resolutions 25 HP L6010 Retail Monitor ...25 Entering User Modes ...25 Energy Saver Feature ...26 v
L6010 Retail Monitor User Guide
Page 7
... provision to enable locking the monitor to a fixed object ● Plug and play capability if supported by the system ● High-Bandwidth Digital Content Protection (HDCP) copy protection on DVI and DisplayPort inputs ● On-Screen Display (OSD) adjustments in several languages for easy setup and screen optimization ● Software and documentation CD that includes driver software and product documentation...
L6010 Retail Monitor User Guide
Page 8
... USB devices to the monitor. 6 USB Upstream Connects a USB cable from HP (sold separately). The stand attaches to the monitor. Attaching an Optional Monitor Stand The optional monitor stand is turned off to the monitor, computer system, and other attached devices, then follow the instructions below. 2 Setting Up the Monitor To set up the monitor, ensure that the power...
L6010 Retail Monitor User Guide
Page 13
Place the rear cover on the back of the stand with the top of the cover slightly above the top of the stand then slide the cover down to the stand and remove the bracket. Remove the four Phillips screws that attach the mounting bracket to lock it in the High-Mount Position 1. Figure 2-10 Replacing the Rear Cover Attaching the Optional Monitor Stand in place. 8. Figure 2-11 Removing the Mounting Bracket Attaching an Optional Monitor Stand 7
L6010 Retail Monitor User Guide
Page 14
Rotate the mounting bracket 180°. Replace the four Phillips screws that attach the mounting bracket to the stand to secure the bracket to the stand. Figure 2-13 Attaching the Mounting Bracket 8 Chapter 2 Setting Up the Monitor Figure 2-12 Rotating the Mounting Bracket 180° 3. 2.
L6010 Retail Monitor User Guide
Page 18
...Attaching the Optional Monitor Stand in a convenient, well-ventilated location near the computer. 12 Chapter 2 Setting Up the Monitor Place the monitor in the High-Mount Position on page 7. 1. Remove the four screws from the VESA mounting holes on the monitor. Connecting the Cables NOTE: If the...rated to a wall, swing arm, or other mounting fixture. Connect the required cables to +35 degrees). Figure 2-20 Adjusting the Tilt Mounting the Monitor The monitor panel can be supported by UL or CSA Listed wall mount bracket. 1. For best performance, it is important to use the power...
L6010 Retail Monitor User Guide
Page 22
... disable the power cord grounding plug. Manufacturer: TPV ELECTRONICS(FUJIAN) CO., LTD model ADPC1236Figure 2-27 Connecting the Power Cord WARNING! Disconnect power from the equipment by unplugging the power cord from the electrical outlet, grasp the cord by the plug. 16 Chapter 2 Setting Up the Monitor Plug the power cord...accidentally step on or trip over them. The grounding plug is easily accessible at all times. Do not pull on power cords or cables. For use only with the attached power adapter (output 12V DC) which has a UL.CSA listed license (only for monitors with a power ...
L6010 Retail Monitor User Guide
Page 23
Figure 2-28 Replacing the Cable Connection Cover Plate 8. Figure 2-29 Pressing the Power Button Connecting the Cables 17 Turn on the computer, then press the power button on the underside of the monitor to power it on the rear of the monitor. 7. Replace the cable connection cover on .
L6010 Retail Monitor User Guide
Page 24
The rating labels are located on the monitor provide the spare part number, product number, and serial number. Installing a Cable Lock You can secure the monitor to a fixed object with an optional cable lock available from HP. You may need these numbers when contacting HP about the monitor model. Figure 2-30 Installing a Cable Lock Locating the Rating Labels The rating labels on the rear panel of the monitor display head. 18 Chapter 2 Setting Up the Monitor
L6010 Retail Monitor User Guide
Page 25
3 Operating the Monitor Front Panel Controls Figure 3-1 Monitor Front Panel Controls NOTE: The front panel controls are inactive unless they are located. All icons will turn off upon exit from the OSD or when the OSD times out. Table 3-1 Monitor Front Panel Controls Control Function 1 Menu Opens the On-Screen Display (OSD) main menu. 2 - (Minus) If the OSD menu...
L6010 Retail Monitor User Guide
Page 26
... HP Customer Self Repair Services Media Library at http://www.hp.com/go/sml. To lock the OSD menu and disable the OSD controls, tap on the keyboard or move the mouse. To unlock the OSD menu and enable the OSD controls, press the Menu icon again for 10 seconds. Flashing Amber = Sleep Timer mode. Power Button Lock/Unlock The power button can be locked and unlocked. Off = Power...
L6010 Retail Monitor User Guide
Page 27
To unlock the power button, press the power button again for 10 seconds. Unlocking the power button will power off the monitor. Power Button Lock/Unlock 21 To power it back on, press the power button. To lock the power button, press the power button for 10 seconds.
L6010 Retail Monitor User Guide
Page 28
... support ● Find support telephone numbers ● Locate an HP service center 22 Chapter 4 Locating Additional Information NOTE: The monitor user guide, reference guide, and drivers are available at http://www.hp.com/support for PC mode. For additional information on : ● Optimizing monitor performance ● Safety and maintenance guidelines ● Agency regulatory and environmental notices ● Using the OSD menu ● Downloading additional software...
L6010 Retail Monitor User Guide
Page 29
... and actual performance may vary either higher or lower. HP L6010 Retail Monitor Table 5-1 Specifications LCD Display Type Pixel Pitch Horizontal Frequency Vertical Frequency Maximum Resolution Aspect Ratio Contrast Ratio Brightness Response Time Color Gamut Viewing Angle (V/H at CR>10) Video Sources Front Controls OSD Main Menu Power Operating Conditions Temperature (Operating) Temperature (Storage) Humidity Altitude 26.4 cm TFT LCD...
L6010 Retail Monitor User Guide
Page 31
... set as it does a preset mode. The monitor automatically stores the new setting, then recognizes the new mode just as factory defaults. This monitor automatically recognized these modes and saved in memory. In addition to readjust the parameters of these preset modes and they will appear properly sized and centered on -screen display. Recognizing Preset Display Resolutions The display resolutions listed below are the most commonly used modes and are not using a preset mode...
L6010 Retail Monitor User Guide
Page 32
... these signals, the monitor screen is blanked, the backlight is turned off, and the power light is a brief warm up period before the monitor will utilize less than 1 watt of power. When the monitor is green. Refer to the computer manual for instructions on setting energy saver features (sometimes called power management features). The monitor also supports a reduced power state.