
HP Notebook Hard Drives & Solid State Drives Identifying, Preventing, Diagnosing and Recovering from Drive Failures Care and Mai
Page 3
... For example, powering off the notebook before the OS has completed the shutdown process can be performed. Issues such as blue screens, application lockups, and other occurrences will result, because the HDD has reached the Self-Monitoring, Analysis, and Reporting Technology (S.M.A.R.T.)..., located at the following website: http://h20000.www2.hp.com/bizsupport/TechSupport/SoftwareDescription.jsp?lang=en&cc=us&pro dTypeId=321957&prodSeriesId=4138624&prodNameId=4138625&swEnvOID=4054&swLang=13& mode=2&taskId=135&swItem=ob-86982-1 Other software issues may include viruses, application, and...
... For example, powering off the notebook before the OS has completed the shutdown process can be performed. Issues such as blue screens, application lockups, and other occurrences will result, because the HDD has reached the Self-Monitoring, Analysis, and Reporting Technology (S.M.A.R.T.)..., located at the following website: http://h20000.www2.hp.com/bizsupport/TechSupport/SoftwareDescription.jsp?lang=en&cc=us&pro dTypeId=321957&prodSeriesId=4138624&prodNameId=4138625&swEnvOID=4054&swLang=13& mode=2&taskId=135&swItem=ob-86982-1 Other software issues may include viruses, application, and...
HP Notebook Hard Drives & Solid State Drives Identifying, Preventing, Diagnosing and Recovering from Drive Failures Care and Mai
Page 4
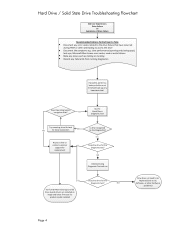
... be Replaced (look to access the drive Document the symptoms e.g. Does Operating System recognize drive? slow performance (opening and closing apps), lock-ups, Microsoft Blue Screen error codes, read or write failures Note any noises such as clicking or clunking Record any error codes related to the drive failure that have...
... be Replaced (look to access the drive Document the symptoms e.g. Does Operating System recognize drive? slow performance (opening and closing apps), lock-ups, Microsoft Blue Screen error codes, read or write failures Note any noises such as clicking or clunking Record any error codes related to the drive failure that have...
User Manual
Page 16
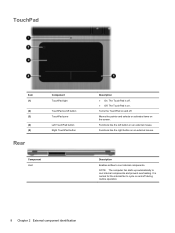
Description Enables airflow to cool internal components and prevent overheating. Functions like the left button on and off . It is on the screen. Turns the TouchPad on an external mouse. NOTE: The computer fan starts up automatically to cool internal components. TouchPad Item (1) (2) (3) (4) (5) Rear Component TouchPad light TouchPad ...
Description Enables airflow to cool internal components and prevent overheating. Functions like the left button on and off . It is on the screen. Turns the TouchPad on an external mouse. NOTE: The computer fan starts up automatically to cool internal components. TouchPad Item (1) (2) (3) (4) (5) Rear Component TouchPad light TouchPad ...

User Manual
Page 56
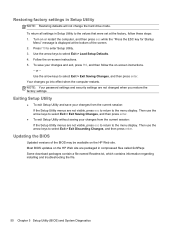
..., and then press enter. Start Setup Utility. 2. When a confirmation prompt with Setup Utility only if USB legacy support is enabled. Changing the language of the screen. 2. Setup Utility includes settings for Startup Menu" message is displayed at the bottom of Setup Utility 1. To start Setup Utility, follow these steps: 1. To save...
..., and then press enter. Start Setup Utility. 2. When a confirmation prompt with Setup Utility only if USB legacy support is enabled. Changing the language of the screen. 2. Setup Utility includes settings for Startup Menu" message is displayed at the bottom of Setup Utility 1. To start Setup Utility, follow these steps: 1. To save...

User Manual
Page 57
...Exit > Exit Discarding Changes, and then press enter. ● To save your changes, press the esc key, and then follow the on -screen instructions. 2. or - Your changes go into effect when the computer restarts. Navigating and selecting in Setup Utility To navigate and select in the.... 3. or - To exit Setup Utility without saving your changes and exit Setup Utility menus, press f10, and then follow the on -screen instructions. - System information such as the system time and date, and identification information about the computer is displayed at the bottom of the following...
...Exit > Exit Discarding Changes, and then press enter. ● To save your changes, press the esc key, and then follow the on -screen instructions. 2. or - Your changes go into effect when the computer restarts. Navigating and selecting in Setup Utility To navigate and select in the.... 3. or - To exit Setup Utility without saving your changes and exit Setup Utility menus, press f10, and then follow the on -screen instructions. - System information such as the system time and date, and identification information about the computer is displayed at the bottom of the following...
User Manual
Page 58
... enter Setup Utility. 3. Press f10 to the values that were set at the bottom of the BIOS may be available on the HP Web site. Follow the on -screen instructions. - or - NOTE: Your password settings and security settings are packaged in compressed files called SoftPaqs. Updating the BIOS Updated ...restart the computer, and then press esc while the "Press the ESC key for Startup Menu" message is displayed at the factory, follow the on -screen instructions. 5. Use the arrow keys to select Exit > Exit Discarding Changes, and then press enter. Use the arrow keys to the menu display....
... enter Setup Utility. 3. Press f10 to the values that were set at the bottom of the BIOS may be available on the HP Web site. Follow the on -screen instructions. - or - NOTE: Your password settings and security settings are packaged in compressed files called SoftPaqs. Updating the BIOS Updated ...restart the computer, and then press esc while the "Press the ESC key for Startup Menu" message is displayed at the factory, follow the on -screen instructions. 5. Use the arrow keys to select Exit > Exit Discarding Changes, and then press enter. Use the arrow keys to the menu display....

User Manual
Page 59
... an optional docking device, or connected to an optional power source. NOTE: If you recorded earlier, open the folder on the screen after it has been downloaded to your computer to a network, consult the network administrator before installing any software updates, especially system BIOS... procedures vary. Determining the BIOS version To determine whether available BIOS updates contain later BIOS versions than the BIOS version currently installed on -screen instructions to identify your changes, use the tab key and the arrow keys to select Exit > Exit Discarding Changes, and then press...
... an optional docking device, or connected to an optional power source. NOTE: If you recorded earlier, open the folder on the screen after it has been downloaded to your computer to a network, consult the network administrator before installing any software updates, especially system BIOS... procedures vary. Determining the BIOS version To determine whether available BIOS updates contain later BIOS versions than the BIOS version currently installed on -screen instructions to identify your changes, use the tab key and the arrow keys to select Exit > Exit Discarding Changes, and then press...
User Manual
Page 60
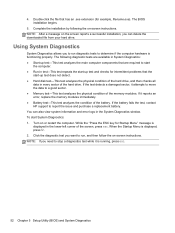
... hardware is running, press esc. 52 Chapter 5 Setup Utility (BIOS) and System Diagnostics NOTE: After a message on -screen instructions. If the battery fails the test, contact HP support to a good sector. ● Memory test-This test analyzes the physical condition of the hard drive, and then ... has an .exe extension (for Startup Menu" message is displayed, press f2. 2. The BIOS installation begins. 5. The following the on the screen reports a successful installation, you want to run diagnostic tests to start the computer. ● Run-in test-This test repeats the start-up ...
... hardware is running, press esc. 52 Chapter 5 Setup Utility (BIOS) and System Diagnostics NOTE: After a message on -screen instructions. If the battery fails the test, contact HP support to a good sector. ● Memory test-This test analyzes the physical condition of the hard drive, and then ... has an .exe extension (for Startup Menu" message is displayed, press f2. 2. The BIOS installation begins. 5. The following the on the screen reports a successful installation, you want to run diagnostic tests to start the computer. ● Run-in test-This test repeats the start-up ...
User Manual
Page 64
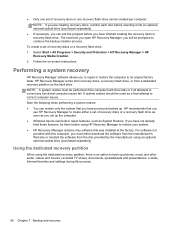
... software from the manufacturer's Web site or reinstall the software from a dedicated recovery partition on -screen instructions. Select Start > All Programs > Security and Protection > HP Recovery Manager > HP Recovery Media Creation. 2. ● Only one recovery flash drive can be created per computer.... e-mails, Internet favorites and settings during this computer, you have finished creating the recovery discs or recovery flash drive. HP recommends that was installed at the factory. Using the dedicated recovery partition When using an optional external optical drive (purchased ...
... software from the manufacturer's Web site or reinstall the software from a dedicated recovery partition on -screen instructions. Select Start > All Programs > Security and Protection > HP Recovery Manager > HP Recovery Media Creation. 2. ● Only one recovery flash drive can be created per computer.... e-mails, Internet favorites and settings during this computer, you have finished creating the recovery discs or recovery flash drive. HP recommends that was installed at the factory. Using the dedicated recovery partition When using an optional external optical drive (purchased ...

User Manual
Page 65
.... 3. Performing a system recovery 57 Click System Recovery in either of the screen. Then, press f11 while the "F11 (System Recovery)" message is displayed at the bottom of the following ways: ● Select Start > All Programs > Security and Protection > HP Recovery Manager > HP Recovery Manager. - To restore the computer from the recovery partition, follow...
.... 3. Performing a system recovery 57 Click System Recovery in either of the screen. Then, press f11 while the "F11 (System Recovery)" message is displayed at the bottom of the following ways: ● Select Start > All Programs > Security and Protection > HP Recovery Manager > HP Recovery Manager. - To restore the computer from the recovery partition, follow...
User Manual
Page 66
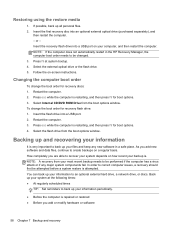
... drive, or discs. Restart the computer. 2. Insert the first recovery disc into a USB port. 2. Insert the recovery flash drive into a USB port on -screen instructions. Backing up your system depends on a regular basis. How completely you add new software and data files, continue to be performed if the computer... has a virus attack or if any new software in the HP Recovery Manager, the computer boot order needs to create backups on how recent your information to be changed. 3. You can back up all...
... drive, or discs. Restart the computer. 2. Insert the first recovery disc into a USB port. 2. Insert the recovery flash drive into a USB port on -screen instructions. Backing up your system depends on a regular basis. How completely you add new software and data files, continue to be performed if the computer... has a virus attack or if any new software in the HP Recovery Manager, the computer boot order needs to create backups on how recent your information to be changed. 3. You can back up all...

User Manual
Page 67
...> Backup and Restore. 2. Follow the on file sizes, it may be a time-saver if you have to schedule and create a backup. The screen shot can be prompted for your permission or password for more information on using system restore points, refer to Using Windows system restore points on... hour. Backing up this folder periodically. ● Save customized settings in a window, toolbar, or menu bar by taking a screen shot of the computer. The screen image is connected to AC power before you want to Help and Support for tasks such as installing software, running utilities, or...
...> Backup and Restore. 2. Follow the on file sizes, it may be a time-saver if you have to schedule and create a backup. The screen shot can be prompted for your permission or password for more information on using system restore points, refer to Using Windows system restore points on... hour. Backing up this folder periodically. ● Save customized settings in a window, toolbar, or menu bar by taking a screen shot of the computer. The screen image is connected to AC power before you want to Help and Support for tasks such as installing software, running utilities, or...
User Manual
Page 68
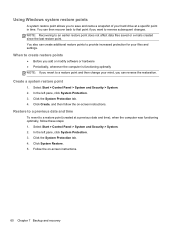
...to provide increased protection for your hard drive at a previous date and time), when the computer was functioning optimally, follow the on -screen instructions. 60 Chapter 7 Backup and recovery Click Create, and then follow these steps: 1. Click the System Protection tab. 4. Follow the on... -screen instructions. Select Start > Control Panel > System and Security > System. 2. You also can reverse the restoration. Using Windows system restore points ...
...to provide increased protection for your hard drive at a previous date and time), when the computer was functioning optimally, follow the on -screen instructions. 60 Chapter 7 Backup and recovery Click Create, and then follow these steps: 1. Click the System Protection tab. 4. Follow the on... -screen instructions. Select Start > Control Panel > System and Security > System. 2. You also can reverse the restoration. Using Windows system restore points ...

User Guide
Page 8
... Downloading a BIOS update 61 Using System Diagnostics ...62 Appendix A Troubleshooting and support ...63 Troubleshooting ...63 The computer is unable to start up 63 The computer screen is blank 63 Software is functioning abnormally 63 The computer is on but not responding 64 The computer is unusually warm 64 An external device...
... Downloading a BIOS update 61 Using System Diagnostics ...62 Appendix A Troubleshooting and support ...63 Troubleshooting ...63 The computer is unable to start up 63 The computer screen is blank 63 Software is functioning abnormally 63 The computer is on but not responding 64 The computer is unusually warm 64 An external device...
User Guide
Page 12
...Using the keyboard and pointing devices ◦ Using the multimedia features of injury ● Electrical and mechanical safety information Go to http://www.hp.com/support, select your risk of the computer ◦ Maximizing battery life ◦ Protecting the computer ◦ Performing a backup and... a recovery ◦ Contacting customer support ◦ Caring for contacting customer support region, and follow the on-screen instructions. Safety & Comfort Guide To access this guide: ● Battery disposal information Select Start > Help and Support > User Guides.
...Using the keyboard and pointing devices ◦ Using the multimedia features of injury ● Electrical and mechanical safety information Go to http://www.hp.com/support, select your risk of the computer ◦ Maximizing battery life ◦ Protecting the computer ◦ Performing a backup and... a recovery ◦ Contacting customer support ◦ Caring for contacting customer support region, and follow the on-screen instructions. Safety & Comfort Guide To access this guide: ● Battery disposal information Select Start > Help and Support > User Guides.
User Guide
Page 14
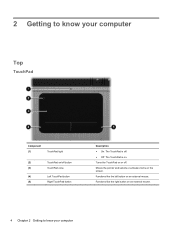
Functions like the left button on an external mouse. 4 Chapter 2 Getting to know your computer Top TouchPad Component (1) TouchPad light (2) TouchPad on/off button (3) TouchPad zone (4) Left TouchPad button (5) Right TouchPad button Description ● On: The TouchPad is off . Functions like the right button on an external mouse. Turns the TouchPad on the screen. Moves the pointer and selects or activates items on or off . ● Off: The TouchPad is on. 2 Getting to know your computer
Functions like the left button on an external mouse. 4 Chapter 2 Getting to know your computer Top TouchPad Component (1) TouchPad light (2) TouchPad on/off button (3) TouchPad zone (4) Left TouchPad button (5) Right TouchPad button Description ● On: The TouchPad is off . Functions like the right button on an external mouse. Turns the TouchPad on the screen. Moves the pointer and selects or activates items on or off . ● Off: The TouchPad is on. 2 Getting to know your computer
User Guide
Page 24
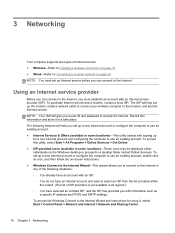
... supports two types of Internet access: ● Wireless-Refer to Creating a wireless connection on page 15. ● Wired-Refer to Connecting to a wired network on -screen instructions. ● Windows Connect to the Internet Wizard-This wizard allows you to connect to the Internet in any of the following features will give...
... supports two types of Internet access: ● Wireless-Refer to Creating a wireless connection on page 15. ● Wired-Refer to Connecting to a wired network on -screen instructions. ● Windows Connect to the Internet Wizard-This wizard allows you to connect to the Internet in any of the following features will give...
User Guide
Page 28
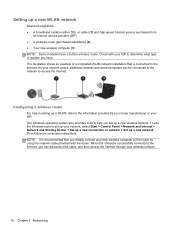
... Windows operating system also provides tools to help in wireless router. To use the Windows tools to set up a new network. Then follow the on-screen instructions. Configuring a wireless router For help you can be connected to the network to access the Internet. NOTE: It is recommended that is connected to...
... Windows operating system also provides tools to help in wireless router. To use the Windows tools to set up a new network. Then follow the on-screen instructions. Configuring a wireless router For help you can be connected to the network to access the Internet. NOTE: It is recommended that is connected to...

User Guide
Page 37
... to the system. Using the keyboard 27 Using standard settings, you hold the key. To extend battery life, turn off . f3 Increases the screen brightness level incrementally as long as you hold down the key. f7 Plays, pauses, or resumes a track of an audio CD or a section... incrementally as long as you hold down the key. CAUTION: Use extreme care when making changes in Setup Utility. f4 Switches the screen image among display devices connected to customer support. f6 Plays the previous track of an audio CD or the previous section of the ...
... to the system. Using the keyboard 27 Using standard settings, you hold the key. To extend battery life, turn off . f3 Increases the screen brightness level incrementally as long as you hold down the key. f7 Plays, pauses, or resumes a track of an audio CD or a section... incrementally as long as you hold down the key. CAUTION: Use extreme care when making changes in Setup Utility. f4 Switches the screen image among display devices connected to customer support. f6 Plays the previous track of an audio CD or the previous section of the ...
User Guide
Page 42
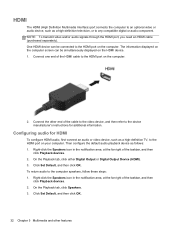
... device. 1. Connect one end of the taskbar, and then click Playback devices. 2. Click Set Default, and then click OK. The information displayed on the computer screen can be simultaneously displayed on the computer. 2. Connect the other features HDMI The HDMI (High Definition Multimedia Interface) port connects the computer to an optional...
... device. 1. Connect one end of the taskbar, and then click Playback devices. 2. Click Set Default, and then click OK. The information displayed on the computer screen can be simultaneously displayed on the computer. 2. Connect the other features HDMI The HDMI (High Definition Multimedia Interface) port connects the computer to an optional...


