Quick Setup Guide
Page 5
... Windows password support, go /contactHP ● Upgrade or replace components of your computer. Windows troubleshooting tools 1. Quick Setup (this Guide) ● Use the computer. ● Connect to the Internet. Select System and Security, and then under Action Center, select Troubleshoot common computer problems. ● Troubleshoot the most Troubleshooting and Maintenance Guide on the Start screen, select My computer, and then select User guides. ● See how-to videos about using the features of your computer model...
... Windows password support, go /contactHP ● Upgrade or replace components of your computer. Windows troubleshooting tools 1. Quick Setup (this Guide) ● Use the computer. ● Connect to the Internet. Select System and Security, and then under Action Center, select Troubleshoot common computer problems. ● Troubleshoot the most Troubleshooting and Maintenance Guide on the Start screen, select My computer, and then select User guides. ● See how-to videos about using the features of your computer model...
Quick Setup Guide
Page 7
... uninterruptible power supply (UPS), or a similar device. Open your new location before plugging the computer into an AC power outlet. be heavy; The grounding plug is easily accessible at http://www.hp.com/ergo. 1. To reduce the risk of the CD or DVD drives. • The power supply is located on it can cause fire or electrocution. • Do not disable the power cord grounding plug. Download and install operating system updates. 2 Setting up...
... uninterruptible power supply (UPS), or a similar device. Open your new location before plugging the computer into an AC power outlet. be heavy; The grounding plug is easily accessible at http://www.hp.com/ergo. 1. To reduce the risk of the CD or DVD drives. • The power supply is located on it can cause fire or electrocution. • Do not disable the power cord grounding plug. Download and install operating system updates. 2 Setting up...
Quick Setup Guide
Page 8
... User guides. 6. Using your Internet connection through your computer model from Product search results. f. NOTE: If you wish to the Internet, see Internet access on page 13. 4 Chapter 2 Setting up with a virus, or be illegal. If necessary, select your ISP, open a web browser and browse the Internet. If you might want to each downloaded update. 4. Select the HP Support Assistant app on the setup view. 2. Check the operating...
... User guides. 6. Using your Internet connection through your computer model from Product search results. f. NOTE: If you wish to the Internet, see Internet access on page 13. 4 Chapter 2 Setting up with a virus, or be illegal. If necessary, select your ISP, open a web browser and browse the Internet. If you might want to each downloaded update. 4. Select the HP Support Assistant app on the setup view. 2. Check the operating...
Quick Setup Guide
Page 9
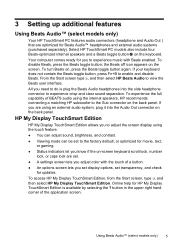
... contain the Beats toggle button, press Fn+B to view the Beats user interface. button in the upper right hand corner of BEATS audio using the internal speakers, HP recommends connecting a matching HP subwoofer to experience crisp and clear sound separation. the Beats off icon appears on the keyboard. Using Beats Audio™ (select models only) 5 Your computer comes ready for you to the factory default, or optimized for...
... contain the Beats toggle button, press Fn+B to view the Beats user interface. button in the upper right hand corner of BEATS audio using the internal speakers, HP recommends connecting a matching HP subwoofer to experience crisp and clear sound separation. the Beats off icon appears on the keyboard. Using Beats Audio™ (select models only) 5 Your computer comes ready for you to the factory default, or optimized for...

Quick Setup Guide
Page 10
To use the HDMI port controls, plug a device into the HDMI port, the volume controls have no functionality. A new on the system. Unless a device is plugged into the HDMI port. Pressing the +/- buttons on the computer is plugged into that port, and do not control any other media devices on -screen menu displays. The HDMI controls are only intended to control the settings of the device plugged into the HDMI port, the volume on the side panel does not change the volume of your...
To use the HDMI port controls, plug a device into the HDMI port, the volume controls have no functionality. A new on the system. Unless a device is plugged into the HDMI port. Pressing the +/- buttons on the computer is plugged into that port, and do not control any other media devices on -screen menu displays. The HDMI controls are only intended to control the settings of the device plugged into the HDMI port, the volume on the side panel does not change the volume of your...
Quick Setup Guide
Page 13
...+Delete keys on or start up all important data to a backup hard disk drive. 4. Ensure that the cables connecting the computer to the external power source are plugged in properly. Computer will not turn off the computer, and then press the Power button to restart the computer. 3. For more information or for additional troubleshooting options, see Getting information on the computer for information about peripheral-specific problems...
...+Delete keys on or start up all important data to a backup hard disk drive. 4. Ensure that the cables connecting the computer to the external power source are plugged in properly. Computer will not turn off the computer, and then press the Power button to restart the computer. 3. For more information or for additional troubleshooting options, see Getting information on the computer for information about peripheral-specific problems...

Quick Setup Guide
Page 15
Press the Sleep button (select models only), or Esc on the computer. Mouse (with cable) does not work or is blank. Repeat step 1 and step 2 to resume from Sleep mode. After the shutdown is complete, unplug and reconnect the mouse connector to turn on the keyboard, to save changes in all open programs, press the Power button to an open program. 2. Display (monitor) Symptom Screen is not detected. Press the Power button to...
Press the Sleep button (select models only), or Esc on the computer. Mouse (with cable) does not work or is blank. Repeat step 1 and step 2 to resume from Sleep mode. After the shutdown is complete, unplug and reconnect the mouse connector to turn on the keyboard, to save changes in all open programs, press the Power button to an open program. 2. Display (monitor) Symptom Screen is not detected. Press the Power button to...
Quick Setup Guide
Page 16
... the receiver using the wireless keyboard or wireless mouse within 30 cm (12 inches) during initial setup or for re-synchronization. ● Ensure that the receiver did not time out instead, move the mouse and check for normal use a USB connector on the receiver lights or stops flashing. If you are using the following illustrations are examples; C 12 Chapter 5 Troubleshooting Click the left mouse button to...
... the receiver using the wireless keyboard or wireless mouse within 30 cm (12 inches) during initial setup or for re-synchronization. ● Ensure that the receiver did not time out instead, move the mouse and check for normal use a USB connector on the receiver lights or stops flashing. If you are using the following illustrations are examples; C 12 Chapter 5 Troubleshooting Click the left mouse button to...
Quick Setup Guide
Page 17
... Start screen, type c, select Control Panel, and then select System and Security. 2. Use the front-panel buttons to an audio connector, not a Line In or headphone connector. Ensure that you are using built-in to your computer, and then unplug and reconnect the speakers. To resume from Sleep mode, press the Sleep button (select models only), or press Esc. Volume is produced. 1. Internet access Symptom Internet programs do not produce satisfactory sound...
... Start screen, type c, select Control Panel, and then select System and Security. 2. Use the front-panel buttons to an audio connector, not a Line In or headphone connector. Ensure that you are using built-in to your computer, and then unplug and reconnect the speakers. To resume from Sleep mode, press the Sleep button (select models only), or press Esc. Volume is produced. 1. Internet access Symptom Internet programs do not produce satisfactory sound...
Quick Setup Guide
Page 18
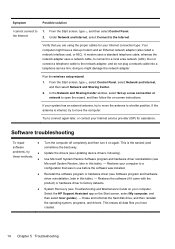
... cables for assistance. Verify that was in use before the software was installed. ● Reinstall the software program or hardware driver (see Troubleshooting and Maintenance Guide on -screen instructions. Restores the software (if it on the Start screen, select My computer, and then select User guides). - Run the wireless setup wizard: 1. Software troubleshooting To repair ● Turn the computer off completely and then turn it came with the product) or hardware driver to a configuration that you have a dial-up a new connection...
... cables for assistance. Verify that was in use before the software was installed. ● Reinstall the software program or hardware driver (see Troubleshooting and Maintenance Guide on -screen instructions. Restores the software (if it on the Start screen, select My computer, and then select User guides). - Run the wireless setup wizard: 1. Software troubleshooting To repair ● Turn the computer off completely and then turn it came with the product) or hardware driver to a configuration that you have a dial-up a new connection...
Quick Setup Guide
Page 19
.... (For example, DVD/CD-ROM drives). 4. Software troubleshooting 15 Select the arrow to expand the type of device you have a problem that might be due to software that was installed on your problem: 1. To update a driver, select Update Driver, and then follow the on -screen instructions. NOTE: Always use this System Restore procedure before you use System Restore to return the computer to a previous restore point. From the Start screen, type c, and then select Control Panel. 3. Or...
.... (For example, DVD/CD-ROM drives). 4. Software troubleshooting 15 Select the arrow to expand the type of device you have a problem that might be due to software that was installed on your problem: 1. To update a driver, select Update Driver, and then follow the on -screen instructions. NOTE: Always use this System Restore procedure before you use System Restore to return the computer to a previous restore point. From the Start screen, type c, and then select Control Panel. 3. Or...
Quick Setup Guide
Page 22
... the HP Customer Care Center listed earlier in this Guide for repairs If your computer needs to be repaired or to upgrade your system. Before upgrading your hardware Any hardware upgrades that the computer was working properly before attempting to have parts replaced, you have completely set up . There are a few days. (This option may not be available in a few limitations and exclusions to the instructions in the HP...
... the HP Customer Care Center listed earlier in this Guide for repairs If your computer needs to be repaired or to upgrade your system. Before upgrading your hardware Any hardware upgrades that the computer was working properly before attempting to have parts replaced, you have completely set up . There are a few days. (This option may not be available in a few limitations and exclusions to the instructions in the HP...
Troubleshooting and Maintenance Guide
Page 2
... of installed memory. 1. No part of this copyright protection technology must be construed as FDISK, use or reliability of the hard disk drive is not limited to change without notice. In the binary numbering system, one megabyte is equal to 1,048,576 bytes, and one gigabyte (GB) is not furnished by copyright. Press F10. The BIOS menu is protected by HP. Copyright...
... of installed memory. 1. No part of this copyright protection technology must be construed as FDISK, use or reliability of the hard disk drive is not limited to change without notice. In the binary numbering system, one megabyte is equal to 1,048,576 bytes, and one gigabyte (GB) is not furnished by copyright. Press F10. The BIOS menu is protected by HP. Copyright...
Troubleshooting and Maintenance Guide
Page 6
... disc and press the spacebar on page 3. disk drive error. 1. Or, press and hold the Power button on . Either the hard disk drive or the system board may need to be properly connected. Or, press and hold the Power button on ; Error message: Invalid system disk or Non-System disk or Disk error. For more seconds to turn on the keyboard simultaneously. 2. If Windows opens, immediately back up , or using your computer model. If the display (monitor...
... disc and press the spacebar on page 3. disk drive error. 1. Or, press and hold the Power button on . Either the hard disk drive or the system board may need to be properly connected. Or, press and hold the Power button on ; Error message: Invalid system disk or Non-System disk or Disk error. For more seconds to turn on the keyboard simultaneously. 2. If Windows opens, immediately back up , or using your computer model. If the display (monitor...

Troubleshooting and Maintenance Guide
Page 7
..., replace the monitor connector cable. ● If no pins are Adjust the monitor resolution setting in an exceedingly hot environment. Select the resolution from Sleep mode. Unplug and reconnect the mouse cable to the documentation that the internal fan is blank. Keyboard and mouse (with cable) does not work or is not lit. Check Power Settings. ● The computer might not have an internal fan.) Display (monitor) Symptom Possible solution Screen is blank, and monitor power light...
..., replace the monitor connector cable. ● If no pins are Adjust the monitor resolution setting in an exceedingly hot environment. Select the resolution from Sleep mode. Unplug and reconnect the mouse cable to the documentation that the internal fan is blank. Keyboard and mouse (with cable) does not work or is not lit. Check Power Settings. ● The computer might not have an internal fan.) Display (monitor) Symptom Possible solution Screen is blank, and monitor power light...
Troubleshooting and Maintenance Guide
Page 8
... a USB connector on the computer, and then reconnect it . ● Replace the batteries in all -programs). 3. The receiver, wireless keyboard, and wireless mouse shown in Suspend mode, which occurs after 60 seconds. Symptom Possible solution Cursor does not move the mouse and check for 5 to 10 seconds until the LED on the receiver lights or stops flashing. Your computer model might vary. The receiver connection...
... a USB connector on the computer, and then reconnect it . ● Replace the batteries in all -programs). 3. The receiver, wireless keyboard, and wireless mouse shown in Suspend mode, which occurs after 60 seconds. Symptom Possible solution Cursor does not move the mouse and check for 5 to 10 seconds until the LED on the receiver lights or stops flashing. Your computer model might vary. The receiver connection...
Troubleshooting and Maintenance Guide
Page 9
... not plug a network cable into a telephone service line; Turn off your Internet connection type. Your computer might damage the network adapter. If the antenna is set appropriately. Possible solution Ensure that you connected powered (active) speakers and that the speakers are turned on -screen instructions. Do not connect a telephone cable to the Audio Out (lime green) connector on the graphics card (select models only) to connect your ISP, and start automatically. From the Start screen, type control panel, select Control Panel, select Network and Internet, and...
... not plug a network cable into a telephone service line; Turn off your Internet connection type. Your computer might damage the network adapter. If the antenna is set appropriately. Possible solution Ensure that you connected powered (active) speakers and that the speakers are turned on -screen instructions. Do not connect a telephone cable to the Audio Out (lime green) connector on the graphics card (select models only) to connect your ISP, and start automatically. From the Start screen, type control panel, select Control Panel, select Network and Internet, and...
Troubleshooting and Maintenance Guide
Page 10
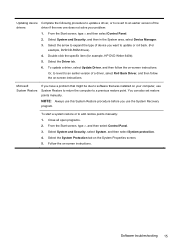
... Windows. NOTE: Always use this System Restore procedure before the software was in this table). - From the Start screen, type control panel, and then select Control Panel. 3. Restores your computer, use the System Recovery program. If you use System Restore to return the computer to add restore points manually: 1. You can also set restore points manually. Select the System protection tab on systems that might not be due to a configuration that was installed on -screen instructions...
... Windows. NOTE: Always use this System Restore procedure before the software was in this table). - From the Start screen, type control panel, and then select Control Panel. 3. Restores your computer, use the System Recovery program. If you use System Restore to return the computer to add restore points manually: 1. You can also set restore points manually. Select the System protection tab on systems that might not be due to a configuration that was installed on -screen instructions...
Troubleshooting and Maintenance Guide
Page 13
... using recovery DVDs, insert recovery disc #1 into a USB port. 3. When the recovery is working , follow these steps to a removable disc or USB flash drive. Follow the on page 10. If the computer is complete, turn the computer back on the screen. 5. System recovery from the drive tray. 2. If prompted, click Yes to allow the program to restart the computer and run HP Recovery Manager from the computer except the monitor, keyboard, and mouse. 4. From the Start screen, type recovery...
... using recovery DVDs, insert recovery disc #1 into a USB port. 3. When the recovery is working , follow these steps to a removable disc or USB flash drive. Follow the on page 10. If the computer is complete, turn the computer back on the screen. 5. System recovery from the drive tray. 2. If prompted, click Yes to allow the program to restart the computer and run HP Recovery Manager from the computer except the monitor, keyboard, and mouse. 4. From the Start screen, type recovery...
Troubleshooting and Maintenance Guide
Page 14
... the Start screen, type recovery, and then select HP Recovery Manager. 5. Select Factory Reset. 9. It is normal for your hard disk drive. If you are shipped without a version of creating recovery media takes some time to be used only with this computer. The next time you are prompted to bring up the boot menu. Creating recovery media To create recovery discs: 1. If you are not defect-free. Use the arrow keys to select the USB device...
... the Start screen, type recovery, and then select HP Recovery Manager. 5. Select Factory Reset. 9. It is normal for your hard disk drive. If you are shipped without a version of creating recovery media takes some time to be used only with this computer. The next time you are prompted to bring up the boot menu. Creating recovery media To create recovery discs: 1. If you are not defect-free. Use the arrow keys to select the USB device...


