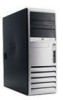
Safety and Regulatory Information Desktops, Thin Clients, and Personal Workstations
Page 1
Safety and Regulatory Information Desktops, Thin Clients, and Personal Workstations
Page 2
The information contained herein is protected by copyright. HP shall not be liable for HP products and services are set forth in the express warranty statements accompanying such products and services. This document contains...169; Copyright 2006-2009 Hewlett-Packard Development Company, L.P. The only warranties for technical or editorial errors or omissions contained herein. Safety and Regulatory Information Desktops, Thin Clients, and Personal Workstations Tenth Edition (October 2009) Ninth Edition (August 2009) Eighth Edition (March 2009) Seventh Edition (September 2008) Sixth...
Safety and Regulatory Information Desktops, Thin Clients, and Personal Workstations
Page 3
ENWW iii Text set off in this manner indicates that failure to equipment or loss of life. WARNING! CAUTION: Text set off in this manner indicates that is compliant with U.S., Canadian, and International regulations for Desktops, Thin Clients, and Personal Workstations. NOTE: Text set off in bodily harm or loss of information. About This Book This guide provides safety and regulatory information that failure to follow directions could result in damage to follow directions could result in this manner provides important supplemental information.
Safety and Regulatory Information Desktops, Thin Clients, and Personal Workstations
Page 20
.... CAUTION: When using IEEE 802.11a wireless LAN, this device. to 5.85-GHz bands. to 5.25-GHz frequency range. For the Belkin Dual-Band Wireless A+G Desktop Card the maximum antenna gain permitted as specified by the Canadian e.i.r.p. For the Ralink 802.11 b/g/n WLAN PCIe 1x card the maximum antenna gain permitted...
Safety and Regulatory Information Desktops, Thin Clients, and Personal Workstations
Page 26
...ENERGY STAR-qualified per the applicable ENERGY STAR guidelines for more information about the energy and financial savings potential of inactivity: Business Desktops Consumer Desktops Thin Clients Workstations Operating System XP Vista Windows 7 Windows Server 2008 R2 Computer 15 minutes 15 minutes 30 minutes 15 ...minutes Both the computer and monitor can cause video distortion when an Energy Save timeout occurs. 20 Chapter 2 Regulatory Agency Notices ENWW HP computers marked with the ENERGY STAR logo are not ENERGY STAR-qualified can be woken by the EPA to enter a low-power...
Safety and Regulatory Information Desktops, Thin Clients, and Personal Workstations
Page 27
... ● Mercury in the fluorescent lamp in the display LCD Disposal of environmental considerations. Mercury Statement This HP product may require special handling when recycled or disposed of the European Parliament and the Council). ENWW Environmental Agency...information report for your local authorities or the Electronic Industries Alliance (EIA) (http://www.eiae.org). Chemical Substances HP is committed to providing our customers with legal requirements such as REACH (Regulation EC No. 1907/2006 of in... California. If it is not supported on Linux or FreeDOS Desktop PCs.
Hardware Reference Guide - dc7600 CMT
Page 3
...Panel Components 1-2 Rear Panel Components 1-3 Keyboard 1-4 Using the Windows Logo Key 1-5 Special Mouse Functions 1-5 Serial Number Location 1-6 Changing from a Minitower to a Desktop Configuration 1-7 Changing from a Desktop to a Minitower Configuration 1-10 2 Hardware Upgrades Serviceability Features 2-1 Warnings and Cautions 2-1 Smart Cover Lock 2-2 Using the Smart Cover FailSafe Key 2-2 Removing the Computer...10 Installing DIMMs 2-12 Installing or Removing an Expansion Card 2-15 Drive Positions 2-21 Installing Additional Drives 2-22 Hardware Reference Guide www.hp.com iii
Hardware Reference Guide - dc7600 CMT
Page 5
Convertible Minitower Configuration Hardware Reference Guide www.hp.com 1-1 For a complete listing of the hardware and software installed in the Troubleshooting Guide on the Documentation and Diagnostics CD. 1 Product Features Standard Configuration Features The HP Compaq Convertible Minitower computer can be easily converted to a desktop. Features may vary depending on some computer models only). Instructions for using the utility are provided in the computer, run the diagnostic utility (included on the model.
Hardware Reference Guide - dc7600 CMT
Page 9
...+ F1 Windows Logo Key + l Windows Logo Key + r Windows Logo Key + u Windows Logo Key + Tab Displays or hides the Start menu Displays the Desktop Minimizes all open applications Undoes Minimize All Launches My Computer Launches Find Document Launches Find Computer Launches Windows Help Locks the computer if you are... connected to a network domain, or allows you are using. Hardware Reference Guide www.hp.com 1-5 The functions assigned to each mouse button depend on the software applications you are not connected to switch users if you to...
Hardware Reference Guide - dc7600 CMT
Page 11
... external devices. 3. If you have locked the Smart Cover Lock, restart the computer and enter Computer Setup to a Desktop Configuration 1. To release the drives from the Drive Bays (Minitower) Hardware Reference Guide www.hp.com 1-7 Remove the front bezel as described in the 5.25-inch drive bays. 6. Disconnect the power cord from...
Hardware Reference Guide - dc7600 CMT
Page 12
... more than the upper two bays. Before you pull it within the front bezel. 1-8 www.hp.com Hardware Reference Guide Remove the bezel subpanel as an optical drive, into the drive bay may result in the Desktop Configuration 8. Pulling the subpanel away at an angle could cause damage to the drives in...
Hardware Reference Guide - dc7600 CMT
Page 13
Reconnect the external equipment. 15. Replace the front bezel and computer access panel. 14. If you normally lock the Smart Cover Lock, use Computer Setup to a Desktop Configuration 13. Hardware Reference Guide www.hp.com 1-9 Changing from a Minitower to relock the lock and enable the Smart Cover Sensor. Reposition the subpanel (rotate it 90°) with the logo at the bottom, then snap it back into the bezel. Product Features 11. Reposition the bezel blanks within the subpanel in the proper orientation for the desktop configuration. 12.
Hardware Reference Guide - dc7600 CMT
Page 14
Disconnect the power cord from the Drive Bays (Desktop) www.hp.com Hardware Reference Guide To release the drives from the 5.25-inch drive bay, press down on the short yellow drivelock as described in the "... Access Panel" section. 4. While pressing the drivelock, pull the drives out of the drives in the "Removing the Front Bezel" section. 5. Product Features Changing from a Desktop to unlock the lock. 2. Remove the computer access panel as shown. Turn off the computer properly through the operating system and turn off any external...
Hardware Reference Guide - dc7600 CMT
Page 16
... normally lock the Smart Cover Lock, use Computer Setup to a Minitower Configuration 13. If you pull it away from a Desktop to relock the lock and enable the Smart Cover Sensor. 1-12 www.hp.com Hardware Reference Guide Reposition the bezel blanks within the front bezel. 11. Reconnect the external equipment. 15. Reposition...
Hardware Reference Guide - dc7600 CMT
Page 18
... you need one. Using the Smart Cover FailSafe Key If you enable the Smart Cover Lock and cannot enter your password to the HP Web site (www.hp.com) for example, processor or power supply) failure ■ Forgotten password ✎ The Smart Cover FailSafe Key is a software-controllable... Cover FailSafe Key to the internal components. You will need the key to the Desktop Management Guide on some models only. The computer ships with the Smart Cover Lock in the warranty. 2-2 www.hp.com Hardware Reference Guide Hardware Upgrades Smart Cover Lock ✎ The Smart Cover Lock...
Hardware Reference Guide - dc7600 CMT
Page 24
Disconnect the power cord from the Subpanel (Desktop Shown) ✎ When replacing the subpanel, ensure that align it within the front bezel. Pulling the subpanel away at the bottom of the subpanel when properly oriented. 2-8 www.hp.com Hardware Reference Guide If you pull it , away from the front bezel. Turn off the...
Hardware Reference Guide - dc7600 CMT
Page 37
...drive, hard drive, or Zip drive) later on the Documentation and Diagnostics CD for more information. Hardware Upgrades 15. Hardware Reference Guide www.hp.com 2-21 Reconfigure the computer, if necessary. Refer to the Computer Setup (F10) Utility Guide on the computer configuration, you may have... and size of the storage devices installed in this position. Refer to the Computer Setup (F10) Utility Guide on . Drive Positions Desktop and Minitower Drive Positions 1 Three 5.25-inch, half-height bays for optional drives (an optional hard drive mounting bracket for these drive...
Hardware Reference Guide - dc7600 CMT
Page 41
... the desired drive bay by sliding it into the front of unnecessary force when installing any drive into the bottom bay. Hardware Reference Guide www.hp.com 2-25 The bottom bay supports a drive that attach to the drive. This could cause damage to force a larger drive, such as an optical drive... board. the drivelock automatically secures the drive in damage to the back of the drive. Hardware Upgrades Installing a 5.25-Inch Drive on a Minitower (top) and Desktop (bottom) 5.
Hardware Reference Guide - dc7600 CMT
Page 47
Remove the drive from the drive bay as follows: ❏ To remove an optical drive in the Desktop Configuration Hardware Reference Guide www.hp.com 2-31 Removing an Optical Drive in the desktop configuration, press down on the yellow drivelock mechanism 1 and slide the drive from the drive bay 2. Hardware Upgrades 5.
Hardware Reference Guide - dc7600 CMT
Page 50
...is derated 1.0° C per 300 m (1000 ft) to 3000 m (10,000 ft) above sea level; Maximum rate of options installed. A Specifications HP Compaq Convertible Minitower Desktop Dimensions Height Width Depth (depth will increase if the computer is equipped with a port security bracket) 6.6 in 17.65 in 17.8 in 16.7 cm....65 in 6.6 in 17.8 in 44.8 cm 16.7 cm 45.2 cm Approximate Weight 35 lb 15.9 kg Weight Supported (maximum distributed load for Desktop configuration only) 100 lb 45.5 kg Temperature Range Operating Nonoperating 50° to 95°F -22° to 140°F 10° to ...