
User Manual
Page 3
To guarantee the CM200 always in this manual carefully and keep it for using CM200 Data Modem. With the CM200, you for further use. They might not be completely identical with your reference. 1 Introduction Thank you can easily: Access the Internet View the statistics Make and answer calls Use the call logs service Send and receive message Use the phonebook Features Technical Standard: CDMA2000 1X USB Interface Standard: USB 2.0 Full Speed Maximum Transmit Power: 24dBm The pictures, symbols and contents in its best condition, please read this manual are just for your CM200.
To guarantee the CM200 always in this manual carefully and keep it for using CM200 Data Modem. With the CM200, you for further use. They might not be completely identical with your reference. 1 Introduction Thank you can easily: Access the Internet View the statistics Make and answer calls Use the call logs service Send and receive message Use the phonebook Features Technical Standard: CDMA2000 1X USB Interface Standard: USB 2.0 Full Speed Maximum Transmit Power: 24dBm The pictures, symbols and contents in its best condition, please read this manual are just for your CM200.
User Manual
Page 4
Data Rate: 153.6kpbs Frequency Band: 800 MHz Dimensions: 89 28 10.5mm Weight: 22g Operating Temperature:0 to 55 Storage Temperature:-20 to 65 Operating Humidity:5 to 95 Storage Humidity:5 to 95 System requirements To use the CM200, the following requirements are recommended for your computer: CPU: Pentium4 1GHz or above Memory: 256MB or above Hard Disk: 50MB free disk space OS: Windows 2000/XP/Vista or Macintosh Operating System Interface: USB1.1 or above
Data Rate: 153.6kpbs Frequency Band: 800 MHz Dimensions: 89 28 10.5mm Weight: 22g Operating Temperature:0 to 55 Storage Temperature:-20 to 65 Operating Humidity:5 to 95 Storage Humidity:5 to 95 System requirements To use the CM200, the following requirements are recommended for your computer: CPU: Pentium4 1GHz or above Memory: 256MB or above Hard Disk: 50MB free disk space OS: Windows 2000/XP/Vista or Macintosh Operating System Interface: USB1.1 or above
User Manual
Page 5
... computer is described here, follow the specific installation instructions. Installation 1.Put the CM200 into the USB interface; 2.The setup program starts automatically, and the CM200 installation interface is displayed later. 3.Follow the instructions of the data modem may be affected. 2 Management Software Installation & Uninstalling The installation process is subject to different operating systems, such as Windows 2000, Windows XP, Windows Vista, Macintosh .During the actual installation, if any step differs from...
... computer is described here, follow the specific installation instructions. Installation 1.Put the CM200 into the USB interface; 2.The setup program starts automatically, and the CM200 installation interface is displayed later. 3.Follow the instructions of the data modem may be affected. 2 Management Software Installation & Uninstalling The installation process is subject to different operating systems, such as Windows 2000, Windows XP, Windows Vista, Macintosh .During the actual installation, if any step differs from...
User Manual
Page 6
... the installation of the CM200 Manager. You can try 3 times to enter your PIN code. Then, the functions related to the R-UIM card are prompted to enter PIN code, enter the correct one and click OK; 5.When the system prompts you failed to do that after 3 times, your R-UIM card would be used, if this happens, use the PUK code to unlock it. To start program, double-click the shortcut icon...
... the installation of the CM200 Manager. You can try 3 times to enter your PIN code. Then, the functions related to the R-UIM card are prompted to enter PIN code, enter the correct one and click OK; 5.When the system prompts you failed to do that after 3 times, your R-UIM card would be used, if this happens, use the PUK code to unlock it. To start program, double-click the shortcut icon...

User Manual
Page 7
However, you . Shortcut Icon Access the Connect interface not available for you can still make emergency calls. Exiting the CM200 Manager Click the button on the right corner on the interface. Instruction to the main interface The initial interface after the CM200 Manager starts is as follows.
However, you . Shortcut Icon Access the Connect interface not available for you can still make emergency calls. Exiting the CM200 Manager Click the button on the right corner on the interface. Instruction to the main interface The initial interface after the CM200 Manager starts is as follows.
User Manual
Page 8
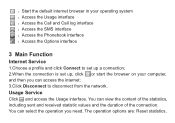
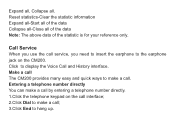
... need. Usage Service Click and access the Usage interface. The operation options are: Reset statistics, You can view the content of the statistics, including sent and received statistic values and the duration of the connection. Start the default internet browser in your operating system Access the Usage interface Access the Call and Call log interface Access the SMS interface Access the Phonebook interface Access the Options interface 3 Main Function Internet Service...
... need. Usage Service Click and access the Usage interface. The operation options are: Reset statistics, You can view the content of the statistics, including sent and received statistic values and the duration of the connection. Start the default internet browser in your operating system Access the Usage interface Access the Call and Call log interface Access the SMS interface Access the Phonebook interface Access the Options interface 3 Main Function Internet Service...
User Manual
Page 9
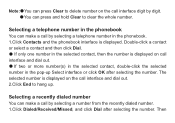
Make a call . Entering a telephone number directly You can make a call The CM200 provides many easy and quick ways to hang up. Click to the earphone jack on the call interface; 2.Click Dial to make a call; 3.Click End to make a call service, you need to insert the earphone to display the Voice Call and History interface. Expand all, Collapse all of the data Note: The above data of the data Collapse all-Close all . Reset statistics-Clear the...
Make a call . Entering a telephone number directly You can make a call The CM200 provides many easy and quick ways to hang up. Click to the earphone jack on the call interface; 2.Click Dial to make a call; 3.Click End to make a call service, you need to insert the earphone to display the Voice Call and History interface. Expand all, Collapse all of the data Note: The above data of the data Collapse all-Close all . Reset statistics-Clear the...
User Manual
Page 10
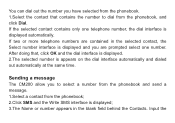
... Contacts and the phonebook interface is displayed. Then The selected number is displayed on the call interface digit by digit. You can press and hold Clear to delete number on call by selecting a number from the recently dialed number. 1.Click Dialed/Received/Missed, and click Dial after selecting the number. Selecting a recently dialed number You can make a call interface and dial out. If only one number in the phonebook You can make a call interface...
... Contacts and the phonebook interface is displayed. Then The selected number is displayed on the call interface digit by digit. You can press and hold Clear to delete number on call by selecting a number from the recently dialed number. 1.Click Dialed/Received/Missed, and click Dial after selecting the number. Selecting a recently dialed number You can make a call interface and dial out. If only one number in the phonebook You can make a call interface...
User Manual
Page 11
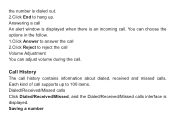
Call History The call . Answering a call An alert window is displayed when there is an incoming call history contains information about dialed, received and missed calls. Saving a number You can choose the options in the follow. 1.Click Answer to answer the call 2.Click Reject to 100 items. Dialed/Received/Missed calls Click Dialed/Received/Missed, and the Dialed/Received/Missed calls interface is displayed. Each kind of call . the number is dialed out. 2.Click End to hang up to reject the call Volume Adjustment You can adjust volume during the call supports up .
Call History The call . Answering a call An alert window is displayed when there is an incoming call history contains information about dialed, received and missed calls. Saving a number You can choose the options in the follow. 1.Click Answer to answer the call 2.Click Reject to 100 items. Dialed/Received/Missed calls Click Dialed/Received/Missed, and the Dialed/Received/Missed calls interface is displayed. Each kind of call . the number is dialed out. 2.Click End to hang up to reject the call Volume Adjustment You can adjust volume during the call supports up .

User Manual
Page 12
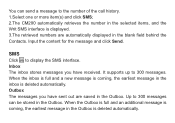
Sending a message Making a call You can delete one or more item(s) from the call history. 1.Select an item and click Dial; 2.The Dial interface is displayed, and the selected number appears automatically on the interface, and dialed out at the same time. Enter required relevant information for this contact. 5.Click OK to save ; 3.Click OK; 4.The New Contact interface is displayed. 1.Select an item and click Save; 2.The Select Position interface...
Sending a message Making a call You can delete one or more item(s) from the call history. 1.Select an item and click Dial; 2.The Dial interface is displayed, and the selected number appears automatically on the interface, and dialed out at the same time. Enter required relevant information for this contact. 5.Click OK to save ; 3.Click OK; 4.The New Contact interface is displayed. 1.Select an item and click Save; 2.The Select Position interface...
User Manual
Page 13
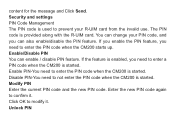
... the message and click Send. SMS Click to 300 messages. Outbox The messages you have sent out are automatically displayed in the blank field behind the Contacts. Inbox The inbox stores messages you have received. It supports up to display the SMS interface. Up to 300 messages can send a message to the number of the call history. 1.Select one or more item(s) and click SMS; 2.The CM200 automatically retrieves the number in...
... the message and click Send. SMS Click to 300 messages. Outbox The messages you have sent out are automatically displayed in the blank field behind the Contacts. Inbox The inbox stores messages you have received. It supports up to display the SMS interface. Up to 300 messages can send a message to the number of the call history. 1.Select one or more item(s) and click SMS; 2.The CM200 automatically retrieves the number in...

User Manual
Page 15
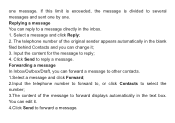
... message. Click Clear to send a message in the pop-up to send message. Select the number to clear the message content. 1.Click New and the Write SMS interface is sent as Select one or more than 160 characters, it is displayed; 2.Enter the telephone number(s) by semicolons To select a number from the Contacts: Click Contacts. After the message is sent successfully, it again. If the message is automatically saved to send...
... message. Click Clear to send a message in the pop-up to send message. Select the number to clear the message content. 1.Click New and the Write SMS interface is sent as Select one or more than 160 characters, it is displayed; 2.Enter the telephone number(s) by semicolons To select a number from the Contacts: Click Contacts. After the message is sent successfully, it again. If the message is automatically saved to send...
User Manual
Page 16
...; 2. The telephone number of the message to several messages and sent one by one message. You can edit it ; 3. Forwarding a message In Inbox/Outbox/Draft, you can forward a message to other contacts. 1.Select a message and click Forward; 2.Input the telephone number to forward to, or click Contacts to forward a message. Replying a message You can reply to a message directly in the blank filed behind Contacts and you can change it . 4.Click Send to select...
...; 2. The telephone number of the message to several messages and sent one by one message. You can edit it ; 3. Forwarding a message In Inbox/Outbox/Draft, you can forward a message to other contacts. 1.Select a message and click Forward; 2.Input the telephone number to forward to, or click Contacts to forward a message. Replying a message You can reply to a message directly in the blank filed behind Contacts and you can change it . 4.Click Send to select...
User Manual
Page 18
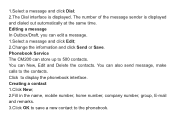
... the contacts. Phonebook Service The CM200 can edit a message. 1.Select a message and click Edit; 2.Change the information and click Send or Save. You can New, Edit and Delete the contacts. 1.Select a message and click Dial; 2.The Dial interface is displayed and dialed out automatically at the same time. You can also send message, make calls to 500 contacts. The number of the message sender is displayed. Click to the phonebook. Creating a contact 1.Click New; 2.Fill in the name, mobile number, home number, company number, group, E-mail...
... the contacts. Phonebook Service The CM200 can edit a message. 1.Select a message and click Edit; 2.Change the information and click Send or Save. You can New, Edit and Delete the contacts. 1.Select a message and click Dial; 2.The Dial interface is displayed and dialed out automatically at the same time. You can also send message, make calls to 500 contacts. The number of the message sender is displayed. Click to the phonebook. Creating a contact 1.Click New; 2.Fill in the name, mobile number, home number, company number, group, E-mail...
User Manual
Page 19
Searching a contact The CM200 provides the function of this group; 4.Click OK to confirm. Making a call Modifying a contact 1.Select a contact and click Edit; 2.Modify the contact; 3.Click OK to search. Grouping in the phonebook 1.Click Group; 2.Create or edit group; 3.Input the requited information of searching a contact in the phonebook. 1.Click Search; 2.Enter relevant searching terms in the value text box to save . Deleting a contact 1.Select one or more contact(s) from the phonebook and click Delete; 2.Click OK to save .
Searching a contact The CM200 provides the function of this group; 4.Click OK to confirm. Making a call Modifying a contact 1.Select a contact and click Edit; 2.Modify the contact; 3.Click OK to search. Grouping in the phonebook 1.Click Group; 2.Create or edit group; 3.Input the requited information of searching a contact in the phonebook. 1.Click Search; 2.Enter relevant searching terms in the value text box to save . Deleting a contact 1.Select one or more contact(s) from the phonebook and click Delete; 2.Click OK to save .
User Manual
Page 20
Sending a message The CM200 allow you to dial from the phonebook; 2.Click SMS and the Write SMS interface is displayed; 3.The Name or number appears in the selected contact, the Select number interface is appears on the dial interface automatically and dialed out automatically at the same time. After doing that contains the number to select a number from the phonebook and send a message. 1.Select a contact from the phonebook, and...
Sending a message The CM200 allow you to dial from the phonebook; 2.Click SMS and the Write SMS interface is displayed; 3.The Name or number appears in the selected contact, the Select number interface is appears on the dial interface automatically and dialed out automatically at the same time. After doing that contains the number to select a number from the phonebook and send a message. 1.Select a contact from the phonebook, and...
User Manual
Page 21
... CM200 is enabled, you need to modify it . If the feature is started . Unlock PIN content for the message and Click Send. Click OK to not enter the PIN code when the CM200 is started. The PIN code is used to confirm it . Disable PIN-You need to enter a PIN code when the CM200 is started . Enter the new PIN code again to prevent your PIN code, and you can enable / disable PIN feature. Security and settings PIN Code Management The PIN code is provided along with the R-UIM card...
... CM200 is enabled, you need to modify it . If the feature is started . Unlock PIN content for the message and Click Send. Click OK to not enter the PIN code when the CM200 is started. The PIN code is used to confirm it . Disable PIN-You need to enter a PIN code when the CM200 is started . Enter the new PIN code again to prevent your PIN code, and you can enable / disable PIN feature. Security and settings PIN Code Management The PIN code is provided along with the R-UIM card...
User Manual
Page 22
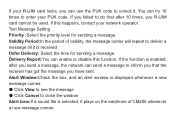
... CM200 whenever a new message comes. Defer Delivery: Select the time for sending a message. Alert Window:Check the box, and an alert window is enabled, after 10 times, you R-UIM card cannot be used. Delivery Report:You can try 10 times to enter your PUK code. If this function. Click View to see the message Click Cancel to close the window Alert tone:If a sound file is selected, it is received. You can enable or disable...
... CM200 whenever a new message comes. Defer Delivery: Select the time for sending a message. Alert Window:Check the box, and an alert window is enabled, after 10 times, you R-UIM card cannot be used. Delivery Report:You can try 10 times to enter your PUK code. If this function. Click View to see the message Click Cancel to close the window Alert tone:If a sound file is selected, it is received. You can enable or disable...
User Manual
Page 23
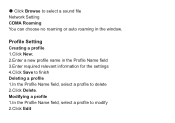
Modifying a profile 1.In the Profile Name field, select a profile to delete 2.Click Delete. Profile Setting Creating a profile 1.Click New; 2.Enter a new profile name in the window. Click Browse to select a sound file Network Setting CDMA Roaming You can choose no roaming or auto roaming in the Profile Name field 3.Enter required relevant information for the settings 4.Click Save to finish Deleting a profile 1.In the Profile Name field, select a profile to modify 2.Click Edit
Modifying a profile 1.In the Profile Name field, select a profile to delete 2.Click Delete. Profile Setting Creating a profile 1.Click New; 2.Enter a new profile name in the window. Click Browse to select a sound file Network Setting CDMA Roaming You can choose no roaming or auto roaming in the Profile Name field 3.Enter required relevant information for the settings 4.Click Save to finish Deleting a profile 1.In the Profile Name field, select a profile to modify 2.Click Edit
User Manual
Page 24
The default password is used. Standby / Hibernate Setting You can set CM200 Manager to connect internet when program starts up and Start main window minimized. Diagnostics The CM200 allows you to enter the password when the feature of usage limit is blank. 1.Enter required relevant information for the CM200 and the R-UIM card. 3.Modify the profile 4.Click Save. Preference Setting Start Up Setting You can set the CM200 Manager to prevent or allow standby / hibernate. Usage Limit You need to query information for the settings. 2.Click Save.
The default password is used. Standby / Hibernate Setting You can set CM200 Manager to connect internet when program starts up and Start main window minimized. Diagnostics The CM200 allows you to enter the password when the feature of usage limit is blank. 1.Enter required relevant information for the CM200 and the R-UIM card. 3.Modify the profile 4.Click Save. Preference Setting Start Up Setting You can set the CM200 Manager to prevent or allow standby / hibernate. Usage Limit You need to query information for the settings. 2.Click Save.


