
Manual
Page 3
...). Make sure the Onboard H/W RAID item is set this option to make sure whether the VT6410 IDE controller are configured correctly in BIOS Setup You have to Disabled, the VT6410 IDE controller will be disabled and will not support any devices. Step 1: Turn on your...Enabled] [Disabled] [Disabled] [3F8/IRQ4] [2F8/IRQ] Item Help Menu Level` KLJI: Move Enter: Select F5: Previous Values +/-/PU/PD: Value F10: Save F6: Fail-Safe Defaults ESC: Exit F1: General Help F7: Optimized Defaults Figure 1 - 3 - VIA VT6410 IDE RAID Drives Configuration To enable the VT6410 IDE controller, ...
...). Make sure the Onboard H/W RAID item is set this option to make sure whether the VT6410 IDE controller are configured correctly in BIOS Setup You have to Disabled, the VT6410 IDE controller will be disabled and will not support any devices. Step 1: Turn on your...Enabled] [Disabled] [Disabled] [3F8/IRQ4] [2F8/IRQ] Item Help Menu Level` KLJI: Move Enter: Select F5: Previous Values +/-/PU/PD: Value F10: Save F6: Fail-Safe Defaults ESC: Exit F1: General Help F7: Optimized Defaults Figure 1 - 3 - VIA VT6410 IDE RAID Drives Configuration To enable the VT6410 IDE controller, ...
Manual
Page 4
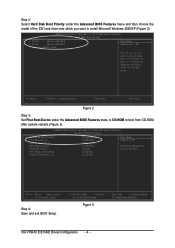
...Menu Level` Select Hard Disk Boot Device Priority KLJI: Move Enter: Select F5: Previous Values Step 4: Save and exit BIOS Setup. +/-/PU/PD: Value F10: Save F6: Fail-Safe Defaults Figure 3 ESC: Exit F1: General Help F7: Optimized Defaults VIA VT6410 IDE RAID Drives Configuration -... Software Hard Disk Boot Priority ¤å 1. SCSI-1 : Maxtor 6E030L0 3. CMOS Setup Utility-Copyright (C) 1984-2004 Award Software Advanced BIOS Features ` Hard Disk Boot Priority First Boot Device Second Boot Device Third Boot Device Password Check CPU Hyper-Threading Limit CPUID Max. SCSI-0...
...Menu Level` Select Hard Disk Boot Device Priority KLJI: Move Enter: Select F5: Previous Values Step 4: Save and exit BIOS Setup. +/-/PU/PD: Value F10: Save F6: Fail-Safe Defaults Figure 3 ESC: Exit F1: General Help F7: Optimized Defaults VIA VT6410 IDE RAID Drives Configuration -... Software Hard Disk Boot Priority ¤å 1. SCSI-1 : Maxtor 6E030L0 3. CMOS Setup Utility-Copyright (C) 1984-2004 Award Software Advanced BIOS Features ` Hard Disk Boot Priority First Boot Device Second Boot Device Third Boot Device Password Check CPU Hyper-Threading Limit CPUID Max. SCSI-0...

Manual
Page 12
... ENTER. Figure 18 Step 2: When a screen similar to that you have prepared a floppy disk with the IDE RAID driver and adjusted BIOS settings, you need to install Windows 2000/XP onto your motherboard. S=Specify Additional Device ENTER=Continue F3=Exit Figure 19 VIA VT6410 IDE RAID... party SCSI or RAID driver. This procedure ¤¤ assumes Windows XP installation. ¤å Step 1: Restart your motherboard. After pressing the F6 key, there will be a few moments of one or more mass storage devices installed in your system, or you see a message which you have...
... ENTER. Figure 18 Step 2: When a screen similar to that you have prepared a floppy disk with the IDE RAID driver and adjusted BIOS settings, you need to install Windows 2000/XP onto your motherboard. S=Specify Additional Device ENTER=Continue F3=Exit Figure 19 VIA VT6410 IDE RAID... party SCSI or RAID driver. This procedure ¤¤ assumes Windows XP installation. ¤å Step 1: Restart your motherboard. After pressing the F6 key, there will be a few moments of one or more mass storage devices installed in your system, or you see a message which you have...
Manual
Page 29
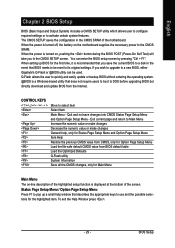
...Q-Flash allows the user to quickly and easily update or backup BIOS without entering the operating system. @BIOS is turned on the motherboard supplies the necessary power to a new BIOS, either Gigabyte's Q-Flash or @BIOS utility can enter the BIOS setup screen by pressing "Ctrl + F1". Exit current page and... into CMOS Status Page Setup Menu and Option Page Setup Menu - To exit the Help Window press . - 29 - English Chapter 2 BIOS Setup BIOS (Basic Input and Output System) includes a CMOS SETUP utility which allows user to configure required settings or to select item Select Item Main ...
...Q-Flash allows the user to quickly and easily update or backup BIOS without entering the operating system. @BIOS is turned on the motherboard supplies the necessary power to a new BIOS, either Gigabyte's Q-Flash or @BIOS utility can enter the BIOS setup screen by pressing "Ctrl + F1". Exit current page and... into CMOS Status Page Setup Menu and Option Page Setup Menu - To exit the Help Window press . - 29 - English Chapter 2 BIOS Setup BIOS (Basic Input and Output System) includes a CMOS SETUP utility which allows user to configure required settings or to select item Select Item Main ...
Manual
Page 32
...Number of heads Write precomp Landing Zone Landing zone Sector Number of three methods: Auto Allows BIOS to automatically detect IDE devices during POST(default) None Select this to 2098 ESC: Exit F1.../Auto(default:Auto) Hard drive information should be labeled on this option for faster system start up. GA-8I915G Duo Motherboard - 32 - Day The day, from 1 to 31 (or the maximum allowed in the month... Memory KLJI: Move Enter: Select F5: Previous Values 640K 127M 128M +/-/PU/PD: Value F6: Fail-Save Default F10: Save 1999 to set the access mode for the hard drive. ...
...Number of heads Write precomp Landing Zone Landing zone Sector Number of three methods: Auto Allows BIOS to automatically detect IDE devices during POST(default) None Select this to 2098 ESC: Exit F1.../Auto(default:Auto) Hard drive information should be labeled on this option for faster system start up. GA-8I915G Duo Motherboard - 32 - Day The day, from 1 to 31 (or the maximum allowed in the month... Memory KLJI: Move Enter: Select F5: Previous Values 640K 127M 128M +/-/PU/PD: Value F6: Fail-Save Default F10: Save 1999 to set the access mode for the hard drive. ...

Manual
Page 34
... F10: Save F6: Fail-Save Default ESC: Exit F1: General Help F7: Optimized Defaults " # " System will show up , or to exit this function. USB-FDD Select your boot device priority by USB-HDD. USB-HDD Select your boot device priority by Hard Disk. GA-8I915G Duo Motherboard - 34... Priority Select boot sequence for onboard(or add-on cards) SCSI, RAID, etc. English 2-2 Advanced BIOS Features CMOS Setup Utility-Copyright (C) 1984-2004 Award Software Advanced BIOS Features ` Hard Disk Boot Priority First Boot Device Second Boot Device Third Boot Device Password Check # CPU...
... F10: Save F6: Fail-Save Default ESC: Exit F1: General Help F7: Optimized Defaults " # " System will show up , or to exit this function. USB-FDD Select your boot device priority by USB-HDD. USB-HDD Select your boot device priority by Hard Disk. GA-8I915G Duo Motherboard - 34... Priority Select boot sequence for onboard(or add-on cards) SCSI, RAID, etc. English 2-2 Advanced BIOS Features CMOS Setup Utility-Copyright (C) 1984-2004 Award Software Advanced BIOS Features ` Hard Disk Boot Priority First Boot Device Second Boot Device Third Boot Device Password Check # CPU...

Manual
Page 39
...enabled and key in Date/time to power on the system. - 39 - Enabled Enable Power on PS/2 mouse left button to Power off. BIOS Setup Disabled Enabled Disable this function. If RTC Alarm Lead To Power On is pressed less than 4 sec. Enter suspend if button is Enabled. ...] [Disabled] Everyday 0 : 0 : 0 [Disabled] [Disabled] Enter [Soft-Off] Item Help Menu Level` KLJI: Move Enter: Select F5: Previous Values +/-/PU/PD: Value F10: Save F6: Fail-Save Default ESC: Exit F1: General Help F7: Optimized Defaults ACPI Suspend Type S1(POS) S3(STR) Set ACPI suspend type to S1/POS...
...enabled and key in Date/time to power on the system. - 39 - Enabled Enable Power on PS/2 mouse left button to Power off. BIOS Setup Disabled Enabled Disable this function. If RTC Alarm Lead To Power On is pressed less than 4 sec. Enter suspend if button is Enabled. ...] [Disabled] Everyday 0 : 0 : 0 [Disabled] [Disabled] Enter [Soft-Off] Item Help Menu Level` KLJI: Move Enter: Select F5: Previous Values +/-/PU/PD: Value F10: Save F6: Fail-Save Default ESC: Exit F1: General Help F7: Optimized Defaults ACPI Suspend Type S1(POS) S3(STR) Set ACPI suspend type to S1/POS...

Manual
Page 41
Auto assign IRQ to PCI 2. (Default value) Set IRQ 3,4,5,7,9,10,11,12,14,15 to PCI 1. BIOS Setup English 2-5 PnP/PCI Configurations CMOS Setup Utility-Copyright (C) 1984-2004 Award Software PnP/PCI Configurations PCI 1 IRQ Assignment PCI 2 IRQ Assignment PCI 3 IRQ ...Assignment [Auto] [Auto] [Auto] Item Help Menu Level` KLJI: Move Enter: Select F5: Previous Values +/-/PU/PD: Value F10: Save F6: Fail-Save Default ESC: Exit F1: General Help F7: Optimized Defaults PCI 1 IRQ Assignment Auto 3,4,5,7,9,10,11,12,14,15 PCI 2 IRQ Assignment Auto 3,4,5,7,9,10...
Auto assign IRQ to PCI 2. (Default value) Set IRQ 3,4,5,7,9,10,11,12,14,15 to PCI 1. BIOS Setup English 2-5 PnP/PCI Configurations CMOS Setup Utility-Copyright (C) 1984-2004 Award Software PnP/PCI Configurations PCI 1 IRQ Assignment PCI 2 IRQ Assignment PCI 3 IRQ ...Assignment [Auto] [Auto] [Auto] Item Help Menu Level` KLJI: Move Enter: Select F5: Previous Values +/-/PU/PD: Value F10: Save F6: Fail-Save Default ESC: Exit F1: General Help F7: Optimized Defaults PCI 1 IRQ Assignment Auto 3,4,5,7,9,10,11,12,14,15 PCI 2 IRQ Assignment Auto 3,4,5,7,9,10...
Manual
Page 43
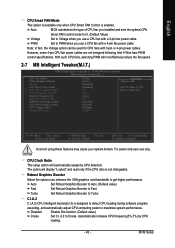
.... For power end-user use a CPU fan with a 3-pin fan power cable. The option will automatically assign by CPU loading. - 43 - BIOS Setup PWM Set to get higher performance. Disabled Disable this function. (Default value) Cruise Set C.I .A.2 (CPU Intelligent Acelerator 2) is unclocked KLJI: Move... Enter: Select F5: Previous Values +/-/PU/PD: Value F10: Save F6: Fail-Save Default ESC: Exit F1: General Help F7: Optimized Defaults Incorrect using these features may cause your system broken. Auto...
.... For power end-user use a CPU fan with a 3-pin fan power cable. The option will automatically assign by CPU loading. - 43 - BIOS Setup PWM Set to get higher performance. Disabled Disable this function. (Default value) Cruise Set C.I .A.2 (CPU Intelligent Acelerator 2) is unclocked KLJI: Move... Enter: Select F5: Previous Values +/-/PU/PD: Value F10: Save F6: Fail-Save Default ESC: Exit F1: General Help F7: Optimized Defaults Incorrect using these features may cause your system broken. Auto...

