User Manual (English (7.82 MB))
Page 9
Beep 66 LCD Brightness 66 Power Saver 67 Zone 67 Date/Time 68 Language 68 File and Software 68 File Numbering 69 Copy to Card (Copy internal memory to memory card 69 Reset Settings 70 FW Version (Firmware version 70 Transmission 71 Video ... 75 Using the PictBridge Menu 76 Print with Date 76 Print without Date 77 Print Index 78 Print DPOF 79 Exit 79 APPENDICES 80 Specifications: A1255 / A1455 80 Specifications : J1455 / Q1455 84 Error Messages 88 Troubleshooting 90
Beep 66 LCD Brightness 66 Power Saver 67 Zone 67 Date/Time 68 Language 68 File and Software 68 File Numbering 69 Copy to Card (Copy internal memory to memory card 69 Reset Settings 70 FW Version (Firmware version 70 Transmission 71 Video ... 75 Using the PictBridge Menu 76 Print with Date 76 Print without Date 77 Print Index 78 Print DPOF 79 Exit 79 APPENDICES 80 Specifications: A1255 / A1455 80 Specifications : J1455 / Q1455 84 Error Messages 88 Troubleshooting 90
User Manual (English (7.82 MB))
Page 71
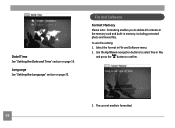
Date/Time See "Setting the Date and Time" section on page 20. Use the Up/Down navigation buttons to select Yes or No, and press the button to delete all contents in the memory card and built-in File and Software menu. 2. File and Software Format Memory Please note: formatting enables you to confirm. 3. To use this setting: 1. Select the Format in memory, including protected photo and movie files. The current media is formatted. 68 Language See "Setting the Language" section on page 19.
Date/Time See "Setting the Date and Time" section on page 20. Use the Up/Down navigation buttons to select Yes or No, and press the button to delete all contents in the memory card and built-in File and Software menu. 2. File and Software Format Memory Please note: formatting enables you to confirm. 3. To use this setting: 1. Select the Format in memory, including protected photo and movie files. The current media is formatted. 68 Language See "Setting the Language" section on page 19.

User Manual (English (7.82 MB))
Page 72
... internal memory to memory card) Use this item to choose whether the file is serially numbered or begins with 1 and is saved in File and Software menu. 2. Use the Up/Down navigation buttons to the memory card. 1. File Numbering After you take a picture or video clip, the camera will save it... ends with the Up/Down button and press the button for confirmation. You can use this setting to copy the files stored in File and Software menu. 2.
... internal memory to memory card) Use this item to choose whether the file is serially numbered or begins with 1 and is saved in File and Software menu. 2. Use the Up/Down navigation buttons to the memory card. 1. File Numbering After you take a picture or video clip, the camera will save it... ends with the Up/Down button and press the button for confirmation. You can use this setting to copy the files stored in File and Software menu. 2.

User Manual (English (7.82 MB))
Page 73
... camera to its default settings. 1. Use the Up/Down navigation buttons to view the current camera firmware version. 1. Select the FW Version in File and Software menu. 2. To update to the latest firmware version, you can go to confirm. Select the Reset setting in File and... Software menu. 2. Then press the button to the following website:www.ge.com/digitalcameras and look under Support. 70 Reset Settings Use this setting to select Yes or No. If SD card contains...
... camera to its default settings. 1. Use the Up/Down navigation buttons to view the current camera firmware version. 1. Select the FW Version in File and Software menu. 2. To update to the latest firmware version, you can go to confirm. Select the Reset setting in File and... Software menu. 2. Then press the button to the following website:www.ge.com/digitalcameras and look under Support. 70 Reset Settings Use this setting to select Yes or No. If SD card contains...

User Manual (English (7.82 MB))
Page 75
...-ROM) supplied with your camera to copy (transfer) pictures to confirm the setting. Transferring files to which ArcSoft software has been installed. 2. Start a computer to your camera. 4. Double-click My Computer icon on the desktop to locate the removable drive and to copy the ...
...-ROM) supplied with your camera to copy (transfer) pictures to confirm the setting. Transferring files to which ArcSoft software has been installed. 2. Start a computer to your camera. 4. Double-click My Computer icon on the desktop to locate the removable drive and to copy the ...

