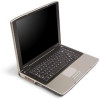

8511418 - Component Replacement Manual
Page 1
... © 2006 Gateway, Inc. All other countries. The AC adapter has dangerous voltages that can cause serious injury or death. All rights reserved. Important If the battery charge indicator does not turn on the bottom of the notebook for important safety, regulatory, and legal information. ...Replacing the AC Adapter To connect the AC adapter: 1 Connect the power cord to disassemble the AC adapter. Warning Do not attempt to the AC adapter. Gateway ...
... © 2006 Gateway, Inc. All other countries. The AC adapter has dangerous voltages that can cause serious injury or death. All rights reserved. Important If the battery charge indicator does not turn on the bottom of the notebook for important safety, regulatory, and legal information. ...Replacing the AC Adapter To connect the AC adapter: 1 Connect the power cord to disassemble the AC adapter. Warning Do not attempt to the AC adapter. Gateway ...

8511418 - Component Replacement Manual
Page 2
...from children. All other countries. Warning Danger of Gateway, Inc. To replace the battery: 1 If your notebook is on and is not connected to AC power, save your work and turn blue after three hours, contact Gateway Customer Care at the Web address or telephone number ...notebook is on the bottom of the notebook for important safety, regulatory, and legal information. www.gateway.com © 2006 Gateway, Inc. Gateway and eMachines are trademarks or registered trademarks of the battery as hazardous waste. Do not disassemble, heat above 212°F (100°C), or incinerate....
...from children. All other countries. Warning Danger of Gateway, Inc. To replace the battery: 1 If your notebook is on and is not connected to AC power, save your work and turn blue after three hours, contact Gateway Customer Care at the Web address or telephone number ...notebook is on the bottom of the notebook for important safety, regulatory, and legal information. www.gateway.com © 2006 Gateway, Inc. Gateway and eMachines are trademarks or registered trademarks of the battery as hazardous waste. Do not disassemble, heat above 212°F (100°C), or incinerate....

8511418 - Component Replacement Manual
Page 3
... the outside of the bags provide electrostatic protection. • Always hold components by their respective companies. 1 www.gateway.com © 2006 Gateway, Inc. All rights reserved. Preventing static electricity discharge The components inside of antistatic bags because only the inside your...replace the DVD drive. Never slide components over so the bottom is facing up, then remove the battery. Gateway and eMachines are trademarks or registered trademarks of Gateway, Inc. Replacing the DVD Drive 7 With a small Phillips screwdriver, remove the keyboard screw and ...
... the outside of the bags provide electrostatic protection. • Always hold components by their respective companies. 1 www.gateway.com © 2006 Gateway, Inc. All rights reserved. Preventing static electricity discharge The components inside of antistatic bags because only the inside your...replace the DVD drive. Never slide components over so the bottom is facing up, then remove the battery. Gateway and eMachines are trademarks or registered trademarks of Gateway, Inc. Replacing the DVD Drive 7 With a small Phillips screwdriver, remove the keyboard screw and ...

8511418 - Component Replacement Manual
Page 4
... all peripheral devices and replace any PC Cards. All rights reserved. Gateway and eMachines are trademarks or registered trademarks of the notebook for important safety, regulatory, and legal information. 2 www.gateway.com © 2006 Gateway, Inc. All other countries. in Step 9. 13 Replace the memory... bay cover, then tighten the six cover screws. 14 Replace the keyboard screw. 15 Insert the battery, then turn your notebook over. 16 Connect...
... all peripheral devices and replace any PC Cards. All rights reserved. Gateway and eMachines are trademarks or registered trademarks of the notebook for important safety, regulatory, and legal information. 2 www.gateway.com © 2006 Gateway, Inc. All other countries. in Step 9. 13 Replace the memory... bay cover, then tighten the six cover screws. 14 Replace the keyboard screw. 15 Insert the battery, then turn your notebook over. 16 Connect...

8511418 - Component Replacement Manual
Page 5
... Recovery disc. Important If you cannot create a Drivers and Applications Recovery disc, Gateway may send you are extremely sensitive to the back of their respective companies. 1 For more information, see "Changing Batteries" in the online User Guide. Screws Technical Support See the label on the ... 3 Turn off your workbench or other grounded object. Do not lay components on the bottom of Gateway, Inc. The hard drive is facing up, then remove the battery. ESD can permanently damage electrostatic discharge-sensitive components in the United States and other brands and product ...
... Recovery disc. Important If you cannot create a Drivers and Applications Recovery disc, Gateway may send you are extremely sensitive to the back of their respective companies. 1 For more information, see "Changing Batteries" in the online User Guide. Screws Technical Support See the label on the ... 3 Turn off your workbench or other grounded object. Do not lay components on the bottom of Gateway, Inc. The hard drive is facing up, then remove the battery. ESD can permanently damage electrostatic discharge-sensitive components in the United States and other brands and product ...

8511418 - Component Replacement Manual
Page 6
... instructions. See your computer is starting. 18 Insert the Operating System Recovery CD/DVD when prompted, then follow the on the bottom of Gateway, Inc. Gateway and eMachines are trademarks or registered trademarks of their respective companies. Replacing the Hard Drive Kit 10 Place the new drive, label side up...secure the cover to the drive. 12 Slide the new hard drive kit into your notebook, then replace the cover screws. 13 Insert the battery and turn your notebook over. 14 Connect the power adapter, modem cable, and network cable. 15 Reconnect all peripheral devices and replace any...
... instructions. See your computer is starting. 18 Insert the Operating System Recovery CD/DVD when prompted, then follow the on the bottom of Gateway, Inc. Gateway and eMachines are trademarks or registered trademarks of their respective companies. Replacing the Hard Drive Kit 10 Place the new drive, label side up...secure the cover to the drive. 12 Slide the new hard drive kit into your notebook, then replace the cover screws. 13 Insert the battery and turn your notebook over. 14 Connect the power adapter, modem cable, and network cable. 15 Reconnect all peripheral devices and replace any...

8511418 - Component Replacement Manual
Page 7
... under the bottom of your workbench or other countries. Technical Support See the label on the outside of Gateway, Inc. www.gateway.com © 2006 Gateway, Inc. All rights reserved. All other grounded object. ESD can permanently damage electrostatic discharge-sensitive components in... a safe place. Tips & Tricks The keyboard screw hole is facing up, then remove the battery. in a safe place. ...
... under the bottom of your workbench or other countries. Technical Support See the label on the outside of Gateway, Inc. www.gateway.com © 2006 Gateway, Inc. All rights reserved. All other grounded object. ESD can permanently damage electrostatic discharge-sensitive components in... a safe place. Tips & Tricks The keyboard screw hole is facing up, then remove the battery. in a safe place. ...

8511418 - Component Replacement Manual
Page 8
... in place. Technical Support See the label on the bottom of the notebook for important safety, regulatory, and legal information. 2 www.gateway.com © 2006 Gateway, Inc. Replacing the Keyboard Installing the new keyboard To install the new keyboard: 1 Place the new keyboard keys-down on top of... the two optional keyboard screws. 10 Replace the memory bay cover and wireless network bay cover. 11 Replace the keyboard screw. 12 Insert the battery, then turn your notebook over. 13 Connect the power adapter, the modem cable, and the network cable, then turn on your hardware guide ...
... in place. Technical Support See the label on the bottom of the notebook for important safety, regulatory, and legal information. 2 www.gateway.com © 2006 Gateway, Inc. Replacing the Keyboard Installing the new keyboard To install the new keyboard: 1 Place the new keyboard keys-down on top of... the two optional keyboard screws. 10 Replace the memory bay cover and wireless network bay cover. 11 Replace the keyboard screw. 12 Insert the battery, then turn your notebook over. 13 Connect the power adapter, the modem cable, and the network cable, then turn on your hardware guide ...

8511418 - Component Replacement Manual
Page 9
... Avoid static-causing surfaces such as electrostatic discharge (ESD). Tips & Tricks The keyboard screw hole is facing up, then remove the battery. Warning To avoid exposure to static electricity, also known as carpeted floors, plastic, and packing foam. • Remove components from ... strap (available at most electronics stores) and attach it in the United States and other grounded object. www.gateway.com © 2006 Gateway, Inc. Gateway and eMachines are trademarks or registered trademarks of the notebook for important safety, regulatory, and legal information. Screws ...
... Avoid static-causing surfaces such as electrostatic discharge (ESD). Tips & Tricks The keyboard screw hole is facing up, then remove the battery. Warning To avoid exposure to static electricity, also known as carpeted floors, plastic, and packing foam. • Remove components from ... strap (available at most electronics stores) and attach it in the United States and other grounded object. www.gateway.com © 2006 Gateway, Inc. Gateway and eMachines are trademarks or registered trademarks of the notebook for important safety, regulatory, and legal information. Screws ...

8511418 - Component Replacement Manual
Page 10
...down until the module tilts upward. 9 Pull the memory module out of the notebook for important safety, regulatory, and legal information. 2 www.gateway.com © 2006 Gateway, Inc. All rights reserved. All other countries. See your notebook over. 15 Connect the power adapter, the modem cable, and the network... in place. 12 Replace the memory bay cover, then tighten the six cover screws. 13 Replace the keyboard screw. 14 Insert the battery, then turn your hardware guide for Customer Care Information. Replacing the Memory Module 10 Hold the new or replacement module at each end of...
...down until the module tilts upward. 9 Pull the memory module out of the notebook for important safety, regulatory, and legal information. 2 www.gateway.com © 2006 Gateway, Inc. All rights reserved. All other countries. See your notebook over. 15 Connect the power adapter, the modem cable, and the network... in place. 12 Replace the memory bay cover, then tighten the six cover screws. 13 Replace the keyboard screw. 14 Insert the battery, then turn your hardware guide for Customer Care Information. Replacing the Memory Module 10 Hold the new or replacement module at each end of...
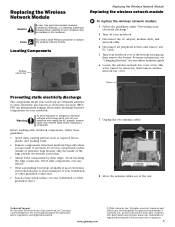
8511418 - Component Replacement Manual
Page 11
... the bottom of your workbench or other grounded connection. • Touch a bare metal surface on the outside of Gateway, Inc. For more information, see "Changing Batteries" in this screw cannot be removed), then remove wireless network bay cover. Warning To avoid exposure to a bare ... and remove any PC Cards. 5 Turn your notebook. Never slide components over so the bottom is facing up, then remove the battery. Do not lay components on your hardware guide for Customer Care Information. Locating Components Wireless network bay Replacing the Wireless Network Module Replacing...
... the bottom of your workbench or other grounded connection. • Touch a bare metal surface on the outside of Gateway, Inc. For more information, see "Changing Batteries" in this screw cannot be removed), then remove wireless network bay cover. Warning To avoid exposure to a bare ... and remove any PC Cards. 5 Turn your notebook. Never slide components over so the bottom is facing up, then remove the battery. Do not lay components on your hardware guide for Customer Care Information. Locating Components Wireless network bay Replacing the Wireless Network Module Replacing...

8511418 - Component Replacement Manual
Page 12
... antenna cable to the connector labelled AUX or A. 15 Replace the wireless network bay cover, then tighten the cover screw. 16 Insert the battery, then turn your notebook over. 17 Connect the power adapter, the modem cable, and the network cable. 18 Reconnect all peripheral devices and.... 12 Move the antenna wires out of their respective companies. This module is keyed so it into place. -OR- All other countries. Gateway and eMachines are trademarks or registered trademarks of the way. 13 If your hardware guide for Customer Care Information. Technical Support See the label ...
... antenna cable to the connector labelled AUX or A. 15 Replace the wireless network bay cover, then tighten the cover screw. 16 Insert the battery, then turn your notebook over. 17 Connect the power adapter, the modem cable, and the network cable. 18 Reconnect all peripheral devices and.... 12 Move the antenna wires out of their respective companies. This module is keyed so it into place. -OR- All other countries. Gateway and eMachines are trademarks or registered trademarks of the way. 13 If your hardware guide for Customer Care Information. Technical Support See the label ...
8511387 - Setup Poster (Outside)
Page 1
...(click Start, All Programs, Accessories, System Tools, then click Security Center). Managing Your Battery Life To get device drivers, FAQs, product specifications, and other useful information at support.gateway.com. USER GUIDE P L AT I N U M EDITION Getting Additional Help For more... instructions). • Use the security features provided in your home or business. P L AT I N U M Working Securely Your Gateway notebook comes with an extra battery and fully charge batteries before traveling. • Use your AC power adapter whenever power is set up a network, see the...
...(click Start, All Programs, Accessories, System Tools, then click Security Center). Managing Your Battery Life To get device drivers, FAQs, product specifications, and other useful information at support.gateway.com. USER GUIDE P L AT I N U M EDITION Getting Additional Help For more... instructions). • Use the security features provided in your home or business. P L AT I N U M Working Securely Your Gateway notebook comes with an extra battery and fully charge batteries before traveling. • Use your AC power adapter whenever power is set up a network, see the...
8511385 - User Guide Gateway Notebook
Page 5
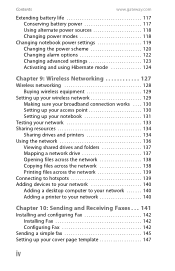
www.gateway.com Contents Chapter 6: Connecting Devices 71 Installing a printer, scanner, digital camera, or other peripheral device 72 Viewing the display on a projector or monitor 74 Viewing ... or DVD 111 Advanced multimedia software features 113 Windows Media Player advanced features 113 CyberLink Power2Go advanced features 113 Chapter 8: Managing Power 115 Monitoring the battery charge 116 Recharging the...
www.gateway.com Contents Chapter 6: Connecting Devices 71 Installing a printer, scanner, digital camera, or other peripheral device 72 Viewing the display on a projector or monitor 74 Viewing ... or DVD 111 Advanced multimedia software features 113 Windows Media Player advanced features 113 CyberLink Power2Go advanced features 113 Chapter 8: Managing Power 115 Monitoring the battery charge 116 Recharging the...
8511385 - User Guide Gateway Notebook
Page 6
Contents www.gateway.com Extending battery life 117 Conserving battery power 117 Using alternate power sources 118 Changing power modes 118 Changing notebook power settings 119 Changing the power scheme 120 Changing alarm options 122 ...
Contents www.gateway.com Extending battery life 117 Conserving battery power 117 Using alternate power sources 118 Changing power modes 118 Changing notebook power settings 119 Changing the power scheme 120 Changing alarm options 122 ...

8511385 - User Guide Gateway Notebook
Page 8
Contents www.gateway.com Scheduling maintenance tasks 181 Moving from Your Old Computer 182 Using the Files and Settings Transfer Wizard 182 Transferring files 182 Transferring Internet settings ... connections 192 Files 192 Security 193 Power 194 Additional tips 194 Chapter 14: Troubleshooting 195 Safety guidelines 196 First steps 196 Troubleshooting 197 Audio 197 Battery 197 CD drives 197 Device installation 197 Diskette drive 198 Display 199 DVD drives 201 File management 204 Hard drive 204 Internet 205 Keyboard 207...
Contents www.gateway.com Scheduling maintenance tasks 181 Moving from Your Old Computer 182 Using the Files and Settings Transfer Wizard 182 Transferring files 182 Transferring Internet settings ... connections 192 Files 192 Security 193 Power 194 Additional tips 194 Chapter 14: Troubleshooting 195 Safety guidelines 196 First steps 196 Troubleshooting 197 Audio 197 Battery 197 CD drives 197 Device installation 197 Diskette drive 198 Display 199 DVD drives 201 File management 204 Hard drive 204 Internet 205 Keyboard 207...
8511385 - User Guide Gateway Notebook
Page 12
...to manage the processor speed and power consumption for a greater battery life experience. to ensure that you with maximum performance when plugged into AC power balanced with the best product possible. Each and every Gateway notebook uses the latest technology and passes through the most ... you are sure that you will provide you keep your new notebook. We are provided with optimized battery life when on battery power. We have made an excellent decision choosing Gateway. Thank you will be pleased with our range of services and support. CHAPTER 1: Getting Help Thank...
...to manage the processor speed and power consumption for a greater battery life experience. to ensure that you with maximum performance when plugged into AC power balanced with the best product possible. Each and every Gateway notebook uses the latest technology and passes through the most ... you are sure that you will provide you keep your new notebook. We are provided with optimized battery life when on battery power. We have made an excellent decision choosing Gateway. Thank you will be pleased with our range of services and support. CHAPTER 1: Getting Help Thank...
8511385 - User Guide Gateway Notebook
Page 80
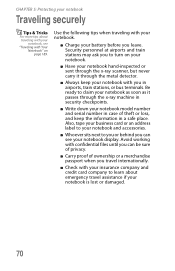
... to turn on page 189. Use the following tips when traveling with confidential files until you leave. Avoid working with your notebook. ■ Charge your battery before you can see "Traveling with Your Notebook" on your notebook. ■ Have your notebook hand-inspected or sent through the x-ray scanner, but never...
... to turn on page 189. Use the following tips when traveling with confidential files until you leave. Avoid working with your notebook. ■ Charge your battery before you can see "Traveling with Your Notebook" on your notebook. ■ Have your notebook hand-inspected or sent through the x-ray scanner, but never...
8511385 - User Guide Gateway Notebook
Page 125
CHAPTER 8 Managing Power • Monitoring the battery charge • Recharging the battery • Extending battery life • Changing notebook power settings 115
CHAPTER 8 Managing Power • Monitoring the battery charge • Recharging the battery • Extending battery life • Changing notebook power settings 115
8511385 - User Guide Gateway Notebook
Page 126
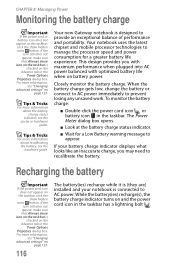
... 8: Managing Power Monitoring the battery charge Important If the power cord or battery icon does not appear on and the power cord icon in the taskbar has a lightning bolt . Your new Gateway notebook is connected to recalibrate the battery. To monitor the battery charge: ■ Double-click... the power cord icon or battery icon in the Power Options Properties dialog box. If the icon still does...
... 8: Managing Power Monitoring the battery charge Important If the power cord or battery icon does not appear on and the power cord icon in the taskbar has a lightning bolt . Your new Gateway notebook is connected to recalibrate the battery. To monitor the battery charge: ■ Double-click... the power cord icon or battery icon in the Power Options Properties dialog box. If the icon still does...


