8512417 - Gateway Setup Guide
Page 2
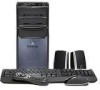
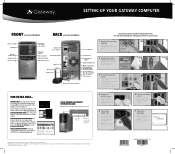
... Automated Troubleshooting System at 800-846-2118 and choose option 7. Follow the instructions that came with it ® into one of Gateway, Inc. MAN GERSHWIN SETUP POSTER R1 5/07 All rights reserved. All other countries. For help resources and protect your computer. ...the Windows setup screen instructions. WARNING: To protect your computer, visit the Gateway Support Web site at www.support.gateway.com. To access these guides, click (Start), All Programs, then click Gateway Documentation. Memory card reader DVD/CD drive IEEE 1394/ FireWire™ port Headphone jack ...
... Automated Troubleshooting System at 800-846-2118 and choose option 7. Follow the instructions that came with it ® into one of Gateway, Inc. MAN GERSHWIN SETUP POSTER R1 5/07 All rights reserved. All other countries. For help resources and protect your computer. ...the Windows setup screen instructions. WARNING: To protect your computer, visit the Gateway Support Web site at www.support.gateway.com. To access these guides, click (Start), All Programs, then click Gateway Documentation. Memory card reader DVD/CD drive IEEE 1394/ FireWire™ port Headphone jack ...

8512418 - Gateway Reference Guide
Page 4
Contents Creating discs 27 Using the memory card reader 28 Memory card types 28 Using a memory card 28 Using the diskette drive 29 Adjusting the volume 30 Configuring the audio jacks 31 Installing a printer, scanner, or other device 32 Chapter 4: Upgrading ... Closing the case 37 Replacing the front bezel 37 Replacing the side panel 37 Replacing the color panel 38 Installing memory 40 Adding or replacing an optical disc drive 43 Replacing the memory card reader 45 Adding or replacing a hard drive 46 Replacing the heat sink and processor 49 Adding or replacing...
Contents Creating discs 27 Using the memory card reader 28 Memory card types 28 Using a memory card 28 Using the diskette drive 29 Adjusting the volume 30 Configuring the audio jacks 31 Installing a printer, scanner, or other device 32 Chapter 4: Upgrading ... Closing the case 37 Replacing the front bezel 37 Replacing the side panel 37 Replacing the color panel 38 Installing memory 40 Adding or replacing an optical disc drive 43 Replacing the memory card reader 45 Adding or replacing a hard drive 46 Replacing the heat sink and processor 49 Adding or replacing...

8512418 - Gateway Reference Guide
Page 5
www.gateway.com Using BigFix 62 Managing hard drive space 62 Checking hard drive space 63 Deleting unnecessary files 64 Checking the hard drive for errors 64 ... 76 DVD drives 76 Ethernet 77 Expansion cards 78 File management 78 Floppy drive 78 Hard drive 79 Internet 79 Keyboard 81 Media Center 82 Memory 84 Memory card reader 85 Modem (cable or DSL 85 Modem (dial-up 85 Monitor 89 Mouse 89 Networks 90 iii
www.gateway.com Using BigFix 62 Managing hard drive space 62 Checking hard drive space 63 Deleting unnecessary files 64 Checking the hard drive for errors 64 ... 76 DVD drives 76 Ethernet 77 Expansion cards 78 File management 78 Floppy drive 78 Hard drive 79 Internet 79 Keyboard 81 Media Center 82 Memory 84 Memory card reader 85 Modem (cable or DSL 85 Modem (dial-up 85 Monitor 89 Mouse 89 Networks 90 iii

8512418 - Gateway Reference Guide
Page 12
Front CHAPTER 2: Checking Out Your Computer Memory card reader DVD/CD drive IEEE 1394/ FireWire™ port Diskette or removable hard drive (optional) Headphone jack Microphone jack Power button/ power indicator USB ports DVD/CD drive (optional) Video jack (optional) Audio left jack (optional) Audio right jack (optional) 6
Front CHAPTER 2: Checking Out Your Computer Memory card reader DVD/CD drive IEEE 1394/ FireWire™ port Diskette or removable hard drive (optional) Headphone jack Microphone jack Power button/ power indicator USB ports DVD/CD drive (optional) Video jack (optional) Audio left jack (optional) Audio right jack (optional) 6
8512418 - Gateway Reference Guide
Page 13
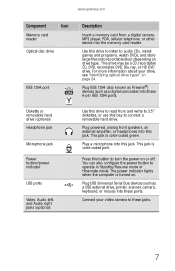
... the computer is turned on drive type). Connect your drive, see "Identifying optical drive types" on or off. www.gateway.com Component Icon Memory card reader Optical disc drive IEEE 1394 port Description Insert a memory card from and write to 3.5" diskettes, or use this drive to listen to connect a removable hard drive. Press...-ray, or HD DVD drive. For more information about your video camera to operate in Standby/Resume mode or Hibernate mode. Plug a microphone into the memory card reader. This jack is color-coded green.
... the computer is turned on drive type). Connect your drive, see "Identifying optical drive types" on or off. www.gateway.com Component Icon Memory card reader Optical disc drive IEEE 1394 port Description Insert a memory card from and write to 3.5" diskettes, or use this drive to listen to connect a removable hard drive. Press...-ray, or HD DVD drive. For more information about your video camera to operate in Standby/Resume mode or Hibernate mode. Plug a microphone into the memory card reader. This jack is color-coded green.

8512418 - Gateway Reference Guide
Page 17
CHAPTER3 Setting Up and Getting Started • Working safely and comfortably • Preparing power connections • Connecting to a broadband modem or network • Connecting a dial-up modem • Starting your computer • Turning off your computer • Restarting (rebooting) your computer • Using the keyboard • Using the mouse • Using optical drives • Using the memory card reader • Using the diskette drive • Adjusting the volume • Configuring the audio jacks • Installing a printer, scanner, or other device 11
CHAPTER3 Setting Up and Getting Started • Working safely and comfortably • Preparing power connections • Connecting to a broadband modem or network • Connecting a dial-up modem • Starting your computer • Turning off your computer • Restarting (rebooting) your computer • Using the keyboard • Using the mouse • Using optical drives • Using the memory card reader • Using the diskette drive • Adjusting the volume • Configuring the audio jacks • Installing a printer, scanner, or other device 11

8512418 - Gateway Reference Guide
Page 34
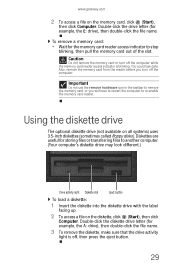
...and the slots to use the optional memory card reader to transfer pictures from one memory card type to another. Using a memory card Caution Before inserting a memory card into the appropriate memory card slot. 28 To insert a memory card: 1 Insert the memory card into a slot, make backups ... discs to make sure that uses memory cards, such as a PDA, MP3 player, or cellular telephone. (Your computer's memory card reader may look different.) Activity indicator Memory card reader slots Memory card types The memory card reader supports several memory card types. Each slot is empty...
...and the slots to use the optional memory card reader to transfer pictures from one memory card type to another. Using a memory card Caution Before inserting a memory card into the appropriate memory card slot. 28 To insert a memory card: 1 Insert the memory card into a slot, make backups ... discs to make sure that uses memory cards, such as a PDA, MP3 player, or cellular telephone. (Your computer's memory card reader may look different.) Activity indicator Memory card reader slots Memory card types The memory card reader supports several memory card types. Each slot is empty...
8512418 - Gateway Reference Guide
Page 35
...letter (for storing files or transferring files to stop blinking, then pull the memory card out of the slot. www.gateway.com 2 To access a file on all systems) uses 3.5-inch diskettes (sometimes called floppy disks). To remove a memory card: • Wait for example, the E: drive), then double-click ...the file name. Also, remove the memory card from the reader before you will ...
...letter (for storing files or transferring files to stop blinking, then pull the memory card out of the slot. www.gateway.com 2 To access a file on all systems) uses 3.5-inch diskettes (sometimes called floppy disks). To remove a memory card: • Wait for example, the E: drive), then double-click ...the file name. Also, remove the memory card from the reader before you will ...

8512418 - Gateway Reference Guide
Page 41
CHAPTER4 Upgrading Your Computer • Preventing static electricity discharge • Opening the case • Closing the case • Replacing the color panel • Installing memory • Adding or replacing an optical disc drive • Replacing the memory card reader • Adding or replacing a hard drive • Replacing the heat sink and processor • Adding or replacing an expansion card • Replacing the system battery • Replacing the system board 33
CHAPTER4 Upgrading Your Computer • Preventing static electricity discharge • Opening the case • Closing the case • Replacing the color panel • Installing memory • Adding or replacing an optical disc drive • Replacing the memory card reader • Adding or replacing a hard drive • Replacing the heat sink and processor • Adding or replacing an expansion card • Replacing the system battery • Replacing the system board 33

8512418 - Gateway Reference Guide
Page 49
... the sides of the memory module and remove it on a towel or other non-abrasive surface. 3 Find the memory module banks on its side. www.gateway.com Installing memory When you upgrade the computer memory, make sure that you install the correct type of the memory module bank. 41 To... install or replace DIMM memory: 1 Remove the side panel by following the ...
... the sides of the memory module and remove it on a towel or other non-abrasive surface. 3 Find the memory module banks on its side. www.gateway.com Installing memory When you upgrade the computer memory, make sure that you install the correct type of the memory module bank. 41 To... install or replace DIMM memory: 1 Remove the side panel by following the ...
8512418 - Gateway Reference Guide
Page 50
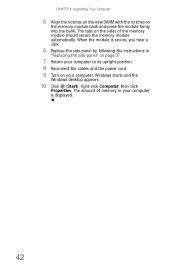
... automatically. CHAPTER 4: Upgrading Your Computer 5 Align the notches on the new DIMM with the notches on the sides of memory in your computer is secure, you hear a click. 6 Replace the side panel by following the instructions in "Replacing the side panel" on page 37. 7 Return ... cord. 9 Turn on your computer. Windows starts and the Windows desktop appears. 10 Click (Start), right-click Computer, then click Properties. The tabs on the memory module bank and press the module firmly into the bank.
... automatically. CHAPTER 4: Upgrading Your Computer 5 Align the notches on the new DIMM with the notches on the sides of memory in your computer is secure, you hear a click. 6 Replace the side panel by following the instructions in "Replacing the side panel" on page 37. 7 Return ... cord. 9 Turn on your computer. Windows starts and the Windows desktop appears. 10 Click (Start), right-click Computer, then click Properties. The tabs on the memory module bank and press the module firmly into the bank.

8512418 - Gateway Reference Guide
Page 53
... computer about 3/4 inch, then remove it from your computer. 4 Remove the two screws that secure the card reader to replace the memory card reader. To replace the memory card reader: 1 Remove the side panel by following the instructions in "Removing the side panel" on page 35. 2 Remove the ...front bezel by following the instructions in "Removing the front bezel" on page 35. Screws 45 www.gateway.com Replacing the memory card reader Tools You ...
... computer about 3/4 inch, then remove it from your computer. 4 Remove the two screws that secure the card reader to replace the memory card reader. To replace the memory card reader: 1 Remove the side panel by following the instructions in "Removing the side panel" on page 35. 2 Remove the ...front bezel by following the instructions in "Removing the front bezel" on page 35. Screws 45 www.gateway.com Replacing the memory card reader Tools You ...
8512418 - Gateway Reference Guide
Page 62
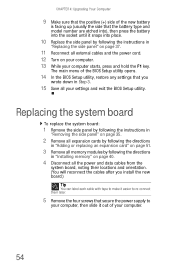
... that secure the power supply to your computer, then slide it snaps into place. 10 Replace the side panel by following the instructions in "Installing memory" on page 40. 4 Disconnect all the power and data cables from the system board, noting their locations and orientation. (You will reconnect the cables after... side panel" on page 35. 2 Remove all expansion cards by following the directions in "Adding or replacing an expansion card" on page 51. 3 Remove all memory modules by following the directions in "Replacing the side panel" on your computer. 13 While your computer. 54
... that secure the power supply to your computer, then slide it snaps into place. 10 Replace the side panel by following the instructions in "Installing memory" on page 40. 4 Disconnect all the power and data cables from the system board, noting their locations and orientation. (You will reconnect the cables after... side panel" on page 35. 2 Remove all expansion cards by following the directions in "Adding or replacing an expansion card" on page 51. 3 Remove all memory modules by following the directions in "Replacing the side panel" on your computer. 13 While your computer. 54
8512418 - Gateway Reference Guide
Page 63
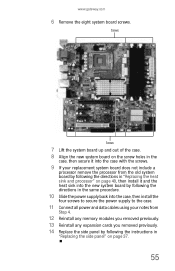
www.gateway.com 6 Remove the eight system board screws. Screws Screws 7 Lift the system board up and out of the case. 8 Align the new system board on ... four screws to secure the power supply to the case. 11 Connect all power and data cables using your notes from Step 4. 12 Reinstall any memory modules you removed previously. 13 Reinstall any expansion cards you removed previously. 14 Replace the side panel by following the instructions in "Replacing the side...
www.gateway.com 6 Remove the eight system board screws. Screws Screws 7 Lift the system board up and out of the case. 8 Align the new system board on ... four screws to secure the power supply to the case. 11 Connect all power and data cables using your notes from Step 4. 12 Reinstall any memory modules you removed previously. 13 Reinstall any expansion cards you removed previously. 14 Replace the side panel by following the instructions in "Replacing the side...
8512418 - Gateway Reference Guide
Page 83
...78. For more information, see "Identifying optical drive types" on page 24. • Your computer may not be experiencing some temporary memory problems. Shut down and restart your computer, then enter the BIOS Setup utility by following the instructions in cards See "Expansion cards"... DVD drive. • If you have copy protection software. Make sure that the IDE controllers are listed in alphabetical order. www.gateway.com Troubleshooting Troubleshooting topics are enabled. • Make sure that the disc label is configured correctly by pressing and holding F2 while ...
...78. For more information, see "Identifying optical drive types" on page 24. • Your computer may not be experiencing some temporary memory problems. Shut down and restart your computer, then enter the BIOS Setup utility by following the instructions in cards See "Expansion cards"... DVD drive. • If you have copy protection software. Make sure that the IDE controllers are listed in alphabetical order. www.gateway.com Troubleshooting Troubleshooting topics are enabled. • Make sure that the disc label is configured correctly by pressing and holding F2 while ...
8512418 - Gateway Reference Guide
Page 95
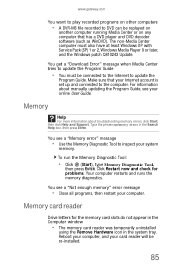
Reboot your computer, and your computer. www.gateway.com You want to play recorded programs on other computers • A DVR-MS file recorded to DVD can be replayed on another computer running Media ... Center tries to update the Program Guide. You see your system memory. Memory Help For more information about manually updating the Program Guide, see a "Memory error" message • Use the Memory Diagnostic Tool to inspect your online User Guide. You see a "Not enough memory" error message • Close all programs, then restart your card reader...
Reboot your computer, and your computer. www.gateway.com You want to play recorded programs on other computers • A DVR-MS file recorded to DVD can be replayed on another computer running Media ... Center tries to update the Program Guide. You see your system memory. Memory Help For more information about manually updating the Program Guide, see a "Memory error" message • Use the Memory Diagnostic Tool to inspect your online User Guide. You see a "Not enough memory" error message • Close all programs, then restart your card reader...
8512418 - Gateway Reference Guide
Page 102
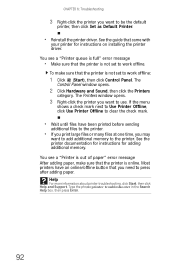
... before sending additional files to the printer. • If you print large files or many files at one time, you may want to add additional memory to the printer. The Printers window opens. 3 Right-click the printer you want to be the default printer, then click Set as Default Printer. •.... Help For more information about printer troubleshooting, click Start, then click Help and Support. See the guide that came with your printer for adding additional memory.
... before sending additional files to the printer. • If you print large files or many files at one time, you may want to add additional memory to the printer. The Printers window opens. 3 Right-click the printer you want to be the default printer, then click Set as Default Printer. •.... Help For more information about printer troubleshooting, click Start, then click Help and Support. See the guide that came with your printer for adding additional memory.

8512418 - Gateway Reference Guide
Page 129
... connection connecting 9 buttons See keys and buttons C cable modem 15 connecting 9 troubleshooting 85 Caps Lock indicator 19, 21 card reader 7 cards adding expansion 51 inserting memory card 28 installing memory card 28 removing memory card 28 replacing expansion 51 slots 28 troubleshooting add-in card 78 troubleshooting Ethernet 77 troubleshooting expansion 78 troubleshooting...
... connection connecting 9 buttons See keys and buttons C cable modem 15 connecting 9 troubleshooting 85 Caps Lock indicator 19, 21 card reader 7 cards adding expansion 51 inserting memory card 28 installing memory card 28 removing memory card 28 replacing expansion 51 slots 28 troubleshooting add-in card 78 troubleshooting Ethernet 77 troubleshooting expansion 78 troubleshooting...

8512418 - Gateway Reference Guide
Page 130
... playing audio 26 recording 27 troubleshooting 73 CD drive adding 43 identifying 25 locating drive 7 replacing 43 See also optical drive troubleshooting 73 cellular phone memory cards 28 Certificate of Authenticity 3 cleaning audio CD 61 case 60 CD 61 computer screen 60 DVD 61 keyboard 60 LCD panel 60 mouse 61...
... playing audio 26 recording 27 troubleshooting 73 CD drive adding 43 identifying 25 locating drive 7 replacing 43 See also optical drive troubleshooting 73 cellular phone memory cards 28 Certificate of Authenticity 3 cleaning audio CD 61 case 60 CD 61 computer screen 60 DVD 61 keyboard 60 LCD panel 60 mouse 61...
8512418 - Gateway Reference Guide
Page 131
www.gateway.com Warranty 106 D default printer setting 91 defragmenting hard drive 65 deleting files and folders 64 dial-up modem 16 adjusting volume 89 connecting 10 ... properties 86 troubleshooting 85 troubleshooting connection speed 87 digital audio out 9 digital camera locating USB port 7, 9 digital video camera locating IEEE 1394 port 7, 9 DIMM See memory directional keys 20, 21 Disk Cleanup 64 Disk Defragmenter 65 diskette troubleshooting 75 diskette drive 7 identifying 29 troubleshooting 75 using 29 display cleaning 60 troubleshooting...
www.gateway.com Warranty 106 D default printer setting 91 defragmenting hard drive 65 deleting files and folders 64 dial-up modem 16 adjusting volume 89 connecting 10 ... properties 86 troubleshooting 85 troubleshooting connection speed 87 digital audio out 9 digital camera locating USB port 7, 9 digital video camera locating IEEE 1394 port 7, 9 DIMM See memory directional keys 20, 21 Disk Cleanup 64 Disk Defragmenter 65 diskette troubleshooting 75 diskette drive 7 identifying 29 troubleshooting 75 using 29 display cleaning 60 troubleshooting...


