
User Guide
Page 7
... Dragging 30 Touchpad Control Adjustment 30 Touch Screen 31 Removing the Stylus 31 Clicking 32 Double-Clicking 33 Dragging 33 Calibrating the Touch Screen 34 Volume Control 35 Controlling the Volume 35 LifeBook Security/Application Panel 36 Setting up Your Security Panel 37 Passwords 37 Operating Your LifeBook Security/ Application Panel 41 Precautions 42 Uninstalling the Security...
... Dragging 30 Touchpad Control Adjustment 30 Touch Screen 31 Removing the Stylus 31 Clicking 32 Double-Clicking 33 Dragging 33 Calibrating the Touch Screen 34 Volume Control 35 Controlling the Volume 35 LifeBook Security/Application Panel 36 Setting up Your Security Panel 37 Passwords 37 Operating Your LifeBook Security/ Application Panel 41 Precautions 42 Uninstalling the Security...

User Guide
Page 17
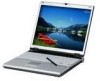
Locating the Controls and Connectors Display Panel Latch Touch Screen Display Panel Status Indicator Panel LifeBook Security Application Panel Suspend/ Resume Button Stereo Speakers Built-in Microphone Pen Garage LifeBook notebook with display open 12 - Locating the Controls and Connectors Scroll Button/Fingerprint Recognition Sensor Touchpad Pointing Device Keyboard Figure 2.
Locating the Controls and Connectors Display Panel Latch Touch Screen Display Panel Status Indicator Panel LifeBook Security Application Panel Suspend/ Resume Button Stereo Speakers Built-in Microphone Pen Garage LifeBook notebook with display open 12 - Locating the Controls and Connectors Scroll Button/Fingerprint Recognition Sensor Touchpad Pointing Device Keyboard Figure 2.

User Guide
Page 18
... The built-in dual speakers allow for the display of your LifeBook notebook from Windows. Locating the Controls and Connectors LifeBook Security/Application Panel The Security/Application Panel provides hardware security and one-touch application launch capability. Display Panel Latch The display panel latch is a color LCD panel with a specific component of your notebook when it has been...
... The built-in dual speakers allow for the display of your LifeBook notebook from Windows. Locating the Controls and Connectors LifeBook Security/Application Panel The Security/Application Panel provides hardware security and one-touch application launch capability. Display Panel Latch The display panel latch is a color LCD panel with a specific component of your notebook when it has been...

User Guide
Page 22
LifeBook notebook right-side panel Anti-Theft Lock Slot Right-Side Panel Components The following is used as the pointing device for the touch screen. CompactFlash Card Eject Button Allows you to connect Universal Serial Bus devices. USB 2.0 transfers data at up to 480 Mbps and is backward-compatible ... you to insert a CompactFlash (CF) card. Stylus CompactFlash Card Eject Button CompactFlash Card Slot USB 2.0 Ports Figure 4. Stylus The stylus is a brief description of your LifeBook notebook's right-side components.
LifeBook notebook right-side panel Anti-Theft Lock Slot Right-Side Panel Components The following is used as the pointing device for the touch screen. CompactFlash Card Eject Button Allows you to connect Universal Serial Bus devices. USB 2.0 transfers data at up to 480 Mbps and is backward-compatible ... you to insert a CompactFlash (CF) card. Stylus CompactFlash Card Eject Button CompactFlash Card Slot USB 2.0 Ports Figure 4. Stylus The stylus is a brief description of your LifeBook notebook's right-side components.

User Guide
Page 32
... Mute on and off . Keyboard The choices, in order, are used in display panel and external monitor. 27 - Function Keys Your LifeBook notebook has 12 function keys, F1 through F12. You should refer to toggle between ... you will increase the volume of your LifeBook notebook. • [Fn+F9]: Pressing [F9] repeatedly while holding [Fn] will step to these keys are : built-in display panel only, external monitor only, and both built...] repeatedly while holding [Fn] will decrease the volume of your LifeBook notebook. • [Fn+F10]: Pressing [F10] while holding [Fn] will toggle the...
... Mute on and off . Keyboard The choices, in order, are used in display panel and external monitor. 27 - Function Keys Your LifeBook notebook has 12 function keys, F1 through F12. You should refer to toggle between ... you will increase the volume of your LifeBook notebook. • [Fn+F9]: Pressing [F9] repeatedly while holding [Fn] will step to these keys are : built-in display panel only, external monitor only, and both built...] repeatedly while holding [Fn] will decrease the volume of your LifeBook notebook. • [Fn+F10]: Pressing [F10] while holding [Fn] will toggle the...

User Guide
Page 37
... object you wish to perform the left-click operation by pressing the key once. 32 - XP Professional: Select Touch Panel > Right Button Simulation tab. Figure 16. XP Tablet PC/Vista Business: Select Tablet and Pen Settings (or Pen and Input Devices in Vista).... your finger on the touch screen once. Go to Right-click. TO AVOID POTENTIAL SCRATCHING AND DAMAGE, NEVER USE ANYTHING BUT THE INCLUDED STYLUS OR YOUR FINGER WITH THE TOUCH SCREEN. To right-click, first select a right-button tool. TO PURCHASE ADDITIONAL OR REPLACEMENT STYLUSES, VISIT FUJITSU'S ACCESSORIES WEBSITE AT: ...
... object you wish to perform the left-click operation by pressing the key once. 32 - XP Professional: Select Touch Panel > Right Button Simulation tab. Figure 16. XP Tablet PC/Vista Business: Select Tablet and Pen Settings (or Pen and Input Devices in Vista).... your finger on the touch screen once. Go to Right-click. TO AVOID POTENTIAL SCRATCHING AND DAMAGE, NEVER USE ANYTHING BUT THE INCLUDED STYLUS OR YOUR FINGER WITH THE TOUCH SCREEN. To right-click, first select a right-button tool. TO PURCHASE ADDITIONAL OR REPLACEMENT STYLUSES, VISIT FUJITSU'S ACCESSORIES WEBSITE AT: ...

User Guide
Page 39
...Go to Start -> Control Panel and double-click on the Tablet Calibration icon. 2 Adjust the display of your notebook to the angle at which you usually work , and follow the calibration instructions on the screen. 3 When you change the display resolution. Touch Screen Depending upon your operating... you have finished calibrating the screen, reboot your system. Calibrating the Touch Screen In order to ensure accurate tracking between the stylus and cursor, you should run the calibration utility: 1 Go to [Start] -> Control Panel, and double-click on the Tablet and Pen Settings icon. 2 ...
...Go to Start -> Control Panel and double-click on the Tablet Calibration icon. 2 Adjust the display of your notebook to the angle at which you usually work , and follow the calibration instructions on the screen. 3 When you change the display resolution. Touch Screen Depending upon your operating... you have finished calibrating the screen, reboot your system. Calibrating the Touch Screen In order to ensure accurate tracking between the stylus and cursor, you should run the calibration utility: 1 Go to [Start] -> Control Panel, and double-click on the Tablet and Pen Settings icon. 2 ...

User Guide
Page 41
...XP TABLET PC EDITION INSTALLED HAVE ADDITIONAL FUNCTIONS, AS DETAILED IN THE TABLES ON THE FOLLOWING PAGES. 36 - LifeBook Security/Application Panel After entering a correct password, your notebook or resuming from unauthorized use. NOTE: THE FUNCTIONS OF THE BUTTONS ...TABLET PC EDITION PREINSTALLED. LifeBook Security/Application Panel LifeBook Security/Application Panel A unique feature of a button when your system is on the Security/Application Panel. The Security/Application Panel also allows you to launch applications with the touch of your LifeBook notebook is activated, upon...
...XP TABLET PC EDITION INSTALLED HAVE ADDITIONAL FUNCTIONS, AS DETAILED IN THE TABLES ON THE FOLLOWING PAGES. 36 - LifeBook Security/Application Panel After entering a correct password, your notebook or resuming from unauthorized use. NOTE: THE FUNCTIONS OF THE BUTTONS ...TABLET PC EDITION PREINSTALLED. LifeBook Security/Application Panel LifeBook Security/Application Panel A unique feature of a button when your system is on the Security/Application Panel. The Security/Application Panel also allows you to launch applications with the touch of your LifeBook notebook is activated, upon...

User Guide
Page 53
In Windows Vista systems, there are three ways to touch the screen, until it is backlit for easier viewing in . In Windows XP systems, the brightness can be adjusted using the keyboard, the Power... the brightness, by using the keyboard. Display Panel Opening the Display Panel 1 Press the Display Panel latch button in bright environments and maintains top resolution through the use of the screen to a more comfortable viewing level. Opening the Display Panel Display Panel Your Fujitsu LifeBook notebook contains a display panel that is at a comfortable viewing angle. Display...
In Windows Vista systems, there are three ways to touch the screen, until it is backlit for easier viewing in . In Windows XP systems, the brightness can be adjusted using the keyboard, the Power... the brightness, by using the keyboard. Display Panel Opening the Display Panel 1 Press the Display Panel latch button in bright environments and maintains top resolution through the use of the screen to a more comfortable viewing level. Opening the Display Panel Display Panel Your Fujitsu LifeBook notebook contains a display panel that is at a comfortable viewing angle. Display...

User Guide
Page 118
Microprocessor Intel Core 2 Duo microprocessor (To determine the processor speed, right-click My Computer, select Properties, then select the General tab.) Chipset Intel 945GM Memory System Memory • DDR2-... of memory for hardware usage. Dynamically responds to application requirements and allocates the proper amount of memory is installed in color flat-panel TFT active matrix LCD display with touch screen capability. Video Color and Resolution 12.1" XGA TFT • Internal: 1024 x 768 pixel resolution, 16M colors. • External: 1600 x 1200 pixel...
Microprocessor Intel Core 2 Duo microprocessor (To determine the processor speed, right-click My Computer, select Properties, then select the General tab.) Chipset Intel 945GM Memory System Memory • DDR2-... of memory for hardware usage. Dynamically responds to application requirements and allocates the proper amount of memory is installed in color flat-panel TFT active matrix LCD display with touch screen capability. Video Color and Resolution 12.1" XGA TFT • Internal: 1024 x 768 pixel resolution, 16M colors. • External: 1600 x 1200 pixel...
