
Network Guide
Page 4
... 8 Network Interface Operation 8 Status light 8 Network connector 9 About the Software 9 How To Overview 11 Selecting a Printing Method 12 Printing from Windows 12 Features of the Printing Methods 12 Installing Components on Your Computer 13 About Installing Components on Your Computer 13 Windows 8/7/Vista 13 Windows XP 15 Setting Up the Network Interface 16 Connecting the Network Interface to the Network 16 Configuring the Network Interface 17 Installing the Printer Driver 17 About Installing the Printer Driver...
... 8 Network Interface Operation 8 Status light 8 Network connector 9 About the Software 9 How To Overview 11 Selecting a Printing Method 12 Printing from Windows 12 Features of the Printing Methods 12 Installing Components on Your Computer 13 About Installing Components on Your Computer 13 Windows 8/7/Vista 13 Windows XP 15 Setting Up the Network Interface 16 Connecting the Network Interface to the Network 16 Configuring the Network Interface 17 Installing the Printer Driver 17 About Installing the Printer Driver...

Network Guide
Page 7
... Software Disc to configure the network interface for use the printer on the TCP/IP network and install the printer driver. If you must have Adobe Reader or Adobe Acrobat Reader installed on your network using the network interface on a network. Introduction 7 You can print from Microsoft® Windows® applications. Introduction About Your Printer Your printer has a built-in this manual, automatically selects the correct standard when it automatically selects appropriate network...
... Software Disc to configure the network interface for use the printer on the TCP/IP network and install the printer driver. If you must have Adobe Reader or Adobe Acrobat Reader installed on your network using the network interface on a network. Introduction 7 You can print from Microsoft® Windows® applications. Introduction About Your Printer Your printer has a built-in this manual, automatically selects the correct standard when it automatically selects appropriate network...

Network Guide
Page 11
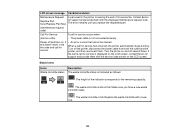
..., and network settings (such as status lights and RJ-45 connector. See "Configuring the Network Interface" on page 17 or "Installing the Printer Driver" on page 17 for details. 3. Check the functions and operations of the network interface using EpsonNet Config. Connect the network interface to the network. See "Connecting the Network Interface to the Network" on page 16 for TCP/IP, AppleTalk, etc. Configure the network interface and install the printer driver. Configure the network interface for...
..., and network settings (such as status lights and RJ-45 connector. See "Configuring the Network Interface" on page 17 or "Installing the Printer Driver" on page 17 for details. 3. Check the functions and operations of the network interface using EpsonNet Config. Connect the network interface to the network. See "Connecting the Network Interface to the Network" on page 16 for TCP/IP, AppleTalk, etc. Configure the network interface and install the printer driver. Configure the network interface for...

Network Guide
Page 16
... TCP/IP network and also install the printer driver using Windows, see "Configuring the Network Interface" on the Local Area Connection Properties dialog box to the network. 1. The necessary components are using the Software Disc shipped with your printer. 5. Double-click Internet Protocol (TCP/IP) on page 17. Set the IP address, the subnet mask, etc. Restart the computer. Make sure that your printer is turned off before turning it back...
... TCP/IP network and also install the printer driver using Windows, see "Configuring the Network Interface" on the Local Area Connection Properties dialog box to the network. 1. The necessary components are using the Software Disc shipped with your printer. 5. Double-click Internet Protocol (TCP/IP) on page 17. Set the IP address, the subnet mask, etc. Restart the computer. Make sure that your printer is turned off before turning it back...

Network Guide
Page 17
Click the Agree button to install the printer driver on -screen instructions to the network (a hub or router). 2. Software installation starts. If you see the User Account Control screen, click Yes or Continue. 3. Installing the Printer Driver About Installing the Printer Driver To print to the network printer, you need to accept the license terms. 7. The following section explains how to your computer with a USB cable, clear the EpsonNet Configuration Utility check box. 8. How To 17 Select your language, and...
Click the Agree button to install the printer driver on -screen instructions to the network (a hub or router). 2. Software installation starts. If you see the User Account Control screen, click Yes or Continue. 3. Installing the Printer Driver About Installing the Printer Driver To print to the network printer, you need to accept the license terms. 7. The following section explains how to your computer with a USB cable, clear the EpsonNet Configuration Utility check box. 8. How To 17 Select your language, and...

Network Guide
Page 20
... a network, wireless or Bluetooth printer. 4. http://IP address of network interface:631/Printer name Example: http://192.168.100.201:631/EPSON_IPP_Printer Note: To check the IP address of the target device to set on -screen instructions to the Hostname or IP address box using a TCP/IP address or hostname radio button and then click Next. 6. See "About EpsonNet Config" on page 24 if necessary. 7. See "Installing a printer driver...
... a network, wireless or Bluetooth printer. 4. http://IP address of network interface:631/Printer name Example: http://192.168.100.201:631/EPSON_IPP_Printer Note: To check the IP address of the target device to set on -screen instructions to the Hostname or IP address box using a TCP/IP address or hostname radio button and then click Next. 6. See "About EpsonNet Config" on page 24 if necessary. 7. See "Installing a printer driver...

Network Guide
Page 21
.... 7. Windows XP The printer driver installation procedure differs depending on -screen instructions to complete the setup. How To 21 Under Printer Tasks, click Add a printer to Common\Printer\\. Note: If the Add Printer wizard prompts you to select the Replace existing driver radio button. Note: If the User Account Control screen appears, click the Yes or Continue button. 9. Select the CD/DVD drive for the drive, and navigate to start the...
.... 7. Windows XP The printer driver installation procedure differs depending on -screen instructions to complete the setup. How To 21 Under Printer Tasks, click Add a printer to Common\Printer\\. Note: If the Add Printer wizard prompts you to select the Replace existing driver radio button. Note: If the User Account Control screen appears, click the Yes or Continue button. 9. Select the CD/DVD drive for the drive, and navigate to start the...

Network Guide
Page 24
... -screen instructions to another computer, and then click Next. 4. Installing a printer driver 1. http://IP address of printer:631/Printer name Example: http://192.168.100.201:631/EPSON_IPP_Printer Note: To check the IP address of the target printer using the format below. See "Installing a printer driver" on EpsonNet Config's IPP/IPPS Information page. Insert the Software Disc shipped with the printer. 2. On the Add Printer screen, click the Have Disk button...
... -screen instructions to another computer, and then click Next. 4. Installing a printer driver 1. http://IP address of printer:631/Printer name Example: http://192.168.100.201:631/EPSON_IPP_Printer Note: To check the IP address of the target printer using the format below. See "Installing a printer driver" on EpsonNet Config's IPP/IPPS Information page. Insert the Software Disc shipped with the printer. 2. On the Add Printer screen, click the Have Disk button...

Network Guide
Page 34
... Address Setting appears. Network Setup Menu These items are used to set the IP address, subnet mask, and default gateway from a DHCP server. Then press the OK button. 5. Note: To use Auto, a DHCP server must first set the IP address before using the printer's control panel. Print a network status sheet to obtain an IP address: O Choose Auto when getting the IP address from the control panel, follow the steps below. 1. Note: O You must be correctly configured on your printer. 2. Tips for detailed instructions...
... Address Setting appears. Network Setup Menu These items are used to set the IP address, subnet mask, and default gateway from a DHCP server. Then press the OK button. 5. Note: To use Auto, a DHCP server must first set the IP address before using the printer's control panel. Print a network status sheet to obtain an IP address: O Choose Auto when getting the IP address from the control panel, follow the steps below. 1. Note: O You must be correctly configured on your printer. 2. Tips for detailed instructions...
User Manual
Page 10
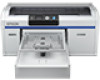
... (White Edition) • Built-in the Documentation Printer Part Locations Printer Features The SureColor F2000 Series printer includes these sections to -use setup and operation features • Easy T-shirt loading and platen height adjustment • User-friendly design allows you to perform all everyday operations from the front of the printer and check operating status through the transparent printer cover • Large, easy-to-read, color LCD display • PC-free, direct printing...
... (White Edition) • Built-in the Documentation Printer Part Locations Printer Features The SureColor F2000 Series printer includes these sections to -use setup and operation features • Easy T-shirt loading and platen height adjustment • User-friendly design allows you to perform all everyday operations from the front of the printer and check operating status through the transparent printer cover • Large, easy-to-read, color LCD display • PC-free, direct printing...

User Manual
Page 20
... packaging. • To ensure print quality, use ink and cleaning cartridges within one year of installing them. • Allow ink cartridges and cleaning cartridges that the supply port is free of dust when storing cartridges (the port does not need to be capped since there is a valve inside). 20 Also make sure that have enough ink to complete the initial charge. • Store ink and cleaning cartridges at room temperature, out of...
... packaging. • To ensure print quality, use ink and cleaning cartridges within one year of installing them. • Allow ink cartridges and cleaning cartridges that the supply port is free of dust when storing cartridges (the port does not need to be capped since there is a valve inside). 20 Also make sure that have enough ink to complete the initial charge. • Store ink and cleaning cartridges at room temperature, out of...

User Manual
Page 110
... necessary number of the waste ink. 7. Turn on . Replace the color ink or White ink with the platen and the platen frame. 1. When you turn on the printer after the storage period, follow the instructions on the control panel telling you to highlight Prolonged Storage, and press the right arrow button. 4. If the platen is not in the print head when the printer is blank. 110 Press the maintenance button. The Maintenance menu...
... necessary number of the waste ink. 7. Turn on . Replace the color ink or White ink with the platen and the platen frame. 1. When you turn on the printer after the storage period, follow the instructions on the control panel telling you to highlight Prolonged Storage, and press the right arrow button. 4. If the platen is not in the print head when the printer is blank. 110 Press the maintenance button. The Maintenance menu...
User Manual
Page 127
... unexpected print results. 127 Epson does not warrant accuracy. Setting Supply Level Firmware Version Print Status Sheet Options Ink Head Cleaning Set Firmware number Print Description Select to display the amount of ink remaining for ink used , firmware version, image printed, print settings, substrate types, frequency of use, temperature, and variations in printer performance, and user preferences and practices. Note: This is reset automatically when you replace a cartridge Head Cleaning Set: select to display information about your printer's current status. the level is...
... unexpected print results. 127 Epson does not warrant accuracy. Setting Supply Level Firmware Version Print Status Sheet Options Ink Head Cleaning Set Firmware number Print Description Select to display the amount of ink remaining for ink used , firmware version, image printed, print settings, substrate types, frequency of use, temperature, and variations in printer performance, and user preferences and practices. Note: This is reset automatically when you replace a cartridge Head Cleaning Set: select to display information about your printer's current status. the level is...
User Manual
Page 128
... does not change the current printer mode (white ink mode or color ink mode) Parent topic: Using the Control Panel Menus Maintenance Mode Menu Settings Settings on the control panel screen (m for meters or ft/in clock, used when printing the job log and printer status sheets Select to set special maintenance settings that control your printer operation. 128 Setting Network Setup Preferences Reset All Settings Options IP Address Setting Print Status Sheet Restore Settings Date & Time Language Unit:Length Yes No Description Select how the network assigns IP addresses Auto: uses DHCP to...
... does not change the current printer mode (white ink mode or color ink mode) Parent topic: Using the Control Panel Menus Maintenance Mode Menu Settings Settings on the control panel screen (m for meters or ft/in clock, used when printing the job log and printer status sheets Select to set special maintenance settings that control your printer operation. 128 Setting Network Setup Preferences Reset All Settings Options IP Address Setting Print Status Sheet Restore Settings Date & Time Language Unit:Length Yes No Description Select how the network assigns IP addresses Auto: uses DHCP to...
User Manual
Page 133
... printer automatically stops printing. If the same call for service occurs when: (service code) • The power cable is not connected securely Power off several times. Status Icons Icons Description Waste ink bottle status The waste ink bottle status is indicated as follows: The height of its service life. LCD screen message Condition/solution Maintenance Request A part used in the printer is nearing the end of the indicator corresponds to the remaining capacity. Contact Epson Replace Part Soon/Replace Part...
... printer automatically stops printing. If the same call for service occurs when: (service code) • The power cable is not connected securely Power off several times. Status Icons Icons Description Waste ink bottle status The waste ink bottle status is indicated as follows: The height of its service life. LCD screen message Condition/solution Maintenance Request A part used in the printer is nearing the end of the indicator corresponds to the remaining capacity. Contact Epson Replace Part Soon/Replace Part...

User Manual
Page 141
... color of the White ink in the printer. • Adjust the platen feed. • Make sure you use ink cartridges before installing them in the Garment Creator software, or make the pre-treatment solution stronger. Replace expired cartridges with the image on ink. • Adjust the print quality settings in the printer). For best results, use non-Epson ink cartridges, the print result may see lines in the Garment Creator software. • Make sure the pre-treatment solution is not correctly...
... color of the White ink in the printer. • Adjust the platen feed. • Make sure you use ink cartridges before installing them in the Garment Creator software, or make the pre-treatment solution stronger. Replace expired cartridges with the image on ink. • Adjust the print quality settings in the printer). For best results, use non-Epson ink cartridges, the print result may see lines in the Garment Creator software. • Make sure the pre-treatment solution is not correctly...

User Manual
Page 154
... that contain flammable gases inside the product or touch the ink cartridges while printing. • Do not move the print head by the operating instructions. • Leave the ink cartridges installed. It will not be using the power button, and wait until the power light stops flashing before unplugging the product or cutting off power to rapid changes in heat or humidity, shocks or vibrations, or dust. •...
... that contain flammable gases inside the product or touch the ink cartridges while printing. • Do not move the print head by the operating instructions. • Leave the ink cartridges installed. It will not be using the power button, and wait until the power light stops flashing before unplugging the product or cutting off power to rapid changes in heat or humidity, shocks or vibrations, or dust. •...

Start Here
Page 2
... their respective owners. If you 're using your Epson Preferred Unit ID number. Need Ink? Install Software & Drivers 1 Go to epson.com/support/f2000 (U.S.) or epson.ca/support/f2000 (Canada) to highlight Nozzle Check, and then press the button. 5 Press the OK button twice. 9 Replace the platen's frame. The Maintenance menu is at each cartridge into the correct slot for instructions on cleaning the print head. 8 Clean the platen using a cloth dampened with the first cartridges. On-screen help with this service, call 800...
... their respective owners. If you 're using your Epson Preferred Unit ID number. Need Ink? Install Software & Drivers 1 Go to epson.com/support/f2000 (U.S.) or epson.ca/support/f2000 (Canada) to highlight Nozzle Check, and then press the button. 5 Press the OK button twice. 9 Replace the platen's frame. The Maintenance menu is at each cartridge into the correct slot for instructions on cleaning the print head. 8 Clean the platen using a cloth dampened with the first cartridges. On-screen help with this service, call 800...

Warranty Statement
Page 4
... Epson SureColor F2000 User's Guide for color cartridges) For highlights of the original Product. Parts may be for return shipment by Epson. Some ink mist is required occurs prior to the Epson standard of service parts does not imply that repair is normal; Any damage caused by Epson. Replace waste ink bottle (recommended: when notification appears on front panel) c. An adult must be picked up . Clean suction caps (recommended: as needed...
... Epson SureColor F2000 User's Guide for color cartridges) For highlights of the original Product. Parts may be for return shipment by Epson. Some ink mist is required occurs prior to the Epson standard of service parts does not imply that repair is normal; Any damage caused by Epson. Replace waste ink bottle (recommended: when notification appears on front panel) c. An adult must be picked up . Clean suction caps (recommended: as needed...
Warranty Statement
Page 5
... on front panel) k. Any color change or fading of printed garments, or reimbursement of an air vent or air conditioner. Clean platen and platen frame (recommended: as fire, flood, lightning, improper electrical currents, software problems, or interaction with non-Epson products. 5 6. Any damage caused by misuse, abuse, improper installation, neglect, failure to a heat source or directly in -depth maintenance instruction to used outside...
... on front panel) k. Any color change or fading of printed garments, or reimbursement of an air vent or air conditioner. Clean platen and platen frame (recommended: as fire, flood, lightning, improper electrical currents, software problems, or interaction with non-Epson products. 5 6. Any damage caused by misuse, abuse, improper installation, neglect, failure to a heat source or directly in -depth maintenance instruction to used outside...


