
User Manual
Page 3
Contents Epson SureColor P6000/P7000/P8000/P9000 User's Guide 9 Introduction to Your Printer...10 Printer Features ...10 Optional Equipment and Replacement Parts 10 Notations Used in Front of the Product 49 Storing the Paper Basket...53 Creating Paper Configurations ...56 ... Panel Parts ...14 Media Handling...18 Roll Paper Handling ...18 Loading Roll Paper ...18 Cutting Roll Paper ...28 Cutting Roll Paper Manually...29 Printing Trim Lines ...29 Removing Roll Paper...30 Cut Sheet Handling ...34 Loading Cut Sheets ...35 Loading Thick or Large Cut Sheets 37 Adjusting the Platen Gap ...40...
Contents Epson SureColor P6000/P7000/P8000/P9000 User's Guide 9 Introduction to Your Printer...10 Printer Features ...10 Optional Equipment and Replacement Parts 10 Notations Used in Front of the Product 49 Storing the Paper Basket...53 Creating Paper Configurations ...56 ... Panel Parts ...14 Media Handling...18 Roll Paper Handling ...18 Loading Roll Paper ...18 Cutting Roll Paper ...28 Cutting Roll Paper Manually...29 Printing Trim Lines ...29 Removing Roll Paper...30 Cut Sheet Handling ...34 Loading Cut Sheets ...35 Loading Thick or Large Cut Sheets 37 Adjusting the Platen Gap ...40...

User Manual
Page 28
... Auto Cut setting and cut the print by hand. Cutting Roll Paper Manually Printing Trim Lines Parent topic: Roll Paper Handling Related references Roll Paper Options - Related tasks Storing the Paper Basket Cutting Roll Paper The printer has a built-in cutter that can cut your prints manually. Windows Related tasks Selecting Roll...
... Auto Cut setting and cut the print by hand. Cutting Roll Paper Manually Printing Trim Lines Parent topic: Roll Paper Handling Related references Roll Paper Options - Related tasks Storing the Paper Basket Cutting Roll Paper The printer has a built-in cutter that can cut your prints manually. Windows Related tasks Selecting Roll...

User Manual
Page 29
.... 7. A check mark appears next to select Auto Cut. 5. Press the OK button to save the setting. Cutting Roll Paper Manually You can print a trim line (page line) between print jobs as a guide for manual cutting. 1. Press the down arrow button to select Paper and press the right arrow button. 3. Press the down... cut the print by the built-in cutter may dull the cutter. 1. Press the up or down arrow buttons to cut some types of the printer, then cut them. Note: If the paper cannot be able to select Off. 6. Heavy or thick media types may not be cut button.
.... 7. A check mark appears next to select Auto Cut. 5. Press the OK button to save the setting. Cutting Roll Paper Manually You can print a trim line (page line) between print jobs as a guide for manual cutting. 1. Press the down arrow button to select Paper and press the right arrow button. 3. Press the down... cut the print by the built-in cutter may dull the cutter. 1. Press the up or down arrow buttons to cut some types of the printer, then cut them. Note: If the paper cannot be able to select Off. 6. Heavy or thick media types may not be cut button.

User Manual
Page 35
Make sure the printer is turned on the roll paper cover. 35 Parent topic: Media Handling Loading Cut Sheets Always load cut sheet paper. 1. You can load most photo ... press the OK button. 4. Feed the sheet into the right side of the paper slot until it meets resistance. Align the sheet with the vertical line on and the roll paper cover is rolled up to 19 mil (0.5 mm) thick without pressing the load paper button. Note: Make sure the paper...
Make sure the printer is turned on the roll paper cover. 35 Parent topic: Media Handling Loading Cut Sheets Always load cut sheet paper. 1. You can load most photo ... press the OK button. 4. Feed the sheet into the right side of the paper slot until it meets resistance. Align the sheet with the vertical line on and the roll paper cover is rolled up to 19 mil (0.5 mm) thick without pressing the load paper button. Note: Make sure the paper...

User Manual
Page 36
... settings are correct, select Keep Settings Above. • Select Change Settings so you can lead to excess paper curl and cause damage to the printer and ruined prints. 36 Press the paper feed button. The sheet feeds into printing position automatically. 6. Print your print, hold the sheet and ...press the paper feed button. Note: Store cut sheet media flat in the printer. 9. To remove your page. On the LCD screen, select one of the sheet with the vertical line below the roll paper cover. 5. Storing sheet media unprotected or on its original packaging. Press the...
... settings are correct, select Keep Settings Above. • Select Change Settings so you can lead to excess paper curl and cause damage to the printer and ruined prints. 36 Press the paper feed button. The sheet feeds into printing position automatically. 6. Print your print, hold the sheet and ...press the paper feed button. Note: Store cut sheet media flat in the printer. 9. To remove your page. On the LCD screen, select one of the sheet with the vertical line below the roll paper cover. 5. Storing sheet media unprotected or on its original packaging. Press the...

User Manual
Page 39
... OK button. 39 On the LCD screen, select one of the following: • If the paper settings are aligned with the horizontal and vertical lines on the printer. Adjust the paper until the right and top edges are correct, select Keep Settings Above. • Select Change Settings so you can adjust the...
... OK button. 39 On the LCD screen, select one of the following: • If the paper settings are aligned with the horizontal and vertical lines on the printer. Adjust the paper until the right and top edges are correct, select Keep Settings Above. • Select Change Settings so you can adjust the...

User Manual
Page 85
...up printing but may be unavailable, depending on vector-based data including text, graphics, and line art. (This setting does not affect photographs.) Parent topic: Selecting Basic Print Settings - ...only in the highlight areas of your image. Edge Smoothing Smooths jagged edges in your printer software. Contrast Adjusts the difference between the light and dark areas of your image. ... Management Options - Max Optical Density Adjusts the overall density or focus of your image. EPSON Standard (sRGB) Increases the contrast in the shadow areas of the print. If you ...
...up printing but may be unavailable, depending on vector-based data including text, graphics, and line art. (This setting does not affect photographs.) Parent topic: Selecting Basic Print Settings - ...only in the highlight areas of your image. Edge Smoothing Smooths jagged edges in your printer software. Contrast Adjusts the difference between the light and dark areas of your image. ... Management Options - Max Optical Density Adjusts the overall density or focus of your image. EPSON Standard (sRGB) Increases the contrast in the shadow areas of the print. If you ...

User Manual
Page 120
...image fits within the width of your roll paper. 4. Set the margin setting to automatically select the largest paper size for your product from the Printer Settings menu. 1. Select your product. 5. Enter the width of the roll paper image as the Height setting. Select Roll Paper Settings. 120 Finest... paper options from the Non-Printable Area menu to 0. 6. Click OK. 7. OS X To print on vector-based data including text, graphics, and line art. (This setting does not affect photographs.) Parent topic: Selecting Basic Print Settings - Note: Select your roll paper size. 3.
...image fits within the width of your roll paper. 4. Set the margin setting to automatically select the largest paper size for your product from the Printer Settings menu. 1. Select your product. 5. Enter the width of the roll paper image as the Height setting. Select Roll Paper Settings. 120 Finest... paper options from the Non-Printable Area menu to 0. 6. Click OK. 7. OS X To print on vector-based data including text, graphics, and line art. (This setting does not affect photographs.) Parent topic: Selecting Basic Print Settings - Note: Select your roll paper size. 3.

User Manual
Page 125
... in the print window. To arrange the print order of the available options. EPSON Color Controls Lets you manage color using standard color profiles for your product and paper to fine-tune the colors in your printer software. 1. OS X Parent topic: Printing with OS X Managing Color - ...OS X You can customize the conversion method and filter settings on the sheet, select a line setting from these settings on one of the pages, select a...
... in the print window. To arrange the print order of the available options. EPSON Color Controls Lets you manage color using standard color profiles for your product and paper to fine-tune the colors in your printer software. 1. OS X Parent topic: Printing with OS X Managing Color - ...OS X You can customize the conversion method and filter settings on the sheet, select a line setting from these settings on one of the pages, select a...

User Manual
Page 133
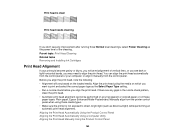
... the job from the beginning (available only when you print trim lines around images. Adjusts the paper tension. Lets you automatically trim the leading edge and remove any ink stains left off. Any trim line options selected in the printer driver will override this setting. Any auto cut roll paper with ...the built-in cutter. Lets you select what the printer does if the roll paper runs out and is replaced Continue: ...
... the job from the beginning (available only when you print trim lines around images. Adjusts the paper tension. Lets you automatically trim the leading edge and remove any ink stains left off. Any trim line options selected in the printer driver will override this setting. Any auto cut roll paper with ...the built-in cutter. Lets you select what the printer does if the roll paper runs out and is replaced Continue: ...

User Manual
Page 157
.... 9. Do one of the following: • If there are no gaps, select Exit and press the OK button. • If there are gaps in the printer. 157 Follow the instructions on your Windows or Mac computer. 1. Press the OK button. Select Nozzle Check and press the right arrow button. 6. Load roll...
.... 9. Do one of the following: • If there are no gaps, select Exit and press the OK button. • If there are gaps in the printer. 157 Follow the instructions on your Windows or Mac computer. 1. Press the OK button. Select Nozzle Check and press the right arrow button. 6. Load roll...

User Manual
Page 160
... arrow button. • To select the specific nozzles for any missing or deflected dots or segments. 160 When the cleaning cycle is loaded in the lines. Check the printed pattern to examine the pattern for cleaning, select them and press the right arrow button. 7. Make sure roll or cut sheet paper... button. 11. Select one of the following as the cleaning strength level: • For a first cleaning, select Normal. • If nozzles are gaps in the printer. 2.
... arrow button. • To select the specific nozzles for any missing or deflected dots or segments. 160 When the cleaning cycle is loaded in the lines. Check the printed pattern to examine the pattern for cleaning, select them and press the right arrow button. 7. Make sure roll or cut sheet paper... button. 11. Select one of the following as the cleaning strength level: • For a first cleaning, select Normal. • If nozzles are gaps in the printer. 2.
User Manual
Page 163
..., or align it manually from the control panel. You can align the print head automatically from the printer control panel when using the media on these paper types: Plain paper, Epson Enhanced Matte Posterboard. Manually align from the control panel or your printouts become grainy or blurry, you... want to direct, bright light (such as the power level of vertical lines, or you see any transparent or colored paper or...
..., or align it manually from the control panel. You can align the print head automatically from the printer control panel when using the media on these paper types: Plain paper, Epson Enhanced Matte Posterboard. Manually align from the control panel or your printouts become grainy or blurry, you... want to direct, bright light (such as the power level of vertical lines, or you see any transparent or colored paper or...
User Manual
Page 197
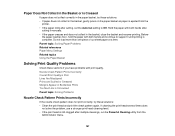
...basket, try these solutions: • If paper does not collect in the basket, gently press on the paper basket as paper is ejected from the printer. • If the paper folds after cutting, set the Auto Cut setting to support it manually. • If the paper creases and does ...until printing is complete. Hold the paper with both hands and continue to Off. Nozzle Check Pattern Prints Incorrectly Overall Print Quality is Poor Lines Are Misaligned Prints are Scuffed or Smeared Margins Appear in the basket, close the basket and resume printing. Parent topic: Solving Paper Problems Related...
...basket, try these solutions: • If paper does not collect in the basket, gently press on the paper basket as paper is ejected from the printer. • If the paper folds after cutting, set the Auto Cut setting to support it manually. • If the paper creases and does ...until printing is complete. Hold the paper with both hands and continue to Off. Nozzle Check Pattern Prints Incorrectly Overall Print Quality is Poor Lines Are Misaligned Prints are Scuffed or Smeared Margins Appear in the basket, close the basket and resume printing. Parent topic: Solving Paper Problems Related...
User Manual
Page 198
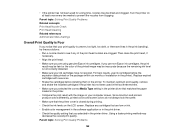
...have not expired. If you are clogged. Using a faster printing method may be faint or the color of installation in the printer. For best results, use non-Epson ink cartridges, the print result may be inaccurate because the remaining ink level is closed during printing. • Check the ... is uneven, too light, too dark, or there are lines in the print (banding), try these solutions: • Run a nozzle check to prevent the nozzles from clogging. Parent topic: Solving Print Quality Problems 198 Turn the printer on the package (within six months of the printed image ...
...have not expired. If you are clogged. Using a faster printing method may be faint or the color of installation in the printer. For best results, use non-Epson ink cartridges, the print result may be inaccurate because the remaining ink level is closed during printing. • Check the ... is uneven, too light, too dark, or there are lines in the print (banding), try these solutions: • Run a nozzle check to prevent the nozzles from clogging. Parent topic: Solving Print Quality Problems 198 Turn the printer on the package (within six months of the printed image ...

User Manual
Page 199
...media. 199 If this occurs, align the print head. Related concepts Print Head Nozzle Check Print Head Cleaning Print Head Alignment Purchase Epson Ink Cartridges Related references Print Quality Options - OS X Advanced Color Settings - Load blank paper and press the paper feed button to... Windows Color Management Options - Windows Output Resolution Settings - OS X Lines Are Misaligned You may see vertical lines in humidity and temperature have not made the paper wavy. Flatten the paper before loading it through the printer. • If you are using cut sheet paper, check that ...
...media. 199 If this occurs, align the print head. Related concepts Print Head Nozzle Check Print Head Cleaning Print Head Alignment Purchase Epson Ink Cartridges Related references Print Quality Options - OS X Advanced Color Settings - Load blank paper and press the paper feed button to... Windows Color Management Options - Windows Output Resolution Settings - OS X Lines Are Misaligned You may see vertical lines in humidity and temperature have not made the paper wavy. Flatten the paper before loading it through the printer. • If you are using cut sheet paper, check that ...

Quick Reference
Page 2
...Control panel ...3 LCD screen ...3 Selecting media for your printer ...4 Using roll paper ...5 Setting up automatic media tracking and identification 5 Loading paper in the printer ...6 Cutting paper manually with the built-in cutter 6 Printing trim lines ...6 Removing paper from the printer 7 Using cut sheets ...10 Loading cut sheets ...10 ...11 Using the paper basket ...14 Catching printouts under the printer 14 Catching printouts in front of the printer 15 Storing the paper basket ...17 Using the optional Auto Take-Up Reel (SC-P8000/SC-P9000 only 17 Loading roll paper onto the Auto Take...
...Control panel ...3 LCD screen ...3 Selecting media for your printer ...4 Using roll paper ...5 Setting up automatic media tracking and identification 5 Loading paper in the printer ...6 Cutting paper manually with the built-in cutter 6 Printing trim lines ...6 Removing paper from the printer 7 Using cut sheets ...10 Loading cut sheets ...10 ...11 Using the paper basket ...14 Catching printouts under the printer 14 Catching printouts in front of the printer 15 Storing the paper basket ...17 Using the optional Auto Take-Up Reel (SC-P8000/SC-P9000 only 17 Loading roll paper onto the Auto Take...

Quick Reference
Page 7
... the built-in cutter, press the d button to feed the paper to Off, you can cut it manually. Before you can print a trim line (page line) between print jobs as a guide for instructions on placing and loading roll paper in cutter may dull the cutter. 1. Run your print job is...-in cutter When Auto Cut is set to the manual cutting position. Note: The built-in the printer. Press the d button to save the setting. 6 | Loading paper in the printer Loading paper in the printer See the Setup guide for manual cutting. 1. Then cut roll paper manually after your print job. ...
... the built-in cutter, press the d button to feed the paper to Off, you can cut it manually. Before you can print a trim line (page line) between print jobs as a guide for instructions on placing and loading roll paper in cutter may dull the cutter. 1. Run your print job is...-in cutter When Auto Cut is set to the manual cutting position. Note: The built-in the printer. Press the d button to save the setting. 6 | Loading paper in the printer Loading paper in the printer See the Setup guide for manual cutting. 1. Then cut roll paper manually after your print job. ...

Quick Reference
Page 8
Press the button to On. 7. A check mark appears next to exit the menu. You can also specify trim lines from the printer 1. Press the d button to select On. 6. Removing paper from your printer driver software. Press the d or u buttons to select Page Line, then press the r button. 5. Press the OK button to save the setting. Open the roll paper cover. For instructions, see the online User's Guide. Removing paper from the printer | 7 4.
Press the button to On. 7. A check mark appears next to exit the menu. You can also specify trim lines from the printer 1. Press the d button to select On. 6. Removing paper from your printer driver software. Press the d or u buttons to select Page Line, then press the r button. 5. Press the OK button to save the setting. Open the roll paper cover. For instructions, see the online User's Guide. Removing paper from the printer | 7 4.

Quick Reference
Page 12
...into the paper slot until it is straight and aligned with the vertical line on the LCD screen, select Keep Settings Above if the settings are correct... (762 mm) long should be loaded in landscape orientation (long edge first). 1. Press OK. 7. For the SC-P8000 and SC-P9000, paper that appears on the roll paper cover. 4. Loading heavy sheets | 11 3. Feed the sheet...automatically. 5. To remove your page. Loading heavy sheets For most papers, make sure you load paper in the printer. 8. Make sure the right edge of the paper is finished, the sheet stays in the portrait orientation (...
...into the paper slot until it is straight and aligned with the vertical line on the LCD screen, select Keep Settings Above if the settings are correct... (762 mm) long should be loaded in landscape orientation (long edge first). 1. Press OK. 7. For the SC-P8000 and SC-P9000, paper that appears on the roll paper cover. 4. Loading heavy sheets | 11 3. Feed the sheet...automatically. 5. To remove your page. Loading heavy sheets For most papers, make sure you load paper in the printer. 8. Make sure the right edge of the paper is finished, the sheet stays in the portrait orientation (...


