
Notices and Warranty
Page 1
... For Canadian Users CAN ICES-3(B)/NMB-3(B) Declaration of Product: Color image scanner Model: J441F/J441C/J441A/J441A Marketing Name: ES-C220/ES-C380W/ES-C320W/RR-400W Epson America, Inc. Trade Name: Epson® Type of Conformity According to 47CFR, Part 2 and...documentation, manuals, software, or cables.) You are items that wear out under law or in connection with arbitration at http://www.jamsadr.com ("Demand for Arbitration"). a. Write a Demand for Arbitration: The demand must accept any Dispute informally. Send three (3) copies of the replacement product in case you or Epson...
... For Canadian Users CAN ICES-3(B)/NMB-3(B) Declaration of Product: Color image scanner Model: J441F/J441C/J441A/J441A Marketing Name: ES-C220/ES-C380W/ES-C320W/RR-400W Epson America, Inc. Trade Name: Epson® Type of Conformity According to 47CFR, Part 2 and...documentation, manuals, software, or cables.) You are items that wear out under law or in connection with arbitration at http://www.jamsadr.com ("Demand for Arbitration"). a. Write a Demand for Arbitration: The demand must accept any Dispute informally. Send three (3) copies of the replacement product in case you or Epson...
Users Guide
Page 3
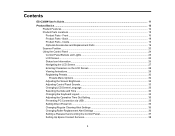
... Screen Brightness...33 Adjusting Control Panel Sounds ...33 Changing LCD Screen Language 33 Selecting the Date and Time ...34 Changing the Keyboard Layout ...34 Adjusting the Operation Time Out Setting 35 Preventing PC Connection via USB 35 Setting Direct Power On ...35 Changing Regular Cleaning Alert Settings 36 Changing Roller Replacement Alert Settings 36 Setting a Password and Locking the Control Panel 37 Setting Up Epson Connect Services 38 3 Contents ES-C380W User's Guide...11 Product Basics ...12 Product Features...12 Product Parts Locations ...15 Product Parts...
... Screen Brightness...33 Adjusting Control Panel Sounds ...33 Changing LCD Screen Language 33 Selecting the Date and Time ...34 Changing the Keyboard Layout ...34 Adjusting the Operation Time Out Setting 35 Preventing PC Connection via USB 35 Setting Direct Power On ...35 Changing Regular Cleaning Alert Settings 36 Changing Roller Replacement Alert Settings 36 Setting a Password and Locking the Control Panel 37 Setting Up Epson Connect Services 38 3 Contents ES-C380W User's Guide...11 Product Basics ...12 Product Features...12 Product Parts Locations ...15 Product Parts...

Users Guide
Page 4
Using Power Saving Settings ...39 Changing the Sleep Timer Settings 39 Changing the Power Off Timer Settings 39 Available Software ...40 Using the Epson Smart Panel Mobile App 41 Wi-Fi Networking ...42 Network Security Recommendations 42 Connecting to an Existing Wi-Fi Network 43 Selecting Wireless Network Settings from the Control Panel 44 Wi-Fi Direct (Simple AP) Mode Setup 45 Connecting to a Mobile Device ...46 Modifying the Wi-Fi Direct Network Name or Password 46 Setting Up Wireless Scanning from...
Using Power Saving Settings ...39 Changing the Sleep Timer Settings 39 Changing the Power Off Timer Settings 39 Available Software ...40 Using the Epson Smart Panel Mobile App 41 Wi-Fi Networking ...42 Network Security Recommendations 42 Connecting to an Existing Wi-Fi Network 43 Selecting Wireless Network Settings from the Control Panel 44 Wi-Fi Direct (Simple AP) Mode Setup 45 Connecting to a Mobile Device ...46 Modifying the Wi-Fi Direct Network Name or Password 46 Setting Up Wireless Scanning from...

Users Guide
Page 5
... Specifications ...115 Scanning ...118 Starting a Scan...118 Starting a Scan Using the Product Control Panel 118 Scanning to an External USB Device 120 Scanning to the Cloud...121 Scanning to Email ...122 Scanning to a Connected Computer 124 Control Panel Scanning Options 125 Setting Up and Scanning to a Network Folder or FTP Server 127 Creating a Shared Network Folder 127 Registering Contacts for Email, Network, or FTP Scanning - Loading Plastic and Laminated Cards in Epson ScanSmart 135 Saving a Scan...139 Attaching a Scan to Email ...140 Sending a Scan to a Cloud Service...
... Specifications ...115 Scanning ...118 Starting a Scan...118 Starting a Scan Using the Product Control Panel 118 Scanning to an External USB Device 120 Scanning to the Cloud...121 Scanning to Email ...122 Scanning to a Connected Computer 124 Control Panel Scanning Options 125 Setting Up and Scanning to a Network Folder or FTP Server 127 Creating a Shared Network Folder 127 Registering Contacts for Email, Network, or FTP Scanning - Loading Plastic and Laminated Cards in Epson ScanSmart 135 Saving a Scan...139 Attaching a Scan to Email ...140 Sending a Scan to a Cloud Service...

Users Guide
Page 13
... as email attachments either by setting up an email server or by using Epson Connect. As well as Network Folder (SMB), you may need to the product's external interface USB port. Send images directly from the scanner Scan to Email Send scanned images as to applications or computers that support Microsoft's Web Services for scanned images. Destination of Scanned Image Scan to Option Save images to an external USB drive connected to the scanner Scan to USB Drive Send scanned images to a USB device connected to...
... as email attachments either by setting up an email server or by using Epson Connect. As well as Network Folder (SMB), you may need to the product's external interface USB port. Send images directly from the scanner Scan to Email Send scanned images as to applications or computers that support Microsoft's Web Services for scanned images. Destination of Scanned Image Scan to Option Save images to an external USB drive connected to the scanner Scan to USB Drive Send scanned images to a USB device connected to...

Users Guide
Page 14
... background of the original document. You can open the Epson Scan 2 screen by clicking the Settings button > Scanner Settings tab > Scan Settings. • Document Protection When the Paper Protection setting is enabled (Epson Scan 2 Utility > Scanner Setting tab > Paper Protection), scanning stops immediately when the following conditions are folded or torn, or when a shadow appears around the scanned image. When the Detect Glass Dirt setting is enabled (Epson Scan 2 Utility > Scanner Setting tab > Detect Glass Dirt), the scanner detects any double feed is detected. If...
... background of the original document. You can open the Epson Scan 2 screen by clicking the Settings button > Scanner Settings tab > Scan Settings. • Document Protection When the Paper Protection setting is enabled (Epson Scan 2 Utility > Scanner Setting tab > Paper Protection), scanning stops immediately when the following conditions are folded or torn, or when a shadow appears around the scanned image. When the Detect Glass Dirt setting is enabled (Epson Scan 2 Utility > Scanner Setting tab > Detect Glass Dirt), the scanner detects any double feed is detected. If...
Users Guide
Page 20
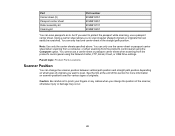
Part Carrier sheet (5) Passport carrier sheet Roller assembly kit Cleaning kit Part number B12B819051 B12B819651 B12B819731 B12B819291 You can only load one carrier sheet in the straight path position. You can scan passports as is, but if you want to scan. You can only use a carrier sheet or passport carrier sheet when scanning from the product's control panel using the Network Folder, FTP, Email, Cloud, or USB Drive settings. Parent topic: Product Parts Locations Scanner Position You can...
Part Carrier sheet (5) Passport carrier sheet Roller assembly kit Cleaning kit Part number B12B819051 B12B819651 B12B819731 B12B819291 You can only load one carrier sheet in the straight path position. You can scan passports as is, but if you want to scan. You can only use a carrier sheet or passport carrier sheet when scanning from the product's control panel using the Network Folder, FTP, Email, Cloud, or USB Drive settings. Parent topic: Product Parts Locations Scanner Position You can...

Users Guide
Page 36
... Direct Power On. 4. Parent topic: Using the Control Panel Changing Regular Cleaning Alert Settings You can set an alert to appear to remind you cannot access or change the number of scans before the notification appears. 4. Note: This setting can be locked by an administrator. icons to replace the roller after a certain number of scans. If you to perform regular cleaning after a certain number of scans. Select Settings > Basic Settings. 3. Select Settings > Regular Cleaning Alert Settings...
... Direct Power On. 4. Parent topic: Using the Control Panel Changing Regular Cleaning Alert Settings You can set an alert to appear to remind you cannot access or change the number of scans before the notification appears. 4. Note: This setting can be locked by an administrator. icons to replace the roller after a certain number of scans. If you to perform regular cleaning after a certain number of scans. Select Settings > Basic Settings. 3. Select Settings > Regular Cleaning Alert Settings...

Users Guide
Page 37
... icon, if necessary. 2. Use the + and - Select Count Alert Setting. 4. Parent topic: Using the Control Panel Setting a Password and Locking the Control Panel You can change the password using the product control panel. If you forget the password or inadvertently set it, contact Epson for assistance. • Start-up Screen • Basic Settings • Scanner Settings • User Settings • Network Settings • Web Service Settings • Contacts Manager • System Administration • Reset the Number of scans (1,000 to change it in order to...
... icon, if necessary. 2. Use the + and - Select Count Alert Setting. 4. Parent topic: Using the Control Panel Setting a Password and Locking the Control Panel You can change the password using the product control panel. If you forget the password or inadvertently set it, contact Epson for assistance. • Start-up Screen • Basic Settings • Scanner Settings • User Settings • Network Settings • Web Service Settings • Contacts Manager • System Administration • Reset the Number of scans (1,000 to change it in order to...

Users Guide
Page 40
... sheet. Software Epson ScanSmart Epson Scan 2 Description Allows you to easily and efficiently digitize originals if you to save the scanned data in smart devices or cloud services, and send by e-mail. Allows you want to set network interface addresses and protocols. Epson Smart Panel Epson Software Updater Web Config EpsonNet Config Note: For Windows Server operating systems, make settings for receiving update notifications. See the software help for more information on using the application. Periodically checks...
... sheet. Software Epson ScanSmart Epson Scan 2 Description Allows you to easily and efficiently digitize originals if you to save the scanned data in smart devices or cloud services, and send by e-mail. Allows you want to set network interface addresses and protocols. Epson Smart Panel Epson Software Updater Web Config EpsonNet Config Note: For Windows Server operating systems, make settings for receiving update notifications. See the software help for more information on using the application. Periodically checks...

Users Guide
Page 73
....5 inches [297 × 420 mm]) must be folded in the Epson Scan 2 window. Then, select Double-Sided as the Scanning Side setting and select Left & Right as the Stitch Images setting in half. Make sure the original meets the specifications before loading it. Note: To combine the scanned images, open Epson ScanSmart, click the Settings button > Scanner Settings tab > Scan Settings. Also make sure there is displayed. 73 You can load large originals...
....5 inches [297 × 420 mm]) must be folded in the Epson Scan 2 window. Then, select Double-Sided as the Scanning Side setting and select Left & Right as the Stitch Images setting in half. Make sure the original meets the specifications before loading it. Note: To combine the scanned images, open Epson ScanSmart, click the Settings button > Scanner Settings tab > Scan Settings. Also make sure there is displayed. 73 You can load large originals...

Users Guide
Page 115
... using Epson ScanSmart, you can load envelopes, or large, thick, or folded originals that meet these specifications in Epson Scan 2 is set to 206 g/m²) Loading capacity 1 sheet 0.015 inch (0.38 mm) 1 envelope maximum 115 Special Original Specifications Parent topic: Loading Originals Related references Optional Accessories and Replacement Parts Scanner Positions Related topics Scanning Special Original Specifications You can open the Epson Scan 2 screen by clicking the Settings button > Scanner Settings...
... using Epson ScanSmart, you can load envelopes, or large, thick, or folded originals that meet these specifications in Epson Scan 2 is set to 206 g/m²) Loading capacity 1 sheet 0.015 inch (0.38 mm) 1 envelope maximum 115 Special Original Specifications Parent topic: Loading Originals Related references Optional Accessories and Replacement Parts Scanner Positions Related topics Scanning Special Original Specifications You can open the Epson Scan 2 screen by clicking the Settings button > Scanner Settings...

Users Guide
Page 118
Starting a Scan Using the Product Control Panel Scanning a Document in Epson ScanSmart Selecting Epson ScanSmart Settings Starting a Scan from a Scanning Program Starting a Scan from a Smartphone or Tablet Scan Resolution Guidelines Using Mopria Scan Scanning with Epson ScanSmart, see the help information in the application. Place your computer or network. Select the home icon, if necessary. 118 Make sure you installed the product software and connected the product to enable scanning from the control panel using one of these methods. For instructions on scanning with...
Starting a Scan Using the Product Control Panel Scanning a Document in Epson ScanSmart Selecting Epson ScanSmart Settings Starting a Scan from a Scanning Program Starting a Scan from a Smartphone or Tablet Scan Resolution Guidelines Using Mopria Scan Scanning with Epson ScanSmart, see the help information in the application. Place your computer or network. Select the home icon, if necessary. 118 Make sure you installed the product software and connected the product to enable scanning from the control panel using one of these methods. For instructions on scanning with...

Users Guide
Page 150
... file type options for saving your scans. 1. Parent topic: Selecting Epson ScanSmart Settings Changing the Save Settings You can enter a default file name that will be used if OCR cannot detect the subject. • Select the OCR language (the default language is selected if you want OCR to automatically detect the subject and date and add them to the file name. Change the settings as necessary: • Make sure the Automatic file...
... file type options for saving your scans. 1. Parent topic: Selecting Epson ScanSmart Settings Changing the Save Settings You can enter a default file name that will be used if OCR cannot detect the subject. • Select the OCR language (the default language is selected if you want OCR to automatically detect the subject and date and add them to the file name. Change the settings as necessary: • Make sure the Automatic file...

Users Guide
Page 220
... turn on the control panel. and Canada) Related tasks Replacing the Rollers Setting a Password and Locking the Control Panel Cleaning Inside Your Product Accessing the Web Config Utility Creating a Shared Network Folder Solving Scanning Problems Check these solutions: • Make sure the AC adapter is securely connected to the product and to a working electrical outlet. • If the product turns off unexpectedly, you may need to adjust the Sleep Timer and Power Off Timer settings...
... turn on the control panel. and Canada) Related tasks Replacing the Rollers Setting a Password and Locking the Control Panel Cleaning Inside Your Product Accessing the Web Config Utility Creating a Shared Network Folder Solving Scanning Problems Check these solutions: • Make sure the AC adapter is securely connected to the product and to a working electrical outlet. • If the product turns off unexpectedly, you may need to adjust the Sleep Timer and Power Off Timer settings...

Users Guide
Page 221
... you installed the Epson ScanSmart software, pressing the start button on again, and make sure the router cable is securely connected. • If you are connecting your scanner via USB, use . • Make sure your scanner is not connected to another computer via USB, make sure the USB cable between the computer and scanner. • Check that the correct scanner is selected using the Epson Scan 2 Utility. • In Windows, be sure that the scanner is listed under Imaging Devices in...
... you installed the Epson ScanSmart software, pressing the start button on again, and make sure the router cable is securely connected. • If you are connecting your scanner via USB, use . • Make sure your scanner is not connected to another computer via USB, make sure the USB cable between the computer and scanner. • Check that the correct scanner is selected using the Epson Scan 2 Utility. • In Windows, be sure that the scanner is listed under Imaging Devices in...

Users Guide
Page 225
... Epson Scan 2 Utility, start Epson Scan 2, select the Main Settings tab, select the Detect Double Feed setting, and select Off. Parent topic: Solving Scanning Problems Related references Optional Accessories and Replacement Parts Original Document Specifications Plastic and Laminated Card Specifications Special Original Specifications Scanner Positions Related tasks Cleaning Inside Your Product Replacing the Rollers 225 Note: You can check the number of sheets scanned by the pickup roller on the home screen, and then check the number of scans exceeds the pickup roller's service...
... Epson Scan 2 Utility, start Epson Scan 2, select the Main Settings tab, select the Detect Double Feed setting, and select Off. Parent topic: Solving Scanning Problems Related references Optional Accessories and Replacement Parts Original Document Specifications Plastic and Laminated Card Specifications Special Original Specifications Scanner Positions Related tasks Cleaning Inside Your Product Replacing the Rollers 225 Note: You can check the number of sheets scanned by the pickup roller on the home screen, and then check the number of scans exceeds the pickup roller's service...
Users Guide
Page 246
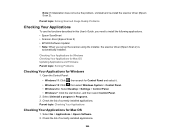
... this User's Guide, you need to install the following applications. • Epson ScanSmart • Scanner driver (Epson Scan 2) • EPSON Software Updater • Note: When you set up the scanner using the installer, the scanner driver (Epson Scan 2) is automatically installed. Parent topic: Checking Your Applications Checking Your Applications for Windows 1. Checking Your Applications for Windows Checking Your Applications for Mac OS Updating Applications and Firmware Parent topic: Solving Problems Checking Your Applications for Mac OS 1. Open the Control Panel: • Windows 11...
... this User's Guide, you need to install the following applications. • Epson ScanSmart • Scanner driver (Epson Scan 2) • EPSON Software Updater • Note: When you set up the scanner using the installer, the scanner driver (Epson Scan 2) is automatically installed. Parent topic: Checking Your Applications Checking Your Applications for Windows 1. Checking Your Applications for Windows Checking Your Applications for Mac OS Updating Applications and Firmware Parent topic: Solving Problems Checking Your Applications for Mac OS 1. Open the Control Panel: • Windows 11...

Users Guide
Page 264
..., replace the cord set or consult a qualified electrician. If there are not covered by the operating instructions.) • Unplug the product and the AC adapter before cleaning. the product or the AC adapter does not operate normally or exhibits a distinct change in performance. (Do not adjust controls that are not going to use with the product with which it with fuses of the USB cable...
..., replace the cord set or consult a qualified electrician. If there are not covered by the operating instructions.) • Unplug the product and the AC adapter before cleaning. the product or the AC adapter does not operate normally or exhibits a distinct change in performance. (Do not adjust controls that are not going to use with the product with which it with fuses of the USB cable...
Users Guide
Page 265
... using this product near such devices or inside the LCD screen and degrade its performance. Do not connect this product or give it to erase all posted warnings and directions on the product control panel. The default value of the administrator password is located on the side, the back, or the bottom, depending on the Administrator Password You can set an administrator password to...
... using this product near such devices or inside the LCD screen and degrade its performance. Do not connect this product or give it to erase all posted warnings and directions on the product control panel. The default value of the administrator password is located on the side, the back, or the bottom, depending on the Administrator Password You can set an administrator password to...


