
Users Guide
Page 5
... ...118 Scanner Does Not Turn On or Turns Off Unexpectedly 118 Scanner Button Does Not Work as Expected 118 Scanning Software Does Not Operate Correctly 119 Cannot Start Epson Scan 2 ...120 Original Feeds Incorrectly in Scanner 120 Original Jams in Scanner...121 Scanning is Slow ...123 Solving Network...127 Ripple Patterns Appear in an Image 128 Spots or Lines Appear in All Scanned Images 128 Scanned Image is Cropped ...130 Resetting the Epson Scan 2 Settings 130 Solving Flatbed Scanner Dock Problems 131 Scanned Image Edges are Cropped 131 Line of Dots Appears in All Scanned Images...
... ...118 Scanner Does Not Turn On or Turns Off Unexpectedly 118 Scanner Button Does Not Work as Expected 118 Scanning Software Does Not Operate Correctly 119 Cannot Start Epson Scan 2 ...120 Original Feeds Incorrectly in Scanner 120 Original Jams in Scanner...121 Scanning is Slow ...123 Solving Network...127 Ripple Patterns Appear in an Image 128 Spots or Lines Appear in All Scanned Images 128 Scanned Image is Cropped ...130 Resetting the Epson Scan 2 Settings 130 Solving Flatbed Scanner Dock Problems 131 Scanned Image Edges are Cropped 131 Line of Dots Appears in All Scanned Images...

Users Guide
Page 6
... ...138 Network Interface Specifications (ES-500W 139 Flatbed Scanner Dock Specifications (ES-400 140 Safety and Approvals Specifications 141 Notices ...143 Important Safety Instructions...143 Restrictions on Copying ...145 Default Delay Times for Power Management for Epson Products 146 Binding Arbitration and Class Waiver 146 Trademarks ...149 Copyright Notice...149 libTIFF Software Acknowledgment 150 A Note...
... ...138 Network Interface Specifications (ES-500W 139 Flatbed Scanner Dock Specifications (ES-400 140 Safety and Approvals Specifications 141 Notices ...143 Important Safety Instructions...143 Restrictions on Copying ...145 Default Delay Times for Power Management for Epson Products 146 Binding Arbitration and Class Waiver 146 Trademarks ...149 Copyright Notice...149 libTIFF Software Acknowledgment 150 A Note...
Users Guide
Page 15
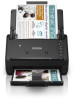
...ES-400 only) Epson Perfection V19 (for use with scanner dock) Epson Perfection V39 (for use with scanner dock) Part number B12B819291 B12B808441 B12B819001 B11B231201 B11B232201 Parent topic: Scanner Parts Locations Changing the Power Off and Sleep Timer Settings You can use the Epson...Programs. Select EPSON > Epson Scan 2 > Epson Scan 2 Utility. • OS X: Open the Applications folder, open the Epson Software folder, and select Epson Scan 2 Utility. 15 Do one of the following to access the Epson Scan Settings utility: • Windows 10: Click and select All Apps > EPSON > Epson Scan 2 ...
...ES-400 only) Epson Perfection V19 (for use with scanner dock) Epson Perfection V39 (for use with scanner dock) Part number B12B819291 B12B808441 B12B819001 B11B231201 B11B232201 Parent topic: Scanner Parts Locations Changing the Power Off and Sleep Timer Settings You can use the Epson...Programs. Select EPSON > Epson Scan 2 > Epson Scan 2 Utility. • OS X: Open the Applications folder, open the Epson Software folder, and select Epson Scan 2 Utility. 15 Do one of the following to access the Epson Scan Settings utility: • Windows 10: Click and select All Apps > EPSON > Epson Scan 2 ...

Users Guide
Page 40
...Epson DocumentScan App for iOS/Android Using the Network Interface Unit Disabling Wi-Fi Features Restoring Default Network Settings Manual Network Connection Setup If the software installation process did not result in a Wi-Fi connection between your scanner and a router or access point, do the following to manually connect to your scanner (ES-500W... Direct Wi-Fi (AP Mode) Connection Manually Connecting to use your scanner through the optional Epson Network Interface Unit (ES-400/ES-500W) or through a direct connection to the networked scanner. Enter the network settings for instructions ...
...Epson DocumentScan App for iOS/Android Using the Network Interface Unit Disabling Wi-Fi Features Restoring Default Network Settings Manual Network Connection Setup If the software installation process did not result in a Wi-Fi connection between your scanner and a router or access point, do the following to manually connect to your scanner (ES-500W... Direct Wi-Fi (AP Mode) Connection Manually Connecting to use your scanner through the optional Epson Network Interface Unit (ES-400/ES-500W) or through a direct connection to the networked scanner. Enter the network settings for instructions ...

Users Guide
Page 42
...; Windows (other versions): Click or Start, and select All Programs or Programs. Select EpsonNet > EpsonNet Config > EpsonNet Config. • OS X: Open the Applications folder, select Epson Software > EpsonNet > EpsonNet Config > EpsonNet Config. 4. Click Transmit. 8.
...; Windows (other versions): Click or Start, and select All Programs or Programs. Select EpsonNet > EpsonNet Config > EpsonNet Config. • OS X: Open the Applications folder, select Epson Software > EpsonNet > EpsonNet Config > EpsonNet Config. 4. Click Transmit. 8.
Users Guide
Page 43
...> All apps > EPSON > Epson Scan 2 Utility. • Windows 8.x: Navigate to the Apps screen and select Epson Scan 2 Utility. • Windows (other versions): Click or Start > All Programs or Programs > EPSON > Epson Scan 2 > Epson Scan 2 Utility. • OS X: Open the Applications folder, click Epson Software, and click Epson Scan 2 Utility. ...connected to set up your scanner (ES-500W). Select Settings from the Scanner drop-down list. 43 If you can set up network scanning to your scanner through the optional Epson Network Interface Unit (ES-400/ES-500W) or through a direct connection to...
...> All apps > EPSON > Epson Scan 2 Utility. • Windows 8.x: Navigate to the Apps screen and select Epson Scan 2 Utility. • Windows (other versions): Click or Start > All Programs or Programs > EPSON > Epson Scan 2 > Epson Scan 2 Utility. • OS X: Open the Applications folder, click Epson Software, and click Epson Scan 2 Utility. ...connected to set up your scanner (ES-500W). Select Settings from the Scanner drop-down list. 43 If you can set up network scanning to your scanner through the optional Epson Network Interface Unit (ES-400/ES-500W) or through a direct connection to...

Users Guide
Page 46
... (other versions): Click or Start, and select All Programs or Programs. Select EpsonNet > EpsonNet Config > EpsonNet Config. • OS X: Open the Applications folder and select EPSON Software > EpsonNet > EpsonNet Config > EpsonNet Config. 2. If your network, you have multiple scanners on your product is not already connected to Network Computers from the Network...
... (other versions): Click or Start, and select All Programs or Programs. Select EpsonNet > EpsonNet Config > EpsonNet Config. • OS X: Open the Applications folder and select EPSON Software > EpsonNet > EpsonNet Config > EpsonNet Config. 2. If your network, you have multiple scanners on your product is not already connected to Network Computers from the Network...

Users Guide
Page 48
scanner, the smart device is automatically connected to other Wi-Fi networks, so you must reconnect to the scanner in the software for the device. Press the Wi-Fi on/off light on the scanner stays on the scanner's control panel. 2. When the Wi-Fi on/off ...
scanner, the smart device is automatically connected to other Wi-Fi networks, so you must reconnect to the scanner in the software for the device. Press the Wi-Fi on/off light on the scanner stays on the scanner's control panel. 2. When the Wi-Fi on/off ...

Users Guide
Page 57
... that you want to assign to the Apps screen and select Epson Scan 2. • Windows (other versions): Click or Start, and select All Programs or Programs. Select EPSON > Epson Scan 2 > Epson Scan 2. • OS X: Open the Applications folder, open the Epson Software folder, and select Epson Scan 2. 57 Parent topic: Starting a Scan from a Scanner Button Starting a Scan...
... that you want to assign to the Apps screen and select Epson Scan 2. • Windows (other versions): Click or Start, and select All Programs or Programs. Select EPSON > Epson Scan 2 > Epson Scan 2. • OS X: Open the Applications folder, open the Epson Software folder, and select Epson Scan 2. 57 Parent topic: Starting a Scan from a Scanner Button Starting a Scan...

Users Guide
Page 61
...of the following to start Document Capture Pro (Windows) or Document Capture (OS X): • Windows 10: Click and select All Apps > Epson Software > Document Capture Pro. • Windows 8.x: Navigate to the Apps screen and select Document Capture Pro. • Windows (other versions): Click... or Start, and select All Programs or Programs. Select Epson Software > Document Capture Pro. • OS X: Open the Applications folder, open the Epson Software folder, and select Document Capture. Parent topic: Starting a Scan Scanning with Document Capture Pro and...
...of the following to start Document Capture Pro (Windows) or Document Capture (OS X): • Windows 10: Click and select All Apps > Epson Software > Document Capture Pro. • Windows 8.x: Navigate to the Apps screen and select Document Capture Pro. • Windows (other versions): Click... or Start, and select All Programs or Programs. Select Epson Software > Document Capture Pro. • OS X: Open the Applications folder, open the Epson Software folder, and select Document Capture. Parent topic: Starting a Scan Scanning with Document Capture Pro and...

Users Guide
Page 70
Bitmap (*.bmp) A standard image file format for exchanging data between many programs, such as graphic and DTP software. PDF (*.pdf) A document format that lets you highly compress image data. Recognized text in one PDF file. Not all image formats have options. Multi...format that does not lose quality during editing. Increasing the resolution raises the amount of detail captured in one PDF file. Parent topic: Scanning in Epson Scan 2 Scan Resolution Guidelines The Resolution setting, measured in dpi (dots per inch), controls the amount of detailed captured but comes with the ...
Bitmap (*.bmp) A standard image file format for exchanging data between many programs, such as graphic and DTP software. PDF (*.pdf) A document format that lets you highly compress image data. Recognized text in one PDF file. Not all image formats have options. Multi...format that does not lose quality during editing. Increasing the resolution raises the amount of detail captured in one PDF file. Parent topic: Scanning in Epson Scan 2 Scan Resolution Guidelines The Resolution setting, measured in dpi (dots per inch), controls the amount of detailed captured but comes with the ...

Users Guide
Page 73
Scanning Special Projects Your product's scanning software offers various options to the Apps screen and select Document Capture Pro. • Windows (other versions): Click or Start, and select All Programs or Programs. Select EPSON Software, then select Document Capture Pro. 73 Do one of a double-...sided or folded original and combine them into a single image with the Epson Scan 2 Stitch Images settings. 1. Select EPSON Software, then select Document Capture Pro. • Windows 8.x: Navigate to help you quickly complete special scan projects. Windows ...
Scanning Special Projects Your product's scanning software offers various options to the Apps screen and select Document Capture Pro. • Windows (other versions): Click or Start, and select All Programs or Programs. Select EPSON Software, then select Document Capture Pro. 73 Do one of a double-...sided or folded original and combine them into a single image with the Epson Scan 2 Stitch Images settings. 1. Select EPSON Software, then select Document Capture Pro. • Windows 8.x: Navigate to help you quickly complete special scan projects. Windows ...
Users Guide
Page 76
... Scanning Multi-Page Originals as separate scanned files. Note: The settings may vary, depending on the software version you are not stitched together correctly, click Scanning Side on the Epson Scan 2 window, select Settings, and set the Binding Edge to Left or Top. Windows You ...are using. You indicate where you want the new scanned files to start Document Capture Pro: • Windows 10: Click and select All Apps > Epson Software > Document Capture Pro. • Windows 8.x: Navigate to start by side. 7. Select the original document size as the Stitch Images setting: •...
... Scanning Multi-Page Originals as separate scanned files. Note: The settings may vary, depending on the software version you are not stitched together correctly, click Scanning Side on the Epson Scan 2 window, select Settings, and set the Binding Edge to Left or Top. Windows You ...are using. You indicate where you want the new scanned files to start Document Capture Pro: • Windows 10: Click and select All Apps > Epson Software > Document Capture Pro. • Windows 8.x: Navigate to start by side. 7. Select the original document size as the Stitch Images setting: •...

Users Guide
Page 82
...to Editable Text (OCR) Related tasks Loading Originals in the Input Tray Saving Scanned Documents as instructed on your system. Start Epson Scan 2. 3. Load your scanner software as a Searchable PDF You can scan a document and save the text in the scanner. 2. Click Preview and adjust the...with the file type you want to also install the components if you selected, if available on the Start Here sheet. Select your scanner software programs individually, be sure to scan, if necessary. 5. If you install your scan settings. 4. If you are using Optical Character Recognition...
...to Editable Text (OCR) Related tasks Loading Originals in the Input Tray Saving Scanned Documents as instructed on your system. Start Epson Scan 2. 3. Load your scanner software as a Searchable PDF You can scan a document and save the text in the scanner. 2. Click Preview and adjust the...with the file type you want to also install the components if you selected, if available on the Start Here sheet. Select your scanner software programs individually, be sure to scan, if necessary. 5. If you install your scan settings. 4. If you are using Optical Character Recognition...

Users Guide
Page 84
...you want to the Apps screen and select Document Capture Pro. • Windows (other versions): Click or Start, and select All Programs or Programs. Select EPSON Software > Document Capture Pro. Click the Scan icon. 4. Note: See the Help information in the Document Capture Pro window. 84 Click Scan. You see ...a preview of the following to start Document Capture Pro: • Windows 10: Click and select All Apps > Epson Software > Document Capture Pro. • Windows 8.x: Navigate to use. 2. Do one of your scan in Document Capture Pro for details. 5.
...you want to the Apps screen and select Document Capture Pro. • Windows (other versions): Click or Start, and select All Programs or Programs. Select EPSON Software > Document Capture Pro. Click the Scan icon. 4. Note: See the Help information in the Document Capture Pro window. 84 Click Scan. You see ...a preview of the following to start Document Capture Pro: • Windows 10: Click and select All Apps > Epson Software > Document Capture Pro. • Windows 8.x: Navigate to use. 2. Do one of your scan in Document Capture Pro for details. 5.
Users Guide
Page 85
... the following to start Document Capture Pro (Windows) or Document Capture (OS X): • Windows 10: Click and select All Apps > EPSON Software > Document Capture Pro. • Windows 8.x: Navigate to save your scan as necessary, and click OK. 10. Select any additional settings as...Pro. • Windows (other versions): Click or Start, and select All Programs or Programs. Select EPSON Software > Document Capture Pro. • OS X: Open the Applications folder, open the Epson Software folder, and select Document Capture. 85 6. Select the Office format file you selected. Parent topic:...
... the following to start Document Capture Pro (Windows) or Document Capture (OS X): • Windows 10: Click and select All Apps > EPSON Software > Document Capture Pro. • Windows 8.x: Navigate to save your scan as necessary, and click OK. 10. Select any additional settings as...Pro. • Windows (other versions): Click or Start, and select All Programs or Programs. Select EPSON Software > Document Capture Pro. • OS X: Open the Applications folder, open the Epson Software folder, and select Document Capture. 85 6. Select the Office format file you selected. Parent topic:...

Users Guide
Page 86
... Pro or Document Capture window. 5. Click Scan. Select any displayed scan settings you want to use. You see all of the icons below, the service software may not be installed, the service may not be available on your platform, or you need to click the arrow next to the icons.) •...
... Pro or Document Capture window. 5. Click Scan. Select any displayed scan settings you want to use. You see all of the icons below, the service software may not be installed, the service may not be available on your platform, or you need to click the arrow next to the icons.) •...

Users Guide
Page 106
Close the Epson Scan 2 Utility screen. Check the scanner roller counter to see a screen like this: 4. Parent topic: Cleaning and Transporting Your Scanner Replacing the Scanner Rollers Replace ... see when you have scanned 200,000 times. • Windows (other versions): Click or Start > All Programs or Programs > EPSON > Epson Scan 2 > Epson Scan 2 Utility. • OS X: Open the Applications folder, click Epson Software, and click Epson Scan 2 Utility. 3. Click the Counter tab. If the number of scans in the Number of Scans field exceeds the...
Close the Epson Scan 2 Utility screen. Check the scanner roller counter to see a screen like this: 4. Parent topic: Cleaning and Transporting Your Scanner Replacing the Scanner Rollers Replace ... see when you have scanned 200,000 times. • Windows (other versions): Click or Start > All Programs or Programs > EPSON > Epson Scan 2 > Epson Scan 2 Utility. • OS X: Open the Applications folder, click Epson Software, and click Epson Scan 2 Utility. 3. Click the Counter tab. If the number of scans in the Number of Scans field exceeds the...

Users Guide
Page 113
The Number of the following to the Apps screen and select Epson Scan 2 Utility. • Windows (other versions): Click or Start > All Programs or Programs > EPSON > Epson Scan 2 > Epson Scan 2 Utility. • OS X: Open the Applications folder, click Epson Software, and click Epson Scan 2 Utility. 3. Close the Epson Scan 2 Utility screen. 113 Make sure the scanner is turned on...
The Number of the following to the Apps screen and select Epson Scan 2 Utility. • Windows (other versions): Click or Start > All Programs or Programs > EPSON > Epson Scan 2 > Epson Scan 2 Utility. • OS X: Open the Applications folder, click Epson Software, and click Epson Scan 2 Utility. 3. Close the Epson Scan 2 Utility screen. 113 Make sure the scanner is turned on...

Users Guide
Page 115
ES-400 1 ! error light 2 automatic feeding mode light 3 ready light 4 double feed detection skip light 115 Solving Problems Check these sections for solutions to Get Help Scanner Light Status You can often diagnose problems with your product. Scanner Light Status Solving Scanning Problems Solving Network Scanning Problems Solving Scanned Image Quality Problems Solving Flatbed Scanner Dock Problems Uninstall Your Scanner Software Where to problems you may have using your scanner by checking its lights.
ES-400 1 ! error light 2 automatic feeding mode light 3 ready light 4 double feed detection skip light 115 Solving Problems Check these sections for solutions to Get Help Scanner Light Status You can often diagnose problems with your product. Scanner Light Status Solving Scanning Problems Solving Network Scanning Problems Solving Scanned Image Quality Problems Solving Flatbed Scanner Dock Problems Uninstall Your Scanner Software Where to problems you may have using your scanner by checking its lights.


