Basics
Page 5
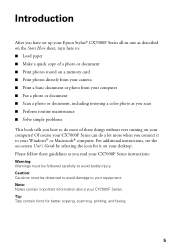
...; Fax a photo or document ■ Scan a photo or document, including restoring a color photo as you read your CX7000F Series instructions: Warning: Warnings must be followed carefully to avoid bodily injury. Introduction After you have set up your Epson Stylus® CX7000F Series all-in-one as described on the... Start Here sheet, turn here to: ■ Load paper ■ Make a quick copy of these guidelines as you scan ■ Perform routine maintenance ■ Solve simple...
...; Fax a photo or document ■ Scan a photo or document, including restoring a color photo as you read your CX7000F Series instructions: Warning: Warnings must be followed carefully to avoid bodily injury. Introduction After you have set up your Epson Stylus® CX7000F Series all-in-one as described on the... Start Here sheet, turn here to: ■ Load paper ■ Make a quick copy of these guidelines as you scan ■ Perform routine maintenance ■ Solve simple...

Basics
Page 41
... and lets you manually configure your scan settings with a full array of control over your scanned image: ■ Full Auto Mode scans quickly and easily using Epson Scan. Scanning a Photo or Document You can use your Epson Stylus CX7000F Series all-in the upper left corner. Basic Scanning You can even automatically restore faded color photographs as ArcSoft PhotoImpression™-using...
... and lets you manually configure your scan settings with a full array of control over your scanned image: ■ Full Auto Mode scans quickly and easily using Epson Scan. Scanning a Photo or Document You can use your Epson Stylus CX7000F Series all-in the upper left corner. Basic Scanning You can even automatically restore faded color photographs as ArcSoft PhotoImpression™-using...

Basics
Page 42
...where you want to automatically restore a color photo as you scan, click the Customize button (see a different Epson Scan settings window. (You can remove the document cover (see page 9). 2. You see the on your desktop. ■ Macintosh: Double-click EPSON Scan in the Applications folder. ■ If... to Full Auto Mode, click the Scan button. Then open the File menu, choose Import or Acquire, and select Epson Stylus CX7000F Series. (Your program may use different scanning commands.) You see its icon or filename in an open folder. 42 Scanning a Photo or Document Click OK. ...
...where you want to automatically restore a color photo as you scan, click the Customize button (see a different Epson Scan settings window. (You can remove the document cover (see page 9). 2. You see the on your desktop. ■ Macintosh: Double-click EPSON Scan in the Applications folder. ■ If... to Full Auto Mode, click the Scan button. Then open the File menu, choose Import or Acquire, and select Epson Stylus CX7000F Series. (Your program may use different scanning commands.) You see its icon or filename in an open folder. 42 Scanning a Photo or Document Click OK. ...
Basics
Page 59
... the wall. ■ Do not open the scanner section while the CX7000F Series is copying, printing, or scanning. ■ Do not spill liquid on the CX7000F Series. ■ Except as specifically explained in your Epson Stylus CX7000F Series all-in-one, read and follow all warnings and instructions marked... on the CX7000F Series. ■ Use only the type of power source...
... the wall. ■ Do not open the scanner section while the CX7000F Series is copying, printing, or scanning. ■ Do not spill liquid on the CX7000F Series. ■ Except as specifically explained in your Epson Stylus CX7000F Series all-in-one, read and follow all warnings and instructions marked... on the CX7000F Series. ■ Use only the type of power source...

Product Information Guide
Page 3
... 297 mm) A4 or US letter size 1200 dpi (main scan) 2400 dpi with Micro Step Drive™ (sub scan) 48 bit (input) 24 bit (output) 50 to 4800, 7200, and 9600 dpi (50 to 4800 dpi in 1 dpi increments) Color: Approx. 15 msec per line at 600 dpi 16 bits per...176;F (10 to 35 °C) Storage: -4 to 104 °F (-20 to 40 °C) Operation: 20 to 80% RH Storage: 5 to 85% RH (without condensation) Epson Stylus CX7000F Series USB Interface Standard Based on Universal Serial Bus Specifications Revision 2.0 Bit rate 480 Mbps (high speed device) Adaptable connector USB Series B Cable length Less...
... 297 mm) A4 or US letter size 1200 dpi (main scan) 2400 dpi with Micro Step Drive™ (sub scan) 48 bit (input) 24 bit (output) 50 to 4800, 7200, and 9600 dpi (50 to 4800 dpi in 1 dpi increments) Color: Approx. 15 msec per line at 600 dpi 16 bits per...176;F (10 to 35 °C) Storage: -4 to 104 °F (-20 to 40 °C) Operation: 20 to 80% RH Storage: 5 to 85% RH (without condensation) Epson Stylus CX7000F Series USB Interface Standard Based on Universal Serial Bus Specifications Revision 2.0 Bit rate 480 Mbps (high speed device) Adaptable connector USB Series B Cable length Less...

Product Information Guide
Page 6
Epson Stylus CX7000F Series 2. Caution: Do not use excessive force on the CX7000F Series. You see Copies:1 100% this display: 5. The display changes to this..., press the x Start Color/OK button. Place the photo on the glass as described on the numeric keypad. Placing Large or Thick Documents When you scan a large or thick document, you are done, replace the document ... objects on page 5. Do not open it and pull it straight up to move . If you copy or scan it . it will be exactly the same size as described on the document table glass, and do not twist...
Epson Stylus CX7000F Series 2. Caution: Do not use excessive force on the CX7000F Series. You see Copies:1 100% this display: 5. The display changes to this..., press the x Start Color/OK button. Place the photo on the glass as described on the numeric keypad. Placing Large or Thick Documents When you scan a large or thick document, you are done, replace the document ... objects on page 5. Do not open it and pull it straight up to move . If you copy or scan it . it will be exactly the same size as described on the document table glass, and do not twist...

Product Information Guide
Page 8
...each selected photo and mark the sheet carefully; Press the x Start Color/OK button. Then you can print an index sheet (which photos to print, scan the sheet, and let the CX7000F Series automatically print the selected photos. 1. The CX7000F Series counts the images on the card. Once you want to print....light is ready to print the index sheet: Number of all the index pages to fill in the slot (as shown on the Index Sheet 1. Epson Stylus CX7000F Series Slot Right slot Left slot Type of the page. 8 10/06 If you have printed the index sheet, use a dark pen or ...
...each selected photo and mark the sheet carefully; Press the x Start Color/OK button. Then you can print an index sheet (which photos to print, scan the sheet, and let the CX7000F Series automatically print the selected photos. 1. The CX7000F Series counts the images on the card. Once you want to print....light is ready to print the index sheet: Number of all the index pages to fill in the slot (as shown on the Index Sheet 1. Epson Stylus CX7000F Series Slot Right slot Left slot Type of the page. 8 10/06 If you have printed the index sheet, use a dark pen or ...

Product Information Guide
Page 9
Epson Stylus CX7000F Series 2. Load up to 100 sheets of plain paper or up to start printing. Press the x Start Color/OK button to 20 sheets of photo paper at a ...this setting is not displayed, press the Memory Card button until the display looks something like this, indicating that the CX7000F Series is not printing. 2. Select Letter, 4"x 6", or 5"x 7" for the paper size. 6. Press the ... the photos print with your selected photos. Printing All Photos or DPOF Photos Follow the steps below to scan the index sheet: 2.Img:92 Scn Idx If this : 3.Img:92 All/DPO Note: If the...
Epson Stylus CX7000F Series 2. Load up to 100 sheets of plain paper or up to start printing. Press the x Start Color/OK button to 20 sheets of photo paper at a ...this setting is not displayed, press the Memory Card button until the display looks something like this, indicating that the CX7000F Series is not printing. 2. Select Letter, 4"x 6", or 5"x 7" for the paper size. 6. Press the ... the photos print with your selected photos. Printing All Photos or DPOF Photos Follow the steps below to scan the index sheet: 2.Img:92 Scn Idx If this : 3.Img:92 All/DPO Note: If the...

Product Information Guide
Page 11
...Color/OK button. Press the u or d button until you return to automatically request retransmission of answer ring pattern you use Error Correction Mode to the screen displaying the date. When you 've loaded. You return to the 4.Scan & Print Setup menu. 10/06 11 Selecting Send/Receive Settings Your CX7000F...to change the fax settings listed above, follow these and other settings. You see the next section for printing received faxes. Epson Stylus CX7000F Series 12. You can enter the numbers 0 to 20 digits total. 19. To change any other fax settings, see ...
...Color/OK button. Press the u or d button until you return to automatically request retransmission of answer ring pattern you use Error Correction Mode to the screen displaying the date. When you 've loaded. You return to the 4.Scan & Print Setup menu. 10/06 11 Selecting Send/Receive Settings Your CX7000F...to change the fax settings listed above, follow these and other settings. You see the next section for printing received faxes. Epson Stylus CX7000F Series 12. You can enter the numbers 0 to 20 digits total. 19. To change any other fax settings, see ...
Product Information Guide
Page 12
... manually entering a fax number or redialing the previous fax number. Note: If you're sending a color fax, or a large document that matches the size of paper you see page 11 for more information...press the 1 key (for the redial, or check your document. You see this display during faxing: Scanning 001 98% Note: If you want to display this display: 1.Dial Mode: Ton 10. The ... or there is an incoming fax. Sending a Fax Before you select (see this step to step 11. Epson Stylus CX7000F Series 8. You can enter the numbers 0 to 9 and the characters * and #, up and select an...
... manually entering a fax number or redialing the previous fax number. Note: If you're sending a color fax, or a large document that matches the size of paper you see page 11 for more information...press the 1 key (for the redial, or check your document. You see this display during faxing: Scanning 001 98% Note: If you want to display this display: 1.Dial Mode: Ton 10. The ... or there is an incoming fax. Sending a Fax Before you select (see this step to step 11. Epson Stylus CX7000F Series 8. You can enter the numbers 0 to 9 and the characters * and #, up and select an...

Product Information Guide
Page 13
... remove the document cover (see page 19. Note: If you want to automatically restore a color photo as you see any TWAIN-compliant application-such as you scan (see page 11 for instructions). Epson Stylus CX7000F Series Selecting the Answer Mode The CX7000F Series tells you whether Auto Answer is turned on or not on the first...
... remove the document cover (see page 19. Note: If you want to automatically restore a color photo as you see any TWAIN-compliant application-such as you scan (see page 11 for instructions). Epson Stylus CX7000F Series Selecting the Answer Mode The CX7000F Series tells you whether Auto Answer is turned on or not on the first...

Product Information Guide
Page 14
... to check the print head nozzles and remaining ink levels using the control panel. 1. Click the Scan button to display this display: 1.Load/Eject 4. Epson Stylus CX7000F Series 5. Press the u or d button, or press the 3 key on the numeric 3.Nozzle Check keypad, to scan and restore the color in Epson Scan's Full Auto, Home, and Professional Mode windows: 1.
... to check the print head nozzles and remaining ink levels using the control panel. 1. Click the Scan button to display this display: 1.Load/Eject 4. Epson Stylus CX7000F Series 5. Press the u or d button, or press the 3 key on the numeric 3.Nozzle Check keypad, to scan and restore the color in Epson Scan's Full Auto, Home, and Professional Mode windows: 1.


