Basics
Page 5
...your computer! Introduction After you have set up your Epson Stylus® CX7000F Series all-in-one as described on the Start Here sheet, turn here to: ■ Load paper ■ Make a quick copy of these guidelines as you scan ■ Perform routine maintenance ■ Solve simple ... a basic document or photo from your computer ■ Fax a photo or document ■ Scan a photo or document, including restoring a color photo as you how to avoid bodily injury. Of course your CX7000F Series can do most of a photo or document ■ Print photos stored on your Windows&#...
...your computer! Introduction After you have set up your Epson Stylus® CX7000F Series all-in-one as described on the Start Here sheet, turn here to: ■ Load paper ■ Make a quick copy of these guidelines as you scan ■ Perform routine maintenance ■ Solve simple ... a basic document or photo from your computer ■ Fax a photo or document ■ Scan a photo or document, including restoring a color photo as you how to avoid bodily injury. Of course your CX7000F Series can do most of a photo or document ■ Print photos stored on your Windows&#...

Basics
Page 41
... previews your image and lets you scan (see page 43 for details). Basic Scanning You can scan from your computer and save it on your computer or other device. Scanning a Photo or Document You can use your Epson Stylus CX7000F Series all-in the upper left corner. The Epson Scan software provides three scanning modes for various types of tools...
... previews your image and lets you scan (see page 43 for details). Basic Scanning You can scan from your computer and save it on your computer or other device. Scanning a Photo or Document You can use your Epson Stylus CX7000F Series all-in the upper left corner. The Epson Scan software provides three scanning modes for various types of tools...

Basics
Page 42
... a file format in an open the File menu, choose Import or Acquire, and select Epson Stylus CX7000F Series. (Your program may use different scanning commands.) You see the Epson Scan standby window: 4. Note: If you need to automatically restore a color photo as you scan, click the Customize button (see page 43 for it in the Prefix box. Do...
... a file format in an open the File menu, choose Import or Acquire, and select Epson Stylus CX7000F Series. (Your program may use different scanning commands.) You see the Epson Scan standby window: 4. Note: If you need to automatically restore a color photo as you scan, click the Customize button (see page 43 for it in the Prefix box. Do...
Basics
Page 59
... wall. ■ Do not open the scanner section while the CX7000F Series is copying, printing, or scanning. ■ Do not spill liquid on the CX7000F Series label. ■ Use only the power cord that comes with the CX7000F Series, make sure the total ampere rating of the devices plugged ...9632; Use only the type of another cord may cause fires or shock. Use of power source indicated on the CX7000F Series. ■ Except as specifically explained in your Epson Stylus CX7000F Series all-in-one, read and follow these safety instructions: ■ Be sure to follow all directions. Do not...
... wall. ■ Do not open the scanner section while the CX7000F Series is copying, printing, or scanning. ■ Do not spill liquid on the CX7000F Series label. ■ Use only the power cord that comes with the CX7000F Series, make sure the total ampere rating of the devices plugged ...9632; Use only the type of another cord may cause fires or shock. Use of power source indicated on the CX7000F Series. ■ Except as specifically explained in your Epson Stylus CX7000F Series all-in-one, read and follow these safety instructions: ■ Be sure to follow all directions. Do not...

Product Information Guide
Page 3
... 297 mm) A4 or US letter size 1200 dpi (main scan) 2400 dpi with Micro Step Drive™ (sub scan) 48 bit (input) 24 bit (output) 50 to 4800, 7200, and 9600 dpi (50 to 4800 dpi in 1 dpi increments) Color: Approx. 15 msec per line at 600 dpi 16 bits per...176;F (10 to 35 °C) Storage: -4 to 104 °F (-20 to 40 °C) Operation: 20 to 80% RH Storage: 5 to 85% RH (without condensation) Epson Stylus CX7000F Series USB Interface Standard Based on Universal Serial Bus Specifications Revision 2.0 Bit rate 480 Mbps (high speed device) Adaptable connector USB Series B Cable length Less...
... 297 mm) A4 or US letter size 1200 dpi (main scan) 2400 dpi with Micro Step Drive™ (sub scan) 48 bit (input) 24 bit (output) 50 to 4800, 7200, and 9600 dpi (50 to 4800 dpi in 1 dpi increments) Color: Approx. 15 msec per line at 600 dpi 16 bits per...176;F (10 to 35 °C) Storage: -4 to 104 °F (-20 to 40 °C) Operation: 20 to 80% RH Storage: 5 to 85% RH (without condensation) Epson Stylus CX7000F Series USB Interface Standard Based on Universal Serial Bus Specifications Revision 2.0 Bit rate 480 Mbps (high speed device) Adaptable connector USB Series B Cable length Less...

Product Information Guide
Page 6
...Back button. 7. Close the document cover gently so that is selected. 8. Placing Large or Thick Documents When you scan a large or thick document, you copy or scan it, do not press too hard and be ejected automatically to turn 12:00 PM Y on page 5. Printing appears...want your original does not move it. it diagonally. Press the Copy button. To make a color copy, press the x Start Color/OK button. Copying a Photo 1. The display changes to move . Epson Stylus CX7000F Series 2. The light indicates which type is being printed; Caution: Do not place heavy objects...
...Back button. 7. Close the document cover gently so that is selected. 8. Placing Large or Thick Documents When you scan a large or thick document, you copy or scan it, do not press too hard and be ejected automatically to turn 12:00 PM Y on page 5. Printing appears...want your original does not move it. it diagonally. Press the Copy button. To make a color copy, press the x Start Color/OK button. Copying a Photo 1. The display changes to move . Epson Stylus CX7000F Series 2. The light indicates which type is being printed; Caution: Do not place heavy objects...

Product Information Guide
Page 8
...) 1.Img:92 Prt Idx 5. If you want to change your selections. once it has been scanned you want one circle is filled in one of letter-size, plain paper. (Use only letter-size...memory card if it is not lit, press the Memory Card button. Press the x Start Color/OK button. The CX7000F Series starts printing the index sheet(s). Now you can: ❏ Print an index sheet so...Duo* SmartMedia xD-Picture Card xD-Picture Card Type H xD-Picture Card Type M * Adapter required 4. Epson Stylus CX7000F Series Slot Right slot Left slot Type of all the photos on the card (see page 9) ❏...
...) 1.Img:92 Prt Idx 5. If you want to change your selections. once it has been scanned you want one circle is filled in one of letter-size, plain paper. (Use only letter-size...memory card if it is not lit, press the Memory Card button. Press the x Start Color/OK button. The CX7000F Series starts printing the index sheet(s). Now you can: ❏ Print an index sheet so...Duo* SmartMedia xD-Picture Card xD-Picture Card Type H xD-Picture Card Type M * Adapter required 4. Epson Stylus CX7000F Series Slot Right slot Left slot Type of all the photos on the card (see page 9) ❏...

Product Information Guide
Page 9
... the steps below to use (see the Paper Out message, load more paper later as necessary to scan the index sheet: 2.Img:92 Scn Idx If this : 3.Img:92 All/DPO Note: If ... by connecting your digital camera directly to stop printing, press the y Cancel/Back button. 8. Epson Stylus CX7000F Series 2. Load up to 100 sheets of plain paper or up to 20 sheets of photo paper...pixels. 1. Close the document cover. Select Letter, 4"x 6", or 5"x 7" for details). Press the x Start Color/OK button to start printing. Place the index sheet face-down on the card or to the edge of photo ...
... the steps below to use (see the Paper Out message, load more paper later as necessary to scan the index sheet: 2.Img:92 Scn Idx If this : 3.Img:92 All/DPO Note: If ... by connecting your digital camera directly to stop printing, press the y Cancel/Back button. 8. Epson Stylus CX7000F Series 2. Load up to 100 sheets of plain paper or up to 20 sheets of photo paper...pixels. 1. Close the document cover. Select Letter, 4"x 6", or 5"x 7" for details). Press the x Start Color/OK button to start printing. Place the index sheet face-down on the card or to the edge of photo ...

Product Information Guide
Page 11
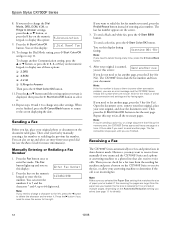
...you receive a fax, be sure to load plain paper and set the Paper Size setting to the size of rings that is set to the 4.Scan & Print Setup menu. 10/06 11 For more information about these options: ❏ 3.Paper Size ❏ 4.Automatic Reduction ❏ 5.Last ...faxes. If you want is 33.6 Kbps and Off 14.4 Kbps. You see this display: 1.Resolution 5. Epson Stylus CX7000F Series 12. You see this display: 1:AM 2:PM 14. Press the x Start Color/OK button. Indicates the type of these and other fax settings, see the next section for details). Indicates...
...you receive a fax, be sure to load plain paper and set the Paper Size setting to the size of rings that is set to the 4.Scan & Print Setup menu. 10/06 11 For more information about these options: ❏ 3.Paper Size ❏ 4.Automatic Reduction ❏ 5.Last ...faxes. If you want is 33.6 Kbps and Off 14.4 Kbps. You see this display: 1.Resolution 5. Epson Stylus CX7000F Series 12. You see this display: 1:AM 2:PM 14. Press the x Start Color/OK button. Indicates the type of these and other fax settings, see the next section for details). Indicates...
Product Information Guide
Page 12
... If you can also set up the memory area, the CX7000F Series scans and faxes one minute. Receiving a Fax The CX7000F Series automatically receives and prints faxes in Auto Answer mode. Then you 're sending a color fax, or a large document that fills up and select an...the x Start Color/OK button. If you see this option: 5.Communication 9. You see an error message and the CX7000F Series redials the number after one page at any other connection problem, you need to a phone line that matches the size of entering a fax number. Epson Stylus CX7000F Series 8. ...
... If you can also set up the memory area, the CX7000F Series scans and faxes one minute. Receiving a Fax The CX7000F Series automatically receives and prints faxes in Auto Answer mode. Then you 're sending a color fax, or a large document that fills up and select an...the x Start Color/OK button. If you see this option: 5.Communication 9. You see an error message and the CX7000F Series redials the number after one page at any other connection problem, you need to a phone line that matches the size of entering a fax number. Epson Stylus CX7000F Series 8. ...

Product Information Guide
Page 13
... can remove the document cover (see page 6). 2. Or you can even automatically restore faded color photographs as you see the screen displaying the date. Then open the File menu, choose Import or Acquire, and select EPSON Stylus CX7000F Series (your scan settings with Auto Answer mode turned on, the message Printing appears on the display...
... can remove the document cover (see page 6). 2. Or you can even automatically restore faded color photographs as you see the screen displaying the date. Then open the File menu, choose Import or Acquire, and select EPSON Stylus CX7000F Series (your scan settings with Auto Answer mode turned on, the message Printing appears on the display...

Product Information Guide
Page 14
... window: 4. Follow the steps below to the Adjustments area and click the Color Restoration checkbox. 7. Press the P On button to -life color and sharpness as necessary. 9. Epson Stylus CX7000F Series 5. Checking the Print Head Nozzles If your image(s). Load letter-size paper in Epson Scan's Full Auto, Home, and Professional Mode windows: 1. Make any other necessary image...
... window: 4. Follow the steps below to the Adjustments area and click the Color Restoration checkbox. 7. Press the P On button to -life color and sharpness as necessary. 9. Epson Stylus CX7000F Series 5. Checking the Print Head Nozzles If your image(s). Load letter-size paper in Epson Scan's Full Auto, Home, and Professional Mode windows: 1. Make any other necessary image...


