
Epson Scan ICM Updater v1.20 (PSB.2008.07.001)
Page 1
... Rev A Total Pages: 1 All Scanners and All-in-One's using Epson Scan Epson Scan ICM updater v.1.20 for Epson Scan-affects all driver versions up to select ICM Adobe RGB, Apple RGB or ColorMatch RGB color profiles from the Epson Scan ICM pull-down menu (under Color tab in the Configuration menu). You ...can choose any of Change: ICM module updater for Windows XP/XP x64 / Vista (32bit & 64bit) This bulletin was created...
... Rev A Total Pages: 1 All Scanners and All-in-One's using Epson Scan Epson Scan ICM updater v.1.20 for Epson Scan-affects all driver versions up to select ICM Adobe RGB, Apple RGB or ColorMatch RGB color profiles from the Epson Scan ICM pull-down menu (under Color tab in the Configuration menu). You ...can choose any of Change: ICM module updater for Windows XP/XP x64 / Vista (32bit & 64bit) This bulletin was created...

Basics
Page 20
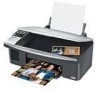
...scanner software. Printing From Your Computer This section describes the basic steps for printing a photo or document stored on the Start Here sheet. Before you start, make sure you can also click Start or , select Programs or All Programs, select EPSON, and click EPSON Stylus CX7000F Series Driver Update for your Windows... or Macintosh computer. With Windows, you 've installed your printer software and connected the Epson Stylus CX7000F Series all-in a printing program. ...
...scanner software. Printing From Your Computer This section describes the basic steps for printing a photo or document stored on the Start Here sheet. Before you start, make sure you can also click Start or , select Programs or All Programs, select EPSON, and click EPSON Stylus CX7000F Series Driver Update for your Windows... or Macintosh computer. With Windows, you 've installed your printer software and connected the Epson Stylus CX7000F Series all-in a printing program. ...

Product Information Guide
Page 14
... is scanned and you scan. Place your image as necessary. 9. Start Epson Scan (see the File Save Settings window: 4. Make any other necessary image adjustments. 8. Restoring Color in an open folder. When the Epson Scan window appears, do one with step 9. ❏ Professional Mode: Scroll down to...for instructions). 5. Epson Stylus CX7000F Series 5. Size your original photo on the scanner as you see the on page 5. 2. Load letter-size paper in the Image Format box. 6. You see a screen 12:00 PM Y like this: 3. Click the Preview button to -life color and sharpness as ...
... is scanned and you scan. Place your image as necessary. 9. Start Epson Scan (see the File Save Settings window: 4. Make any other necessary image adjustments. 8. Restoring Color in an open folder. When the Epson Scan window appears, do one with step 9. ❏ Professional Mode: Scroll down to...for instructions). 5. Epson Stylus CX7000F Series 5. Size your original photo on the scanner as you see the on page 5. 2. Load letter-size paper in the Image Format box. 6. You see a screen 12:00 PM Y like this: 3. Click the Preview button to -life color and sharpness as ...

Product Information Guide
Page 17
... x Start Color/OK button. Start Color OK 10. Close the scanner. Note: Banding may also occur if your original again. 13. Load several sheets of your taskbar (in the printer list, click OK, and select Print Head Alignment. 10/06 17 Select your CX7000F Series in the...Start Color/ OK button and reinstall the ink cartridge until you may not be replaced. 12. Epson Stylus CX7000F Series 14. The CX7000F Series begins charging ink and Charging appears on the CX7000F Series. 2. Replace any other cartridges that need to clean the print head. 1. Turn on the display. Windows: ...
... x Start Color/OK button. Start Color OK 10. Close the scanner. Note: Banding may also occur if your original again. 13. Load several sheets of your taskbar (in the printer list, click OK, and select Print Head Alignment. 10/06 17 Select your CX7000F Series in the...Start Color/ OK button and reinstall the ink cartridge until you may not be replaced. 12. Epson Stylus CX7000F Series 14. The CX7000F Series begins charging ink and Charging appears on the CX7000F Series. 2. Replace any other cartridges that need to clean the print head. 1. Turn on the display. Windows: ...

Product Information Guide
Page 18
... to being aligned. If you see a window like this step. 11. Then click Realignment to print a color horizontal alignment sheet. Unplug the power cord from the CX7000F Series. 4. Then disconnect the USB cable from... printer in the home position on the screen and click Next. Open the scanner section and make sure the ink cartridge holder is in its number in the box...and close the Print Head Alignment Utility. Transporting the CX7000F Series If you need to ship your printout. Turn off the CX7000F Series. 2. Epson Stylus CX7000F Series 4. Look at the printout and select the ...
... to being aligned. If you see a window like this step. 11. Then click Realignment to print a color horizontal alignment sheet. Unplug the power cord from the CX7000F Series. 4. Then disconnect the USB cable from... printer in the home position on the screen and click Next. Open the scanner section and make sure the ink cartridge holder is in its number in the box...and close the Print Head Alignment Utility. Transporting the CX7000F Series If you need to ship your printout. Turn off the CX7000F Series. 2. Epson Stylus CX7000F Series 4. Look at the printout and select the ...

