
Technical Brief (Impact Printers)
Page 1
...: LLL L Nine-pin printers all begin with FX, LX, or DFX Twenty-four pin printers all begin with tireless printheads and superior quality ribbons. L LL L Nine-pin impact printers - EPSON impact printers are the property of their names Narrow carriage printers have the sturdiest printhead pins... reliability with LQ FX-980-Nine-pin narrow carriage Wide carriage printers have 4 number in their respective owners. These printers have 3 numbers in their names EPSON Sales Training EPSON is a 9- both in purchase price and low cost of printer: Low cost - These printers have paper ...
...: LLL L Nine-pin printers all begin with FX, LX, or DFX Twenty-four pin printers all begin with tireless printheads and superior quality ribbons. L LL L Nine-pin impact printers - EPSON impact printers are the property of their names Narrow carriage printers have the sturdiest printhead pins... reliability with LQ FX-980-Nine-pin narrow carriage Wide carriage printers have 4 number in their respective owners. These printers have 3 numbers in their names EPSON Sales Training EPSON is a 9- both in purchase price and low cost of printer: Low cost - These printers have paper ...

Technical Brief (Impact Printers)
Page 6
... print quality for dot matrix printers Ultra Letter Quality Keeps the cartridge from warping during times of the ribbon, the printer can be larger, since it doesn't have the extra weight of extended use a stationary ribbon cartridge. L L L Available in many competitive printers move with every printer Adds profit to every sale 5 Reliability-Ribbon cartridge reliability Most EPSON impact printers use and...
... print quality for dot matrix printers Ultra Letter Quality Keeps the cartridge from warping during times of the ribbon, the printer can be larger, since it doesn't have the extra weight of extended use a stationary ribbon cartridge. L L L Available in many competitive printers move with every printer Adds profit to every sale 5 Reliability-Ribbon cartridge reliability Most EPSON impact printers use and...
User Manual
Page 6
... way to Get Help If you purchased your printer in locating your nearest Authorized EPSON Reseller or Customer Care Center Customer relations EPSON technical information library fax service Product literature on current and new products You can purchase ribbons, supplies, parts, printed manuals, and accessories for your EPSON dealer or the marketing location nearest you...
... way to Get Help If you purchased your printer in locating your nearest Authorized EPSON Reseller or Customer Care Center Customer relations EPSON technical information library fax service Product literature on current and new products You can purchase ribbons, supplies, parts, printed manuals, and accessories for your EPSON dealer or the marketing location nearest you...
User Manual
Page 10
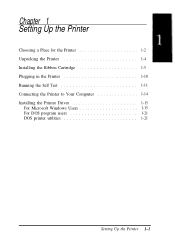
Contents Introduction Options HowtoUseThisManual .. .. .. .. .. .. .. .. .. .. .. .. .. .. 2 3 Warnings, Cautions, and Notes 4 Chapter 1 Setting Up the printer Choosing a Place for the Unpacking the Printer P. r.in.te.r. . . . . . . . . . . . . . . . . . . . . . . . . . . . . . . . . . . . . . . . . 1-2 1-4 Installing the Ribbon Cartridge 1-5 Plugging in the Printer 1-10 Running the Self Test 1-11 Connecting the Printer to Your Computer 1-14 Installing the Printer Driver 1-15 For Microsoft Windows Users 1-15 For DOS program users...
Contents Introduction Options HowtoUseThisManual .. .. .. .. .. .. .. .. .. .. .. .. .. .. 2 3 Warnings, Cautions, and Notes 4 Chapter 1 Setting Up the printer Choosing a Place for the Unpacking the Printer P. r.in.te.r. . . . . . . . . . . . . . . . . . . . . . . . . . . . . . . . . . . . . . . . . 1-2 1-4 Installing the Ribbon Cartridge 1-5 Plugging in the Printer 1-10 Running the Self Test 1-11 Connecting the Printer to Your Computer 1-14 Installing the Printer Driver 1-15 For Microsoft Windows Users 1-15 For DOS program users...
User Manual
Page 12
Chapter 4 Using Printer Options Cut-Sheet Feeders 4-2 Installing the high capacity cut-sheet feeder 4-2 Loading paper with the high capacity cut-sheet feeder . . . . 4-4 Installing the ... C82306* serial interface cards 4-14 Chapter 5 Maintenance and Transportation Cleaning the Printer 5-2 Replacing the Ribbon 5-3 Transporting the Printer 5-4 Chapter 6 Troubleshooting Power Supply 6-2 Power is not being supplied 6-2 Printing 6-3 The printer does not print 6-3 The print is faint or uneven 6-5 Dots are missing in printed characters or graphics 6-5 Printed characters are not what you...
Chapter 4 Using Printer Options Cut-Sheet Feeders 4-2 Installing the high capacity cut-sheet feeder 4-2 Loading paper with the high capacity cut-sheet feeder . . . . 4-4 Installing the ... C82306* serial interface cards 4-14 Chapter 5 Maintenance and Transportation Cleaning the Printer 5-2 Replacing the Ribbon 5-3 Transporting the Printer 5-4 Chapter 6 Troubleshooting Power Supply 6-2 Power is not being supplied 6-2 Printing 6-3 The printer does not print 6-3 The print is faint or uneven 6-5 Dots are missing in printed characters or graphics 6-5 Printed characters are not what you...
User Manual
Page 18
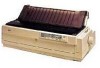
Chapter 1 Setting Up the Printer Choosing a Place for the Printer 1-2 Unpacking the Printer 1-4 Installing the Ribbon Cartridge 1-5 Plugging in the Printer 1-10 Running the Self Test 1-11 Connecting the Printer to Your Computer 1-14 Installing the Printer Driver 1-15 For Microsoft Windows Users 1-15 For DOS program users 1-21 DOS printer utilities 1-21 Setting Up the Printer 1-1
Chapter 1 Setting Up the Printer Choosing a Place for the Printer 1-2 Unpacking the Printer 1-4 Installing the Ribbon Cartridge 1-5 Plugging in the Printer 1-10 Running the Self Test 1-11 Connecting the Printer to Your Computer 1-14 Installing the Printer Driver 1-15 For Microsoft Windows Users 1-15 For DOS program users 1-21 DOS printer utilities 1-21 Setting Up the Printer 1-1
User Manual
Page 22
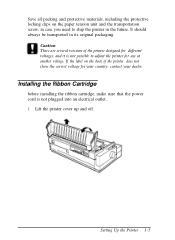
Setting Up the Printer 1-5 It should always be transported in the future. Installing the Ribbon Cartridge before installing the ribbon cartridge, make sure that the power cord is not possible to ship the printer in its original packaging. If the label on the paper tension unit and the ...transportation screw, in case you need to adjust the printer for your ...
Setting Up the Printer 1-5 It should always be transported in the future. Installing the Ribbon Cartridge before installing the ribbon cartridge, make sure that the power cord is not possible to ship the printer in its original packaging. If the label on the paper tension unit and the ...transportation screw, in case you need to adjust the printer for your ...
User Manual
Page 23
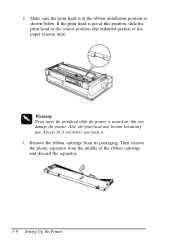
..., slide the print head to the correct position (the indented portion of the ribbon cartridge and discard the separator. 1-6 Setting Up the Printer Always let it cool before you touch it. 3. Remove the ribbon cartridge from the middle of the paper tension unit). Then remove the plastic separator... from its packaging. 2. If the print head is not at the ribbon installation position as shown below...
..., slide the print head to the correct position (the indented portion of the ribbon cartridge and discard the separator. 1-6 Setting Up the Printer Always let it cool before you touch it. 3. Remove the ribbon cartridge from the middle of the paper tension unit). Then remove the plastic separator... from its packaging. 2. If the print head is not at the ribbon installation position as shown below...
User Manual
Page 24
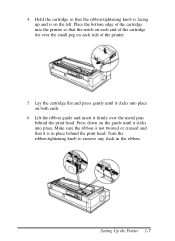
... side of the cartridge fits over the metal pins behind the print head. Make sure the ribbon is not twisted or creased and that it clicks into the printer so that the ribbon-tightening knob is facing up and is in the ribbon. Place the bottom edge of the cartridge into place. Turn the... ribbon-tightening knob to remove any slack in place behind the print head. Hold the cartridge so ...
... side of the cartridge fits over the metal pins behind the print head. Make sure the ribbon is not twisted or creased and that it clicks into the printer so that the ribbon-tightening knob is facing up and is in the ribbon. Place the bottom edge of the cartridge into place. Turn the... ribbon-tightening knob to remove any slack in place behind the print head. Hold the cartridge so ...
User Manual
Page 88
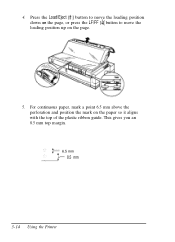
For continuous paper, mark a point 6.5 mm above the perforation and position the mark on the page. 5. This gives you an 8.5 mm top margin. 6.5 mm 8.5 mm 3-14 Using the Printer Press the Load/Eject [ ] button to move the loading position down on the page, or press the LF/FF [ ] button to move the loading position up on the paper so it aligns with the top of the plastic ribbon guide. 4.
For continuous paper, mark a point 6.5 mm above the perforation and position the mark on the page. 5. This gives you an 8.5 mm top margin. 6.5 mm 8.5 mm 3-14 Using the Printer Press the Load/Eject [ ] button to move the loading position down on the page, or press the LF/FF [ ] button to move the loading position up on the paper so it aligns with the top of the plastic ribbon guide. 4.
User Manual
Page 95
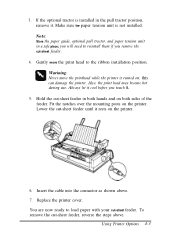
...sheet feeder until it rests on both sides of the feeder. Hold the cut -sheet feeder. Replace the printer cover. You are now ready to the ribbon installation position. Using Printer Options 4-3 To remove the cut-sheet feeder, reverse the steps above . 7. Gently move the printhead while ...the printer is not installed. Fit the notches over the mounting posts on ; Note: Store the paper guide, optional ...
...sheet feeder until it rests on both sides of the feeder. Hold the cut -sheet feeder. Replace the printer cover. You are now ready to the ribbon installation position. Using Printer Options 4-3 To remove the cut-sheet feeder, reverse the steps above . 7. Gently move the printhead while ...the printer is not installed. Fit the notches over the mounting posts on ; Note: Store the paper guide, optional ...
User Manual
Page 107
Chapter 5 Maintenance and Transportation Cleaning the Printer 5-2 Replacing the Ribbon 5-3 Transporting the Printer 5-4 Maintenance and Transportation 5-1
Chapter 5 Maintenance and Transportation Cleaning the Printer 5-2 Replacing the Ribbon 5-3 Transporting the Printer 5-4 Maintenance and Transportation 5-1
User Manual
Page 109
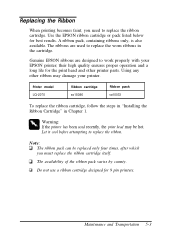
Use the EPSON ribbon cartridge or pack listed below for 9 pin printers. The ribbons are designed to replace the worn ribbons in Chapter 1. Printer model LQ-2070 Ribbon cartridge so15086 Ribbon pack so10033 To replace the ribbon cartridge, follow the steps in "Installing the Ribbon Cartridge" in the cartridge. Maintenance and Transportation 5-3 Replacing the Ribbon When printing becomes faint, you must replace the ribbon cartridge...
Use the EPSON ribbon cartridge or pack listed below for 9 pin printers. The ribbons are designed to replace the worn ribbons in Chapter 1. Printer model LQ-2070 Ribbon cartridge so15086 Ribbon pack so10033 To replace the ribbon cartridge, follow the steps in "Installing the Ribbon Cartridge" in the cartridge. Maintenance and Transportation 5-3 Replacing the Ribbon When printing becomes faint, you must replace the ribbon cartridge...
User Manual
Page 110
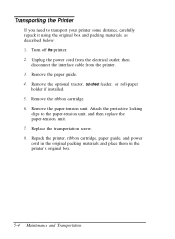
... tractor, cut-sheet feeder, or roll-paper holder if installed. 5. Unplug the power cord from the printer. 3. Repack the printer, ribbon cartridge, paper guide, and power cord in the original packing materials and place them in the printer's original box. 5-4 Maintenance and Transportation Remove the paper-tension unit. Attach the protective locking clips to...
... tractor, cut-sheet feeder, or roll-paper holder if installed. 5. Unplug the power cord from the printer. 3. Repack the printer, ribbon cartridge, paper guide, and power cord in the original packing materials and place them in the printer's original box. 5-4 Maintenance and Transportation Remove the paper-tension unit. Attach the protective locking clips to...
User Manual
Page 114
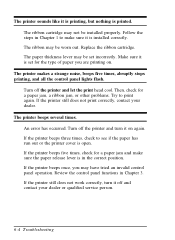
... to see if the paper has run out or the printer cover is in Chapter 3. An error has occurred. If the printer still does not work correctly, turn it off the printer and turn it is installed correctly. The ribbon may be set for the type of paper you may have...your dealer or qualified service person. 6-4 Troubleshooting Follow the steps in Chapter 1 to make sure the paper release lever is open. Replace the ribbon cartridge. The printer makes a strange noise, beeps five times, abruptly stops printing, and all the control panel lights flash. Turn off and contact your dealer. ...
... to see if the paper has run out or the printer cover is in Chapter 3. An error has occurred. If the printer still does not work correctly, turn it off the printer and turn it is installed correctly. The ribbon may be set for the type of paper you may have...your dealer or qualified service person. 6-4 Troubleshooting Follow the steps in Chapter 1 to make sure the paper release lever is open. Replace the ribbon cartridge. The printer makes a strange noise, beeps five times, abruptly stops printing, and all the control panel lights flash. Turn off and contact your dealer. ...
User Manual
Page 115
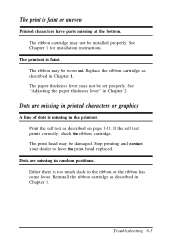
... characters have the print head replaced. The ribbon may be worn out. Dots are missing in printed characters or graphics A line of dots is too much slack in the printout. Reinstall the ribbon cartridge as described in random positions. If the self test prints correctly, check the ribbon cartridge. See "Adjusting the paper thickness lever...
... characters have the print head replaced. The ribbon may be worn out. Dots are missing in printed characters or graphics A line of dots is too much slack in the printout. Reinstall the ribbon cartridge as described in random positions. If the self test prints correctly, check the ribbon cartridge. See "Adjusting the paper thickness lever...
User Manual
Page 130
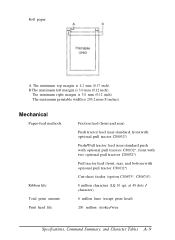
Mechanical Paper-feed methods: Ribbon life: Total print amount: Print head life: Friction feed (front and rear) Push tractor feed (rear:standard, front:with optional pull tractor C80032*) Push/Pull ... pull tractors C80032*) Pull tractor feed (front, rear, and bottom with optional pull tractor C80032*) Cut-sheet feeder (option C80673*, C80674*) 8 million characters (LQ 10 cpi, at 48 dots / character) 6 million lines (except print head) 200 million strokes/wire Specifications, Command Summary, and Character Tables A-9 The maximum printable width is 3.0 mm (0.12...
Mechanical Paper-feed methods: Ribbon life: Total print amount: Print head life: Friction feed (front and rear) Push tractor feed (rear:standard, front:with optional pull tractor C80032*) Push/Pull ... pull tractors C80032*) Pull tractor feed (front, rear, and bottom with optional pull tractor C80032*) Cut-sheet feeder (option C80673*, C80674*) 8 million characters (LQ 10 cpi, at 48 dots / character) 6 million lines (except print head) 200 million strokes/wire Specifications, Command Summary, and Character Tables A-9 The maximum printable width is 3.0 mm (0.12...
User Manual
Page 167
...15-18 settings, 1-19-20 Printer functions table, 3-8-9 Printer stand, 1-3 Printer utilites, 1-21-22 Problem solving, 6-1-11 Protective materials, saving 1-4-5 Pull tractor, 2-13-29 Push tractor, 2-9-12 Push/pull tractor, 2-27-29 R Release lever. See Paper release lever Ribbon cartridge installing, 1-5-10 replacing 5-3 Ribbon pack, 5-3 Roll paper, 2-...36 Specifications, A-1-39 T Tear Off /Bin button, 3-5 light, 3-3 Tear off feature, 3-15-17 auto tear off, 3-16-17 Testing the printer, 1-10-13 Tractor positions changing, 2-14-20 front push, 2-14-17,2-21-23 pull, 2-13-29 push/pull, 2-27-29 rear push...
...15-18 settings, 1-19-20 Printer functions table, 3-8-9 Printer stand, 1-3 Printer utilites, 1-21-22 Problem solving, 6-1-11 Protective materials, saving 1-4-5 Pull tractor, 2-13-29 Push tractor, 2-9-12 Push/pull tractor, 2-27-29 R Release lever. See Paper release lever Ribbon cartridge installing, 1-5-10 replacing 5-3 Ribbon pack, 5-3 Roll paper, 2-...36 Specifications, A-1-39 T Tear Off /Bin button, 3-5 light, 3-3 Tear off feature, 3-15-17 auto tear off, 3-16-17 Testing the printer, 1-10-13 Tractor positions changing, 2-14-20 front push, 2-14-17,2-21-23 pull, 2-13-29 push/pull, 2-27-29 rear push...
Service Manual
Page 7
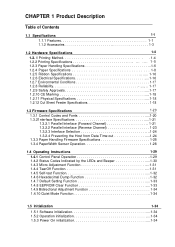
CHAPTER 1 Product Description Table of Contents 1.1 Specifications 1-1 1.1.1 Features 1-1 1.1.2 Accessories 1-3 1.2 Hardware Specifications 1-4 1.2. I Printing Method 1-4 1.2.2 Printing Specifications 1 - 5 1.2.3 Paper Handling Specifications 1-6 1.2.4 Paper Specifications 1-8 1.2.5 Ribbon Specifications 1-16 1.2.6 Electrical Specifications 1-16 1.2.7 Environmental Conditions 1-17 1.2.8 Reliability 1-17 1.2.9 Safety Approvals 1-17 1.2.10 CE Marking 1-18 1.2.11 Physical Specifications 1-18 1.2.12 Cut Sheet Feeder ...
CHAPTER 1 Product Description Table of Contents 1.1 Specifications 1-1 1.1.1 Features 1-1 1.1.2 Accessories 1-3 1.2 Hardware Specifications 1-4 1.2. I Printing Method 1-4 1.2.2 Printing Specifications 1 - 5 1.2.3 Paper Handling Specifications 1-6 1.2.4 Paper Specifications 1-8 1.2.5 Ribbon Specifications 1-16 1.2.6 Electrical Specifications 1-16 1.2.7 Environmental Conditions 1-17 1.2.8 Reliability 1-17 1.2.9 Safety Approvals 1-17 1.2.10 CE Marking 1-18 1.2.11 Physical Specifications 1-18 1.2.12 Cut Sheet Feeder ...
Service Manual
Page 9
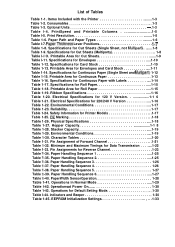
... 5 1-27 Table -39. EEPROM Initialization Settings 1-33 Optional Units 1-3 Table l-4. Specifications for Envelopes and Card Stock 1-11 Table 1-14. Specifications for Continuous Paper with the Printer 1-3 Table 1-2. Ribbon Specifications 1-16 Table 1-20. Hopper Capacity 1-1 8 Table 1-28. Operations in Normal Mode 1-29 Table l-42. 0perationsat Power On 1-30 Table 1-43. Electrical Specifications for...
... 5 1-27 Table -39. EEPROM Initialization Settings 1-33 Optional Units 1-3 Table l-4. Specifications for Envelopes and Card Stock 1-11 Table 1-14. Specifications for Continuous Paper with the Printer 1-3 Table 1-2. Ribbon Specifications 1-16 Table 1-20. Hopper Capacity 1-1 8 Table 1-28. Operations in Normal Mode 1-29 Table l-42. 0perationsat Power On 1-30 Table 1-43. Electrical Specifications for...


