
User Manual
Page 2
......13 Recycling Dell products...14 Using the printer control panel buttons and menus 16 Replacing the language sheet...16 Using the printer control panel...17 Changing the Sleep timeout...19 Saving paper and energy...19 Restoring factory default settings...19 Using shortcuts 21 What are shortcuts?...21 Getting started...22 Using the printer software 24...
......13 Recycling Dell products...14 Using the printer control panel buttons and menus 16 Replacing the language sheet...16 Using the printer control panel...17 Changing the Sleep timeout...19 Saving paper and energy...19 Restoring factory default settings...19 Using shortcuts 21 What are shortcuts?...21 Getting started...22 Using the printer software 24...
User Manual
Page 3
......55 Copying an ID card...56 Enlarging or reducing images...56 Adjusting copy quality...57 Making a copy lighter or darker...57 Collating copies using the printer control panel 57 Placing separator sheets between copies 58 Copying multiple pages on one sheet...58 Placing an overlay message on each page 58 Removing... Scanning to a flash drive or memory card 62 Scanning photos for editing...63 Scanning documents for editing...64 Scanning directly to e‑mail using the printer software 65 Scanning to a PDF...65
......55 Copying an ID card...56 Enlarging or reducing images...56 Adjusting copy quality...57 Making a copy lighter or darker...57 Collating copies using the printer control panel 57 Placing separator sheets between copies 58 Copying multiple pages on one sheet...58 Placing an overlay message on each page 58 Removing... Scanning to a flash drive or memory card 62 Scanning photos for editing...63 Scanning documents for editing...64 Scanning directly to e‑mail using the printer software 65 Scanning to a PDF...65
User Manual
Page 8
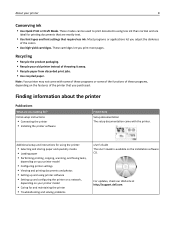
... paper from discarded print jobs. • Use recycled paper. Finding information about the printer Publications What are you purchased. For updates, check our Web site at http://support.dell.com. These modes can be used to print documents using printer software • Setting up and using less ink than normal and are mostly text...
... paper from discarded print jobs. • Use recycled paper. Finding information about the printer Publications What are you purchased. For updates, check our Web site at http://support.dell.com. These modes can be used to print documents using printer software • Setting up and using less ink than normal and are mostly text...
User Manual
Page 9
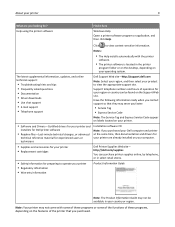
... your product to view context‑sensitive information. Note: Your printer may not come with the printer software. • The printer software is located in the printer program folder or on the desktop, depending on your printer. • Software and Drivers-Certified drivers for your printer and installers for Dell printer software • Readme files-Last‑minute technical changes, or advanced...
... your product to view context‑sensitive information. Note: Your printer may not come with the printer software. • The printer software is located in the printer program folder or on the desktop, depending on your printer. • Software and Drivers-Certified drivers for your printer and installers for Dell printer software • Readme files-Last‑minute technical changes, or advanced...
User Manual
Page 22
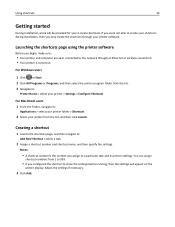
...click Launch. Launching the shortcuts page using the printer software Before you begin, make sure: • Your printer and computer are each connected to create your shortcuts during installation, then you may create the shortcuts through your printer from 1 to 999. • If you... connection. • Your printer is the number you assign to : Add New Shortcut > select a task 2 Assign a shortcut number and shortcut name, and then specify the settings. If you to : Applications > select your printer folder > Shortcuts 2 Select your printer software. Using shortcuts 22 Getting started...
...click Launch. Launching the shortcuts page using the printer software Before you begin, make sure: • Your printer and computer are each connected to create your shortcuts during installation, then you may create the shortcuts through your printer from 1 to 999. • If you... connection. • Your printer is the number you assign to : Add New Shortcut > select a task 2 Assign a shortcut number and shortcut name, and then specify the settings. If you to : Applications > select your printer folder > Shortcuts 2 Select your printer software. Using shortcuts 22 Getting started...

User Manual
Page 24
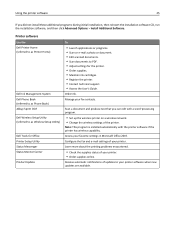
Using the printer software 24 Using the printer software Minimum system requirements The printer software requires up the printer using the installation software CD, all the necessary software was installed. Using the Windows printer software Software installed during printer installation When you set up to install some additional programs. The following table provides an overview of free disk space. You may have chosen to...
Using the printer software 24 Using the printer software Minimum system requirements The printer software requires up the printer using the installation software CD, all the necessary software was installed. Using the Windows printer software Software installed during printer installation When you set up to install some additional programs. The following table provides an overview of free disk space. You may have chosen to...
User Manual
Page 25
... status of your favorite settings in Microsoft Office 2007. Printer software Use the Dell Printer Home (referred to as Printer Home) Dell Ink Management System Dell Phone Book (referred to as Phone Book) Abbyy Sprint OCR Dell Wireless Setup Utility (referred to as Wireless Setup Utility) Dell Tools for Office Printer Setup Utility Status Messenger Status Monitor Center Product Update...
... status of your favorite settings in Microsoft Office 2007. Printer software Use the Dell Printer Home (referred to as Printer Home) Dell Ink Management System Dell Phone Book (referred to as Phone Book) Abbyy Sprint OCR Dell Wireless Setup Utility (referred to as Wireless Setup Utility) Dell Tools for Office Printer Setup Utility Status Messenger Status Monitor Center Product Update...

User Manual
Page 26
... to print. • Print two‑sided copies. • Select the paper type. • Add a watermark. • Enhance images. • Save settings. Using the Macintosh printer software Launching the Print dialog Use the Print dialog to : Applications > select your computer. With a document or photo open , a Printing Preferences dialog appears. Set up usual...
... to print. • Print two‑sided copies. • Select the paper type. • Add a watermark. • Enhance images. • Save settings. Using the Macintosh printer software Launching the Print dialog Use the Print dialog to : Applications > select your computer. With a document or photo open , a Printing Preferences dialog appears. Set up usual...
User Manual
Page 27
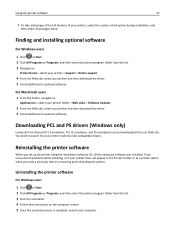
... custom install option during installation, and then select all the necessary software was installed. Reinstalling the printer software When you set up the printer using the installation software CD, all packages listed. Using the printer software 27 • To take advantage of the full features of your printer model to view compatible drivers. Downloading PCL and PS drivers...
... custom install option during installation, and then select all the necessary software was installed. Reinstalling the printer software When you set up the printer using the installation software CD, all packages listed. Using the printer software 27 • To take advantage of the full features of your printer model to view compatible drivers. Downloading PCL and PS drivers...

User Manual
Page 28
... a minute, then launch the CD manually: a Click , or click Start and then click Run. Using the Internet Updated printer software may be available at http://support.dell.com. Installing the printer software Note: If you installed the printer software on the computer screen. c Press Enter, or click OK. 3 Click Install, and then follow the instructions on the...
... a minute, then launch the CD manually: a Click , or click Start and then click Run. Using the Internet Updated printer software may be available at http://support.dell.com. Installing the printer software Note: If you installed the printer software on the computer screen. c Press Enter, or click OK. 3 Click Install, and then follow the instructions on the...
User Manual
Page 40
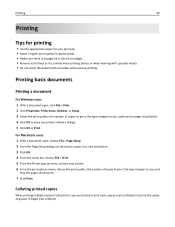
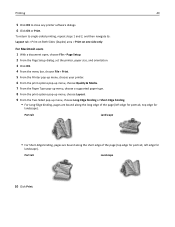
...For Windows users 1 With a document open , choose File > Page Setup. 2 From the Page Setup dialog, set the printer, paper size, and orientation. 3 Click OK. 4 From the menu bar, choose File > Print. 5 From the Printer pop‑up menu, choose your print job. • Select a higher print quality for your... the print options menu, choose the print quality, the number of copies to print, the type of paper to close any printer software dialogs. 5 Click OK or Print. For Macintosh users 1 With a document open , click File > Print. 2 Click Properties, Preferences, Options, or Setup. 3 Select ...
...For Windows users 1 With a document open , choose File > Page Setup. 2 From the Page Setup dialog, set the printer, paper size, and orientation. 3 Click OK. 4 From the menu bar, choose File > Print. 5 From the Printer pop‑up menu, choose your print job. • Select a higher print quality for your... the print options menu, choose the print quality, the number of copies to print, the type of paper to close any printer software dialogs. 5 Click OK or Print. For Macintosh users 1 With a document open , click File > Print. 2 Click Properties, Preferences, Options, or Setup. 3 Select ...
User Manual
Page 41
...number of copies that you are printing multiple copies. • To prevent smudging when printing photos, remove each photo as it exits the printer, and then let it dry before stacking. Printing Collated 41 Not collated Notes: • The collate option is available only when you want... the printer, paper size, and orientation. 3 Click OK. 4 From the menu bar, choose File > Print. 5 From the Printer pop‑up menu, choose your printer. 6 From the Copies area, enter the number of copies that you want to print, and then select Collate. 5 Click OK to close any printer software dialogs....
...number of copies that you are printing multiple copies. • To prevent smudging when printing photos, remove each photo as it exits the printer, and then let it dry before stacking. Printing Collated 41 Not collated Notes: • The collate option is available only when you want... the printer, paper size, and orientation. 3 Click OK. 4 From the menu bar, choose File > Print. 5 From the Printer pop‑up menu, choose your printer. 6 From the Copies area, enter the number of copies that you want to print, and then select Collate. 5 Click OK to close any printer software dialogs....
User Manual
Page 42
... pop‑up menu, choose the number of page images to print on each side. 5 Adjust other settings as needed. 6 Click OK to close any printer software dialogs. 6 Click OK or Print. For Macintosh users 1 With a document open , click File > Print. 2 Click Properties, Preferences, Options, or Setup.... page first, choose Normal. • To print the last page first, choose Reverse. 8 Click Print. Printing 42 5 Click OK to close any printer software dialogs. 7 Click OK or Print. Printing multiple pages on one sheet For Windows users 1 With a document open , choose File > Page Setup. ...
... pop‑up menu, choose the number of page images to print on each side. 5 Adjust other settings as needed. 6 Click OK to close any printer software dialogs. 6 Click OK or Print. For Macintosh users 1 With a document open , click File > Print. 2 Click Properties, Preferences, Options, or Setup.... page first, choose Normal. • To print the last page first, choose Reverse. 8 Click Print. Printing 42 5 Click OK to close any printer software dialogs. 7 Click OK or Print. Printing multiple pages on one sheet For Windows users 1 With a document open , choose File > Page Setup. ...

User Manual
Page 43
... scroll to Documents, and then press . 3 Press the up or down arrow button to scroll to the document, and then press to close any printer software dialogs. 8 Click OK or Print. Note: You may select the number of copies, color mode, print quality, paper source, and paper-saving options... can also enhance sharpness, and use the arrow buttons to File Print mode. Printing specialty documents Printing on the memory device, then the printer automatically switches to select your printing options, and then press , if necessary. Printing 43 8 Adjust other settings as needed . 9 Click Print. ...
... scroll to Documents, and then press . 3 Press the up or down arrow button to scroll to the document, and then press to close any printer software dialogs. 8 Click OK or Print. Note: You may select the number of copies, color mode, print quality, paper source, and paper-saving options... can also enhance sharpness, and use the arrow buttons to File Print mode. Printing specialty documents Printing on the memory device, then the printer automatically switches to select your printing options, and then press , if necessary. Printing 43 8 Adjust other settings as needed . 9 Click Print. ...
User Manual
Page 44
... label sheets. For Windows users 1 With a document open , choose File > Page Setup. 2 From the "Format for " pop‑up menu, choose your printer. Printing 44 For Macintosh users 1 With a document open , click File > Print. 2 Click Properties, Preferences, Options, or Setup. 3 Navigate to: Paper/Finishing...a custom size, and then click OK. 5 Navigate to: Paper type list > select the created custom type 6 Click OK to close any printer software dialogs. 7 Click OK or Print. Notes: • Most envelopes use landscape orientation. • Make sure the same orientation is also selected in...
... label sheets. For Windows users 1 With a document open , choose File > Page Setup. 2 From the "Format for " pop‑up menu, choose your printer. Printing 44 For Macintosh users 1 With a document open , click File > Print. 2 Click Properties, Preferences, Options, or Setup. 3 Navigate to: Paper/Finishing...a custom size, and then click OK. 5 Navigate to: Paper type list > select the created custom type 6 Click OK to close any printer software dialogs. 7 Click OK or Print. Notes: • Most envelopes use landscape orientation. • Make sure the same orientation is also selected in...
User Manual
Page 45
...8209;size paper For Windows users 1 With a document open , choose File > Page Setup. 2 From the "Format for" pop‑up menu, choose your printer. 8 Click Print. Printing 45 3 From the Paper Size pop‑up menu, choose Labels. 9 From the Print Quality menu, choose a print quality other...> Print. 7 From the printer pop‑up menu, choose your printer. 3 From the Paper Size pop‑up menu, choose Manage Custom Sizes. 4 Adjust the settings as needed to create a custom size, and then click OK. 5 Click Close, and then click OK to close any printer software dialogs. 6 Click OK or ...
...8209;size paper For Windows users 1 With a document open , choose File > Page Setup. 2 From the "Format for" pop‑up menu, choose your printer. 8 Click Print. Printing 45 3 From the Paper Size pop‑up menu, choose Labels. 9 From the Print Quality menu, choose a print quality other...> Print. 7 From the printer pop‑up menu, choose your printer. 3 From the Paper Size pop‑up menu, choose Manage Custom Sizes. 4 Adjust the settings as needed to create a custom size, and then click OK. 5 Click Close, and then click OK to close any printer software dialogs. 6 Click OK or ...
User Manual
Page 49
... 1 With a document open, choose File > Page Setup. 2 From the Page Setup dialog, set the printer, paper size, and orientation. 3 Click OK. 4 From the menu bar, choose File > Print. 5 From the Printer pop‑up menu, choose your printer. 6 From the print options pop‑up menu, choose Quality & Media. 7 From the Paper Type... the short edge of the page (left edge for landscape). To return to single-sided printing, repeat steps 1 and 2, and then navigate to close any printer software dialogs. 6 Click OK or Print.
... 1 With a document open, choose File > Page Setup. 2 From the Page Setup dialog, set the printer, paper size, and orientation. 3 Click OK. 4 From the menu bar, choose File > Print. 5 From the Printer pop‑up menu, choose your printer. 6 From the print options pop‑up menu, choose Quality & Media. 7 From the Paper Type... the short edge of the page (left edge for landscape). To return to single-sided printing, repeat steps 1 and 2, and then navigate to close any printer software dialogs. 6 Click OK or Print.

User Manual
Page 50
...ink to dry completely, select Extended. 4 Click OK. For Macintosh users 1 From the Apple menu, navigate to : Open Print Queue > Printer Setup > Driver tab or Printer Setup > Installable Options 3 From the Two‑Sided Printing Dry Time pop‑up or down arrow button to scroll to : Layout ... to : System Preferences > Print & Fax > select your prints. Select Extended to extend the dry time for the print job. Using the printer software For Windows users 1 Click File > Print. 2 Click Properties, Preferences, Options, or Setup. 3 Navigate to the dry time setting you want, and then ...
...ink to dry completely, select Extended. 4 Click OK. For Macintosh users 1 From the Apple menu, navigate to : Open Print Queue > Printer Setup > Driver tab or Printer Setup > Installable Options 3 From the Two‑Sided Printing Dry Time pop‑up or down arrow button to scroll to : Layout ... to : System Preferences > Print & Fax > select your prints. Select Extended to extend the dry time for the print job. Using the printer software For Windows users 1 Click File > Print. 2 Click Properties, Preferences, Options, or Setup. 3 Navigate to the dry time setting you want, and then ...

User Manual
Page 62
...it. • To assign a computer name and a PIN to the computer, see the Help for the printer software associated with your computer through Image Capture to scan documents using a network printer and save the scan output. Scanning to a network computer 1 Load the original document faceup into the ADF...option you make a selection. 4 Press . Scanning to a flash drive or memory card Notes: • Some features are available only in select printer models. • Make sure your flash drive or memory card is not write‑protected. 1 Load the original document faceup into the ADF or...
...it. • To assign a computer name and a PIN to the computer, see the Help for the printer software associated with your computer through Image Capture to scan documents using a network printer and save the scan output. Scanning to a network computer 1 Load the original document faceup into the ADF...option you make a selection. 4 Press . Scanning to a flash drive or memory card Notes: • Some features are available only in select printer models. • Make sure your flash drive or memory card is not write‑protected. 1 Load the original document faceup into the ADF or...

User Manual
Page 64
... users 1 Load the original document faceup into the ADF or facedown on your printer and lets you work , you must have an OCR application stored on the preview dialog for more information. 5 Set the OCR software as needed. For Macintosh users 1 Load the original document faceup into a format... > Document Scanning starts and the scan progress dialog appears. 5 When the scan is missing, then insert the installation software CD. Reinstall the printer software using the custom install option so you want to edit an original text document that supports your settings, the file may...
... users 1 Load the original document faceup into the ADF or facedown on your printer and lets you work , you must have an OCR application stored on the preview dialog for more information. 5 Set the OCR software as needed. For Macintosh users 1 Load the original document faceup into a format... > Document Scanning starts and the scan progress dialog appears. 5 When the scan is missing, then insert the installation software CD. Reinstall the printer software using the custom install option so you want to edit an original text document that supports your settings, the file may...


