
Dell™ Technology Guide
Page 20
... 1394 Device Problems 291 Keyboard Problems for External Keyboards . . . 292 Lockups and Software Problems 292 Memory Problems 294 Mouse Problems 295 Network Problems 296 Power Problems 296 Printer Problems 298 Scanner Problems 299 Sound and Speaker Problems 299 Touch Pad or Mouse Problems for Laptop Computers 301 Video and Monitor Problems 302 Power Lights 304 Dell Technical Update Service 305 21 System Setup 307 Viewing System Settings With the System Setup Program 307 Entering the System Setup Program 308 Working With Options on the System Setup Program Screen 308 Changing...
... 1394 Device Problems 291 Keyboard Problems for External Keyboards . . . 292 Lockups and Software Problems 292 Memory Problems 294 Mouse Problems 295 Network Problems 296 Power Problems 296 Printer Problems 298 Scanner Problems 299 Sound and Speaker Problems 299 Touch Pad or Mouse Problems for Laptop Computers 301 Video and Monitor Problems 302 Power Lights 304 Dell Technical Update Service 305 21 System Setup 307 Viewing System Settings With the System Setup Program 307 Entering the System Setup Program 308 Working With Options on the System Setup Program Screen 308 Changing...
Dell™ Technology Guide
Page 28
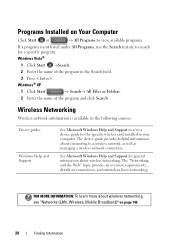
... All Programs, use the Search feature to search for the specific wireless card installed in the Search field. 3 Press . FOR MORE INFORMATION: To learn more about wireless networking, see "Networks (LAN, Wireless, Mobile Broadband)" on connections, and tutorials in the following sources: Device guides Windows Help and Support See Microsoft Windows Help and Support to a wireless network, as well as managing a wireless network connection. The device guide provides helpful information about wireless networking. Windows® XP 1 Click Start → Search...
... All Programs, use the Search feature to search for the specific wireless card installed in the Search field. 3 Press . FOR MORE INFORMATION: To learn more about wireless networking, see "Networks (LAN, Wireless, Mobile Broadband)" on connections, and tutorials in the following sources: Device guides Windows Help and Support See Microsoft Windows Help and Support to a wireless network, as well as managing a wireless network connection. The device guide provides helpful information about wireless networking. Windows® XP 1 Click Start → Search...
Dell™ Technology Guide
Page 64
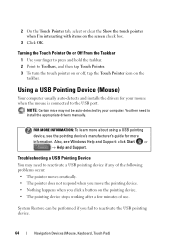
... pointing device stops working after a few minutes of use. NOTE: Certain mice may need to Toolbars, and then tap Touch Pointer. 3 To turn the touch pointer on or off, tap the Touch Pointer icon on the screen check box. 3 Click OK. System Restore can be auto-detected by your mouse when the mouse is connected to the USB port. You then need to...
... pointing device stops working after a few minutes of use. NOTE: Certain mice may need to Toolbars, and then tap Touch Pointer. 3 To turn the touch pointer on or off, tap the Touch Pointer icon on the screen check box. 3 Click OK. System Restore can be auto-detected by your mouse when the mouse is connected to the USB port. You then need to...
Dell™ Technology Guide
Page 79
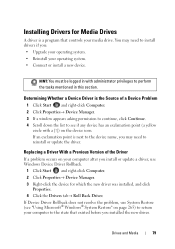
...; Connect or install a new device. Drives and Media 79 Replacing a Driver With a Previous Version of a Device Problem 1 Click Start and right-click Computer. 2 Click Properties→ Device Manager. 3 If a window appears asking permission to continue, click Continue. 4 Scroll down the list to see "Using Microsoft® Windows® System Restore" on the device icon. If Device Driver Rollback does not resolve the problem, use Windows Device Driver Rollback. 1 Click Start and right-click Computer. 2 Click Properties→ Device Manager...
...; Connect or install a new device. Drives and Media 79 Replacing a Driver With a Previous Version of a Device Problem 1 Click Start and right-click Computer. 2 Click Properties→ Device Manager. 3 If a window appears asking permission to continue, click Continue. 4 Scroll down the list to see "Using Microsoft® Windows® System Restore" on the device icon. If Device Driver Rollback does not resolve the problem, use Windows Device Driver Rollback. 1 Click Start and right-click Computer. 2 Click Properties→ Device Manager...
Dell™ Technology Guide
Page 81
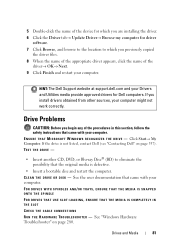
... support.dell.com and your computer. See "Windows Hardware Troubleshooter" on page 337). FOR DRIVES WITH SPINDLES AND/OR TRAYS, ENSURE THAT THE MEDIA IS SNAPPED ONTO THE SPINDLE FOR DRIVES THAT USE SLOT-LOADING, ENSURE THAT THE MEDIA IS COMPLETELY IN THE SLOT CHECK THE CABLE CONNECTIONS R U N T H E H A R D W A R E TR O U B L E S H O O T E R - 5 Double-click the name of the device for which you are installing the driver. 6 Click the Driver tab→ Update Driver...
... support.dell.com and your computer. See "Windows Hardware Troubleshooter" on page 337). FOR DRIVES WITH SPINDLES AND/OR TRAYS, ENSURE THAT THE MEDIA IS SNAPPED ONTO THE SPINDLE FOR DRIVES THAT USE SLOT-LOADING, ENSURE THAT THE MEDIA IS COMPLETELY IN THE SLOT CHECK THE CABLE CONNECTIONS R U N T H E H A R D W A R E TR O U B L E S H O O T E R - 5 Double-click the name of the device for which you are installing the driver. 6 Click the Driver tab→ Update Driver...
Dell™ Technology Guide
Page 119
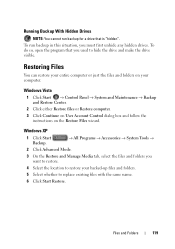
... drives. Windows Vista 1 Click Start → Control Panel → System and Maintenance → Backup and Restore Center. 2 Click either Restore files or Restore computer. 3 Click Continue on User Account Control dialog box and follow the instructions on your backed-up files and folders. 5 Select whether to hide the drive and make the drive visible. To run backup for a drive that you want to restore. 4 Select the location to restore your computer. Windows XP 1 Click Start...
... drives. Windows Vista 1 Click Start → Control Panel → System and Maintenance → Backup and Restore Center. 2 Click either Restore files or Restore computer. 3 Click Continue on User Account Control dialog box and follow the instructions on your backed-up files and folders. 5 Select whether to hide the drive and make the drive visible. To run backup for a drive that you want to restore. 4 Select the location to restore your computer. Windows XP 1 Click Start...
Dell™ Technology Guide
Page 151
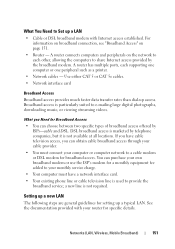
... CAT 5e cables. • Network interface card Broadband Access Broadband access provides much faster data transfer rates than dial-up a typical LAN. Broadband access is used to a cable modem or DSL modem for broadband access. Setting up a new LAN The following steps are general guidelines for specific details. What You Need to e-mailing large digital photographs, downloading music, or viewing streaming videos. If you have a network interface card. •...
... CAT 5e cables. • Network interface card Broadband Access Broadband access provides much faster data transfer rates than dial-up a typical LAN. Broadband access is used to a cable modem or DSL modem for broadband access. Setting up a new LAN The following steps are general guidelines for specific details. What You Need to e-mailing large digital photographs, downloading music, or viewing streaming videos. If you have a network interface card. •...

Dell™ Technology Guide
Page 166
... network connection: 1 Click Start → Control Panel. 2 Double click the Security Center icon, then click the Windows Firewall option. 3 Select the Exceptions tab on page 255. If you use public wireless access frequently, subscribe to a Virtual Private Network (VPN) or secure hotspot wireless service provider. Update your operating system does not include a firewall, purchase and install an integrated Internet security software package or, at a minimum, standalone firewall software. If your software. Use...
... network connection: 1 Click Start → Control Panel. 2 Double click the Security Center icon, then click the Windows Firewall option. 3 Select the Exceptions tab on page 255. If you use public wireless access frequently, subscribe to a Virtual Private Network (VPN) or secure hotspot wireless service provider. Update your operating system does not include a firewall, purchase and install an integrated Internet security software package or, at a minimum, standalone firewall software. If your software. Use...
Dell™ Technology Guide
Page 207
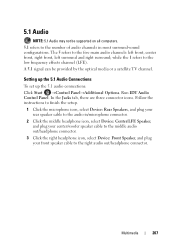
... 5.1 Audio Connections To set up the 5.1 audio connections: Click Start →Control Panel→Additional Options. Follow the instructions to finish the setup. 1 Click the microphone icon, select Device: Rear Speakers, and plug your rear speaker cable to the audio in/microphone connector. 2 Click the middle headphone icon, select Device: Center/LFE Speaker, and plug your center/woofer speaker cable to the middle audio out/headphone connector. 3 Click the right headphone icon, select Device: Front Speaker, and plug your front speaker cable to the number...
... 5.1 Audio Connections To set up the 5.1 audio connections: Click Start →Control Panel→Additional Options. Follow the instructions to finish the setup. 1 Click the microphone icon, select Device: Rear Speakers, and plug your rear speaker cable to the audio in/microphone connector. 2 Click the middle headphone icon, select Device: Center/LFE Speaker, and plug your center/woofer speaker cable to the middle audio out/headphone connector. 3 Click the right headphone icon, select Device: Front Speaker, and plug your front speaker cable to the number...
Dell™ Technology Guide
Page 276
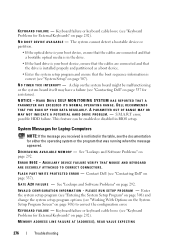
... 292). MEMORY ADDRESS LINE FAILURE AT (ADDRESS), READ VALUE EXPECTING 276 Troubleshooting S.M.A.R.T error, possible HDD failure. Contact Dell (see "Keyboard Problems for External Keyboards" on page 337). I N V A L I D C O N F I G U R A T I O N I N F O R M A T I L U R E - The system cannot detect a bootable device or partition. • If the optical drive is your boot device, ensure that the cables are connected and that a bootable optical media is in the drive. • If the hard drive is your boot device, ensure that the cables are connected and that the drive is installed...
... 292). MEMORY ADDRESS LINE FAILURE AT (ADDRESS), READ VALUE EXPECTING 276 Troubleshooting S.M.A.R.T error, possible HDD failure. Contact Dell (see "Keyboard Problems for External Keyboards" on page 337). I N V A L I D C O N F I G U R A T I O N I N F O R M A T I L U R E - The system cannot detect a bootable device or partition. • If the optical drive is your boot device, ensure that the cables are connected and that a bootable optical media is in the drive. • If the hard drive is your boot device, ensure that the cables are connected and that the drive is installed...
Dell™ Technology Guide
Page 285
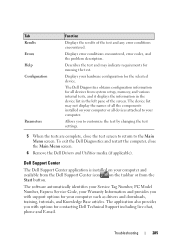
.... Troubleshooting 285 Tab Results Errors Help Configuration Parameters Function Displays the results of the screen. The device list may indicate requirements for all devices attached to customize the test by changing the test settings. 5 When the tests are complete, close the Main Menu screen. 6 Remove the Dell Drivers and Utilities media (if applicable). The software automatically identifies your Service Tag Number, PC Model Number, Express Service Code, your computer or all devices from system setup, memory, and various internal tests, and it displays...
.... Troubleshooting 285 Tab Results Errors Help Configuration Parameters Function Displays the results of the screen. The device list may indicate requirements for all devices attached to customize the test by changing the test settings. 5 When the tests are complete, close the Main Menu screen. 6 Remove the Dell Drivers and Utilities media (if applicable). The software automatically identifies your Service Tag Number, PC Model Number, Express Service Code, your computer or all devices from system setup, memory, and various internal tests, and it displays...
Dell™ Technology Guide
Page 296
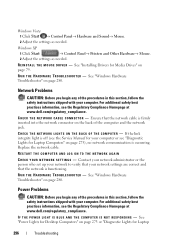
Windows Vista 1 Click Start → Control Panel→ Hardware and Sound→ Mouse. 2 Adjust the settings as needed . R E I N S T A L L T H E M O U S E D R I G H T S O N T H E B A C K O F T H E C O M P U T E R - See "Installing Drivers for Desktop Computers" on page 280. Replace the network cable. See "Windows Hardware Troubleshooter" on page 79. Windows XP 1 Click Start → Control Panel→ Printers and Other Hardware→ Mouse. 2 Adjust the settings as needed . For additional safety best practices information, see the Regulatory Compliance ...
Windows Vista 1 Click Start → Control Panel→ Hardware and Sound→ Mouse. 2 Adjust the settings as needed . R E I N S T A L L T H E M O U S E D R I G H T S O N T H E B A C K O F T H E C O M P U T E R - See "Installing Drivers for Desktop Computers" on page 280. Replace the network cable. See "Windows Hardware Troubleshooter" on page 79. Windows XP 1 Click Start → Control Panel→ Printers and Other Hardware→ Mouse. 2 Adjust the settings as needed . For additional safety best practices information, see the Regulatory Compliance ...
Dell™ Technology Guide
Page 303
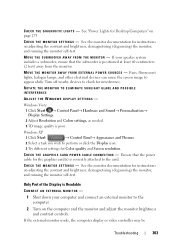
... - Fans, fluorescent lights, halogen lamps, and other electrical devices can cause the screen image to check for instructions on adjusting the contrast and brightness, demagnetizing (degaussing) the monitor, and running the monitor self-test. M O V E T H E S U B W O O F E R A W A Y F R O M T H E M O N I G H T S - ROTATE THE MONITOR TO ELIMINATE SUNLIGHT GLARE AND POSSIBLE INTERFERENCE ADJUST THE WINDOWS DISPLAY SETTINGS - Turn off nearby devices to appear shaky. See the monitor documentation for interference. Windows Vista 1 Click Start → Control Panel→ Hardware...
... - Fans, fluorescent lights, halogen lamps, and other electrical devices can cause the screen image to check for instructions on adjusting the contrast and brightness, demagnetizing (degaussing) the monitor, and running the monitor self-test. M O V E T H E S U B W O O F E R A W A Y F R O M T H E M O N I G H T S - ROTATE THE MONITOR TO ELIMINATE SUNLIGHT GLARE AND POSSIBLE INTERFERENCE ADJUST THE WINDOWS DISPLAY SETTINGS - Turn off nearby devices to appear shaky. See the monitor documentation for interference. Windows Vista 1 Click Start → Control Panel→ Hardware...
Dell™ Technology Guide
Page 332
... a broadband connection, diagnose your problem and repair it all under your Express Service Code to route the call directly to support.dell.com and click DellConnect. 332 Getting Help Technical Support and Customer Service Dell's support service is a simple online access tool that the support staff can assist you do not have not resolved the problem, see "Technical Support and Customer Service" on availability. Our support staff uses special diagnostic utilities to support.dell.com...
... a broadband connection, diagnose your problem and repair it all under your Express Service Code to route the call directly to support.dell.com and click DellConnect. 332 Getting Help Technical Support and Customer Service Dell's support service is a simple online access tool that the support staff can assist you do not have not resolved the problem, see "Technical Support and Customer Service" on availability. Our support staff uses special diagnostic utilities to support.dell.com...
Dell™ Technology Guide
Page 351
... area of video memory installed in the computer. A video standard for this program. A connector used to operate with a processor and a memory chip. SXGA+ - A utility that supports resolutions up to save energy. telephony application programming interface - smart card - A video standard for smart cards. system setup - A card that shuts down all unnecessary computer operations to 1400 x 1050. A power management mode that is on the capabilities of the monitor, the video controller and its drivers, and the...
... area of video memory installed in the computer. A video standard for this program. A connector used to operate with a processor and a memory chip. SXGA+ - A utility that supports resolutions up to save energy. telephony application programming interface - smart card - A video standard for smart cards. system setup - A card that shuts down all unnecessary computer operations to 1400 x 1050. A power management mode that is on the capabilities of the monitor, the video controller and its drivers, and the...

Setup Guide
Page 5
... 6 Connect the Keyboard and Mouse 7 Connect the Display 8 Connect the Network Cable (Optional 10 Connect the Power Cable 11 Press the Power Button 12 Set Up Microsoft Windows 13 Create System Recovery Media (Recommended 14 Connect to the Internet (Optional 15 Using Your Studio XPS Desktop 18 Front View Features 18 Top View Features 20 Back View Features 22 Back Panel Connectors 24 Software Features 26 Dell Dock 27 Dell DataSafe Online Backup 28 Solving Problems 29 Beep Codes 29 Network Problems 30 Power Problems 31 Memory Problems 33...
... 6 Connect the Keyboard and Mouse 7 Connect the Display 8 Connect the Network Cable (Optional 10 Connect the Power Cable 11 Press the Power Button 12 Set Up Microsoft Windows 13 Create System Recovery Media (Recommended 14 Connect to the Internet (Optional 15 Using Your Studio XPS Desktop 18 Front View Features 18 Top View Features 20 Back View Features 22 Back Panel Connectors 24 Software Features 26 Dell Dock 27 Dell DataSafe Online Backup 28 Solving Problems 29 Beep Codes 29 Network Problems 30 Power Problems 31 Memory Problems 33...
Setup Guide
Page 12
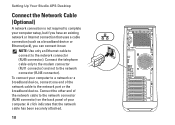
... connector) on the back panel of the network cable to the network port or the broadband device. A click indicates that uses a cable connection (such as a broadband device or Ethernet jack), you can connect it now. Setting Up Your Studio XPS Desktop Connect the Network Cable (Optional) A network connection is not required to complete your computer. To connect your computer to a network or a broadband device, connect one end of your computer setup, but if you have an existing network or Internet connection...
... connector) on the back panel of the network cable to the network port or the broadband device. A click indicates that uses a cable connection (such as a broadband device or Ethernet jack), you can connect it now. Setting Up Your Studio XPS Desktop Connect the Network Cable (Optional) A network connection is not required to complete your computer. To connect your computer to a network or a broadband device, connect one end of your computer setup, but if you have an existing network or Internet connection...

Setup Guide
Page 35
... are not using to see if that resolves the problem. • See the software documentation for minimum memory requirements. If necessary, install additional memory (see the Service Manual at support.dell.com/manuals). • Reseat the memory module(s) into the connector(s) (see the Service Manual at support.dell.com/manuals). • Check if the memory module is compatible with your computer, see "Specifications" on page 60. • Run the Dell Diagnostics (see "Dell Diagnostics" on...
... are not using to see if that resolves the problem. • See the software documentation for minimum memory requirements. If necessary, install additional memory (see the Service Manual at support.dell.com/manuals). • Reseat the memory module(s) into the connector(s) (see the Service Manual at support.dell.com/manuals). • Check if the memory module is compatible with your computer, see "Specifications" on page 60. • Run the Dell Diagnostics (see "Dell Diagnostics" on...

Setup Guide
Page 41
... S.M.A.R.T error, possible hard drive failure. Hardware Troubleshooter If a device is either not detected during the operating system setup or is detected but incorrectly configured, you back up your device has two USB cables, connect both of range may or may not indicate a potential hard drive problem - To start the search. 3. NOTICE - In the search results, select the option that a parameter has exceeded its normal operating range. See the Service Manual at support.dell.com/manuals...
... S.M.A.R.T error, possible hard drive failure. Hardware Troubleshooter If a device is either not detected during the operating system setup or is detected but incorrectly configured, you back up your device has two USB cables, connect both of range may or may not indicate a potential hard drive problem - To start the search. 3. NOTICE - In the search results, select the option that a parameter has exceeded its normal operating range. See the Service Manual at support.dell.com/manuals...

Setup Guide
Page 62
Computer Model Studio XPS™ 9100 Computer Information Processor type Intel® Core™ i7 System chipset Intel X58 RAID support RAID 0 (striping) RAID 1 (mirroring) BIOS chip (NVRAM) 4 MB Drives Externally accessible Internally accessible two 5.25-inch bays for SATA DVD+/-RW Super Multi Drive, Blu-ray Disc™ combo, or Blu-ray Disc RW optical drive two 3.5-inch FlexBays three 3.5-inch bays for , and upgrading your computer. For more information regarding the configuration of your...
Computer Model Studio XPS™ 9100 Computer Information Processor type Intel® Core™ i7 System chipset Intel X58 RAID support RAID 0 (striping) RAID 1 (mirroring) BIOS chip (NVRAM) 4 MB Drives Externally accessible Internally accessible two 5.25-inch bays for SATA DVD+/-RW Super Multi Drive, Blu-ray Disc™ combo, or Blu-ray Disc RW optical drive two 3.5-inch FlexBays three 3.5-inch bays for , and upgrading your computer. For more information regarding the configuration of your...


