Dell™ Technology Guide
Page 9
... Restricting Access to a File 115 Transferring Files and Settings to a New Computer . . 116 Transferring Files From a Computer Running Windows XP to a Computer Running Windows Vista 116 Transferring Files Between Computers Running Windows XP 117 Backing up Files 117 Windows Vista 117 Windows XP 118 Running Backup When the Settings Have Been Preconfigured 118 Running...
... Restricting Access to a File 115 Transferring Files and Settings to a New Computer . . 116 Transferring Files From a Computer Running Windows XP to a Computer Running Windows Vista 116 Transferring Files Between Computers Running Windows XP 117 Backing up Files 117 Windows Vista 117 Windows XP 118 Running Backup When the Settings Have Been Preconfigured 118 Running...
Dell™ Technology Guide
Page 11
...Power Settings, Power Protection Devices, and Batteries) . . . 135 Setting Power Options 135 Windows Vista 135 Windows® XP 137 Power Protection Devices 140 Surge Protector 140 Power Line Conditioner 140 Uninterruptible Power Supply (UPS 141 Laptop Computer Batteries 141 ...Charge 143 Conserving Battery Power 145 Charging the Battery 145 Storing a Battery 146 US Department of Transportation (DOT) Notebook Battery Restrictions 146 Dell™ ControlPoint Power Manager 146 12 Networks (LAN, Wireless, Mobile Broadband 149 Overview 149 Local Area Networks (LAN 150 What You Need...
...Power Settings, Power Protection Devices, and Batteries) . . . 135 Setting Power Options 135 Windows Vista 135 Windows® XP 137 Power Protection Devices 140 Surge Protector 140 Power Line Conditioner 140 Uninterruptible Power Supply (UPS 141 Laptop Computer Batteries 141 ...Charge 143 Conserving Battery Power 145 Charging the Battery 145 Storing a Battery 146 US Department of Transportation (DOT) Notebook Battery Restrictions 146 Dell™ ControlPoint Power Manager 146 12 Networks (LAN, Wireless, Mobile Broadband 149 Overview 149 Local Area Networks (LAN 150 What You Need...
Dell™ Technology Guide
Page 12
... up a WLAN 153 Checking Your Wireless Network Card 154 Reinstalling Software and Drivers for Your Wireless Network Card 154 Setting up a new Wireless Local Area Network (WLAN 155 Ad Hoc Networks 158 Mobile Broadband (or Wireless Wide Area Network) Networks 159 Establishing a Mobile ... Card . . . . . 160 Connecting to a Mobile Broadband Network . . 160 Activating Mobile Broadband Service 160 Managing the Network With the Dell Mobile Broadband Card Utility 161 WiMAX 161 WPAN 162 Managing Your Network 162 Securing Your Network 162 Securing Your Wireless Local Area Network (WLAN 164...
... up a WLAN 153 Checking Your Wireless Network Card 154 Reinstalling Software and Drivers for Your Wireless Network Card 154 Setting up a new Wireless Local Area Network (WLAN 155 Ad Hoc Networks 158 Mobile Broadband (or Wireless Wide Area Network) Networks 159 Establishing a Mobile ... Card . . . . . 160 Connecting to a Mobile Broadband Network . . 160 Activating Mobile Broadband Service 160 Managing the Network With the Dell Mobile Broadband Card Utility 161 WiMAX 161 WPAN 162 Managing Your Network 162 Securing Your Network 162 Securing Your Wireless Local Area Network (WLAN 164...

Dell™ Technology Guide
Page 14
... Temporary Files Folder 188 Maintaining Privacy by Blocking and Deleting Cookies 189 14 E-mail 191 Setting up a new E-mail Account 191 Windows Vista 192 Windows® XP 192 Managing and Organizing E-mail Messages . . . . . 192 Windows Vista 192 Windows XP 194 Securing Your E-mail 194 Reducing Spam 195 Viruses and Phishing 196 14 Contents
... Temporary Files Folder 188 Maintaining Privacy by Blocking and Deleting Cookies 189 14 E-mail 191 Setting up a new E-mail Account 191 Windows Vista 192 Windows® XP 192 Managing and Organizing E-mail Messages . . . . . 192 Windows Vista 192 Windows XP 194 Securing Your E-mail 194 Reducing Spam 195 Viruses and Phishing 196 14 Contents
Dell™ Technology Guide
Page 37
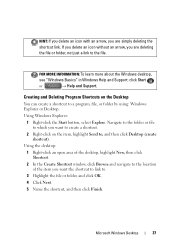
... Shortcuts on the item, highlight Send to, and then click Desktop (create shortcut). Using the desktop: 1 Right-click an open area of the desktop, highlight New, then click Shortcut. 2 In the Create Shortcut window, click Browse and navigate to the location of the item you are simply deleting the shortcut link...
... Shortcuts on the item, highlight Send to, and then click Desktop (create shortcut). Using the desktop: 1 Right-click an open area of the desktop, highlight New, then click Shortcut. 2 In the Create Shortcut window, click Browse and navigate to the location of the item you are simply deleting the shortcut link...
Dell™ Technology Guide
Page 41
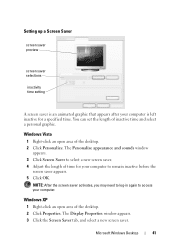
... saver. 4 Adjust the length of the desktop. 2 Click Personalize. Windows XP 1 Right-click an open area of time for a specified time. Microsoft Windows Desktop 41 The Display Properties window appears. 3 Click the Screen Saver tab, and select a new screen saver. You can set the length of the desktop. 2 Click Properties. Windows Vista...
... saver. 4 Adjust the length of the desktop. 2 Click Personalize. Windows XP 1 Right-click an open area of time for a specified time. Microsoft Windows Desktop 41 The Display Properties window appears. 3 Click the Screen Saver tab, and select a new screen saver. You can set the length of the desktop. 2 Click Properties. Windows Vista...
Dell™ Technology Guide
Page 60
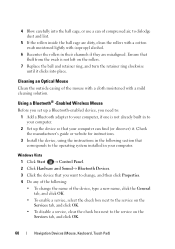
... device that you set up the device so that fluff from the swab is not already built in your computer can of the device, type a new name, click the General tab, and click OK. • To enable a service, select the check box next to the service on the Services tab, and...
... device that you set up the device so that fluff from the swab is not already built in your computer can of the device, type a new name, click the General tab, and click OK. • To enable a service, select the check box next to the service on the Services tab, and...
Dell™ Technology Guide
Page 61
... Bluetooth Devices. 4 On the Devices tab, click Add. 5 Select the My device is set up and ready to connect check box. Windows® XP 1 Attach or turn on your Bluetooth-enabled adapter. 2 Make your mouse documentation for any passkey instructions. 8 Follow the remaining instructions in the Bluetooth Devices... click Start or → Help and Support. See your mouse discoverable by pressing a button on the Options tab, select the Alert me when a new Bluetooth device wants to be found check box, and click Next. 6 Click the icon that represents the Bluetooth-enabled mouse, and click Next. 7 ...
... Bluetooth Devices. 4 On the Devices tab, click Add. 5 Select the My device is set up and ready to connect check box. Windows® XP 1 Attach or turn on your Bluetooth-enabled adapter. 2 Make your mouse documentation for any passkey instructions. 8 Follow the remaining instructions in the Bluetooth Devices... click Start or → Help and Support. See your mouse discoverable by pressing a button on the Options tab, select the Alert me when a new Bluetooth device wants to be found check box, and click Next. 6 Click the icon that represents the Bluetooth-enabled mouse, and click Next. 7 ...
Dell™ Technology Guide
Page 75
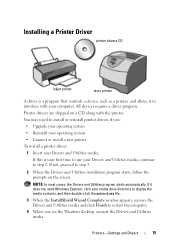
... Utilities media and click Finish to restart the computer. 4 When you : • Upgrade your operating system • Reinstall your operating system • Connect or install a new printer To install a printer driver: 1 Insert your Drivers and Utilities media, continue to step 2. If it to interface with the printer. NOTE: In most cases...
... Utilities media and click Finish to restart the computer. 4 When you : • Upgrade your operating system • Reinstall your operating system • Connect or install a new printer To install a printer driver: 1 Insert your Drivers and Utilities media, continue to step 2. If it to interface with the printer. NOTE: In most cases...
Dell™ Technology Guide
Page 76
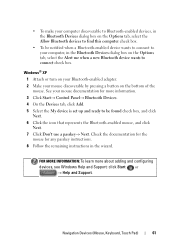
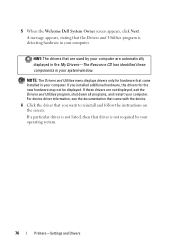
HINT: The drivers that the Drivers and Utilities program is detecting hardware in your computer. 5 When the Welcome Dell System Owner screen appears, click Next. A message appears, stating that are used by your computer. If those drivers are automatically displayed in ...Drivers and Utilities program, shut down all programs, and restart your system window. NOTE: The Drivers and Utilities menu displays drivers only for the new hardware may not be displayed. If you installed additional hardware, the drivers for hardware that came with the device. 6 Click the driver that ...
HINT: The drivers that the Drivers and Utilities program is detecting hardware in your computer. 5 When the Welcome Dell System Owner screen appears, click Next. A message appears, stating that are used by your computer. If those drivers are automatically displayed in ...Drivers and Utilities program, shut down all programs, and restart your system window. NOTE: The Drivers and Utilities menu displays drivers only for the new hardware may not be displayed. If you installed additional hardware, the drivers for hardware that came with the device. 6 Click the driver that ...
Dell™ Technology Guide
Page 79
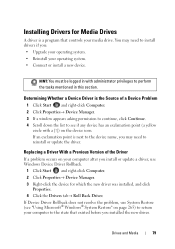
.... Determining Whether a Device Driver is a program that existed before you : • Upgrade your operating system. • Reinstall your operating system. • Connect or install a new device. Replacing a Driver With a Previous Version of a Device Problem 1 Click Start and right-click Computer. 2 Click Properties→ Device Manager. 3 If a window appears asking...driver, use System Restore (see if any device has an exclamation point (a yellow circle with administrator privileges to install drivers if you installed the new driver. HINT: You must be logged in this section.
.... Determining Whether a Device Driver is a program that existed before you : • Upgrade your operating system. • Reinstall your operating system. • Connect or install a new device. Replacing a Driver With a Previous Version of a Device Problem 1 Click Start and right-click Computer. 2 Click Properties→ Device Manager. 3 If a window appears asking...driver, use System Restore (see if any device has an exclamation point (a yellow circle with administrator privileges to install drivers if you installed the new driver. HINT: You must be logged in this section.
Dell™ Technology Guide
Page 88
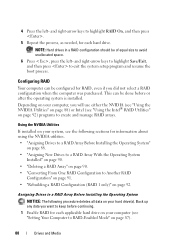
..., as needed, for information about using the NVIDIA utilities. • "Assigning Drives to a RAID Array Before Installing the Operating System" on page 88. • "Assigning New Drives to a RAID Array With the Operating System Installed" on page 90. • "Deleting a RAID Array" on your hard drive(s).
..., as needed, for information about using the NVIDIA utilities. • "Assigning Drives to a RAID Array Before Installing the Operating System" on page 88. • "Assigning New Drives to a RAID Array With the Operating System Installed" on page 90. • "Deleting a RAID Array" on your hard drive(s).
Dell™ Technology Guide
Page 89
The Define a New Array window appears. To create a RAID 0 configuration, use the right-arrow key to the Array Disks field. NOTICE: You lose all data from the Free ...
The Define a New Array window appears. To create a RAID 0 configuration, use the right-arrow key to the Array Disks field. NOTICE: You lose all data from the Free ...
Dell™ Technology Guide
Page 90
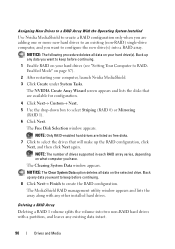
...(see "Setting Your Computer to create the RAID configuration. The Clearing System Data window appears. Back up any data you want to configure the new drive(s) into two non-RAID hard drives with any existing data intact. 90 Drives and Media NOTE: The number of drives supported in each ...RAID array varies, depending on your hard drive(s). Assigning New Drives to a RAID Array With the Operating System Installed Use Nvidia MediaShield to create a RAID configuration only when you are adding one or more...
...(see "Setting Your Computer to create the RAID configuration. The Clearing System Data window appears. Back up any data you want to configure the new drive(s) into two non-RAID hard drives with any existing data intact. 90 Drives and Media NOTE: The number of drives supported in each ...RAID array varies, depending on your hard drive(s). Assigning New Drives to a RAID Array With the Operating System Installed Use Nvidia MediaShield to create a RAID configuration only when you are adding one or more...

Dell™ Technology Guide
Page 95
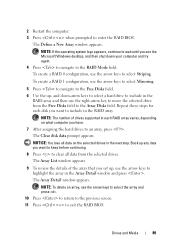
...or restart your computer. 2 Press when you are prompted to enter the Intel RAID Option ROM utility. 3 Under DEGRADED VOLUME DETECTED, confirm that the new (non-RAID) drive is listed and then press . 4 Under Disk/Volume Information, confirm that the volume status is lost. 1 Set your computer... only after you have not yet set your computer to RAID-enabled mode (see the appropriate "Drives" section for creating a partition on the new RAID volume. Drives and Media 95 Creating a RAID Level 1 Configuration With the Operating System Installed NOTE: When you perform this operation, all ...
...or restart your computer. 2 Press when you are prompted to enter the Intel RAID Option ROM utility. 3 Under DEGRADED VOLUME DETECTED, confirm that the new (non-RAID) drive is listed and then press . 4 Under Disk/Volume Information, confirm that the volume status is lost. 1 Set your computer... only after you have not yet set your computer to RAID-enabled mode (see the appropriate "Drives" section for creating a partition on the new RAID volume. Drives and Media 95 Creating a RAID Level 1 Configuration With the Operating System Installed NOTE: When you perform this operation, all ...

Dell™ Technology Guide
Page 113
... to operate. 1 Right-click the file you want to rename. 2 Click Rename from the drop-down menu. 3 Type a new name for the file and press the key. Files and Folders 113 Windows® XP 1 Click Start → Search. 2 Under Search Companion, select the type of a word in the Search box. 4 Type a word...
... to operate. 1 Right-click the file you want to rename. 2 Click Rename from the drop-down menu. 3 Type a new name for the file and press the key. Files and Folders 113 Windows® XP 1 Click Start → Search. 2 Under Search Companion, select the type of a word in the Search box. 4 Type a word...
Dell™ Technology Guide
Page 114
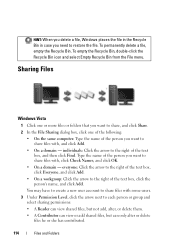
... the file. Type the name of the person you want to share files with, and click Add. • On a domain - You may have to create a new user account to share files with , click Check Names, and click OK. • On a domain - HINT: When you delete a file, Windows places the file in...
... the file. Type the name of the person you want to share files with, and click Add. • On a domain - You may have to create a new user account to share files with , click Check Names, and click OK. • On a domain - HINT: When you delete a file, Windows places the file in...
Dell™ Technology Guide
Page 115
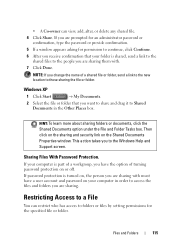
...folders or files by setting permissions for permission to continue, click Continue. 6 After you receive confirmation that you are sharing with . 7 Click Done. Windows XP 1 Click Start → My Documents. 2 Select the file or folder that your folder is shared, send a link to the shared files to the ... Documents Properties window. If you are sharing them with must have the option of a shared file or folder, send a link to the new location to those sharing the file or folder. This action takes you are prompted for an administrator password or confirmation, type the password or ...
...folders or files by setting permissions for permission to continue, click Continue. 6 After you receive confirmation that you are sharing with . 7 Click Done. Windows XP 1 Click Start → My Documents. 2 Select the file or folder that your folder is shared, send a link to the shared files to the ... Documents Properties window. If you are sharing them with must have the option of a shared file or folder, send a link to the new location to those sharing the file or folder. This action takes you are prompted for an administrator password or confirmation, type the password or ...

Dell™ Technology Guide
Page 116
... the required group or user and click Remove. FOR MORE INFORMATION: To learn more about setting permissions, see "Administrator Rights" on the computer running Windows XP. 2 After the installation is complete, click Start Transfer. → Windows Easy 116 Files and Folders Transferring Files and Settings to...
... the required group or user and click Remove. FOR MORE INFORMATION: To learn more about setting permissions, see "Administrator Rights" on the computer running Windows XP. 2 After the installation is complete, click Start Transfer. → Windows Easy 116 Files and Folders Transferring Files and Settings to...
Dell™ Technology Guide
Page 118
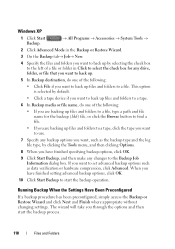
... you want, such as data verification or hardware compression, click Advanced. The wizard will take you want to the Backup Job Information dialog box. Windows XP 1 Click Start Backup. → All Programs → Accessories → System Tools → 2 Click Advanced Mode in the Backup or Restore Wizard. 3... On the Backup tab→ Job→ New. 4 Specify the files and folders you want to back up by selecting the check box to the left of a file or folder in Click to...
... you want, such as data verification or hardware compression, click Advanced. The wizard will take you want to the Backup Job Information dialog box. Windows XP 1 Click Start Backup. → All Programs → Accessories → System Tools → 2 Click Advanced Mode in the Backup or Restore Wizard. 3... On the Backup tab→ Job→ New. 4 Specify the files and folders you want to back up by selecting the check box to the left of a file or folder in Click to...


