
Owner's Manual
Page 2
... countries. Other trademarks and trade names may be used in this document to Microsoft® Windows® operating systems are trademarks of Dell Inc.; NOTICE: A NOTICE indicates either potential damage to change without the written permission of ...Model DCSM July 2007 P/N PY349 Rev. If you purchased a Dell™ n Series computer, any references in this text: Dell, the DELL logo, Inspiron, Dell Precision, Dimension, OptiPlex, Latitude, PowerEdge, PowerVault, PowerApp, DellNet, Dell TravelLite, Strike Zone, and PowerConnect are not applicable. A03 Bluetooth...
... countries. Other trademarks and trade names may be used in this document to Microsoft® Windows® operating systems are trademarks of Dell Inc.; NOTICE: A NOTICE indicates either potential damage to change without the written permission of ...Model DCSM July 2007 P/N PY349 Rev. If you purchased a Dell™ n Series computer, any references in this text: Dell, the DELL logo, Inspiron, Dell Precision, Dimension, OptiPlex, Latitude, PowerEdge, PowerVault, PowerApp, DellNet, Dell TravelLite, Strike Zone, and PowerConnect are not applicable. A03 Bluetooth...
Owner's Manual
Page 4
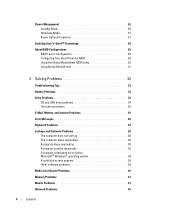
... not start up 38 The computer stops responding 38 A program stops responding 38 A program crashes repeatedly 39 A program is designed for an earlier Microsoft® Windows® operating system 39 A solid blue screen appears 39 Other software problems 39 Media Card Reader Problems 40 Memory Problems 41 Mouse Problems 41 Network...
... not start up 38 The computer stops responding 38 A program stops responding 38 A program crashes repeatedly 39 A program is designed for an earlier Microsoft® Windows® operating system 39 A solid blue screen appears 39 Other software problems 39 Media Card Reader Problems 40 Memory Problems 41 Mouse Problems 41 Network...

Owner's Manual
Page 5
... If the screen is blank 47 If the screen is difficult to read 48 3 Troubleshooting Tools 49 Diagnostic Lights 49 Dell Diagnostics 52 Dell Diagnostics Main Menu 52 Drivers 53 What Is a Driver 53 Identifying Drivers 53 Reinstalling Drivers 54 Resolving Software and Hardware... Incompatibilities 55 Restoring Your Operating System 55 Using Microsoft Windows XP System Restore 56 Using Dell PC Restore 57 Using the Operating System CD 59 4 Removing and Installing Parts 61 Before You Begin 61 Recommended...
... If the screen is blank 47 If the screen is difficult to read 48 3 Troubleshooting Tools 49 Diagnostic Lights 49 Dell Diagnostics 52 Dell Diagnostics Main Menu 52 Drivers 53 What Is a Driver 53 Identifying Drivers 53 Reinstalling Drivers 54 Resolving Software and Hardware... Incompatibilities 55 Restoring Your Operating System 55 Using Microsoft Windows XP System Restore 56 Using Dell PC Restore 57 Using the Operating System CD 59 4 Removing and Installing Parts 61 Before You Begin 61 Recommended...

Owner's Manual
Page 9
...Guide • How to set up my computer Setup Diagram • Service Tag and Express Service Code • Microsoft Windows License Label Service Tag and Microsoft® Windows® License These labels are located on your computer. •Use the Service Tag to identify your computer when you... use support.dell.com or contact support. •Enter the Express Service Code to direct your computer. Finding Information NOTE: ...
...Guide • How to set up my computer Setup Diagram • Service Tag and Express Service Code • Microsoft Windows License Label Service Tag and Microsoft® Windows® License These labels are located on your computer. •Use the Service Tag to identify your computer when you... use support.dell.com or contact support. •Enter the Express Service Code to direct your computer. Finding Information NOTE: ...
Owner's Manual
Page 10
NOTE: Corporate, government, and education customers can also use Windows XP • How to work with programs and files • How to support.dell.com and click Downloads. 2 Enter your Service Tag or product model. 3 In the Download Category drop-down menu, click All. 4... your region to System and appropriate for your Dell computer. DSS provides critical updates for your operating system and support for correct operation of your computer, and click Submit. The software automatically detects your 1 Go to personalize my desktop Windows Help and Support Center 1 Click Start→...
NOTE: Corporate, government, and education customers can also use Windows XP • How to work with programs and files • How to support.dell.com and click Downloads. 2 Enter your Service Tag or product model. 3 In the Download Category drop-down menu, click All. 4... your region to System and appropriate for your Dell computer. DSS provides critical updates for your operating system and support for correct operation of your computer, and click Submit. The software automatically detects your 1 Go to personalize my desktop Windows Help and Support Center 1 Click Start→...

Owner's Manual
Page 16
... telephone line. If you are using a dial-up connection, connect a telephone line to the modem connector on the computer. If the Add New Hardware Wizard window appears, click Cancel. 4 Install the printer driver if necessary. To connect to the Internet NOTE: ISPs and ISP offerings vary by country. 1 2 3 1 USB connector on...
... telephone line. If you are using a dial-up connection, connect a telephone line to the modem connector on the computer. If the Add New Hardware Wizard window appears, click Cancel. 4 Install the printer driver if necessary. To connect to the Internet NOTE: ISPs and ISP offerings vary by country. 1 2 3 1 USB connector on...

Owner's Manual
Page 17
... have successfully connected in the past, the ISP might have a service outage. The New Connection Wizard appears. 3 Click Connect to the Internet. 4 In the next window, click the appropriate option: • If you do not have an ISP and want to select one, click Choose from a list of connection to select... Internet connection with a different ISP: 1 Save and close any open files, and exit any open programs. 2 Double-click the ISP icon on the Microsoft® Windows® desktop. 3 Follow the instructions on the screen to complete the setup.
... have successfully connected in the past, the ISP might have a service outage. The New Connection Wizard appears. 3 Click Connect to the Internet. 4 In the next window, click the appropriate option: • If you do not have an ISP and want to select one, click Choose from a list of connection to select... Internet connection with a different ISP: 1 Save and close any open files, and exit any open programs. 2 Double-click the ISP icon on the Microsoft® Windows® desktop. 3 Follow the instructions on the screen to complete the setup.
Owner's Manual
Page 19
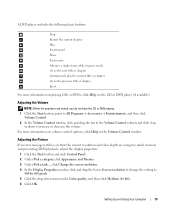
...following basic buttons: Stop Restart the current chapter Play Fast forward Pause Fast reverse Advance a single frame while in the Volume Control window. For more information on volume control options, click Help in pause mode Go to the next title or chapter Continuously play the current title .... 1 Click the Start button, point to All Programs→ Accessories→ Entertainment, and then click Volume Control. 2 In the Volume Control window, click and drag the bar in Screen resolution to change the setting to increase or decrease the volume. Setting Up and Using Your Computer 19
...following basic buttons: Stop Restart the current chapter Play Fast forward Pause Fast reverse Advance a single frame while in the Volume Control window. For more information on volume control options, click Help in pause mode Go to the next title or chapter Continuously play the current title .... 1 Click the Start button, point to All Programs→ Accessories→ Entertainment, and then click Volume Control. 2 In the Volume Control window, click and drag the bar in Screen resolution to change the setting to increase or decrease the volume. Setting Up and Using Your Computer 19

Owner's Manual
Page 20
For help, open Sonic DigitalMedia and then click the question mark icon in Dell™ computers can write to and read DVD-RAM or DVD-R DL media. The DVD-writable drives installed in the upper-right corner of the window. Using Blank CDs and DVDs CD-RW drives can write to CD recording... CD-R again (see the Sonic documentation for more information). This section applies only to make an exact copy of CD or DVD drives offered by Dell may not read DVD+/-R, DVD+/-RW and DVD+R DL (dual layer) media, but cannot write to and may vary by country. Use blank CD-Rs...
For help, open Sonic DigitalMedia and then click the question mark icon in Dell™ computers can write to and read DVD-RAM or DVD-R DL media. The DVD-writable drives installed in the upper-right corner of the window. Using Blank CDs and DVDs CD-RW drives can write to CD recording... CD-R again (see the Sonic documentation for more information). This section applies only to make an exact copy of CD or DVD drives offered by Dell may not read DVD+/-R, DVD+/-RW and DVD+R DL (dual layer) media, but cannot write to and may vary by country. Use blank CD-Rs...

Owner's Manual
Page 21
... Yes Yes Yes Write Yes Yes Yes Yes Yes Yes Yes Rewritable No Yes No No Yes Yes No Helpful Tips • Use Microsoft® Windows® Explorer to drag and drop files to a CD-R or CD-RW only after you start Sonic DigitalMedia and open a DigitalMedia project. • Use CD...
... Yes Yes Yes Write Yes Yes Yes Yes Yes Yes Yes Rewritable No Yes No No Yes Yes No Helpful Tips • Use Microsoft® Windows® Explorer to drag and drop files to a CD-R or CD-RW only after you start Sonic DigitalMedia and open a DigitalMedia project. • Use CD...

Owner's Manual
Page 25
... adapter connector on the computer. Do not plug a network cable into the network adapter connector on the back of viewable work space. The Microsoft® Windows® desktop displays on the primary monitor. 2 Enable clone mode or extended desktop mode in the Help and Support Center (click the Start button, click...
... adapter connector on the computer. Do not plug a network cable into the network adapter connector on the back of viewable work space. The Microsoft® Windows® desktop displays on the primary monitor. 2 Enable clone mode or extended desktop mode in the Help and Support Center (click the Start button, click...

Owner's Manual
Page 26
...conserves power by . NOTE: Selecting the connection method This computer connects directly to the Internet enables the integrated firewall provided with Windows XP Service Pack. 4 Complete the checklist and required preparations. 5 Return to the Network Setup Wizard and follow the instructions on...Network Setup Wizard. 2 On the welcome screen, click Next. 3 Click Checklist for creating a network. Network Setup Wizard The Microsoft® Windows® XP operating system provides a Network Setup Wizard to guide you through the process of inactivity: 1 Click the Start button and click Control...
...conserves power by . NOTE: Selecting the connection method This computer connects directly to the Internet enables the integrated firewall provided with Windows XP Service Pack. 4 Complete the checklist and required preparations. 5 Return to the Network Setup Wizard and follow the instructions on...Network Setup Wizard. 2 On the welcome screen, click Next. 3 Click Checklist for creating a network. Network Setup Wizard The Microsoft® Windows® XP operating system provides a Network Setup Wizard to guide you through the process of inactivity: 1 Click the Start button and click Control...

Owner's Manual
Page 27
...mode requires a special file on your power settings on your computer with minimal power conservation. • Max Battery - To access the Power Options Properties window: 1 Click the Start button and click Control Panel. 2 Under Pick a category, click Performance and Maintenance. 3 Under or pick a Control Panel icon,...with enough disk space to store the contents of time. Each scheme has different settings for extended periods of the computer memory, Dell creates an appropriately sized hibernate mode file before it was in the fields below the scheme name. The Power schemes drop-down...
...mode requires a special file on your power settings on your computer with minimal power conservation. • Max Battery - To access the Power Options Properties window: 1 Click the Start button and click Control Panel. 2 Under Pick a category, click Performance and Maintenance. 3 Under or pick a Control Panel icon,...with enough disk space to store the contents of time. Each scheme has different settings for extended periods of the computer memory, Dell creates an appropriately sized hibernate mode file before it was in the fields below the scheme name. The Power schemes drop-down...

Owner's Manual
Page 28
... Setup" on page 111). 2 Click on the Start→ Settings→ Control Panel→ Power Options to access the Power Options Properties window. 3 From the Power Schemes tab, click the Power Schemes drop-down menu and click OK. Changing the time-out for a scheme field ...permanently changes the default settings for that scheme, unless you click Save As and enter a new name for your Windows password before the monitor does, your computer's processor performance automatically, dynamically adjusting the operating frequency and voltage, according to enable hibernate mode....
... Setup" on page 111). 2 Click on the Start→ Settings→ Control Panel→ Power Options to access the Power Options Properties window. 3 From the Power Schemes tab, click the Power Schemes drop-down menu and click OK. Changing the time-out for a scheme field ...permanently changes the default settings for that scheme, unless you click Save As and enter a new name for your Windows password before the monitor does, your computer's processor performance automatically, dynamically adjusting the operating frequency and voltage, according to enable hibernate mode....

Owner's Manual
Page 30
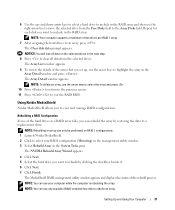
... requirements, see "Setting Your Computer to RAIDEnabled Mode" on page 29. and down-arrow keys to the RAID Mode field. The Define a New Array window appears. 4 Press to navigate to highlight the SATA operation, then press . 4 Press the left - Configuring Your Hard Drives for RAID Your computer can...on how to install a hard drive, see "Installing a Hard Drive" on page 88. 1 Enable RAID for RAID, even if you see the Microsoft Windows desktop, then shut down -arrow keys to install a hard drive, see "About RAID Configurations" on page 29. and right-arrow keys to enter the RAID...
... requirements, see "Setting Your Computer to RAIDEnabled Mode" on page 29. and down-arrow keys to the RAID Mode field. The Define a New Array window appears. 4 Press to navigate to highlight the SATA operation, then press . 4 Press the left - Configuring Your Hard Drives for RAID Your computer can...on how to install a hard drive, see "Installing a Hard Drive" on page 88. 1 Enable RAID for RAID, even if you see the Microsoft Windows desktop, then shut down -arrow keys to install a hard drive, see "About RAID Configurations" on page 29. and right-arrow keys to enter the RAID...
Owner's Manual
Page 31
... press . The NVIDIA Rebuild Array Wizard appears. 4 Click Next. 5 Select the hard drive you want to highlight the array in the Array Detail window and press . NOTICE: You will lose all data from the Free Disks field to a replacement drive. Rebuilding a RAID Configuration If one of two drives... each disk you can use any available (RAID-enabled) free disk to select your computer while the computer is rebuilding the array. The Array List window appears. 9 To review the details of the rebuild process. NOTE: You can rebuild the array by clicking the checkbox beside it. 6 Click Next...
... press . The NVIDIA Rebuild Array Wizard appears. 4 Click Next. 5 Select the hard drive you want to highlight the array in the Array Detail window and press . NOTICE: You will lose all data from the Free Disks field to a replacement drive. Rebuilding a RAID Configuration If one of two drives... each disk you can use any available (RAID-enabled) free disk to select your computer while the computer is rebuilding the array. The Array List window appears. 9 To review the details of the rebuild process. NOTE: You can rebuild the array by clicking the checkbox beside it. 6 Click Next...
Owner's Manual
Page 34
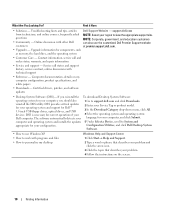
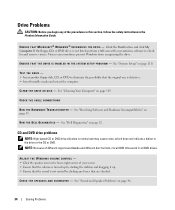
See "Cleaning Your Computer" on page 52. See "Dell Diagnostics" on page 119. NOTE: Because of different regions worldwide and different disc formats, not all ... is defective. • Insert bootable media and restart the computer. E N S U R E T H A T M I C R O S O F T ® W I N D O W S ® R E C O G N I Z E S T H E D R I C S - Viruses can sometimes prevent Windows from recognizing the drive. E N S U R E T H A T T H E D R I V E I S E N A B L E D I S K - See "System Setup" on page 111) TEST THE DRIVE - • Insert another floppy disk, CD, or DVD to check for and...
See "Cleaning Your Computer" on page 52. See "Dell Diagnostics" on page 119. NOTE: Because of different regions worldwide and different disc formats, not all ... is defective. • Insert bootable media and restart the computer. E N S U R E T H A T M I C R O S O F T ® W I N D O W S ® R E C O G N I Z E S T H E D R I C S - Viruses can sometimes prevent Windows from recognizing the drive. E N S U R E T H A T T H E D R I V E I S E N A B L E D I S K - See "System Setup" on page 111) TEST THE DRIVE - • Insert another floppy disk, CD, or DVD to check for and...
Owner's Manual
Page 35
TURN OFF STANDBY MODE IN WINDOWS BEFORE WRITING TO A CD/DVD-RW DISC - 1 Click the Start button and click Control Panel. 2 Under Pick a category, click Performance and Maintenance. 3 Under or pick a ...
TURN OFF STANDBY MODE IN WINDOWS BEFORE WRITING TO A CD/DVD-RW DISC - 1 Click the Start button and click Control Panel. 2 Under Pick a category, click Performance and Maintenance. 3 Under or pick a ...

Owner's Manual
Page 36
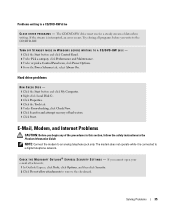
... tab, and then click Query Modem to a telephone. USE A DIFFERENT TELEPHONE LINE - • Verify that the modem is communicating with Windows. If all computers.) VERIFY THAT THE MODEM IS COMMUNICATING WITH WINDOWS - 1 Click the Start button and click Control Panel. 2 Click Printers and Other Hardware. 3 Click Phone and Modem Options. 4 Click the...
... tab, and then click Query Modem to a telephone. USE A DIFFERENT TELEPHONE LINE - • Verify that the modem is communicating with Windows. If all computers.) VERIFY THAT THE MODEM IS COMMUNICATING WITH WINDOWS - 1 Click the Start button and click Control Panel. 2 Click Printers and Other Hardware. 3 Click Phone and Modem Options. 4 Click the...
Owner's Manual
Page 37
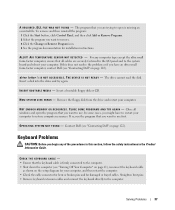
...pins and for installation instructions. Keyboard Problems CAUTION: Before you begin any computer type except the ultra small form-factor computer, ensure that all windows and open is firmly connected to the computer. CHECK THE KEYBOARD CABLE - • Ensure that you have to use first. Straighten bent... Control Panel, and then click Add or Remove Programs. 2 Select the program you might have an ultra small form-factor computer, contact Dell (see "Contacting Dell" on page 122). A I N - If this section, follow the safety instructions in this does not resolve the problem or if you...
...pins and for installation instructions. Keyboard Problems CAUTION: Before you begin any computer type except the ultra small form-factor computer, ensure that all windows and open is firmly connected to the computer. CHECK THE KEYBOARD CABLE - • Ensure that you have to use first. Straighten bent... Control Panel, and then click Add or Remove Programs. 2 Select the program you might have an ultra small form-factor computer, contact Dell (see "Contacting Dell" on page 122). A I N - If this section, follow the safety instructions in this does not resolve the problem or if you...


