Owner's Manual
Page 1
... switch serial connector keyboard connector center/LFE connector line-out connector microphone connector USB 2.0 connectors (6) VGA video connector TV-OUT connector** optional sound-card connectors** parallel connector diagnostic lights mouse connector surround connector line-in connector network adapter DVI connector PCI card (3), PCI Express x1 card (1), PCI Express x16 card (1) slots **Not present on all computers. Dell™ Dimension™ 8400 Series CD or DVD activity light CD or DVD drive eject button USB 2.0 connectors (2) headphone connector Service Tag floppy drive...
... switch serial connector keyboard connector center/LFE connector line-out connector microphone connector USB 2.0 connectors (6) VGA video connector TV-OUT connector** optional sound-card connectors** parallel connector diagnostic lights mouse connector surround connector line-in connector network adapter DVI connector PCI card (3), PCI Express x1 card (1), PCI Express x16 card (1) slots **Not present on all computers. Dell™ Dimension™ 8400 Series CD or DVD activity light CD or DVD drive eject button USB 2.0 connectors (2) headphone connector Service Tag floppy drive...
Owner's Manual
Page 10
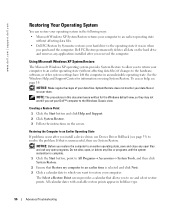
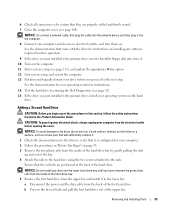
... These labels are located on the screen. 10 Finding Information Online discussion with other Dell customers • Upgrades - Upgrade information for devices (such as memory, the hard drive, and the operating system • Customer Care - Contact information, order status, warranty, and repair information • Downloads - Computer documentation, product specifications, and white papers Windows Help and Support Center 1 Click the Start button and click Help and Support. 2 Type a word or phrase...
... These labels are located on the screen. 10 Finding Information Online discussion with other Dell customers • Upgrades - Upgrade information for devices (such as memory, the hard drive, and the operating system • Customer Care - Contact information, order status, warranty, and repair information • Downloads - Computer documentation, product specifications, and white papers Windows Help and Support Center 1 Click the Start button and click Help and Support. 2 Type a word or phrase...
Owner's Manual
Page 13
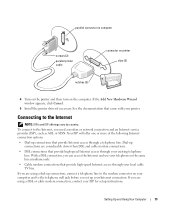
... access the Internet and use your telephone on the computer. Setting Up and Using Your Computer 13 parallel connector on computer screws (2) parallel printer cable connector on printer clips (2) notches (2) 4 Turn on the printer and then turn on the same line simultaneously. • Cable modem connections that provide high-speed Internet access through your local cable TV line. If the Add New Hardware Wizard window appears, click Cancel. 5 Install the printer driver...
... access the Internet and use your telephone on the computer. Setting Up and Using Your Computer 13 parallel connector on computer screws (2) parallel printer cable connector on printer clips (2) notches (2) 4 Turn on the printer and then turn on the same line simultaneously. • Cable modem connections that provide high-speed Internet access through your local cable TV line. If the Add New Hardware Wizard window appears, click Cancel. 5 Install the printer driver...
Owner's Manual
Page 19
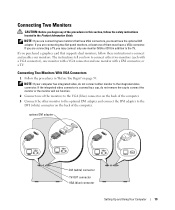
...: If your monitors. Connecting Two Monitors With VGA Connectors 1 Follow the procedures in the Product Information Guide. If the integrated video connector is covered by a cap, do not connect either two monitors (each with a VGA connector), one monitor with a DVI connector, or a TV. If you purchased a graphics card that have VGA connectors, you must have the optional DVI adapter. NOTE: If you are connecting two monitors that supports dual monitors, follow the safety instructions located in "Before You...
...: If your monitors. Connecting Two Monitors With VGA Connectors 1 Follow the procedures in the Product Information Guide. If the integrated video connector is covered by a cap, do not connect either two monitors (each with a VGA connector), one monitor with a DVI connector, or a TV. If you purchased a graphics card that have VGA connectors, you must have the optional DVI adapter. NOTE: If you are connecting two monitors that supports dual monitors, follow the safety instructions located in "Before You...
Owner's Manual
Page 20
... RAID configuration program, although it can only create a RAID volume using two physical drives. If a third drive is not included with your graphics card). An S-video cable is present, then that you might have selected when you purchased your computer can be used as a spare drive in a RAID 1 configuration (see the user's guide in the Help and Support Center (click the Start button, click Help and Support, click User and system guides, click Device guides...
... RAID configuration program, although it can only create a RAID volume using two physical drives. If a third drive is not included with your graphics card). An S-video cable is present, then that you might have selected when you purchased your computer can be used as a spare drive in a RAID 1 configuration (see the user's guide in the Help and Support Center (click the Start button, click Help and Support, click User and system guides, click Device guides...

Owner's Manual
Page 31
... permanently changes the default settings for that you use the hibernate settings you click Save As and enter a new name for extended periods of performing certain tasks simultaneously. For more information on power management options: 1 Click the Start button and click Help and Support. 2 In the Help and Support window, click Performance and maintenance. 3 In the Performance and maintenance window, click Conserving power on the keyboard or click the mouse. Hyper...
... permanently changes the default settings for that you use the hibernate settings you click Save As and enter a new name for extended periods of performing certain tasks simultaneously. For more information on power management options: 1 Click the Start button and click Help and Support. 2 In the Help and Support window, click Performance and maintenance. 3 In the Performance and maintenance window, click Conserving power on the keyboard or click the mouse. Hyper...
Owner's Manual
Page 41
... display the Start menu. 2 Type u, press the keyboard arrow keys to highlight Shut down the computer (see page 59), reconnect the mouse cable as shown on the on page 107. • Run the Dell Diagnostics (see page 73). • Your computer supports DDR2 memory. C L E A N T H E M O U S E - CHECK THE MOUSE SETTINGS - 1 Click the Start button, click Control Panel, and then click Printers and Other Hardware. 2 Click Mouse. 3 Try adjusting the settings. IF YOU EXPERIENCE OTHER MEMORY PROBLEMS...
... display the Start menu. 2 Type u, press the keyboard arrow keys to highlight Shut down the computer (see page 59), reconnect the mouse cable as shown on the on page 107. • Run the Dell Diagnostics (see page 73). • Your computer supports DDR2 memory. C L E A N T H E M O U S E - CHECK THE MOUSE SETTINGS - 1 Click the Start button, click Control Panel, and then click Printers and Other Hardware. 2 Click Mouse. 3 Try adjusting the settings. IF YOU EXPERIENCE OTHER MEMORY PROBLEMS...

Owner's Manual
Page 51
... (see "Resolving Software and Hardware Incompatibilities" on page 58). 4 If the problem persists, contact Dell (see page 123). Continue until you have identified a faulty module or reinstalled all modules without error. • If available, install properly working memory of the same type into your computer (see page 73). • If the problem persists, contact Dell (see page 123). Light Pattern ABCD ABCD...
... (see "Resolving Software and Hardware Incompatibilities" on page 58). 4 If the problem persists, contact Dell (see page 123). Continue until you have identified a faulty module or reinstalled all modules without error. • If available, install properly working memory of the same type into your computer (see page 73). • If the problem persists, contact Dell (see page 123). Light Pattern ABCD ABCD...
Owner's Manual
Page 55
... before you installed the new driver. Advanced Troubleshooting 55 If Device Driver Rollback does not resolve the problem, then use Windows XP Device Driver Rollback to replace the driver with a [!]) on your computer. If an exclamation point is next to the device name, you install or update a driver, use System Restore to return your computer might not work correctly. Manually Reinstalling Drivers 1 After copying the required driver files to your hard drive, click the Start button and...
... before you installed the new driver. Advanced Troubleshooting 55 If Device Driver Rollback does not resolve the problem, then use Windows XP Device Driver Rollback to replace the driver with a [!]) on your computer. If an exclamation point is next to the device name, you install or update a driver, use System Restore to return your computer might not work correctly. Manually Reinstalling Drivers 1 After copying the required driver files to your hard drive, click the Start button and...
Owner's Manual
Page 56
... you install a device driver, use System Restore. See the Windows Help and Support Center for the Windows default view, so they may not work if you want to see and select restore points. All calendar dates with available restore points appear in this document were written for information on the screen. To access help, see page 55) to an earlier operating state, save and close any open...
... you install a device driver, use System Restore. See the Windows Help and Support Center for the Windows default view, so they may not work if you want to see and select restore points. All calendar dates with available restore points appear in this document were written for information on the screen. To access help, see page 55) to an earlier operating state, save and close any open...
Owner's Manual
Page 65
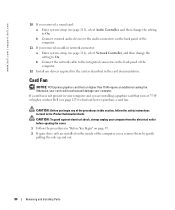
... a sound card, use the connector on your network or broadband device. Connect the other end of the network cable to the network adapter connector on the card. Effects (LFE) connector On computers with a network connector card, use the connector on page 59. 2 Disconnect the computer power cable from the electrical outlet. 3 Remove the front-panel door by gently snapping it is recommended that you use the front USB connectors for devices that you use Category 5 wiring and connectors for devices that...
... a sound card, use the connector on your network or broadband device. Connect the other end of the network cable to the network adapter connector on the card. Effects (LFE) connector On computers with a network connector card, use the connector on page 59. 2 Disconnect the computer power cable from the electrical outlet. 3 Remove the front-panel door by gently snapping it is recommended that you use the front USB connectors for devices that you use Category 5 wiring and connectors for devices that...
Owner's Manual
Page 80
... Removing and Installing Parts b Connect the network cable to the integrated connector on the back panel of your computer. 6 Lower the retention arm and press it into place, securing the card(s) in the computer. www.dell.com | support.dell.com 12 If you installed an add-in network adapter and want to disable the integrated network adapter: a Enter system setup (see page 111), select Network Controller, and then change the setting to On. b Connect external audio devices to the audio connectors...
... Removing and Installing Parts b Connect the network cable to the integrated connector on the back panel of your computer. 6 Lower the retention arm and press it into place, securing the card(s) in the computer. www.dell.com | support.dell.com 12 If you installed an add-in network adapter and want to disable the integrated network adapter: a Enter system setup (see page 111), select Network Controller, and then change the setting to On. b Connect external audio devices to the audio connectors...
Owner's Manual
Page 86
... you removed an add-in network connector: a Enter system setup (see page 111), select Audio Controller, and then change the setting to On. www.dell.com | support.dell.com 10 If you begin any drivers required for the card as described in the card documentation. b Connect external audio devices to the integrated connector on the inside of the procedures in this section, follow the safety instructions located in the Product Information Guide. b Connect the network cable to the audio connectors...
... you removed an add-in network connector: a Enter system setup (see page 111), select Audio Controller, and then change the setting to On. www.dell.com | support.dell.com 10 If you begin any drivers required for the card as described in the card documentation. b Connect external audio devices to the integrated connector on the inside of the procedures in this section, follow the safety instructions located in the Product Information Guide. b Connect the network cable to the audio connectors...
Owner's Manual
Page 93
... drive, insert a bootable floppy disk into the computer. 8 Connect your drive before opening the cover. Ensure that the rail tabs are properly cabled and firmly seated. 7 Close the computer cover (see page 111), and update the appropriate Drive option. 12 Exit system setup, and restart the computer. 13 Partition and logically format your computer and devices to electrical outlets, and turn them on the hard drive. Adding a Second Hard Drive...
... drive, insert a bootable floppy disk into the computer. 8 Connect your drive before opening the cover. Ensure that the rail tabs are properly cabled and firmly seated. 7 Close the computer cover (see page 111), and update the appropriate Drive option. 12 Exit system setup, and restart the computer. 13 Partition and logically format your computer and devices to electrical outlets, and turn them on the hard drive. Adding a Second Hard Drive...
Owner's Manual
Page 103
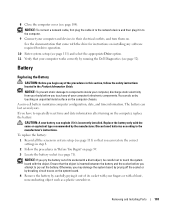
... the system board. 4 Remove the battery by running the Dell Diagnostics (see page 71). Otherwise, you pry the battery out of the procedures in this section, follow the safety instructions located in to the network device and then plug it out of your fingers or with the drive for instructions on page 59. 3 Locate the battery socket (see page 52). NOTICE: To connect a network cable, first plug the cable in to...
... the system board. 4 Remove the battery by running the Dell Diagnostics (see page 71). Otherwise, you pry the battery out of the procedures in this section, follow the safety instructions located in to the network device and then plug it out of your fingers or with the drive for instructions on page 59. 3 Locate the battery socket (see page 52). NOTICE: To connect a network cable, first plug the cable in to...
Owner's Manual
Page 115
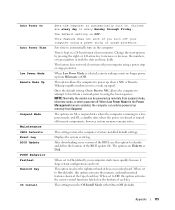
... certain configurations and tests. Choices are Diskette or Disk. When Low Power Mode is enabled, the computer can be powered up remotely from Hibernate or Off. The options are S1, a suspend state where the computer is running in the Power Management menu) is selected, remote wakeup events no longer power up time by pressing the right- After downloading a new version of the BIOS, use this option activates the cursor-control functions...
... certain configurations and tests. Choices are Diskette or Disk. When Low Power Mode is enabled, the computer can be powered up remotely from Hibernate or Off. The options are S1, a suspend state where the computer is running in the Power Management menu) is selected, remote wakeup events no longer power up time by pressing the right- After downloading a new version of the BIOS, use this option activates the cursor-control functions...
Owner's Manual
Page 116
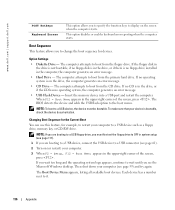
... Microsoft Windows desktop. When F12 = Boot Menu appears in the upper-right corner of the screen, press . NOTE: If you are booting to a USB device, connect the USB device to boot from the primary hard drive. Each device has a number next to the boot menu. Option Settings • Diskette Drive - If no CD is bootable, check the device documentation. The BIOS detects the device and adds the USB flash option to it. 116 Appendix NOTE: To boot to display on...
... Microsoft Windows desktop. When F12 = Boot Menu appears in the upper-right corner of the screen, press . NOTE: If you are booting to a USB device, connect the USB device to boot from the primary hard drive. Each device has a number next to the boot menu. Option Settings • Diskette Drive - If no CD is bootable, check the device documentation. The BIOS detects the device and adds the USB flash option to it. 116 Appendix NOTE: To boot to display on...
Owner's Manual
Page 142
..., 65 front-panel inserts, 94 H hard drive activity light, 61 installing, 92 installing second, 93 problems, 35 removing, 91 hardware Dell Diagnostics, 52 drives, RAID configuration, 20 Hardware Troubleshooter, 58 headphone connector, 62 Help and Support Center, 10 help file Windows Help and Support Center, 10 hibernate mode, 30-31 Hyper-Threading, 31 I IEEE 1394 problems, 37 installing parts before you begin, 59 recommended tools, 59 turning off your computer, 59 Internet connection, about, 13 connection, options, 13 connection, setting up, 14 problems, 35...
..., 65 front-panel inserts, 94 H hard drive activity light, 61 installing, 92 installing second, 93 problems, 35 removing, 91 hardware Dell Diagnostics, 52 drives, RAID configuration, 20 Hardware Troubleshooter, 58 headphone connector, 62 Help and Support Center, 10 help file Windows Help and Support Center, 10 hibernate mode, 30-31 Hyper-Threading, 31 I IEEE 1394 problems, 37 installing parts before you begin, 59 recommended tools, 59 turning off your computer, 59 Internet connection, about, 13 connection, options, 13 connection, setting up, 14 problems, 35...

Owner's Manual
Page 143
...-20 connect VGA, 19-20 display settings, 20 extended desktop mode, 20 hard to read, 47 problems, 46 motherboard. See system board mouse connector, 63 problems, 41 N network connector, 65 Network Setup Wizard, 29 problems, 42 setting up, 28 Network Setup Wizard, 29 O operating system reinstalling Windows XP, 56 P password clearing, 117 jumper, 117 PC Restore, 57 PCI cards installing, 76 removing, 80 PCI Express cards card fan, 86 installing, 81 removing, 85 playing CDs, 15 playing DVDs, 15 power button, 62 connector, 63 conserving, 29 hibernate mode, 30-31 managing, 29 options, 30 options...
...-20 connect VGA, 19-20 display settings, 20 extended desktop mode, 20 hard to read, 47 problems, 46 motherboard. See system board mouse connector, 63 problems, 41 N network connector, 65 Network Setup Wizard, 29 problems, 42 setting up, 28 Network Setup Wizard, 29 O operating system reinstalling Windows XP, 56 P password clearing, 117 jumper, 117 PC Restore, 57 PCI cards installing, 76 removing, 80 PCI Express cards card fan, 86 installing, 81 removing, 85 playing CDs, 15 playing DVDs, 15 power button, 62 connector, 63 conserving, 29 hibernate mode, 30-31 managing, 29 options, 30 options...
Owner's Manual
Page 145
... a new computer, 28 troubleshooting Dell Diagnostics, 52 diagnostic lights, 49 Hardware Troubleshooter, 58 Help and Support Center, 10 restore to previous operating state, 56 tips, 33 TV connect to computer, 19-20, 64 U USB booting to devices, 116 connectors, 62, 65 V VGA connector, 64 video connector, 64 problems, 46 voltage selection switch, 63 volume adjusting, 45 W warranty information, 9 Windows XP Device Driver Rollback, 55 Files and Settings Transfer Wizard, 28 Hardware Troubleshooter, 58 Help and Support Center, 10 Hyper-Threading, 31 Network Setup...
... a new computer, 28 troubleshooting Dell Diagnostics, 52 diagnostic lights, 49 Hardware Troubleshooter, 58 Help and Support Center, 10 restore to previous operating state, 56 tips, 33 TV connect to computer, 19-20, 64 U USB booting to devices, 116 connectors, 62, 65 V VGA connector, 64 video connector, 64 problems, 46 voltage selection switch, 63 volume adjusting, 45 W warranty information, 9 Windows XP Device Driver Rollback, 55 Files and Settings Transfer Wizard, 28 Hardware Troubleshooter, 58 Help and Support Center, 10 Hyper-Threading, 31 Network Setup...


