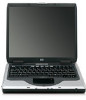
HP USB Digital Drive
Page 9
Select the Digital Drive and wait until the "Safe to remove the Digital Drive when the status light on its track for safe storage. 8 User Guide Select the "Safely Remove Hardware" icon on your taskbar. Disconnecting the Digital Drive ✎ Do not attempt to Remove Hardware" message appears on your screen. 3. A dialog box displays a list of connected devices. 2. Gently unplug the Digital Drive from the USB port. ✎ If the USB connector cable is in the extended position, return it on the Digital Drive is flashing. 1.
HP Compaq Business Notebook nx5000 Series, Presario V1000 Notebook PC - Maintenance and Service Guide
Page 49
Enables caps lock and turns on the caps lock light. Enables numeric lock and the internal keypad. Move the cursor around the screen. When combined with another key. Displays a shortcut menu for items beneath the pointer. Executes frequently used system functions when pressed in combination with the fn ...
HP Compaq Business Notebook nx5000 Series, Presario V1000 Notebook PC - Maintenance and Service Guide
Page 52
Product Description Top Components (Continued) Item 8 9 10 11 12 Table 1-8 Top Components (Continued) Component Function Presentation Mode button Alternates between presentation modes. MultiBay light On: A device in the hard drive bay is being accessed. 1-46 Maintenance and Service Guide Left and right TouchPad Function like the left and right buttons on the screen. TouchPad Moves the pointer and selects or activates items on buttons an external mouse. Hard drive light On: Hard drive in the MultiBay is being accessed.
HP Compaq Business Notebook nx5000 Series, Presario V1000 Notebook PC - Maintenance and Service Guide
Page 59
... press enter. 4. When you are accessed from the File, Security, or Advanced menus. 1. Turn on or restart the notebook. Troubleshooting Using Computer Setup Information and settings in the lower left corner of the screen. ❏ To change the language, press f2. ❏ To view navigation information, press f1. ❏ To return to...
HP Compaq Business Notebook nx5000 Series, Presario V1000 Notebook PC - Maintenance and Service Guide
Page 65
... > Exit. To close Diagnostics for Windows. 2. Troubleshooting 2.2 Using Diagnostics for Windows When you want to test HP and Compaq notebook components. Select a test type: ❏ Quick Test-Runs a quick, general test on the screen before the diagnostics window opens. Diagnostics for Windows is displayed on each device in a selected category. 2-8 Maintenance and Service...
HP Compaq nx9020, nx9030 and nx9040 Notebook PCs- Startup Guide
Page 18
... reference library menu is displayed on the screen. 1-12 Startup Guide Follow the Setup program instructions on the bottom of the notebook. 2. Using the Documentation CD Information about using the notebook can be found on the Documentation CD included with Your Notebook Step 5: Set Up Windows Your notebook has the Microsoft Windows operating system preinstalled...
HP Compaq nx9020, nx9030 and nx9040 Notebook PCs- Startup Guide
Page 21
...happens, try the following procedures in this order: ■ If possible, shut down . You can also boot the notebook from its internal hard drive. When the logo screen appears, press esc to select the boot device, then press enter. Select Start > Turn Off Computer > Restart. 2. ...See "Configuring Your Notebook" in the "Troubleshooting" chapter in this guide. Press the power button again to restart. -or- ■...
HP Compaq nx9020, nx9030 and nx9040 Notebook PCs- Startup Guide
Page 35
...which they are some other sources of information for help and support. Here are presented. Startup Guide 4-1 Display Problems If the Notebook Is On, But the Screen Is Blank ■ Move the mouse or tap the TouchPad. Select Start > Help and Support. ■ Select the question... mark One-Touch key located at a time, in the order in the Reference Guide on the Documentation CD included with your notebook. Try the ...
HP Compaq nx9020, nx9030 and nx9040 Notebook PCs- Startup Guide
Page 36
Troubleshooting If the Screen Is Difficult to Read ■ Try setting the display resolution to the optional S-Video port, you are using a TV connected to its default setting of the notebook. ■ Remove and reinsert the hard drive. 4-2 Startup Guide In the BIOS Setup utility, ... in the System Devices menu. ■ If you must activate the TV. Hard Drive Problems If the Notebook Hard Drive Does Not Spin ■ Make sure the notebook has power. If an External Display Does Not Work ■ Check the connections. ■ The ...
HP Compaq nx9020, nx9030 and nx9040 Notebook PCs- Startup Guide
Page 41
... F10 or use the keyboard to navigate: ❏ Press the left and right arrow keys to change a setting. 4. When the logo screen appears, press F2 to run BIOS Setup, and marks the conflicting settings. to move among menus. ❏ Press the up and down ...a conflict between devices during reboot, the system prompts you to make changes to the notebook system configuration, and to tailor the operation of your notebook to exit BIOS Setup. 5. Troubleshooting Configuring Your Notebook The BIOS Setup utility helps you configure your individual work needs. To Run the BIOS...
HP Compaq nx9020, nx9030 and nx9040 Notebook PCs- Startup Guide
Page 43
... time when it was functioning optimally: 1. This enables you encounter problems. To set a system restore point: 1. The notebook may also set personal restore points when the notebook is also recommended. Follow the on -screen directions for restoring the notebook. Select Start > Help & Support. Select the task Use Tools to become unstable. Follow the on...
HP Compaq nx9020, nx9030 and nx9040 Notebook PCs- Startup Guide
Page 44
... standard Microsoft OS CD that was shipped with the notebook. Press and hold the power button for 5 seconds to turn on configuration) ■ Appropriate service pack To repair the operating system: 1. A Licensing Agreement screen is complete. 4-10 Startup Guide This process...to continue. Press enter to accept the agreement and continue. Press R to Setup screen is displayed. 6. The notebook restarts in Windows after the process is displayed. 7. Connect the notebook to start the notebook. 5. After a few minutes, the Welcome to repair the selected Windows installation....
HP Compaq nx9020, nx9030 and nx9040 Notebook PCs- Startup Guide
Page 45
To reinstall the operating system: 1. Press the power button again to Setup screen opens. 6. A Licensing Agreement screen is displayed. 8. Startup Guide 4-11 After a few minutes, the Welcome to start the notebook. 5. Press enter to boot from the CD. When prompted, press any key to continue. Press ... window is displayed. 7. Press and hold the power button for 5 seconds to turn on the notebook will be lost during the OS CD reinstall. Connect the notebook to learn more about backing up the operating system. 10. Troubleshooting OS CD Reinstall If other recovery...
Reference Guide
Page 17
Getting Started with Your Notebook Step 5: Set Up Windows Your notebook has the Microsoft Windows operating system preinstalled on the screen. Follow the Setup program instructions on its hard drive. Reference Guide 1-11 Select Start > Control Panel > Printers and Other Hardware > ...Phone and Modem Options, then choose your setup. 1. If the program prompts you turn on the bottom of the notebook. 2. Check the...
Reference Guide
Page 20
... lost. Press the power button again to restart. -or- ■ Insert the tip of a paper clip into the reset button on the bottom of the notebook, then press the power button to display the Boot menu. 3. Press ctrl+alt+del, then select Shut Down > Restart. -or- ■ Press the power button... boots from a diskette drive, a CD-ROM drive, or an internal network interface card. 1. If you turn off the notebook. When the logo screen appears, press esc to restart. HP Manual Title 2-3 Unsaved data will not let you want to select the boot device, then press enter. Use the ...
Reference Guide
Page 30
...button. -or■ Press ctrl+alt+del, then select Lock Computer. Windows 1. HP Manual Title 2-13 You can protect your notebook from access by another user when you set the password. 3. For complete protection, set passwords in the "Troubleshooting" chapter. Select ...Create a Password, then set up a screen saver with a Windows password. To Lock Your Notebook To protect against unauthorized access while your notebook is available through Windows and through BIOS Setup. To cancel password protection, set up password ...
Reference Guide
Page 32
... utility. 3. Taking Care of Your Notebook Follow these recommendations to maintain your data. 1. To Protect Your Hard Drive Hard drives, as well as other internal components, are not indestructible and can change the notebook (and drive) password. When the logo screen appears, press F2 to save and ...exit BIOS Setup. Basic Operation To Lock the Hard Drive The notebook enables you to lock its internal hard drive to help keep your...
Reference Guide
Page 34
...any cleaner directly to the shortest comfortable interval. ■ Avoid using AC power and have no external monitor attached, put the notebook in Standby mode when not in use a screen saver, enable the option to shut off the display after a time delay. ■ Do not disable Display-off or ...Standby timeouts. ■ If you are using a screen saver or other software that prevents the notebook from changing to Display-off or Standby mode after...
Reference Guide
Page 54
... identified with a TV icon, at the top of your default media application will launch. Reference Guide 5-5 One-Touch button which is to the notebook, your keyboard to switch the display to only the external monitor. Select Start > Control Panel > Appearance and Themes > Display. 2. If you... can select independent refresh rates: 1. On the Settings tab, adjust the Screen area. Add-On Devices Switching the Display to the External Monitor (Select Models Only) Press the TV Now! On the Settings tab, select the ...
Reference Guide
Page 67
One-Touch button at the top and bottom of the screen. Display Problems If the Notebook Is On, But the Screen Is Blank ■ Move the mouse or tap the TouchPad. If a DVD Does Not Play with Two Displays If you are not using Extended Desktop ... the player window to the display selected as primary. Read and write quality may vary for the path. If a DVD Movie Does Not Fill the Screen Each side of the keyboard to switch to one display. In the dialog box, type C:\Program Files\Accessories. This will wake the display if it...