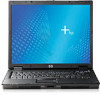
nc6320 Keyboard - Compaq Notebook PC
nc6320 Keyboard
Related Manual Pages


Related Videos

Công ty, 0975.39.3333, Bàn phím HP Compaq NX6120 NX6105 NX6115 NC6220 NC6230 NC6300 NC6320 Keyboard
Duration: :51
Total Views: 61
Duration: :51
Total Views: 61
Similar Questions

Powers On No Monitor Keyboard Or Mouse
Unit powers on fans run both cds activate but no monitor keyboard or mouse. No beeps After two mins ...
Unit powers on fans run both cds activate but no monitor keyboard or mouse. No beeps After two mins ...
(Posted by toliverfamily 9 years ago)

Type Of Keyboard
what type of keyboard have in compaq 420 laptop?
what type of keyboard have in compaq 420 laptop?
(Posted by tanzidulahsan 10 years ago)

I Have A Model # Sdm 4700p Compaq Keyboard.
Where can I find a free downloadable users manual for my compaq model # SDM4700p keyboard?
Where can I find a free downloadable users manual for my compaq model # SDM4700p keyboard?
(Posted by schlitz315 12 years ago)
Related Terms
The following terms were also used when searching for nc6320 Keyboard - Compaq Notebook PC:- compaq nc6320
- hp compaq nc6320
- nc6320 laptop
- hp compaq nc6320 notebook
- nc6320 memory
- nc6320 notebook
- compaq nc6320 laptop
- compaq nc6320 drivers
- compaq nc6320 notebook
- nc6320 drivers
- compaq nc6320 memory
- hp compaq nc6320 notebook pc
- nc6320 ram
- nc6320 restore
- nc6320 battery
- hp nc6320 notebook
- nc6320 hard drive
- nc6320 price
- nc6320 power supply
- compaq nc6320 battery
- compaq nc6320 restore
- nc6320 manual
- nc6320 windows 7
- compaq nc6320 hard drive
- compaq nc6320 manual
- compaq nc6320 ram
- nc6320 ac adapter
- nc6320 review
- nc6320 service manual
- nc6320 power adapter
- nc6320 unknown device
- compaq nc6320 power adapter
- compaq nc6320 review
- compaq nc6320 power supply
- compaq nc6320 ac adapter
- nc6320 battery life
- nc6320 recovery partition
- compaq nc6320 a disk read error
- compaq nc6320 adapter
- compaq nc6320 and hp integrated module
- compaq nc6320 audio drivers
- compaq nc6320 audio drivers windows 7
- compaq nc6320 battery life
- compaq nc6320 bios
- compaq nc6320 bios password
- compaq nc6320 bios password reset
- compaq nc6320 bios update
- compaq nc6320 charger
- compaq nc6320 cmos battery
- compaq nc6320 cpu upgrade
- compaq nc6320 disassembly
- compaq nc6320 docking station
- compaq nc6320 driver
- compaq nc6320 drivers download
- compaq nc6320 drivers for windows 7
- compaq nc6320 drivers for xp
- compaq nc6320 drivers vista
- compaq nc6320 drivers windows 7
- compaq nc6320 drivers windows 8
- compaq nc6320 drivers xp
- compaq nc6320 fingerprint
- compaq nc6320 fingerprint software
- compaq nc6320 fn button not working
- compaq nc6320 hda audio bus driver
- compaq nc6320 hp integrated module driver
- compaq nc6320 keyboard
- compaq nc6320 keyboard not working
- compaq nc6320 lcd
- compaq nc6320 lcd screen
- compaq nc6320 memory installation
- compaq nc6320 memory slots
- compaq nc6320 memory upgrade
- compaq nc6320 monitor
- compaq nc6320 motherboard
- compaq nc6320 not turning on
- compaq nc6320 parts
- compaq nc6320 power cord
- compaq nc6320 power on password
- compaq nc6320 price
- compaq nc6320 ram upgrade
- compaq nc6320 recovery
- compaq nc6320 recovery cd
- compaq nc6320 recovery disk
- compaq nc6320 recovery partition
- compaq nc6320 replacement display
- compaq nc6320 replacement wireless card
- compaq nc6320 reviews
- compaq nc6320 screen
- compaq nc6320 screen black
- compaq nc6320 screen replacement
- compaq nc6320 sd card reader driver
- compaq nc6320 sd drivers
- compaq nc6320 service manual
- compaq nc6320 sound drivers
- compaq nc6320 specification
- compaq nc6320 specifications
- compaq nc6320 support
- compaq nc6320 troubleshooting
- compaq nc6320 unknown device
- compaq nc6320 video driver
- compaq nc6320 video drivers
- compaq nc6320 weight
- compaq nc6320 windows 10
- compaq nc6320 windows 7
- compaq nc6320 windows 7 32 bit drivers
- compaq nc6320 windows 7 drivers
- compaq nc6320 windows 7 drivers download
- compaq nc6320 windows 7 wireless
- compaq nc6320 wireless disabled
- hp nc6320
- hp nc6320 laptop
- nc6320
- nc6320 a disk read error
- nc6320 adapter
- nc6320 and hp integrated module
- nc6320 audio driver
- nc6320 audio driver windows 7
- nc6320 audio drivers
- nc6320 audio drivers windows 7
- nc6320 audio not working
- nc6320 backlight
- nc6320 battery calibration
- nc6320 battery driver
- nc6320 battery part number
- nc6320 bios
- nc6320 bios battery
- nc6320 bios password
- nc6320 bios password reset
- nc6320 bios time
- nc6320 bios update
- nc6320 charger
- nc6320 cmos battery
- nc6320 compaq
- nc6320 compaq drivers
- nc6320 cpu
- nc6320 cpu support
- nc6320 cpu upgrade
- nc6320 disassembly
- nc6320 docking station
- nc6320 driver
- nc6320 driver windows 7
- nc6320 drivers download
- nc6320 drivers download xp
- nc6320 drivers for windows 7
- nc6320 drivers for xp
- nc6320 drivers vista
- nc6320 drivers windows 7
- nc6320 drivers windows 7 sd card
- nc6320 drivers windows 8
- nc6320 drivers xp
- nc6320 fingerprint
- nc6320 fingerprint software
- nc6320 fn button not working
- nc6320 hda audio bus driver
- nc6320 hp
- nc6320 hp integrated module driver
- nc6320 keyboard
- nc6320 keyboard not working
- nc6320 lcd
- nc6320 lcd screen
- nc6320 max memory
- nc6320 memory cover
- nc6320 memory installation
- nc6320 memory slots
- nc6320 memory upgrade
- nc6320 monitor
- nc6320 motherboard
- nc6320 no audio
- nc6320 not turning on
- nc6320 outputs
- nc6320 parts
- nc6320 power cord
- nc6320 power on password
- nc6320 processor upgrade
- nc6320 ram upgrade
- nc6320 recovery
- nc6320 recovery cd
- nc6320 recovery disk
- nc6320 recovery disk download
- nc6320 remove screen
- nc6320 replacement display
- nc6320 replacement wireless card
- nc6320 restore disks
- nc6320 reviews
- nc6320 screen
- nc6320 screen black
- nc6320 screen replacement
- nc6320 screen size
- nc6320 sd card reader driver
- nc6320 sd drivers
- nc6320 software
- nc6320 sound drivers
- nc6320 specification
- nc6320 specifications
- nc6320 support
- nc6320 touchpad replacement
- nc6320 troubleshooting
- nc6320 video driver
- nc6320 video drivers
- nc6320 vista drivers
- nc6320 weight
- nc6320 win 7 drivers
- nc6320 windows 10
- nc6320 windows 7 32 bit drivers
- nc6320 windows 7 drivers
- nc6320 windows 7 drivers download
- nc6320 windows 7 drivers for touchpad
- nc6320 windows 7 soundmax driver
- nc6320 windows 7 wireless
- nc6320 wireless disabled
- nc6320 wireless not turning on
- nc6320 wireless not working