Owners Manual
Page 3
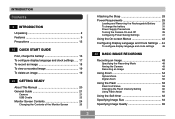
... Turning the Camera On and Off 39 Configuring Power Saving Settings 41 Using the On-screen Menus 42 Configuring Display Language and Clock Settings ... 44 To configure display language and clock settings 45 48 BASIC IMAGE RECORDING Recording an Image 48 Specifying the Recording Mode 48 Aiming the Camera 49 Recording an Image 50 Using Zoom 54 Optical Zoom 54 Digital Zoom 56 Using the Flash 58 Flash Unit Status 59 Changing the Flash Intensity Setting 60 Using Flash Assist 60 Using the Self-timer 62 Specifying Image Size 64 Specifying Image...
... Turning the Camera On and Off 39 Configuring Power Saving Settings 41 Using the On-screen Menus 42 Configuring Display Language and Clock Settings ... 44 To configure display language and clock settings 45 48 BASIC IMAGE RECORDING Recording an Image 48 Specifying the Recording Mode 48 Aiming the Camera 49 Recording an Image 50 Using Zoom 54 Optical Zoom 54 Digital Zoom 56 Using the Flash 58 Flash Unit Status 59 Changing the Flash Intensity Setting 60 Using Flash Assist 60 Using the Self-timer 62 Specifying Image Size 64 Specifying Image...
Owners Manual
Page 5
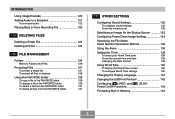
... Power Down Image Settings 134 Specifying the File Name Serial Number Generation Method 136 Using the Alarm 136 Setting the Clock 138 To select your Home Time zone 138 To set the current time and date 139 Changing the Date Format 139 Using World Time 140 To display the World Time screen 140 To configure World Time settings 140 Changing the Display Language 141 Changing the USB Port Protocol 142 Configuring [ ] (REC) and [ ] (PLAY) Power On/Off Functions 143 Formatting...
... Power Down Image Settings 134 Specifying the File Name Serial Number Generation Method 136 Using the Alarm 136 Setting the Clock 138 To select your Home Time zone 138 To set the current time and date 139 Changing the Date Format 139 Using World Time 140 To display the World Time screen 140 To configure World Time settings 140 Changing the Display Language 141 Changing the USB Port Protocol 142 Configuring [ ] (REC) and [ ] (PLAY) Power On/Off Functions 143 Formatting...
Owners Manual
Page 6
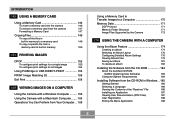
... camera 147 Formatting a Memory Card 147 Copying Files 149 To copy all the files in built-in memory to a memory card 149 To copy a specific file from a memory card to built-in memory 150 151 PRINTING IMAGES DPOF 152 To configure print settings for a single image 153 To configure print settings for all images 154 Using PictBridge or USB DIRECT-PRINT 155 PRINT Image Matching III 158 Exif Print 158 159 VIEWING IMAGES ON A COMPUTER Using the Camera with a Windows Computer ......... 159 Using the Camera with a Macintosh Computer ....... 165 Operations...
... camera 147 Formatting a Memory Card 147 Copying Files 149 To copy all the files in built-in memory to a memory card 149 To copy a specific file from a memory card to built-in memory 150 151 PRINTING IMAGES DPOF 152 To configure print settings for a single image 153 To configure print settings for all images 154 Using PictBridge or USB DIRECT-PRINT 155 PRINT Image Matching III 158 Exif Print 158 159 VIEWING IMAGES ON A COMPUTER Using the Camera with a Windows Computer ......... 159 Using the Camera with a Macintosh Computer ....... 165 Operations...
Owners Manual
Page 8
.... software. Compatibility Software Copyright C 1997 Phoenix Technologies Ltd., All Rights Reserved. • Other company, product and service names used herein may arise through the use of this manual. • CASIO COMPUTER CO., LTD. assumes no responsibility for any loss or claims by deletion of malfunction, repairs, or battery replacement. Except as a result of data as stipulated above, all important data on other media to protect against...
.... software. Compatibility Software Copyright C 1997 Phoenix Technologies Ltd., All Rights Reserved. • Other company, product and service names used herein may arise through the use of this manual. • CASIO COMPUTER CO., LTD. assumes no responsibility for any loss or claims by deletion of malfunction, repairs, or battery replacement. Except as a result of data as stipulated above, all important data on other media to protect against...

Owners Manual
Page 12
... Precautions Be sure to take pictures or use the built-in display while operating a motor vehicle or while walking. When using the EX-S100. All references in the direction of this manual to "camera" refer to the CASIO EX-S100 Digital Camera. • Never try to observe the following important precautions whenever using the flash, the camera should be at least one meter (3.3´) from your camera to your PC. Doing...
... Precautions Be sure to take pictures or use the built-in display while operating a motor vehicle or while walking. When using the EX-S100. All references in the direction of this manual to "camera" refer to the CASIO EX-S100 Digital Camera. • Never try to observe the following important precautions whenever using the flash, the camera should be at least one meter (3.3´) from your camera to your PC. Doing...
Owners Manual
Page 14
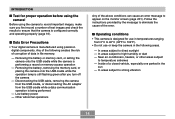
Removing the battery, removing the memory card, or placing the camera onto the USB cradle while the operation lamp is still flashing green after you first record a number of test images and check the results to record important images, make sure you turn off the camera - In areas subject to strong vibration 14 In areas subject to high humidity or dust - I Data Error Precautions • Your digital camera is manufactured using the camera to ensure that...
Removing the battery, removing the memory card, or placing the camera onto the USB cradle while the operation lamp is still flashing green after you first record a number of test images and check the results to record important images, make sure you turn off the camera - In areas subject to strong vibration 14 In areas subject to high humidity or dust - I Data Error Precautions • Your digital camera is manufactured using the camera to ensure that...
Owners Manual
Page 25
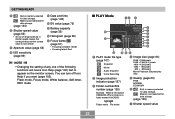
Flash mode, Focus mode, White balance, Self-timer, REC mode I PLAY Mode 12 3 4 F 5 6 E 7 8 9 0 D CBA 1 PLAY mode file type (page 107) Snapshot Movie Audio Snapshot Voice Recording 4 Image size (page 64) 2048 × 1536 pixels 2048 × 1360 (3:2) pixels 1600 × 1200 pixels 1280 × 960 pixels 640 × 480 pixels Movie Playback: Elapsed play time 2 Image protection indicator (page 127) 3 Folder number/File number (page 126) Example : When a file named CIMG0023.JPG is stored in a folder named 100CASIO 100-0023 Folder name File name...
Flash mode, Focus mode, White balance, Self-timer, REC mode I PLAY Mode 12 3 4 F 5 6 E 7 8 9 0 D CBA 1 PLAY mode file type (page 107) Snapshot Movie Audio Snapshot Voice Recording 4 Image size (page 64) 2048 × 1536 pixels 2048 × 1360 (3:2) pixels 1600 × 1200 pixels 1280 × 960 pixels 640 × 480 pixels Movie Playback: Elapsed play time 2 Image protection indicator (page 127) 3 Folder number/File number (page 126) Example : When a file named CIMG0023.JPG is stored in a folder named 100CASIO 100-0023 Folder name File name...
Owners Manual
Page 41
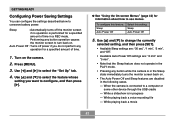
... Auto Power Off and Sleep features are disabled in the PLAY mode. • Pressing any button operation causes the monitor screen to use menus. While playing back a voice recording file - Use [̆] and [̄] to a computer or some other device through the USB cradle - Turn on . Use [̇] and [̈] to conserve battery power. While a slideshow is connected to change the currently selected setting, and then press [SET]. • Available Sleep settings are...
... Auto Power Off and Sleep features are disabled in the PLAY mode. • Pressing any button operation causes the monitor screen to use menus. While playing back a voice recording file - Use [̆] and [̄] to a computer or some other device through the USB cradle - Turn on . Use [̇] and [̈] to conserve battery power. While a slideshow is connected to change the currently selected setting, and then press [SET]. • Available Sleep settings are...

Owners Manual
Page 81
... the image recording operation is recommended to their defaults when you select another BESTSHOT scene, change the camera settings that are made when you select a BESTSHOT scene. OTHER RECORDING FUNCTIONS IMPORTANT! • BESTSHOT scenes were not recorded using the setup of a BESTSHOT scene may not produce exactly the results you expect. • You can change the recording mode, or turn it takes longer to shooting conditions and other image using a slow shutter speed, use...
... the image recording operation is recommended to their defaults when you select another BESTSHOT scene, change the camera settings that are made when you select a BESTSHOT scene. OTHER RECORDING FUNCTIONS IMPORTANT! • BESTSHOT scenes were not recorded using the setup of a BESTSHOT scene may not produce exactly the results you expect. • You can change the recording mode, or turn it takes longer to shooting conditions and other image using a slow shutter speed, use...

Owners Manual
Page 109
... the monitor screen. [SET] Shutter button 1. In the PLAY mode, use [̇] and [̈] to scroll through images on the monitor screen while a flipped image is displayed. • You cannot use [̇] and [̈] to scroll to show someone standing in handy when you an image on the display. 109 To return the image to flip an image while a zoomed image, 9-image screen, calendar screen image, a movie image, an audio snapshot, or a voice recording file icon is...
... the monitor screen. [SET] Shutter button 1. In the PLAY mode, use [̇] and [̈] to scroll through images on the monitor screen while a flipped image is displayed. • You cannot use [̇] and [̈] to scroll to show someone standing in handy when you an image on the display. 109 To return the image to flip an image while a zoomed image, 9-image screen, calendar screen image, a movie image, an audio snapshot, or a voice recording file icon is...
Owners Manual
Page 117
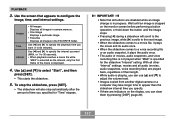
... "Interval" setting. IMPORTANT! • Note that appears to 30 seconds). • When playback reaches a movie file while "MAX" is selected as the interval, only the first frame of movies, audio snapshots, and voice recording files is not played when "MAX" is displayed. 4. Use [̇] and [̈] to specify the playback time you can use [̆] and [̄] to adjust the volume level. • Images copied from another digital camera or...
... "Interval" setting. IMPORTANT! • Note that appears to 30 seconds). • When playback reaches a movie file while "MAX" is selected as the interval, only the first frame of movies, audio snapshots, and voice recording files is not played when "MAX" is displayed. 4. Use [̇] and [̈] to specify the playback time you can use [̆] and [̄] to adjust the volume level. • Images copied from another digital camera or...
Owners Manual
Page 122
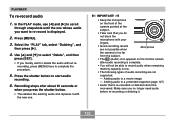
... recording results are not supported. - Press [MENU]. 3. Adding audio to complete the procedure. 5. Use [̆] and [̄] to select " Delete" , and then press [SET]. • If you want to start audio recording. 6. Recording stops after audio recording is complete. • You will not be recovered. Make sure you press the shutter button. • This deletes the existing audio and replaces it . 122 Adding audio to a protected...
... recording results are not supported. - Press [MENU]. 3. Adding audio to complete the procedure. 5. Use [̆] and [̄] to select " Delete" , and then press [SET]. • If you want to start audio recording. 6. Recording stops after audio recording is complete. • You will not be recovered. Make sure you press the shutter button. • This deletes the existing audio and replaces it . 122 Adding audio to a protected...
Owners Manual
Page 136
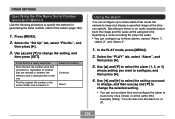
... deleted or whether the memory card is replaced with a new one Find the highest file number in the current folder and increment it Select this setting: Continue Reset Using the Alarm You can set an alarm time and configure the alarm to configure, and then press [̈]. 4. Specifying a voice recording file plays the audio. • You can also turn the alarm on or off. 136 In the PLAY mode...
... deleted or whether the memory card is replaced with a new one Find the highest file number in the current folder and increment it Select this setting: Continue Reset Using the Alarm You can set an alarm time and configure the alarm to configure, and then press [̈]. 4. Specifying a voice recording file plays the audio. • You can also turn the alarm on or off. 136 In the PLAY mode...

Owners Manual
Page 160
... above operating systems without the AC adaptor, make sure there is no memory card loaded in the case of Windows XP. 1. Click [USB driver] and then [Install]. • This starts installation. • The following steps show installation under Windows 98, Me, 2000, or XP. Use of Windows. 160 What you place it onto the USB cradle. VIEWING IMAGES ON A COMPUTER IMPORTANT! • Low battery power can cause the camera to install the USB driver...
... above operating systems without the AC adaptor, make sure there is no memory card loaded in the case of Windows XP. 1. Click [USB driver] and then [Install]. • This starts installation. • The following steps show installation under Windows 98, Me, 2000, or XP. Use of Windows. 160 What you place it onto the USB cradle. VIEWING IMAGES ON A COMPUTER IMPORTANT! • Low battery power can cause the camera to install the USB driver...
Owners Manual
Page 168
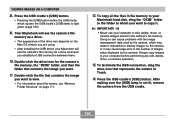
... edit, delete, move , or rename images stored in file memory to copy it may make it impossible to display images on the Mac OS version you want . 11. To copy all the files in the camera's file memory. VIEWING IMAGES ON A COMPUTER 8. Double-click the file that represents the camera to light green (page 196). 9. Press the USB cradle's [USB] button. Always copy images to your Macintosh hard disk, drag the "DCIM" folder to the folder to which...
... edit, delete, move , or rename images stored in file memory to copy it may make it impossible to display images on the Mac OS version you want . 11. To copy all the files in the camera's file memory. VIEWING IMAGES ON A COMPUTER 8. Double-click the file that represents the camera to light green (page 196). 9. Press the USB cradle's [USB] button. Always copy images to your Macintosh hard disk, drag the "DCIM" folder to the folder to which...
Owners Manual
Page 182
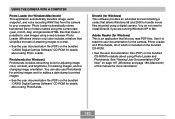
... will be able to perform USB communication simply by connecting the camera to your personal computer over a USB connection. With Windows XP, you need on your computer with a computer. In the PLAY mode, press [MENU]. 2. If you want to the PLAY mode screen. About the bundled CD-ROM (CASIO Digital Camera Software) The CD-ROM (CASIO Digital Camera Software) that makes it in combination with the USB cable. 182 USB Driver for Mass Storage (for the...
... will be able to perform USB communication simply by connecting the camera to your personal computer over a USB connection. With Windows XP, you need on your computer with a computer. In the PLAY mode, press [MENU]. 2. If you want to the PLAY mode screen. About the bundled CD-ROM (CASIO Digital Camera Software) The CD-ROM (CASIO Digital Camera Software) that makes it in combination with the USB cable. 182 USB Driver for Mass Storage (for the...
Owners Manual
Page 183
... adjusting image color, contrast, and brightness, for resizing images, and for Windows/Macintosh) This application automatically transfers image, audio snapshot, and voice recording WAV files from the camera to install DirectX if you read the user documentation for the camera, Photo Loader, and Photohands, all of this manual for details about using a digital camera. You do not need to your computer. USING THE CAMERA WITH A COMPUTER Photo Loader (for changing image orientation. See "Viewing User Documentation (PDF files...
... adjusting image color, contrast, and brightness, for resizing images, and for Windows/Macintosh) This application automatically transfers image, audio snapshot, and voice recording WAV files from the camera to install DirectX if you read the user documentation for the camera, Photo Loader, and Photohands, all of this manual for details about using a digital camera. You do not need to your computer. USING THE CAMERA WITH A COMPUTER Photo Loader (for changing image orientation. See "Viewing User Documentation (PDF files...
Owners Manual
Page 192
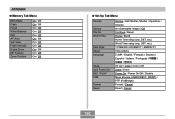
... Shutter /Shutter / Operation / Volume On (Selectable image) / Off Continue / Reset Home / World Home Time setup (city, DST, etc.) World Time setup (city, DST, etc.) YY/MM/DD / DD/MM/YY / MM/DD/YY Time setting / English / Français / Deutsch / Español / Italiano / Português / / / 30 sec / 1 min / 2 min / Off 2 min / 5 min Power On / Power On/Off / Disable Mass Storage (USB DIRECT- APPENDIX G Memory Tab Menu REC Mode Flash Focus White Balance ISO AF Area Self-timer Flash Intensity Digital Zoom...
... Shutter /Shutter / Operation / Volume On (Selectable image) / Off Continue / Reset Home / World Home Time setup (city, DST, etc.) World Time setup (city, DST, etc.) YY/MM/DD / DD/MM/YY / MM/DD/YY Time setting / English / Français / Deutsch / Español / Italiano / Português / / / 30 sec / 1 min / 2 min / Off 2 min / 5 min Power On / Power On/Off / Disable Mass Storage (USB DIRECT- APPENDIX G Memory Tab Menu REC Mode Flash Focus White Balance ISO AF Area Self-timer Flash Intensity Digital Zoom...
Owners Manual
Page 199
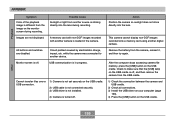
... [USB] button on the monitor screen during recording. Possible Cause Sunlight or light from another device. This camera cannot display non-DCF images recorded onto a memory card using another camera is loaded in progress. A memory card with non-DCF images recorded with another digital camera. while the camera was connected to make sure that the [USB] lamp on the USB cradle is not set securely on the USB cradle. USB communication is shining directly into the lens. Cannot transfer files over a USB connection. 1) Camera...
... [USB] button on the monitor screen during recording. Possible Cause Sunlight or light from another device. This camera cannot display non-DCF images recorded onto a memory card using another camera is loaded in progress. A memory card with non-DCF images recorded with another digital camera. while the camera was connected to make sure that the [USB] lamp on the USB cradle is not set securely on the USB cradle. USB communication is shining directly into the lens. Cannot transfer files over a USB connection. 1) Camera...
Owners Manual
Page 200
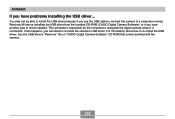
... is connected. This will need to a computer running Windows 98 before installing the USB driver from the bundled CD-ROM (CASIO Digital Camera Software), or if you have problems installing the USB driver... APPENDIX If you have another type of driver installed. You may not be able to install the USB driver properly if you will make it impossible for the computer to re-install the USB driver, see the USB driver's "Read me" file on "CASIO Digital Camera Software...
... is connected. This will need to a computer running Windows 98 before installing the USB driver from the bundled CD-ROM (CASIO Digital Camera Software), or if you have problems installing the USB driver... APPENDIX If you have another type of driver installed. You may not be able to install the USB driver properly if you will make it impossible for the computer to re-install the USB driver, see the USB driver's "Read me" file on "CASIO Digital Camera Software...


