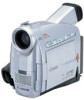

ZR10 Instruction Manual
Page 3
...Quick stops, excessive force, and uneven surfaces may fall, causing serious injury to a child or adult, and serious damage to the Canon Digital Video Camcorder ZR10 A and all its accessories. 1_ZR10_E(02-06) 00/3/9 20:29 Page 3 (1,1) IMPORTANT SAFETY INSTRUCTIONS In these safety instructions the word...cords exit the product. moved with respect to replace your electrician to proper 9. for the grounding electrode. Do not use the camera close to TV transmitters, portable communication devices or other sources of antenna discharge unit, connection to an antenna discharge unit, size ...
...Quick stops, excessive force, and uneven surfaces may fall, causing serious injury to a child or adult, and serious damage to the Canon Digital Video Camcorder ZR10 A and all its accessories. 1_ZR10_E(02-06) 00/3/9 20:29 Page 3 (1,1) IMPORTANT SAFETY INSTRUCTIONS In these safety instructions the word...cords exit the product. moved with respect to replace your electrician to proper 9. for the grounding electrode. Do not use the camera close to TV transmitters, portable communication devices or other sources of antenna discharge unit, connection to an antenna discharge unit, size ...

ZR10 Instruction Manual
Page 5
...47 Using the Various Recording Programs 48 Using Digital Effects 52 Preparing the Camera 86 Notes on Using the Batteries 88 Maintenance 91 Troubleshooting 95 The ZR10 System Diagram 98 Optional Accessories 99 Screen Displays 103 Specifications 108 Index ...Manual Adjustments ...~ INSTRUCTIONS 3 Adjusting Exposure Manually 62 Thank you for Choosing a Canon 6 Adjusting Focus Manually 65 Quick Overview Setting the White Balance 66 Introducing the ZR10 7 Finding Your Way Around the ZR10 ........8 Powering Your Camcorder 11 Loading a Cassette 16 Basic Recording 18 Zooming 22...
...47 Using the Various Recording Programs 48 Using Digital Effects 52 Preparing the Camera 86 Notes on Using the Batteries 88 Maintenance 91 Troubleshooting 95 The ZR10 System Diagram 98 Optional Accessories 99 Screen Displays 103 Specifications 108 Index ...Manual Adjustments ...~ INSTRUCTIONS 3 Adjusting Exposure Manually 62 Thank you for Choosing a Canon 6 Adjusting Focus Manually 65 Quick Overview Setting the White Balance 66 Introducing the ZR10 7 Finding Your Way Around the ZR10 ........8 Powering Your Camcorder 11 Loading a Cassette 16 Basic Recording 18 Zooming 22...

ZR10 Instruction Manual
Page 11
Disconnect the power adapter from the TV or the antenna cable. Connect the power adapter to the power adapter. 3. Connect the power cable to the camera's DC IN terminal. 2. Unplug the power cable from the AC outlet, then disconnect it may cause bars to appear on the TV - 2_ZR10_E(07-33) 3/... instant power from an AC outlet. Plug the adapter into an AC outlet. 4. move the adapter away from the camera after use the power adapter to: E Provide power from an AC outlet or Charge a battery pack • The power adapter converts current from a household power ...
Disconnect the power adapter from the TV or the antenna cable. Connect the power adapter to the power adapter. 3. Connect the power cable to the camera's DC IN terminal. 2. Unplug the power cable from the AC outlet, then disconnect it may cause bars to appear on the TV - 2_ZR10_E(07-33) 3/... instant power from an AC outlet. Plug the adapter into an AC outlet. 4. move the adapter away from the camera after use the power adapter to: E Provide power from an AC outlet or Charge a battery pack • The power adapter converts current from a household power ...

ZR10 Instruction Manual
Page 12
... the viewfinder upwards. • With the triangle on the battery pack pointing downwards, align the edge of the battery pack with the line on the camera, press lightly and slide the battery down until it to show that it is between 50% and 75% charged. Connect the power adapter to OFF... 50% charged. It should have enough power for you want it clicks into an AC outlet. • The charge indicator flashes red to power the camera for more than about 5 minutes. 12 2_ZR10_E(07-33) 3/10/00 18:19 Page 12 (1,1) Attaching and charging the battery packs E DC IN 9.5V CHARGE...
... the viewfinder upwards. • With the triangle on the battery pack pointing downwards, align the edge of the battery pack with the line on the camera, press lightly and slide the battery down until it to show that it is between 50% and 75% charged. Connect the power adapter to OFF... 50% charged. It should have enough power for you want it clicks into an AC outlet. • The charge indicator flashes red to power the camera for more than about 5 minutes. 12 2_ZR10_E(07-33) 3/10/00 18:19 Page 12 (1,1) Attaching and charging the battery packs E DC IN 9.5V CHARGE...

ZR10 Instruction Manual
Page 13
... Rotate the viewfinder upwards. • Press and hold the BATT. When replacement of power supply is required, please return it to the camera's DC terminal. Unplug the power cable from the AC outlet, then E disconnect it with a power supply between 100 and 240 V AC... used , you slide the battery up. • Never connect an unspecified product to the responsible nearest Canon Service Center and please replace it from the camera. CA-560 Compact Power Adapter Quick Overview Specifications Power supply Power consumption Rated output Operating temperature range Dimensions ...
... Rotate the viewfinder upwards. • Press and hold the BATT. When replacement of power supply is required, please return it to the camera's DC terminal. Unplug the power cable from the AC outlet, then E disconnect it with a power supply between 100 and 240 V AC... used , you slide the battery up. • Never connect an unspecified product to the responsible nearest Canon Service Center and please replace it from the camera. CA-560 Compact Power Adapter Quick Overview Specifications Power supply Power consumption Rated output Operating temperature range Dimensions ...

ZR10 Instruction Manual
Page 14
The Charge Adapter/Car Battery Cable Kit CR-560 includes the following: Quick Overview Charge Adapter Car Battery Cable DC Cable 1. Operate the camera with power from car battery or household outlet 1 hr. 20 min. 1 hr. 40 min. 14 BP-511 BP-522 (optional) Time required for full charge ...(07-33) 3/10/00 18:19 Page 14 (1,1) Using the Charge Adapter CR-560 Kit (optional) E The Compact Power Adapter CA-560 included with the camera can be used along with the CR-560 Kit for the high-capacity BP-522 (optional). Charge the BP-500 Series battery packs with power...
The Charge Adapter/Car Battery Cable Kit CR-560 includes the following: Quick Overview Charge Adapter Car Battery Cable DC Cable 1. Operate the camera with power from car battery or household outlet 1 hr. 20 min. 1 hr. 40 min. 14 BP-511 BP-522 (optional) Time required for full charge ...(07-33) 3/10/00 18:19 Page 14 (1,1) Using the Charge Adapter CR-560 Kit (optional) E The Compact Power Adapter CA-560 included with the camera can be used along with the CR-560 Kit for the high-capacity BP-522 (optional). Charge the BP-500 Series battery packs with power...

ZR10 Instruction Manual
Page 15
... + Charge Adapter + Car Battery Cable → car's cigarette E lighter To car's cigarette lighter 3. Operate the camera with power from a household AC outlet. 1 or 2 battery pack(s) + Charge Adapter + Compact Power Adapter CHARGE Quick Overview • Fast charging for the high-capacity BP-...
... + Charge Adapter + Car Battery Cable → car's cigarette E lighter To car's cigarette lighter 3. Operate the camera with power from a household AC outlet. 1 or 2 battery pack(s) + Charge Adapter + Compact Power Adapter CHARGE Quick Overview • Fast charging for the high-capacity BP-...

ZR10 Instruction Manual
Page 16
.... • Pull the cover fully open automatically. • The confirmation beep sounds when the cassette cover fully opens. 3. Make sure that you turn the camera's power on the compartment until you load a cassette. • With some types of seconds for the cassette compartment to close the cover. • Be ...careful not to its case and store it in the camera after use - Press the P mark on , v flashes in the display until it clicks, and wait for it to open (while holding the button) ...
.... • Pull the cover fully open automatically. • The confirmation beep sounds when the cassette cover fully opens. 3. Make sure that you turn the camera's power on the compartment until you load a cassette. • With some types of seconds for the cassette compartment to close the cover. • Be ...careful not to its case and store it in the camera after use - Press the P mark on , v flashes in the display until it clicks, and wait for it to open (while holding the button) ...

ZR10 Instruction Manual
Page 17
... or touch the tape itself. • Do not use the cassette memory function with the camera switched to record on the camera or the wireless controller with this cassette and put the camera in the display. The camera also shows the above phrase if you want to VCR mode. they may become dirty with...
... or touch the tape itself. • Do not use the cassette memory function with the camera switched to record on the camera or the wireless controller with this cassette and put the camera in the display. The camera also shows the above phrase if you want to VCR mode. they may become dirty with...

ZR10 Instruction Manual
Page 18
...optional) attached, extend the viewfinder ( 86). 2_ZR10_E(07-33) 3/10/00 18:19 Page 18 (1,1) Basic Recording E 3P POWER 1 CAMERA OFF VCR 4, 5 POWER CAMERA OFF VCR Quick Overview Before you start recording Have you completed the following steps? • Attached a power source ( 11). • ... 16). 18 To record 1. PAUSE appears in the display. • The camera power indicator lights up red. • The confirmation beep sounds. • The camera will turn the POWER switch to CAMERA. • The camera automatically sets to install the backup battery ( 90) in record pause mode for...
...optional) attached, extend the viewfinder ( 86). 2_ZR10_E(07-33) 3/10/00 18:19 Page 18 (1,1) Basic Recording E 3P POWER 1 CAMERA OFF VCR 4, 5 POWER CAMERA OFF VCR Quick Overview Before you start recording Have you completed the following steps? • Attached a power source ( 11). • ... 16). 18 To record 1. PAUSE appears in the display. • The camera power indicator lights up red. • The confirmation beep sounds. • The camera will turn the POWER switch to CAMERA. • The camera automatically sets to install the backup battery ( 90) in record pause mode for...

ZR10 Instruction Manual
Page 19
...in the display. • You can stop and restart recording as often as you , then push it in flat against the side of the camera until it clicks securely. • You cannot monitor the sound from the speaker when recording. • For tips on how to make better videos...p. 44. 5. Press and release the start/stop button once to simply E point and shoot without making important recordings, clean the video heads using a Canon DVM-CL Digital Video Head Cleaning Cassette or a commercially available digital video head cleaning cassette. • To close the LCD panel, rotate it vertically until...
...in the display. • You can stop and restart recording as often as you , then push it in flat against the side of the camera until it clicks securely. • You cannot monitor the sound from the speaker when recording. • For tips on how to make better videos...p. 44. 5. Press and release the start/stop button once to simply E point and shoot without making important recordings, clean the video heads using a Canon DVM-CL Digital Video Head Cleaning Cassette or a commercially available digital video head cleaning cassette. • To close the LCD panel, rotate it vertically until...

ZR10 Instruction Manual
Page 20
... in the 16:9 mode for 16:9 on a normal TV screen, the image will automatically play back in SP mode. For important recordings, therefore, set the camera to a tape that has been recorded in the 16:9 format for instructions on how to use either of tapes recorded in SP (standard play) and... may become distorted when played back on this camcorder, and vice versa. 16:9 (Widescreen TV recording) Produces images in LP mode. Select 16:9 from the camera or VCR menu, select LP and then close the menu. • "16:9" is shown in the display when you switch the 16:9 effect on. •...
... in the 16:9 mode for 16:9 on a normal TV screen, the image will automatically play back in SP mode. For important recordings, therefore, set the camera to a tape that has been recorded in the 16:9 format for instructions on how to use either of tapes recorded in SP (standard play) and... may become distorted when played back on this camcorder, and vice versa. 16:9 (Widescreen TV recording) Produces images in LP mode. Select 16:9 from the camera or VCR menu, select LP and then close the menu. • "16:9" is shown in the display when you switch the 16:9 effect on. •...

ZR10 Instruction Manual
Page 21
2_ZR10_E(07-33) 3/10/00 18:19 Page 21 (1,1) Confirmation/Warning beeps E The camera's short operation confirmation beeps are not recorded on , during the self-timer countdown, right before the camera's automatic shut-off, and also upon certain camera operations such as when you turn them OFF through the menu. ( 35, 36) BEEP ON Quick Overview 21 You can turn the camera on the tape. Beeps sound upon any unusual condition of the camera. Beeps are indicated by ` in the illustrations.
2_ZR10_E(07-33) 3/10/00 18:19 Page 21 (1,1) Confirmation/Warning beeps E The camera's short operation confirmation beeps are not recorded on , during the self-timer countdown, right before the camera's automatic shut-off, and also upon certain camera operations such as when you turn them OFF through the menu. ( 35, 36) BEEP ON Quick Overview 21 You can turn the camera on the tape. Beeps sound upon any unusual condition of the camera. Beeps are indicated by ` in the illustrations.

ZR10 Instruction Manual
Page 22
... (light blue). 2_ZR10_E(07-33) 3/10/00 18:19 Page 22 (1,1) Zooming E W Zoom out Zoom in T Quick Overview 10× optical zoom The camera's 10× zoom lens allows you to choose the best picture angle for each scene: • Move the zoom control towards T to zoom in and... out between optical zooming (up to 20×. ( 35) D.ZOOM 40× The zoom control continues to telephoto. the camera automatically switches between 1× and 40× or 1× and 200× magnification - You can also control the speed of zooming: • Move the...
... (light blue). 2_ZR10_E(07-33) 3/10/00 18:19 Page 22 (1,1) Zooming E W Zoom out Zoom in T Quick Overview 10× optical zoom The camera's 10× zoom lens allows you to choose the best picture angle for each scene: • Move the zoom control towards T to zoom in and... out between optical zooming (up to 20×. ( 35) D.ZOOM 40× The zoom control continues to telephoto. the camera automatically switches between 1× and 40× or 1× and 200× magnification - You can also control the speed of zooming: • Move the...

ZR10 Instruction Manual
Page 23
... panel OPEN button and open the panel by opening and rotating the screen, also you can also push the panel flat against the camera until it away from the camera. Changing the angle of the LCD screen You can choose the angle of the lens ( 25). Quick Overview You can rotate the...
... panel OPEN button and open the panel by opening and rotating the screen, also you can also push the panel flat against the camera until it away from the camera. Changing the angle of the LCD screen You can choose the angle of the lens ( 25). Quick Overview You can rotate the...

ZR10 Instruction Manual
Page 24
... the viewfinder. • Make sure you open the LCD panel at 90°, before closing it or pushing it flat against the side of the camera. • Always fully close the LCD panel until it difficult for 4 seconds. • Turn the selector dial up to make the display darker. ... the brightness of the LCD screen and they are also able to using the viewfinder. Quick Overview BRIGHTNESS••- + ( 35, 36) • The camera will remember your brightness setting even after you to view the image. A bar showing the level appears in a window. Doing so could cause damage. •...
... the viewfinder. • Make sure you open the LCD panel at 90°, before closing it or pushing it flat against the side of the camera. • Always fully close the LCD panel until it difficult for 4 seconds. • Turn the selector dial up to make the display darker. ... the brightness of the LCD screen and they are also able to using the viewfinder. Quick Overview BRIGHTNESS••- + ( 35, 36) • The camera will remember your brightness setting even after you to view the image. A bar showing the level appears in a window. Doing so could cause damage. •...

ZR10 Instruction Manual
Page 25
... style, reversed (mirror on : REC REC PAUSE EJECT Self-timer ( 60) • These and all other indicators appear normally in the viewfinder. 25 Open the camera menu and point the arrow at MIRROR. 2. Quick Overview ( 35) MIRROR ON 1. The viewfinder is also activated when the panel is in this position. •...
... style, reversed (mirror on : REC REC PAUSE EJECT Self-timer ( 60) • These and all other indicators appear normally in the viewfinder. 25 Open the camera menu and point the arrow at MIRROR. 2. Quick Overview ( 35) MIRROR ON 1. The viewfinder is also activated when the panel is in this position. •...

ZR10 Instruction Manual
Page 26
... bar appears in the display to indicate the current volume. The volume level is turned up to camera mode or when you adjust for stereo sound. If this happens, turn off when the camera is set to increase the volume, and down the volume. 26 Quick Overview MIC A/V IN/ ...the headphone volume separately from the built-in four seconds. • You can review the sound track alongside the picture during VCR mode or camera mode. It disappears in speaker, either during playback. The built-in speaker and headphones are memorized separately. use headphones. • Sometimes ...
... bar appears in the display to indicate the current volume. The volume level is turned up to camera mode or when you adjust for stereo sound. If this happens, turn off when the camera is set to increase the volume, and down the volume. 26 Quick Overview MIC A/V IN/ ...the headphone volume separately from the built-in four seconds. • You can review the sound track alongside the picture during VCR mode or camera mode. It disappears in speaker, either during playback. The built-in speaker and headphones are memorized separately. use headphones. • Sometimes ...

ZR10 Instruction Manual
Page 27
...mosaic-like noise), clean the video heads using the viewfinder to VCR. • The power indicator lights up . • When you're using a Canon DVM-CL Digital Video Head Cleaning Cassette or a commercially available digital video head cleaning cassette. 27 Load the cassette. 3. 2_ZR10_E(07-33) 3/10/00 ...18:19 Page 27 (1,1) Playing Back a Cassette 3 REC SEARCH REC SEARCH FOCUS EXP E Quick Overview 1 POWER CAMERA OFF VCR You can also close the LCD panel with its screen side facing up green. 2. To use the LCD screen for instant, on the...
...mosaic-like noise), clean the video heads using the viewfinder to VCR. • The power indicator lights up . • When you're using a Canon DVM-CL Digital Video Head Cleaning Cassette or a commercially available digital video head cleaning cassette. 27 Load the cassette. 3. 2_ZR10_E(07-33) 3/10/00 ...18:19 Page 27 (1,1) Playing Back a Cassette 3 REC SEARCH REC SEARCH FOCUS EXP E Quick Overview 1 POWER CAMERA OFF VCR You can also close the LCD panel with its screen side facing up green. 2. To use the LCD screen for instant, on the...

ZR10 Instruction Manual
Page 28
... 9.5 times normal speed, press and hold the 1 (fast forward) button during normal playback or press and hold the ` (rewind) button during normal fast forward. The camera automatically goes into stop mode after about 9.5 times normal speed, press and hold the ` (rewind) button during normal playback or press and hold the 1 (fast...
... 9.5 times normal speed, press and hold the 1 (fast forward) button during normal playback or press and hold the ` (rewind) button during normal fast forward. The camera automatically goes into stop mode after about 9.5 times normal speed, press and hold the ` (rewind) button during normal playback or press and hold the 1 (fast...


