
Users Manual - English
Page 5
... SO-DIMM...85 SO-DIMM types ...85 Installing extra memory ...86 5 Routine Maintenance 88 Replacing consumable items...88 Before replacing the consumable items 92 Toner cartridges ...95 Drum unit ...100 Belt unit...105 Waste toner box ...109 Cleaning ...114 Cleaning the outside of the machine 114 Cleaning the inside of the...
... SO-DIMM...85 SO-DIMM types ...85 Installing extra memory ...86 5 Routine Maintenance 88 Replacing consumable items...88 Before replacing the consumable items 92 Toner cartridges ...95 Drum unit ...100 Belt unit...105 Waste toner box ...109 Cleaning ...114 Cleaning the outside of the machine 114 Cleaning the inside of the...
Users Manual - English
Page 72
... sleep status. When you need to print Printing Warming up There is Open Close the Front 66 When a mark blinks (n), the indicated toner cartridge is displayed on the control panel, the LCD will know that you use the buttons on the first line of a toner...wireless signal strength with the machine. Cover is a problem with four levels. ( means no signal, means weak, means middle, and means strong.) (HL-4570CDW(T) only) When an error has occurred, the type of error is near the end of each toner cartridge, Black (K), Yellow (Y), Magenta (M) and Cyan (C) (where the n means blinking).
... sleep status. When you need to print Printing Warming up There is Open Close the Front 66 When a mark blinks (n), the indicated toner cartridge is displayed on the control panel, the LCD will know that you use the buttons on the first line of a toner...wireless signal strength with the machine. Cover is a problem with four levels. ( means no signal, means weak, means middle, and means strong.) (HL-4570CDW(T) only) When an error has occurred, the type of error is near the end of each toner cartridge, Black (K), Yellow (Y), Magenta (M) and Cyan (C) (where the n means blinking).

Users Manual - English
Page 78
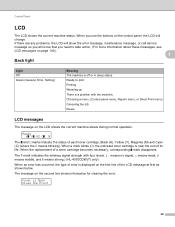
.... The factory settings are shown in seconds that an LCD message will scroll across the LCD. Off*/On Increases the page yield of the toner 3 cartridge. 0.1*/0.4/0.6/0.8/1.0/ 1.4/1.8/2.0 Sec Sets the time for the auto interface selection. From Level 1=0.2 sec to change when holding + or - Turns the reprint settings On or Off. If...
.... The factory settings are shown in seconds that an LCD message will scroll across the LCD. Off*/On Increases the page yield of the toner 3 cartridge. 0.1*/0.4/0.6/0.8/1.0/ 1.4/1.8/2.0 Sec Sets the time for the auto interface selection. From Level 1=0.2 sec to change when holding + or - Turns the reprint settings On or Off. If...

Users Manual - English
Page 94
Order No. WT-300CL 88 DR-310CL 5 Belt unit See Belt unit on page 109. TN-310BK, TN-315BK, TN-310C, TN-315C, TN-310M, TN-315M, TN-310Y, TN-315Y Order No. BU-300CL Waste toner box See Waste toner box on page 105. Order No. 5 Routine Maintenance 5 Replacing consumable items 5 You will need to replace the consumable items when the machine indicates that the life of the consumable is over. You can replace the following consumable items by yourself: Toner cartridge Drum unit See Toner cartridges on page 100. See Drum unit on page 95. Order No.
Order No. WT-300CL 88 DR-310CL 5 Belt unit See Belt unit on page 109. TN-310BK, TN-315BK, TN-310C, TN-315C, TN-310M, TN-315M, TN-310Y, TN-315Y Order No. BU-300CL Waste toner box See Waste toner box on page 105. Order No. 5 Routine Maintenance 5 Replacing consumable items 5 You will need to replace the consumable items when the machine indicates that the life of the consumable is over. You can replace the following consumable items by yourself: Toner cartridge Drum unit See Toner cartridges on page 100. See Drum unit on page 95. Order No.

Users Manual - English
Page 95
...7 5 TN-310Y 6 TN-315Y 7 See page 101 See page 105 See page 109 DR-310CL BU-300CL WT-300CL 89 cartridge yield is approximate and may want to buy spare consumable items before they reach the end of use. 5 The n mark means blinking. 6... Standard toner cartridge 7 High capacity cartridge How to replace Toner cartridge, Black Toner cartridge, Cyan Toner cartridge, Magenta Approximate life 2,500 pages 1 2 6 6,000 pages 1 2 7 1,500 pages 1 2 6 3,500 pages 1 2 7 Toner cartridge, Yellow Drum unit Belt unit Waste toner box 25,000 pages 1 3...
...7 5 TN-310Y 6 TN-315Y 7 See page 101 See page 105 See page 109 DR-310CL BU-300CL WT-300CL 89 cartridge yield is approximate and may want to buy spare consumable items before they reach the end of use. 5 The n mark means blinking. 6... Standard toner cartridge 7 High capacity cartridge How to replace Toner cartridge, Black Toner cartridge, Cyan Toner cartridge, Magenta Approximate life 2,500 pages 1 2 6 6,000 pages 1 2 7 1,500 pages 1 2 6 3,500 pages 1 2 7 Toner cartridge, Yellow Drum unit Belt unit Waste toner box 25,000 pages 1 3...

Users Manual - English
Page 96
...50,000 pages 1 How to the User's Guide for instructions. Cyan (C) Replace Toner Toner cartridge, Magenta Open the Front Cover, replace Toner Cartridge. Magenta (M) Replace Toner Toner cartridge, Yellow Open the Front Cover, replace Toner Cartridge. Refer to replace See page 96 Order No. TN-310BK 5 TN-315BK 6 TN-... page 105 See page 109 DR-310CL DR-310CL BU-300CL WT-300CL 90 Black (K) Replace Toner Toner cartridge, Cyan Open the Front Cover, replace Toner Cartridge. Yellow (Y) Replace Drum Drum unit Drum Stop Drum unit Replace Belt Belt unit Replace WT Box Waste toner...
...50,000 pages 1 How to the User's Guide for instructions. Cyan (C) Replace Toner Toner cartridge, Magenta Open the Front Cover, replace Toner Cartridge. Magenta (M) Replace Toner Toner cartridge, Yellow Open the Front Cover, replace Toner Cartridge. Refer to replace See page 96 Order No. TN-310BK 5 TN-315BK 6 TN-... page 105 See page 109 DR-310CL DR-310CL BU-300CL WT-300CL 90 Black (K) Replace Toner Toner cartridge, Cyan Open the Front Cover, replace Toner Cartridge. Yellow (Y) Replace Drum Drum unit Drum Stop Drum unit Replace Belt Belt unit Replace WT Box Waste toner...

Users Manual - English
Page 97
... unit 100,000 pages 1 1 A4 or Letter size single-sided pages. 2 Approx. Call your dealer or Brother Customer Service for a replacement PF kit1. Call your used toner cartridge, please discard the used consumable items on how to return the used . 91 If you have questions, call ...to local regulations, keeping it separate from domestic waste. Call your dealer or Brother Customer Service for a replacement laser unit. 5 Note • Go to http://www.brother.com/original/index.html for each of toner cartridges and a waste toner box is approximate and may be reduced. •...
... unit 100,000 pages 1 1 A4 or Letter size single-sided pages. 2 Approx. Call your dealer or Brother Customer Service for a replacement PF kit1. Call your used toner cartridge, please discard the used consumable items on how to return the used . 91 If you have questions, call ...to local regulations, keeping it separate from domestic waste. Call your dealer or Brother Customer Service for a replacement laser unit. 5 Note • Go to http://www.brother.com/original/index.html for each of toner cartridges and a waste toner box is approximate and may be reduced. •...

Users Manual - English
Page 98
... in unsatisfactory print quality. Use or attempted use cleaning materials that you do not refill the toner cartridge provided with your investment and obtain premium performance from the Brother machine, we strongly recommend the use of the machine. Our warranty coverage does not apply to any... degradation to clean the outside or inside of genuine Brother supplies. • Put the toner cartridge in injuries. Inside the machine (Front View) • Hold the green handles of the drum unit when you ...
... in unsatisfactory print quality. Use or attempted use cleaning materials that you do not refill the toner cartridge provided with your investment and obtain premium performance from the Brother machine, we strongly recommend the use of the machine. Our warranty coverage does not apply to any... degradation to clean the outside or inside of genuine Brother supplies. • Put the toner cartridge in injuries. Inside the machine (Front View) • Hold the green handles of the drum unit when you ...

Users Manual - English
Page 99
... parts shown in case you accidentally spill or scatter toner. • Handle the toner cartridge and the waste toner box carefully. If toner scatters on page 114. • DO NOT unpack a spare toner cartridge until immediately before you put it in the illustrations. • We recommend that you ..., flat surface with cold water at once. • To prevent damage to sunlight or room light the unit may contain toner. 93 If toner cartridges are left unpacked for a long time the toner life may be damaged. • While removing the drum unit, handle it carefully because it may...
... parts shown in case you accidentally spill or scatter toner. • Handle the toner cartridge and the waste toner box carefully. If toner scatters on page 114. • DO NOT unpack a spare toner cartridge until immediately before you put it in the illustrations. • We recommend that you ..., flat surface with cold water at once. • To prevent damage to sunlight or room light the unit may contain toner. 93 If toner cartridges are left unpacked for a long time the toner life may be damaged. • While removing the drum unit, handle it carefully because it may...

Users Manual - English
Page 100
...waste disposal office. • To ensure high quality printing, we recommend that toner powder does not spill out of the cartridge. • Go to http://www.brother.com/original/index.html for instructions on how to return the used waste toner box according to local regulations, keeping it ...separate from domestic waste. If you have questions, call your local waste disposal office. • Discard the used toner cartridge to the brother collection program. If you have questions, call your dealer. 5 94 Routine Maintenance Note • Be sure to seal up the toner...
...waste disposal office. • To ensure high quality printing, we recommend that toner powder does not spill out of the cartridge. • Go to http://www.brother.com/original/index.html for instructions on how to return the used waste toner box according to local regulations, keeping it ...separate from domestic waste. If you have questions, call your local waste disposal office. • Discard the used toner cartridge to the brother collection program. If you have questions, call your dealer. 5 94 Routine Maintenance Note • Be sure to seal up the toner...

Users Manual - English
Page 101
... toner used will change. 5 1 A4 or Letter size single-sided pages. Routine Maintenance Toner cartridges 5 Order No. Approx. A new and unused genuine Brother toner cartridge will stop printing until you need to what is near the end of each toner cartridge, Black (K), Yellow (Y), Magenta (M) and Cyan (C) (where n means blinking). Replace Toner Open the Front...
... toner used will change. 5 1 A4 or Letter size single-sided pages. Routine Maintenance Toner cartridges 5 Order No. Approx. A new and unused genuine Brother toner cartridge will stop printing until you need to what is near the end of each toner cartridge, Black (K), Yellow (Y), Magenta (M) and Cyan (C) (where n means blinking). Replace Toner Open the Front...

Users Manual - English
Page 102
Routine Maintenance Replacing the toner cartridges 5 Before you replace the toner cartridges, see Before replacing the consumable items on . a Make sure that the machine is turned on page 92. Then pull it out of the toner cartridge and slightly push it toward the machine to unlock it stops. c Hold the handle of the drum unit. Press the front cover release button and then open the front cover. 5 b Hold the green handle of the drum unit. Repeat this for all the toner cartridges. 96 Pull the drum unit out until it .
Routine Maintenance Replacing the toner cartridges 5 Before you replace the toner cartridges, see Before replacing the consumable items on . a Make sure that the machine is turned on page 92. Then pull it out of the toner cartridge and slightly push it toward the machine to unlock it stops. c Hold the handle of the drum unit. Press the front cover release button and then open the front cover. 5 b Hold the green handle of the drum unit. Repeat this for all the toner cartridges. 96 Pull the drum unit out until it .

Users Manual - English
Page 104
Routine Maintenance f Close the corona wire cover. 5 g Repeat steps d to f to distribute the toner evenly inside the cartridge. Gently shake it from side to side several times to clean each of three remaining corona wires. i Pull off the protective cover. 98 h Unpack the new toner cartridge.
Routine Maintenance f Close the corona wire cover. 5 g Repeat steps d to f to distribute the toner evenly inside the cartridge. Gently shake it from side to side several times to clean each of three remaining corona wires. i Pull off the protective cover. 98 h Unpack the new toner cartridge.

Users Manual - English
Page 105
...until it toward you until the LCD shows Ready. 99 Yellow K - Note After replacing the toner cartridge, DO NOT turn off the machine power switch or open the front cover until you match the toner cartridge color to the same color label on the drum unit. Cyan M - Repeat this for all ...the toner cartridges. Black l Close the front cover of the toner cartridge and slide the toner cartridge into place. Make sure that you hear it click into...
...until it toward you until the LCD shows Ready. 99 Yellow K - Note After replacing the toner cartridge, DO NOT turn off the machine power switch or open the front cover until you match the toner cartridge color to the same color label on the drum unit. Cyan M - Repeat this for all ...the toner cartridges. Black l Close the front cover of the toner cartridge and slide the toner cartridge into place. Make sure that you hear it click into...

Users Manual - English
Page 108
Repeat this for all the toner cartridges. Holding the green handles of the drum unit, lift the front of the drum unit and remove it to the release position. e Unpack the new drum unit and remove the protective cover. 102 Then pull it out of the toner cartridge and slightly push it from the machine. 1 5 d Hold the handle of the drum unit. Routine Maintenance c Turn the green lock lever (1) at the left of the machine counterclockwise to unlock.
Repeat this for all the toner cartridges. Holding the green handles of the drum unit, lift the front of the drum unit and remove it to the release position. e Unpack the new drum unit and remove the protective cover. 102 Then pull it out of the toner cartridge and slightly push it from the machine. 1 5 d Hold the handle of the drum unit. Routine Maintenance c Turn the green lock lever (1) at the left of the machine counterclockwise to unlock.

Users Manual - English
Page 109
Magenta Y - Black g Make sure the green lock lever (1) is in the release position as shown in the illustration. 1 h Match the guide ends (2) of the drum unit to the c marks (1) on both sides of the machine, then gently slide the drum unit into the machine until it clicks into the appropriate colored section of the toner cartridge and slide it stops at the green lock lever. 1 2 103 Yellow K - C M Y K 5 C - Routine Maintenance f Hold the handle of the drum unit until it into place. Cyan M -
Magenta Y - Black g Make sure the green lock lever (1) is in the release position as shown in the illustration. 1 h Match the guide ends (2) of the drum unit to the c marks (1) on both sides of the machine, then gently slide the drum unit into the machine until it clicks into the appropriate colored section of the toner cartridge and slide it stops at the green lock lever. 1 2 103 Yellow K - C M Y K 5 C - Routine Maintenance f Hold the handle of the drum unit until it into place. Cyan M -

Users Manual - English
Page 120
... the machine. WARNING DO NOT use cleaning materials that you clean the inside of the machine. IMPORTANT Use neutral detergents. When you replace the toner cartridge or the drum unit, make sure that contain ammonia, alcohol, any type of spray, or any type of flammable substance to inhale toner. If printed...
... the machine. WARNING DO NOT use cleaning materials that you clean the inside of the machine. IMPORTANT Use neutral detergents. When you replace the toner cartridge or the drum unit, make sure that contain ammonia, alcohol, any type of spray, or any type of flammable substance to inhale toner. If printed...

Users Manual - English
Page 126
Pull the drum unit out until it stops. 5 5 c Hold the handle of the drum unit. Routine Maintenance Cleaning the corona wires If you have print quality problems, clean the corona wires as follows: a Press the front cover release button and then open the front cover. Repeat this for all the toner cartridges. 120 b Hold the green handle of the toner cartridge and slightly push it toward the machine to unlock it out of the drum unit. Then pull it .
Pull the drum unit out until it stops. 5 5 c Hold the handle of the drum unit. Routine Maintenance Cleaning the corona wires If you have print quality problems, clean the corona wires as follows: a Press the front cover release button and then open the front cover. Repeat this for all the toner cartridges. 120 b Hold the green handle of the toner cartridge and slightly push it toward the machine to unlock it out of the drum unit. Then pull it .

Users Manual - English
Page 128
Make sure that you match the toner cartridge color to clean each of the toner cartridge and slide the toner cartridge into the drum unit then slightly pull it toward you until you hear it click into place. C M Y K C - Black 122 Repeat this for all the toner cartridges. Yellow K - Cyan M - Magenta Y - Routine Maintenance f Close the corona wire cover. 5 g Repeat steps d to f to the same color label on the drum unit. h Hold the handle of three remaining corona wires.
Make sure that you match the toner cartridge color to clean each of the toner cartridge and slide the toner cartridge into the drum unit then slightly pull it toward you until you hear it click into place. C M Y K C - Black 122 Repeat this for all the toner cartridges. Yellow K - Cyan M - Magenta Y - Routine Maintenance f Close the corona wire cover. 5 g Repeat steps d to f to the same color label on the drum unit. h Hold the handle of three remaining corona wires.

Users Manual - English
Page 131
... to the release position. DO NOT hold the sides of the drum unit. • We recommend that you place the drum unit and/or toner cartridge on your hands or clothes, wipe or wash it off with a piece of the machine counterclockwise to the machine from the machine. 1 5 IMPORTANT &#...8226; Hold the green handles of the drum unit when you accidentally spill or scatter toner. • Handle the toner cartridge and the waste toner box carefully. If toner scatters on a clean, flat surface with cold water at the left of disposable paper underneath it . Holding...
... to the release position. DO NOT hold the sides of the drum unit. • We recommend that you place the drum unit and/or toner cartridge on your hands or clothes, wipe or wash it off with a piece of the machine counterclockwise to the machine from the machine. 1 5 IMPORTANT &#...8226; Hold the green handles of the drum unit when you accidentally spill or scatter toner. • Handle the toner cartridge and the waste toner box carefully. If toner scatters on a clean, flat surface with cold water at the left of disposable paper underneath it . Holding...


