User Manual
Page 2
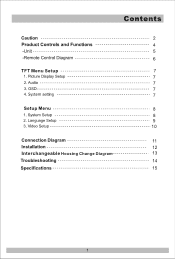
Picture Display Setup 7 2. System setting 7 Setup Menu 8 1. Language Setup 9 3. Contents Caution 2 Product Controls and Functions 4 -Unit 5 -Remote Control Diagram 6 TFT Menu Setup 7 1. Audio 7 3. OSD 7 4. System Setup 8 2. Video Setup 10 Connection Diagram 11 Installation 12 Interchangeable Housing Change Diagram 13 Troubleshooting 14 Specifications 15 1
Picture Display Setup 7 2. System setting 7 Setup Menu 8 1. Language Setup 9 3. Contents Caution 2 Product Controls and Functions 4 -Unit 5 -Remote Control Diagram 6 TFT Menu Setup 7 1. Audio 7 3. OSD 7 4. System Setup 8 2. Video Setup 10 Connection Diagram 11 Installation 12 Interchangeable Housing Change Diagram 13 Troubleshooting 14 Specifications 15 1
User Manual
Page 4
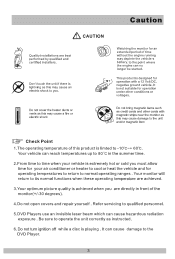
... under other conditions or voltages. Don't touch the unit if there is lightning as this product is limted to the DVD Player. 3 Caution 6, CAUTION Quality installations are directly in the summertime. 2.From time to time when your vehicle is extremely hot or cold you must allow time for your air conditioner... or heater to cool or heat the vehicle and for operating temperatures to return to you are best performed by qualified and certified installers. Your vehicle can cause damage to -10°C-+ 60t.
... under other conditions or voltages. Don't touch the unit if there is lightning as this product is limted to the DVD Player. 3 Caution 6, CAUTION Quality installations are directly in the summertime. 2.From time to time when your vehicle is extremely hot or cold you must allow time for your air conditioner... or heater to cool or heat the vehicle and for operating temperatures to return to you are best performed by qualified and certified installers. Your vehicle can cause damage to -10°C-+ 60t.
User Manual
Page 13
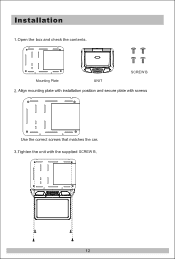
Align mounting plate with installation position and secure plate with screws Use the correct screws that matches the car. 3.Tighten the unit with the supplied SCREW B. 0 O o Installation 1.Open the box and check the contents. 0 0 ▪ T ▪ T Mounting Plate UNIT SCREW B 2.
Align mounting plate with installation position and secure plate with screws Use the correct screws that matches the car. 3.Tighten the unit with the supplied SCREW B. 0 O o Installation 1.Open the box and check the contents. 0 0 ▪ T ▪ T Mounting Plate UNIT SCREW B 2.


