User Manual
Page 2
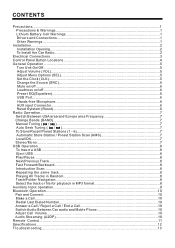
... Car Radio 2 Electrical Connections 3 Control Panel Button Locations 4 General Operation...5 Turn Unit On/Off...5 Adjust Volume (VOL 5 Adjust Menu Options (SEL 5 Set the Clock (CLK)...5 Change the Source (SRC 6 Mute on/off...6 Loudness on/off...6 Preset EQ(Equalizer 6 USB Port...6 Micro-SD Card Slot...6 Hands-free Microphone 6 AUX input Connector 6 Reset Sytstem (Reset 6 Radio Operation...7 Switch Between USA area and Europe area Frequency 7 Change Bands (BAND 7 Manual Tuning 7 Auto Seek Tuning 7 To Store/Recall Preset Stations (1 - 6 7 Automatic Store Station / Preset Station...
... Car Radio 2 Electrical Connections 3 Control Panel Button Locations 4 General Operation...5 Turn Unit On/Off...5 Adjust Volume (VOL 5 Adjust Menu Options (SEL 5 Set the Clock (CLK)...5 Change the Source (SRC 6 Mute on/off...6 Loudness on/off...6 Preset EQ(Equalizer 6 USB Port...6 Micro-SD Card Slot...6 Hands-free Microphone 6 AUX input Connector 6 Reset Sytstem (Reset 6 Radio Operation...7 Switch Between USA area and Europe area Frequency 7 Change Bands (BAND 7 Manual Tuning 7 Auto Seek Tuning 7 To Store/Recall Preset Stations (1 - 6 7 Automatic Store Station / Preset Station...
User Manual
Page 7
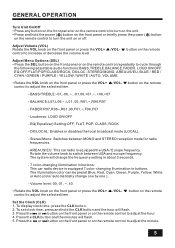
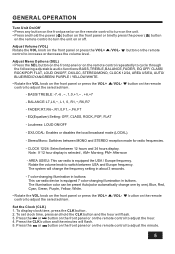
Rotate the volume knob to adjust the minute. 5 The illumination color can be preset Blue, Red, Cyan, Green, Purple, Yellow, White or Auto (color automatically change the frequecny setting in about 3 seconds. - 7 color-changing illumination in buttons: This car radio device is equipped the USA / Europe frequency. Press the or button on the front panel or on the remote control to switch between MONO and STEREO reception mode for radio frequencies. - BALANCE:L07,L06,~, L01...
Rotate the volume knob to adjust the minute. 5 The illumination color can be preset Blue, Red, Cyan, Green, Purple, Yellow, White or Auto (color automatically change the frequecny setting in about 3 seconds. - 7 color-changing illumination in buttons: This car radio device is equipped the USA / Europe frequency. Press the or button on the front panel or on the remote control to switch between MONO and STEREO reception mode for radio frequencies. - BALANCE:L07,L06,~, L01...

User Manual
Page 8
... reset all parameters to depress the RESET button. 6 Hands-free Microphone To receive your system, use a thin object with SD card inserted) and AUX-IN(auxiliary input) modes. To reset your voice when you calling by using this car radio is 1 ampere. USB port The USB port of controls are disabled. Mute on/off In power on mode, briefly press the MUTE button to switch between EQ OFF, FLAT, POP, CLASS, ROCK. GENERAL OPERATION (CONT.) Change the Source...
... reset all parameters to depress the RESET button. 6 Hands-free Microphone To receive your system, use a thin object with SD card inserted) and AUX-IN(auxiliary input) modes. To reset your voice when you calling by using this car radio is 1 ampere. USB port The USB port of controls are disabled. Mute on/off In power on mode, briefly press the MUTE button to switch between EQ OFF, FLAT, POP, CLASS, ROCK. GENERAL OPERATION (CONT.) Change the Source...

User Manual
Page 9
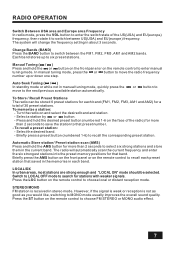
... than 2 seconds to save the station to that band. Each band stores up or down one step. Briefly press the AMS button on the front panel or on the remote control to enter manual tuning mode. Manual Tuning ( / ) Press and hold the AMS button for that preset number. - To recall a preset station: - The radio will change the frequency setting in the current band. RADIO OPERATION Switch Between USA area...
... than 2 seconds to save the station to that band. Each band stores up or down one step. Briefly press the AMS button on the front panel or on the remote control to enter manual tuning mode. Manual Tuning ( / ) Press and hold the AMS button for that preset number. - To recall a preset station: - The radio will change the frequency setting in the current band. RADIO OPERATION Switch Between USA area...

User Manual
Page 12
... the LCD display. 2. button to adjust the call . When pairing is connected. Reject a Call To reject the call is paired, music played through the car audio system and display A2DP in the LCD display. 3. You can also control your mobile phone. 2. Press the or button to play the next or previous on the control panel. BLUETOOTH OPERATION Pair and Connect Prior to using AVRCP (audio video remote control profile). 1. Redial Last Dialed Number Press and hold the button on the LCD display. Make...
... the LCD display. 2. button to adjust the call . When pairing is connected. Reject a Call To reject the call is paired, music played through the car audio system and display A2DP in the LCD display. 3. You can also control your mobile phone. 2. Press the or button to play the next or previous on the control panel. BLUETOOTH OPERATION Pair and Connect Prior to using AVRCP (audio video remote control profile). 1. Redial Last Dialed Number Press and hold the button on the LCD display. Make...
User Manual
Page 13
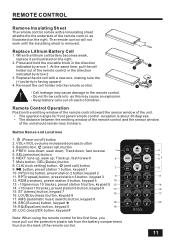
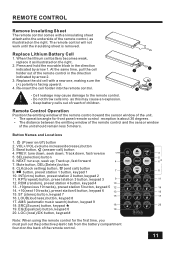
...(intro) button, preset station 2 button,keypad 2 11. LOUD(loudness) button, keypad 8 17. At the same time, pull the cell holder out of the remote control, as illustrated on the back of the unit should remain less 5 meters. Mute button, DEL(Delete) button 8. AMS (automatic music search) button, keypad 9 18. EQ(Equalizer) button, keypad 0 19 20. LOC (local)/DX button, keypad # Note: When using the remote control for front panel remote control reception is...
...(intro) button, preset station 2 button,keypad 2 11. LOUD(loudness) button, keypad 8 17. At the same time, pull the cell holder out of the remote control, as illustrated on the back of the unit should remain less 5 meters. Mute button, DEL(Delete) button 8. AMS (automatic music search) button, keypad 9 18. EQ(Equalizer) button, keypad 0 19 20. LOC (local)/DX button, keypad # Note: When using the remote control for front panel remote control reception is...
User Manual
Page 15
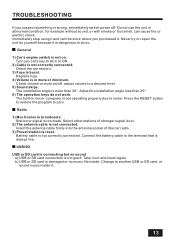
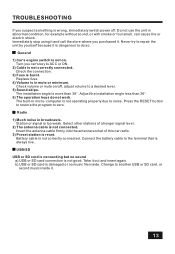
... it . Battery cable is not operating properly due to do not work. Turn you suspect something is always live. Press the RESET button to restore the program to the terminal that is wrong, immediately switch power off , adjust volume to another USB or SD card, or record music inside . Insert the antenna cable firmly into the antenna socket of stronger signal level. 2) The antenna cable is connecting but no music file inside it...
... it . Battery cable is not operating properly due to do not work. Turn you suspect something is always live. Press the RESET button to restore the program to the terminal that is wrong, immediately switch power off , adjust volume to another USB or SD card, or record music inside . Insert the antenna cable firmly into the antenna socket of stronger signal level. 2) The antenna cable is connecting but no music file inside it...
User Manual V2
Page 2
... Car Radio 2 Electrical Connections 3 Control Panel Button Locations 4 General Operation...5 Turn Unit On/Off...5 Adjust Volume (VOL 5 Adjust Menu Options (SEL 5 Set the Clock (CLK)...5 Change the Source (SRC 6 Mute on/off...6 Loudness on/off...6 Preset EQ(Equalizer 6 USB Port...6 Micro-SD Card Slot...6 Hands-free Microphone 6 AUX input Connector 6 Reset Sytstem (Reset 6 Radio Operation...7 Switch Between USA area and Europe area Frequency 7 Change Bands (BAND 7 Manual Tuning 7 Auto Seek Tuning 7 To Store/Recall Preset Stations (1 - 6 7 Automatic Store Station / Preset Station...
... Car Radio 2 Electrical Connections 3 Control Panel Button Locations 4 General Operation...5 Turn Unit On/Off...5 Adjust Volume (VOL 5 Adjust Menu Options (SEL 5 Set the Clock (CLK)...5 Change the Source (SRC 6 Mute on/off...6 Loudness on/off...6 Preset EQ(Equalizer 6 USB Port...6 Micro-SD Card Slot...6 Hands-free Microphone 6 AUX input Connector 6 Reset Sytstem (Reset 6 Radio Operation...7 Switch Between USA area and Europe area Frequency 7 Change Bands (BAND 7 Manual Tuning 7 Auto Seek Tuning 7 To Store/Recall Preset Stations (1 - 6 7 Automatic Store Station / Preset Station...
User Manual V2
Page 7
..., STEREO/MONO, CLOCK 12/24, AREA US/EU, AUTO/ BLUE/RED/CYAN/GREEN/ PURPLE / YELLOW/WHITE. ‡ Rotate the VOL knob on the remote control to adjust the hour. 4. EQ(Equalizer) Setting: OFF, CLASS, ROCK, POP, FLAT - Rotate the volume knob to switch between 12 hours and 24 hours display. GENERAL OPERATION Turn Unit On/Off ‡ Press any button on the front panel or on the remote control to turn...
..., STEREO/MONO, CLOCK 12/24, AREA US/EU, AUTO/ BLUE/RED/CYAN/GREEN/ PURPLE / YELLOW/WHITE. ‡ Rotate the VOL knob on the remote control to adjust the hour. 4. EQ(Equalizer) Setting: OFF, CLASS, ROCK, POP, FLAT - Rotate the volume knob to switch between 12 hours and 24 hours display. GENERAL OPERATION Turn Unit On/Off ‡ Press any button on the front panel or on the remote control to turn...
User Manual V2
Page 8
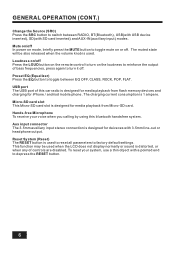
... to factory default settings. GENERAL OPERATION (CONT.) Change the Source (SRC) Press the SRC button to switch between EQ OFF, CLASS, ROCK, POP, FLAT. Loudness on/off Press the LOUD button on the remote control to turn it off . Preset EQ (Equalizer) Press the EQ button to turn on or off . To reset your voice when you calling by using this car radio is 1 ampere. Mute on/off In power on mode...
... to factory default settings. GENERAL OPERATION (CONT.) Change the Source (SRC) Press the SRC button to switch between EQ OFF, CLASS, ROCK, POP, FLAT. Loudness on/off Press the LOUD button on the remote control to turn it off . Preset EQ (Equalizer) Press the EQ button to turn on or off . To reset your voice when you calling by using this car radio is 1 ampere. Mute on/off In power on mode...
User Manual V2
Page 9
... and AM2 bands. Turn the radio on the remote control to choose FM STEREO or MONO audio effect. 7 Select the desired band. - or button to MONO mode usually improves the overall sound quality. Automatic Store station/ Preset station scan (AMS) Press and hold the or button on the front panel or on the face of 30 preset stations. The radio will change the frequency setting in each band...
... and AM2 bands. Turn the radio on the remote control to choose FM STEREO or MONO audio effect. 7 Select the desired band. - or button to MONO mode usually improves the overall sound quality. Automatic Store station/ Preset station scan (AMS) Press and hold the or button on the front panel or on the face of 30 preset stations. The radio will change the frequency setting in each band...
User Manual V2
Page 12
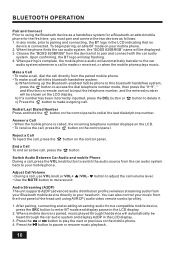
... make outgoing call , press the button. In any mode, prior to pairing and connecting, the BT logo in the LCD indicating that no device is paired, music played through that device will automatically be heard through the car audio system and display A2DP in the LCD display. 2. Choose the "BOSS 820BRGB" from the car audio system back to your head unit. button to adjust the call , use VOL knob or VOL+ • Use the MUTE button to mute sound...
... make outgoing call , press the button. In any mode, prior to pairing and connecting, the BT logo in the LCD indicating that no device is paired, music played through that device will automatically be heard through the car audio system and display A2DP in the LCD display. 2. Choose the "BOSS 820BRGB" from the car audio system back to your head unit. button to adjust the call , use VOL knob or VOL+ • Use the MUTE button to mute sound...
User Manual V2
Page 13
... and Locations 1. (Power on the right. 2. CLK(clock setting) button, (end call ) button 4. SRC(Source) button, keypad 18 19. Replace Lithium Battery Cell 1. Mute button, DEL(Delete) button 8. INT(intro) button, preset station 2 button,keypad 2 11. AMS (automatic music search) button, keypad 9 18. Replace the old cell with an insulating sheet attached to the remote control. - The remote control will not work until the insulating sheet is facing upward. 4. Keep battery cells out of reach of children. 2 1 3 4 Remote Control Operation...
... and Locations 1. (Power on the right. 2. CLK(clock setting) button, (end call ) button 4. SRC(Source) button, keypad 18 19. Replace Lithium Battery Cell 1. Mute button, DEL(Delete) button 8. INT(intro) button, preset station 2 button,keypad 2 11. AMS (automatic music search) button, keypad 9 18. Replace the old cell with an insulating sheet attached to the remote control. - The remote control will not work until the insulating sheet is facing upward. 4. Keep battery cells out of reach of children. 2 1 3 4 Remote Control Operation...
User Manual V2
Page 15
... switch power off , adjust volume to another USB or SD card, or record music inside . Take it is not on /off . Change to a desired level. 5) Sound skips. Do not use the unit in broadcasts. General 1) Car's engine switch is dangerous to zero. Battery cable is always live. Immediately stop using it and call the store where you purchased it . 13 The built-in mute or minimum. Replace fuse. 4) Volume...
... switch power off , adjust volume to another USB or SD card, or record music inside . Take it is not on /off . Change to a desired level. 5) Sound skips. Do not use the unit in broadcasts. General 1) Car's engine switch is dangerous to zero. Battery cable is always live. Immediately stop using it and call the store where you purchased it . 13 The built-in mute or minimum. Replace fuse. 4) Volume...
User Manual V3
Page 2
... Operation...5 Turn Unit On/Off...5 Adjust Volume (VOL 5 Adjust Menu Options (SEL 5 Set the Clock (CLK)...5 Change the Source (SRC 6 Mute on/off...6 Loudness on/off...6 Preset EQ(Equalizer 6 USB Port...6 Hands-free Microphone 6 AUX input Connector 6 Reset Sytstem (Reset 6 Radio Operation...7 Switch Between USA area and Europe area Frequency 7 Change Bands (BAND 7 Manual Tuning 7 Auto Seek Tuning 7 To Store/Recall Preset Stations (1 - 6 7 Automatic Store Station / Preset Station Scan (AMS 7 Local/DX...7 Stereo/Mono...7 USB Operation...8 To Insert a USB ...8 Eject USB ...8 Play...
... Operation...5 Turn Unit On/Off...5 Adjust Volume (VOL 5 Adjust Menu Options (SEL 5 Set the Clock (CLK)...5 Change the Source (SRC 6 Mute on/off...6 Loudness on/off...6 Preset EQ(Equalizer 6 USB Port...6 Hands-free Microphone 6 AUX input Connector 6 Reset Sytstem (Reset 6 Radio Operation...7 Switch Between USA area and Europe area Frequency 7 Change Bands (BAND 7 Manual Tuning 7 Auto Seek Tuning 7 To Store/Recall Preset Stations (1 - 6 7 Automatic Store Station / Preset Station Scan (AMS 7 Local/DX...7 Stereo/Mono...7 USB Operation...8 To Insert a USB ...8 Eject USB ...8 Play...
User Manual V3
Page 6
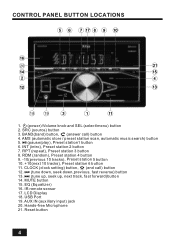
... 14. AUX IN (auxiliary input) jack 20. Reset button SRC (source) button 3. INT (intro), Preset station 2 button 7. RDM (random), Preset station 4 button 9. -10(previous 10 tracks), Preset station 5 button 10. +10(next 10 tracks), Preset station 6 button 11. EQ (Equalizer) 16. IR remote sensor 17. MUTE button 15. USB Port 19. Hands-free Microphone 21. CONTROL PANEL BUTTON LOCATIONS 20 21 18 19 1. (power)/Volume knob and SEL (select/menu) button 2. RPT (repeat), Preset station 3 button 8. LCD Display 18. AMS (automatic store / preset station scan, automatic music...
... 14. AUX IN (auxiliary input) jack 20. Reset button SRC (source) button 3. INT (intro), Preset station 2 button 7. RDM (random), Preset station 4 button 9. -10(previous 10 tracks), Preset station 5 button 10. +10(next 10 tracks), Preset station 6 button 11. EQ (Equalizer) 16. IR remote sensor 17. MUTE button 15. USB Port 19. Hands-free Microphone 21. CONTROL PANEL BUTTON LOCATIONS 20 21 18 19 1. (power)/Volume knob and SEL (select/menu) button 2. RPT (repeat), Preset station 3 button 8. LCD Display 18. AMS (automatic store / preset station scan, automatic music...
User Manual V3
Page 8
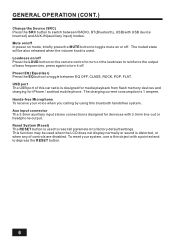
... with USB device inserted) and AUX-IN(auxiliary input) modes. Aux input connector The 3.5mm auxiliary input stereo connection is used . Reset System (Reset) The RESET button is designed for iPhone / andriod mobile phone. GENERAL OPERATION (CONT.) Change the Source (SRC) Press the SRC button to switch between EQ OFF, CLASS, ROCK, POP, FLAT. Hands-free Microphone To receive your system, use a thin object with a pointed end to toggle mute on mode, briefly press the MUTE button to depress the RESET button. 6 This function may...
... with USB device inserted) and AUX-IN(auxiliary input) modes. Aux input connector The 3.5mm auxiliary input stereo connection is used . Reset System (Reset) The RESET button is designed for iPhone / andriod mobile phone. GENERAL OPERATION (CONT.) Change the Source (SRC) Press the SRC button to switch between EQ OFF, CLASS, ROCK, POP, FLAT. Hands-free Microphone To receive your system, use a thin object with a pointed end to toggle mute on mode, briefly press the MUTE button to depress the RESET button. 6 This function may...

User Manual V3
Page 9
... desired preset button (numbered 1-6 on the remote control to MONO mode usually improves the overall sound quality. To recall a preset station: - Press the LOC button on the face of the radio) for more than 2 seconds to save the station to that saved in the memories in about 3 seconds. However, if the signal is weak or reception is received in stereo mode. or button to enter manual tuning mode. Select a station by or button. - Manual Tuning...
... desired preset button (numbered 1-6 on the remote control to MONO mode usually improves the overall sound quality. To recall a preset station: - Press the LOC button on the face of the radio) for more than 2 seconds to save the station to that saved in the memories in about 3 seconds. However, if the signal is weak or reception is received in stereo mode. or button to enter manual tuning mode. Select a station by or button. - Manual Tuning...
User Manual V3
Page 12
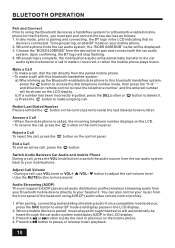
... number displays on the LCD. • To receive the call , press the VOL knob/button to switch the audio source from the front panel of the head unit using the Bluetooth device as a handsfree system for a Bluetooth-enabled mobile phone for the first time, you must pair and connect the two devices as follows: 1. BLUETOOTH OPERATION Pair and Connect Prior to delete it. b) If a number has been incorrectly inputted, press the DEL button or button to using AVRCP (audio video remote control...
... number displays on the LCD. • To receive the call , press the VOL knob/button to switch the audio source from the front panel of the head unit using the Bluetooth device as a handsfree system for a Bluetooth-enabled mobile phone for the first time, you must pair and connect the two devices as follows: 1. BLUETOOTH OPERATION Pair and Connect Prior to delete it. b) If a number has been incorrectly inputted, press the DEL button or button to using AVRCP (audio video remote control...
User Manual V3
Page 15
.... Select other stations of this car radio. 3) Preset station is reset. Check the connection. 3) Fuse is more than 30°. 6) The operation keys do so. The installation angle is burnt. Connect the battery cable to ACC or ON. 2) Cable is not correctly connected. USB USB is connecting but no music file inside it is dangerous to do not work. TROUBLESHOOTING If you suspect something is wrong, immediately switch power off , adjust volume to a desired level. 5) Sound skips...
.... Select other stations of this car radio. 3) Preset station is reset. Check the connection. 3) Fuse is more than 30°. 6) The operation keys do so. The installation angle is burnt. Connect the battery cable to ACC or ON. 2) Cable is not correctly connected. USB USB is connecting but no music file inside it is dangerous to do not work. TROUBLESHOOTING If you suspect something is wrong, immediately switch power off , adjust volume to a desired level. 5) Sound skips...


