
iDEQ 200A user's manual
Page 6
... by transient over the power cord. Use moisture sheet or clothe for cleaning. 4.For pluggable equipment, the socket-outlet shall be installed near the equipment and shall be rated for the product and for the voltage and current marked on a reliable surface when install. The power cord must be easily accessible. 5.Please keep this User's Manual for later reference. 3.Please...
... by transient over the power cord. Use moisture sheet or clothe for cleaning. 4.For pluggable equipment, the socket-outlet shall be installed near the equipment and shall be rated for the product and for the voltage and current marked on a reliable surface when install. The power cord must be easily accessible. 5.Please keep this User's Manual for later reference. 3.Please...
iDEQ 200A user's manual
Page 8
... 2 Mainboard Set Up 2.1 Mainboard Features 6 2.2 Layout And Components Index 9 2.3 Jumpers, Headers, Connectors and Slots 11 Section 3 Peripheral Connections 3.1 Overview 22 3.2 Connecting Peripheral Devices 23 Section 4 Software and Utilities 4.1 Installing Drivers and Utilities 30 Section 5 Trouble Shooting 5.1 System Does Not Start 34 5.2 Keyboard and Mouse Problems 35 5.3 USB Devices Problems 36 5.4 Software Problems 37 Section 6 Taking Care of Your Computer 6.1 General Maintenance 40 6.2 Safe Use of The System 41 Appendix Installing Mainboard A.1 Installing...
... 2 Mainboard Set Up 2.1 Mainboard Features 6 2.2 Layout And Components Index 9 2.3 Jumpers, Headers, Connectors and Slots 11 Section 3 Peripheral Connections 3.1 Overview 22 3.2 Connecting Peripheral Devices 23 Section 4 Software and Utilities 4.1 Installing Drivers and Utilities 30 Section 5 Trouble Shooting 5.1 System Does Not Start 34 5.2 Keyboard and Mouse Problems 35 5.3 USB Devices Problems 36 5.4 Software Problems 37 Section 6 Taking Care of Your Computer 6.1 General Maintenance 40 6.2 Safe Use of The System 41 Appendix Installing Mainboard A.1 Installing...

iDEQ 200A user's manual
Page 10
... output, and the standard audio ports including headphone, microphone, line-in and line-out connectors, which satisfy you have the reliability and flexibility of the components like side-blown CPU cooler and special-made power supply that are developed to work effectively and play ingeniously with built-in using this user's guide including the clear and concise installation guide, trouble-shooting procedure and the...
... output, and the standard audio ports including headphone, microphone, line-in and line-out connectors, which satisfy you have the reliability and flexibility of the components like side-blown CPU cooler and special-made power supply that are developed to work effectively and play ingeniously with built-in using this user's guide including the clear and concise installation guide, trouble-shooting procedure and the...

iDEQ 200A user's manual
Page 14
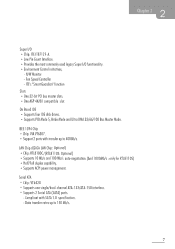
... Side Bus at 400/533/800MHz. • Supports Hyper-Threading Technology. • Supports Northwood CPU. (Willamette not supported) Chipset • North Bridge:ATi RS300. • South Bridge: IXP150. 2.1 _Mainboard Feature Model P4ABS Hardware CPU • Provides Socket-478. • Supports the Intel Pentium 4 processor up to 3.2GB/s(DDR400) for single-channel mode and 6.4GB/s (DDR 400) in dual channel mode. • Notice: For DDR400, do not use 16 memory chips (loads...
... Side Bus at 400/533/800MHz. • Supports Hyper-Threading Technology. • Supports Northwood CPU. (Willamette not supported) Chipset • North Bridge:ATi RS300. • South Bridge: IXP150. 2.1 _Mainboard Feature Model P4ABS Hardware CPU • Provides Socket-478. • Supports the Intel Pentium 4 processor up to 3.2GB/s(DDR400) for single-channel mode and 6.4GB/s (DDR 400) in dual channel mode. • Notice: For DDR400, do not use 16 memory chips (loads...
iDEQ 200A user's manual
Page 15
.../100 Bus Master Mode. IEEE 1394 Chip • Chip: VIA VT6307. • Support 2 ports with SATA 1.0 specification. - LAN Chip/(GIGA LAN Chip: Optional) • Chip: RTL8100C/(RTL8110S: Optional) • Supports 10 Mb/s and 100 Mb/s auto-negotiation.(And 1000Mb/s : only for RTL8110S) • Half/Full duplex capability. • Supports ACPI power management. ITE's "Smart Guardian" function Slots • One 32-bit PCI bus master slots. • One AGP 4X/8X compatible slot. H/W Monitor - Serial ATA • Chip: VT6420 • Supports one single/dual-channel ATA...
.../100 Bus Master Mode. IEEE 1394 Chip • Chip: VIA VT6307. • Support 2 ports with SATA 1.0 specification. - LAN Chip/(GIGA LAN Chip: Optional) • Chip: RTL8100C/(RTL8110S: Optional) • Supports 10 Mb/s and 100 Mb/s auto-negotiation.(And 1000Mb/s : only for RTL8110S) • Half/Full duplex capability. • Supports ACPI power management. ITE's "Smart Guardian" function Slots • One 32-bit PCI bus master slots. • One AGP 4X/8X compatible slot. H/W Monitor - Serial ATA • Chip: VT6420 • Supports one single/dual-channel ATA...
iDEQ 200A user's manual
Page 16
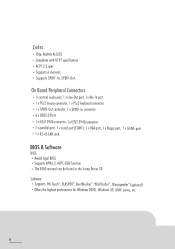
...(optional) • Offers the highest performance for Windows 2000, Windows XP, UNIX series, etc. 8 BIOS & Software BIOS • Award legal BIOS • Supports APM1.2, ACPI, USB Function • The BIOS manual can be found in the Setup Driver CD. On Board Peripheral Connectors • lx vertical audio port, 1 x Line-Out port, lx Mic-In port • 1 x PS/2 mouse connector, 1 x PS/2 keyboard connector • 1 x SPDIF-Out connector, 1 x SPDIF- Codec • Chip: RealtekALC655 • Compliant with AC97 specification • AC97 2.2 spec • Supports 6 channels • Supports...
...(optional) • Offers the highest performance for Windows 2000, Windows XP, UNIX series, etc. 8 BIOS & Software BIOS • Award legal BIOS • Supports APM1.2, ACPI, USB Function • The BIOS manual can be found in the Setup Driver CD. On Board Peripheral Connectors • lx vertical audio port, 1 x Line-Out port, lx Mic-In port • 1 x PS/2 mouse connector, 1 x PS/2 keyboard connector • 1 x SPDIF-Out connector, 1 x SPDIF- Codec • Chip: RealtekALC655 • Compliant with AC97 specification • AC97 2.2 spec • Supports 6 channels • Supports...
iDEQ 200A user's manual
Page 18
... Clear CMOS Jumper • JATXPWER2: ATX Power Connector • DDRAVDDRB1: DDR DIMM Modules • PCI1: Peripheral Component Interconnect Slot • JGAME1: Game Header • JATXPWERI: AD( Power Connector • JSATAI-2: Serial ATA Connectors • JAGPI: Accelerated Graphics Port Slot • IDEI -2: Hard Disk Connectors • JWOLl: Wake On LAN Header (Optional) • FDD1: Floppy Disk Connector • JSFAN1: System Fan Header - Component Index • JUSBVI : Power Source Selection for USB4/USB5 • JCDIN1: CD-Rom Audio-In Header • JCL1: Case Open Connector...
... Clear CMOS Jumper • JATXPWER2: ATX Power Connector • DDRAVDDRB1: DDR DIMM Modules • PCI1: Peripheral Component Interconnect Slot • JGAME1: Game Header • JATXPWERI: AD( Power Connector • JSATAI-2: Serial ATA Connectors • JAGPI: Accelerated Graphics Port Slot • IDEI -2: Hard Disk Connectors • JWOLl: Wake On LAN Header (Optional) • FDD1: Floppy Disk Connector • JSFAN1: System Fan Header - Component Index • JUSBVI : Power Source Selection for USB4/USB5 • JCDIN1: CD-Rom Audio-In Header • JCL1: Case Open Connector...

iDEQ 200A user's manual
Page 19
... cables. • Hard Disk Connectors: IDE1/ IDE2 The motherboard has a 32-bit Enhanced PCI IDE Controller that video card. PCI stands for Peripheral Component Interconnect, and it is designated as 32 bits. • Accelerated Graphics Port Slot: J AGP1 Your monitor will take advantage of AGP technology for expansion cards. An AGP card will attach directly to that provides PIO Mode 0.5, Bus Master, and Ultra DMA 33/ 66/ 100 functionality. The illustration shows a 3-pin jumper...
... cables. • Hard Disk Connectors: IDE1/ IDE2 The motherboard has a 32-bit Enhanced PCI IDE Controller that video card. PCI stands for Peripheral Component Interconnect, and it is designated as 32 bits. • Accelerated Graphics Port Slot: J AGP1 Your monitor will take advantage of AGP technology for expansion cards. An AGP card will attach directly to that provides PIO Mode 0.5, Bus Master, and Ultra DMA 33/ 66/ 100 functionality. The illustration shows a 3-pin jumper...

iDEQ 200A user's manual
Page 22
... standby voltage of 5V. JUSBV3:5Vfor USBattheJUSB3 port connector. 3 00 • 1 Pin 2-3 close JUSBV1:5Vfor USBattheJUSB4/JUSB5 port connectors. +5V JUSBV2:5Vfor USBattheJUSBLAN1 port connector. • Power Source Selection for five seconds. • Set the jumper to "Pin 1-2 Close". • Power on pin 2-3 respectively. • Clear CMOS Jumper: JCMOS1 JCMOS1 Assignment • 0 0 3 Pin 1-2 close Normal Operation (default) • 00 3 Pin 2-3 close Clear CMOS Data *Clear CMOS Procedures: • Remove AC power line. • Set the jumper to power-on USB devices...
... standby voltage of 5V. JUSBV3:5Vfor USBattheJUSB3 port connector. 3 00 • 1 Pin 2-3 close JUSBV1:5Vfor USBattheJUSB4/JUSB5 port connectors. +5V JUSBV2:5Vfor USBattheJUSBLAN1 port connector. • Power Source Selection for five seconds. • Set the jumper to "Pin 1-2 Close". • Power on pin 2-3 respectively. • Clear CMOS Jumper: JCMOS1 JCMOS1 Assignment • 0 0 3 Pin 1-2 close Normal Operation (default) • 00 3 Pin 2-3 close Clear CMOS Data *Clear CMOS Procedures: • Remove AC power line. • Set the jumper to power-on USB devices...
iDEQ 200A user's manual
Page 32
... USB port (if your mouse uses the PS/2 connector, plug the cable into the green PS/2 port located on the rear panel of your computer). • Plug the keyboard cable into the USB port (if your keyboard uses the PS/2 connector, plug the cable into the VGA port located on the rear panel of your computer. 00 0 Figure 3.3 Connecting mouse and keyboard Most of mouse and keyboard are PS/2 compliant. Connecting monitor To connect a monitor, plug the monitor cable into the purple PS/2 port located...
... USB port (if your mouse uses the PS/2 connector, plug the cable into the green PS/2 port located on the rear panel of your computer). • Plug the keyboard cable into the USB port (if your keyboard uses the PS/2 connector, plug the cable into the VGA port located on the rear panel of your computer. 00 0 Figure 3.3 Connecting mouse and keyboard Most of mouse and keyboard are PS/2 compliant. Connecting monitor To connect a monitor, plug the monitor cable into the purple PS/2 port located...
iDEQ 200A user's manual
Page 33
...; Digital camera PDA Scanner Figure 3.5 Note: The USB devices support "hot plugging," eliminating the need to the USB port. • The OS will automatically detect the device and install the driver for the device. • If the OS does not have the driver for your device, install the driver from the driver CD that is backward compatible with four standard USB 2.0 ports as USB mouse, USB keyboard, digital camera, scanner, flash disk-etc.
...; Digital camera PDA Scanner Figure 3.5 Note: The USB devices support "hot plugging," eliminating the need to the USB port. • The OS will automatically detect the device and install the driver for the device. • If the OS does not have the driver for your device, install the driver from the driver CD that is backward compatible with four standard USB 2.0 ports as USB mouse, USB keyboard, digital camera, scanner, flash disk-etc.
iDEQ 200A user's manual
Page 34
... 1394 devices also support "hot plugging", eliminating the need to power down or restart the computer when attaching a new peripheral like USB devices. • Match the shape of the computer and allow users to the IEEE 1394 port. • Insert the connector, and make sure that it is connected. • The OS will start running and automatically install the driver for the device. •...
... 1394 devices also support "hot plugging", eliminating the need to power down or restart the computer when attaching a new peripheral like USB devices. • Match the shape of the computer and allow users to the IEEE 1394 port. • Insert the connector, and make sure that it is connected. • The OS will start running and automatically install the driver for the device. •...
iDEQ 200A user's manual
Page 35
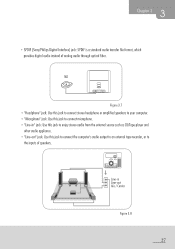
... 3.8 27 3 Chapter 3 • SPDIF (Sony/Philips Digital Interface) jack: SPDIF is a standard audio transfer file format, which provides digital audio instead of speakers. 0 0 OJ Line-in " jack: Use this jack to enjoy stereo audio from the external source such as CD/Tape player and other audio appliance. • "Line-out" jack: Use this jack to connect the computer's audio output to an...
... 3.8 27 3 Chapter 3 • SPDIF (Sony/Philips Digital Interface) jack: SPDIF is a standard audio transfer file format, which provides digital audio instead of speakers. 0 0 OJ Line-in " jack: Use this jack to enjoy stereo audio from the external source such as CD/Tape player and other audio appliance. • "Line-out" jack: Use this jack to connect the computer's audio output to an...
iDEQ 200A user's manual
Page 36
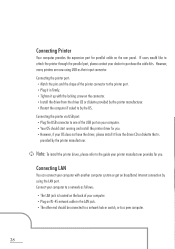
... printer connector to the printer port. • Plug it in the LAN jack. • The other end should start running and install the printer driver for parallel cable on your computer to purchase the cable kits. Connecting the printer port: • Match the pins and the shape of the USB port on the rear panel. Connect your computer. • Your OS should be connected to a network hub or switch...
... printer connector to the printer port. • Plug it in the LAN jack. • The other end should start running and install the printer driver for parallel cable on your computer to purchase the cable kits. Connecting the printer port: • Match the pins and the shape of the USB port on the rear panel. Connect your computer. • Your OS should be connected to a network hub or switch...
iDEQ 200A user's manual
Page 38
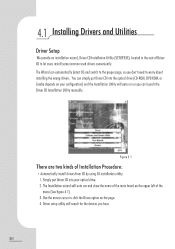
... let users install some common used drivers conveniently. Q,1 Installing Drivers and Utilities Driver Setup We provide an installation wizard, Driver CD Installation Utility (SETUP.EXE), located in the root of Installation Procedure: • Automatically install drivers from CD by using CD installation utility: 1. Simply put Driver CD into your configuration) and the Installation Utility will auto run and show the name of the main board on your optical drive. 2. You can simply put Driver CD into the optical drive (CD-ROM, DVD ROM, or...
... let users install some common used drivers conveniently. Q,1 Installing Drivers and Utilities Driver Setup We provide an installation wizard, Driver CD Installation Utility (SETUP.EXE), located in the root of Installation Procedure: • Automatically install drivers from CD by using CD installation utility: 1. Simply put Driver CD into your configuration) and the Installation Utility will auto run and show the name of the main board on your optical drive. 2. You can simply put Driver CD into the optical drive (CD-ROM, DVD ROM, or...
iDEQ 200A user's manual
Page 39
... the installing instructions to finish the installation. 11. Place the Driver CD into the optical drive. 1. Use the mouse cursor to click the Driver option on My Computer. 3. Driver setup utility will search for the devices you place the CD into the optical drive. 2. Follow the installing instructions to finish the installation. 9. Just like installing drivers for you. • If the Driver and utility installation CD does not auto run the utility manually. 5. Double...
... the installing instructions to finish the installation. 11. Place the Driver CD into the optical drive. 1. Use the mouse cursor to click the Driver option on My Computer. 3. Driver setup utility will search for the devices you place the CD into the optical drive. 2. Follow the installing instructions to finish the installation. 9. Just like installing drivers for you. • If the Driver and utility installation CD does not auto run the utility manually. 5. Double...
iDEQ 200A user's manual
Page 40
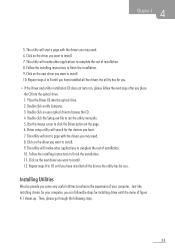
The installation utility will start the installation wizard for the software you are done, simply close the Installation Utility. 32 When you choose. 4. Follow the instruction steps of the wizard. 5. Click Software and Update Utility option. 2. 1. Repeat steps 2 to 4 if you want to install. 3. Click on the software you want to install more. 6.
The installation utility will start the installation wizard for the software you are done, simply close the Installation Utility. 32 When you choose. 4. Follow the instruction steps of the wizard. 5. Click Software and Update Utility option. 2. 1. Repeat steps 2 to 4 if you want to install. 3. Click on the software you want to install more. 6.
iDEQ 200A user's manual
Page 42
Plug another, known-working appliance into the outlet to use a different power cable. 3. If available, try the monitor on a different VGA-compatible computer. 3. Contact your computer dealer for technical support and service. 34 Make sure the monitor display cable is plugged securely into a working , there may be a power supply failure. Inspect the cables to be working outlet. 2. If the monitor is powered on and its power cable is plugged in securely. If available, try a different monitor, or...
Plug another, known-working appliance into the outlet to use a different power cable. 3. If available, try the monitor on a different VGA-compatible computer. 3. Contact your computer dealer for technical support and service. 34 Make sure the monitor display cable is plugged securely into a working , there may be a power supply failure. Inspect the cables to be working outlet. 2. If the monitor is powered on and its power cable is plugged in securely. If available, try a different monitor, or...
iDEQ 200A user's manual
Page 45
If possible, use the task bar to switch to close , press the Ctrl + Alt + Del keys together only once. and then plug the power cable back in. Download the file/files and execute to fix from the software developer. wait a moment; If the problem persists, contact your software. 5. If a problem does not close the program that is tested thoroughly before you the option of ending...
If possible, use the task bar to switch to close , press the Ctrl + Alt + Del keys together only once. and then plug the power cable back in. Download the file/files and execute to fix from the software developer. wait a moment; If the problem persists, contact your software. 5. If a problem does not close the program that is tested thoroughly before you the option of ending...

iDEQ 200A user's manual
Page 49
... and unplug it before installing or removing a peripheral device, except USB, or IEEE 1394 devices. • Turn off the computer and refer for servicing under the following instructions. When the power cord or plug is damaged. • Never push any objects of any magnetic devices or TVs. • Do not use the computer in a dusty or dirty working area. Chapter 6 6.2, Safe Use of The System...
... and unplug it before installing or removing a peripheral device, except USB, or IEEE 1394 devices. • Turn off the computer and refer for servicing under the following instructions. When the power cord or plug is damaged. • Never push any objects of any magnetic devices or TVs. • Do not use the computer in a dusty or dirty working area. Chapter 6 6.2, Safe Use of The System...


