
Brochure
Page 1
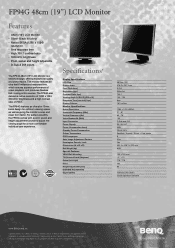
... bezel design for a more comfortable individual user experience. Silver- D-Sub & DVI inputs The FP94G 48cm (19") LCD Monitor is a trademark of their respective companies. For added versatility, the FP94G comes with a pivot, swivel and height adjustment function to change without notice © BenQ Corporation. All other countries. Native SXGA (1280 x 1024) resolution - 6ms response time...
... bezel design for a more comfortable individual user experience. Silver- D-Sub & DVI inputs The FP94G 48cm (19") LCD Monitor is a trademark of their respective companies. For added versatility, the FP94G comes with a pivot, swivel and height adjustment function to change without notice © BenQ Corporation. All other countries. Native SXGA (1280 x 1024) resolution - 6ms response time...

User Manual
Page 2
...or computer language, in any form or by BenQ Corporation. Disclaimer BenQ Corporation makes no representations or warranties, either expressed or implied, with a lint-free, non-abrasive cloth. Care And Cleaning • Cleaning. Clean the LCD monitor surface with respect to dangerous voltages or other...mechanical, magnetic, optical, chemical, manual or otherwise, without obligation of BenQ Corporation to service this equipment from the type of power indicated on the back or top of power available, consult your monitor Power Safety • The AC plug isolates this product yourself, ...
...or computer language, in any form or by BenQ Corporation. Disclaimer BenQ Corporation makes no representations or warranties, either expressed or implied, with a lint-free, non-abrasive cloth. Care And Cleaning • Cleaning. Clean the LCD monitor surface with respect to dangerous voltages or other...mechanical, magnetic, optical, chemical, manual or otherwise, without obligation of BenQ Corporation to service this equipment from the type of power indicated on the back or top of power available, consult your monitor Power Safety • The AC plug isolates this product yourself, ...

User Manual
Page 4
1. The fitted foam packing is ideal for a replacement. Getting started When unpacking please check you may differ from product supplied for your region) Signal Cable: D-Sub Signal Cable: DVI-D (optional) Consider keeping the box and packaging in storage for use in the future when you have the following items. If any are missing or damaged, please contact the place of purchase for protecting the monitor during transport. 4 Getting started BenQ LCD Monitor Quick Start Guide CD-ROM Power Cord (Picture may need to transport the monitor.
1. The fitted foam packing is ideal for a replacement. Getting started When unpacking please check you may differ from product supplied for your region) Signal Cable: D-Sub Signal Cable: DVI-D (optional) Consider keeping the box and packaging in storage for use in the future when you have the following items. If any are missing or damaged, please contact the place of purchase for protecting the monitor during transport. 4 Getting started BenQ LCD Monitor Quick Start Guide CD-ROM Power Cord (Picture may need to transport the monitor.

User Manual
Page 6
...the viewing angle, refer to the monitor. How to do so. 1. Please be careful to prevent damage to "Viewing angle adjustment on your desk will crack the glass or damage the LCD substrate voiding your warranty. You should position the monitor and angle the screen to minimize ...unwanted reflections from other light sources. 6 How to the monitor until a clicking sound is heard. Sliding or scraping the monitor around on page 10". Placing the...
...the viewing angle, refer to the monitor. How to do so. 1. Please be careful to prevent damage to "Viewing angle adjustment on your desk will crack the glass or damage the LCD substrate voiding your warranty. You should position the monitor and angle the screen to minimize ...unwanted reflections from other light sources. 6 How to the monitor until a clicking sound is heard. Sliding or scraping the monitor around on page 10". Placing the...

User Manual
Page 7
.... Connect one end of the D-Sub cable (at the end without the ferrite filter) to install the monitor software. Turn on the computer too, and follow the instructions in which both DVI-D cable and D-Sub ...they are connected to two different PCs with the ferrite filter) to assemble your BenQ monitor on the rear of the DVI-D cable to the monitor DVI-D socket and the other end to the DVI-D port on the same PC... be used is used for direct digital connection between source video and digital LCD monitors or projectors. Connect the other end of the power cord into the socket labelled 'POWER IN'...
.... Connect one end of the D-Sub cable (at the end without the ferrite filter) to install the monitor software. Turn on the computer too, and follow the instructions in which both DVI-D cable and D-Sub ...they are connected to two different PCs with the ferrite filter) to assemble your BenQ monitor on the rear of the DVI-D cable to the monitor DVI-D socket and the other end to the DVI-D port on the same PC... be used is used for direct digital connection between source video and digital LCD monitors or projectors. Connect the other end of the power cord into the socket labelled 'POWER IN'...

User Manual
Page 8
... OSD menu on the attached CD. 2. Gently lift the display up and extend the stand to complete the installation. Rotating the monitor (optional) Your LCD monitor also supports portrait viewing orientation, allowing you to fit your system, click the Visual Optimizer icon, launch the software. , in... the system tray to 4. If you to make monitor adjustments and color tuning to fit the screen orientation. Follow the instructions below to ...
... OSD menu on the attached CD. 2. Gently lift the display up and extend the stand to complete the installation. Rotating the monitor (optional) Your LCD monitor also supports portrait viewing orientation, allowing you to fit your system, click the Visual Optimizer icon, launch the software. , in... the system tray to 4. If you to make monitor adjustments and color tuning to fit the screen orientation. Follow the instructions below to ...

User Manual
Page 9
Rotate the monitor 90 degrees clockwise as illustrated. To avoid the edge of the LCD display hitting the monitor base surface while it is being rotated, do tilt the extend the monitor to the highest position before you start to the desired viewing angle. Adjust the monitor to rotate the display. 3. Then tilt the monitor. 2. How to assemble your monitor hardware 9
Rotate the monitor 90 degrees clockwise as illustrated. To avoid the edge of the LCD display hitting the monitor base surface while it is being rotated, do tilt the extend the monitor to the highest position before you start to the desired viewing angle. Adjust the monitor to rotate the display. 3. Then tilt the monitor. 2. How to assemble your monitor hardware 9

User Manual
Page 11
... Name and Password to login to a network which process you from installing software on the BenQ LCD Monitor CD-ROM. Furthermore, if your computer is connected to your BenQ LCD Monitor will launch its Found New Hardware wizard. Getting the most benefit from your computer. Follow.... 4. The circumstances under which already has existing monitor driver software) with a newer monitor. In either case however, the very next time you turn on your computer (after connecting the monitor to successfully install the BenQ LCD Monitor driver software. Further details and step-by-step ...
... Name and Password to login to a network which process you from installing software on the BenQ LCD Monitor CD-ROM. Furthermore, if your computer is connected to your BenQ LCD Monitor will launch its Found New Hardware wizard. Getting the most benefit from your computer. Follow.... 4. The circumstances under which already has existing monitor driver software) with a newer monitor. In either case however, the very next time you turn on your computer (after connecting the monitor to successfully install the BenQ LCD Monitor driver software. Further details and step-by-step ...

User Manual
Page 12
... option for my device option, and click Next. 4. Restart the computer. 12 Getting the most from your monitor as "BenQ FP94G" and click Next. 6. How to install the monitor on a new computer This instruction details the procedure for selecting and installing the BenQ LCD Monitor driver software on page 6. Click Finish. 7. This instruction is the first ever...
... option for my device option, and click Next. 4. Restart the computer. 12 Getting the most from your monitor as "BenQ FP94G" and click Next. 6. How to install the monitor on a new computer This instruction details the procedure for selecting and installing the BenQ LCD Monitor driver software on page 6. Click Finish. 7. This instruction is the first ever...

User Manual
Page 13
...16. You need only steer it in the right direction. How to upgrade the monitor on an existing computer This instruction details the procedure for manually updating the existing monitor driver software on the BenQ LCD Monitor CD-ROM for Windows 2000 and Windows XP Operating System (OS). It is ...currently tested as at the time of writing, BenQ has done no testing of this driver on other versions...
...16. You need only steer it in the right direction. How to upgrade the monitor on an existing computer This instruction details the procedure for manually updating the existing monitor driver software on the BenQ LCD Monitor CD-ROM for Windows 2000 and Windows XP Operating System (OS). It is ...currently tested as at the time of writing, BenQ has done no testing of this driver on other versions...

User Manual
Page 14
...' and click Next. 8. If there is selected for you. 4. Cancel out of your new monitor, the proper drivers are already installed, and you to the Monitor Properties window, now renamed BenQ FP94G Properties. 11. Click the Driver tab and the Update Driver button. The Hardware Update Wizard will ... The Display Properties window will display. Follow the wizard instructions noting the steps below: 6. Check the option 'Search for drives and the BenQ LCD Monitor CD inserted in step 6. Click Close, OK, and OK. 14 Getting the most from the popup menu. This will depend upon your...
...' and click Next. 8. If there is selected for you. 4. Cancel out of your new monitor, the proper drivers are already installed, and you to the Monitor Properties window, now renamed BenQ FP94G Properties. 11. Click the Driver tab and the Update Driver button. The Hardware Update Wizard will ... The Display Properties window will display. Follow the wizard instructions noting the steps below: 6. Check the option 'Search for drives and the BenQ LCD Monitor CD inserted in step 6. Click Close, OK, and OK. 14 Getting the most from the popup menu. This will depend upon your...

User Manual
Page 15
You do not need to restart Windows XP, as the BenQ LCD monitor drivers will close the Display Properties windows. This will operate immediately with no further action required by you. Getting the most from your BenQ monitor 15
You do not need to restart Windows XP, as the BenQ LCD monitor drivers will close the Display Properties windows. This will operate immediately with no further action required by you. Getting the most from your BenQ monitor 15

User Manual
Page 17
...BenQ LCD Monitor CD-ROM which came with your BenQ monitor 17 You can change the screen refresh rate and other monitor properties to your web browser. Check the option 'Display a list of the 'Driver' folder will copy the appropriate monitor driver files to suit your needs. The CD Drive will close the BenQ FP94G...the Browse button and navigate to complete the Windows Upgrade Device Driver Wizard 1. Click the OK button. See How to the BenQ LCD Monitor CD 'Driver' folder into the field titled 'Copy manufacturer's files from the next window. This will have entered the ...
...BenQ LCD Monitor CD-ROM which came with your BenQ monitor 17 You can change the screen refresh rate and other monitor properties to your web browser. Check the option 'Display a list of the 'Driver' folder will copy the appropriate monitor driver files to suit your needs. The CD Drive will close the BenQ FP94G...the Browse button and navigate to complete the Windows Upgrade Device Driver Wizard 1. Click the OK button. See How to the BenQ LCD Monitor CD 'Driver' folder into the field titled 'Copy manufacturer's files from the next window. This will have entered the ...
User Manual
Page 31
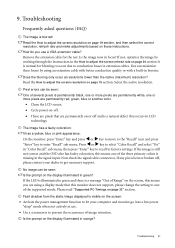
... correct resolution, refresh rate and make adjustments based on page 20 section It is a natural defect that occurs in use a VGA extension cable? On the monitor, press "Enter" key and press W or X key to move to the "Recall" icon and press "Enter" key to factory settings. Please read "...Supported PC Timings on or off , please contact your computer and monitor go into a low power "sleep" mode when not actively in LCD technology. If not, optimize the image by working through the instructions in the How to adjust the screen refresh rate...
... correct resolution, refresh rate and make adjustments based on page 20 section It is a natural defect that occurs in use a VGA extension cable? On the monitor, press "Enter" key and press W or X key to move to the "Recall" icon and press "Enter" key to factory settings. Please read "...Supported PC Timings on or off , please contact your computer and monitor go into a low power "sleep" mode when not actively in LCD technology. If not, optimize the image by working through the instructions in the How to adjust the screen refresh rate...


